Sheet-Pan Garlic Butter Shrimp Scampi Quick Meal Idea

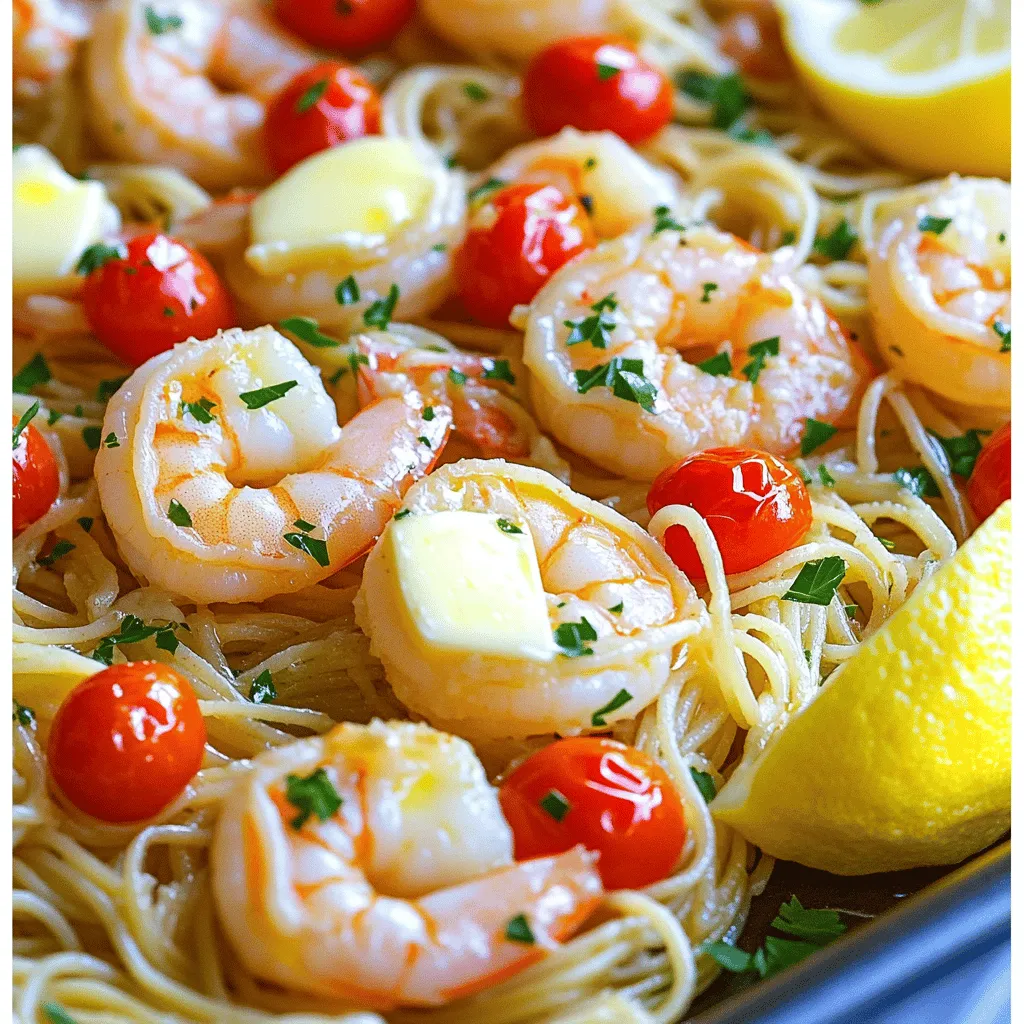
Looking for a quick and tasty meal? This Sheet-Pan Garlic Butter Shrimp Scampi is your answer! With just a few simple ingredients and easy steps, you’ll have a delicious dinner on the table in no time. Whether you’re busy after work or hosting friends, this dish is quick, flavorful, and perfect for any night. Let’s dive into the details and transform your dinner routine!
Ingredients
Shrimp and Main Ingredients
For this dish, you need fresh shrimp. I use 1 pound of large shrimp, peeled and deveined. This gives a sweet, tender bite. Next, we need 6 tablespoons of unsalted butter. This is the base for our garlic butter sauce. You also need 5 cloves of garlic, minced. Garlic adds great flavor. Lastly, grab 1 lemon to zest and juice. The lemon brightens the dish and adds a fresh taste.
Flavor Enhancers
A few key flavor enhancers make this meal pop. I like to add 1 teaspoon of red pepper flakes. This gives a nice kick without being too hot. You’ll also need 1 cup of cherry tomatoes, halved. These add color and a juicy burst. Don’t forget salt and pepper to taste. These simple seasonings make a big difference.
Pasta and Broth Choices
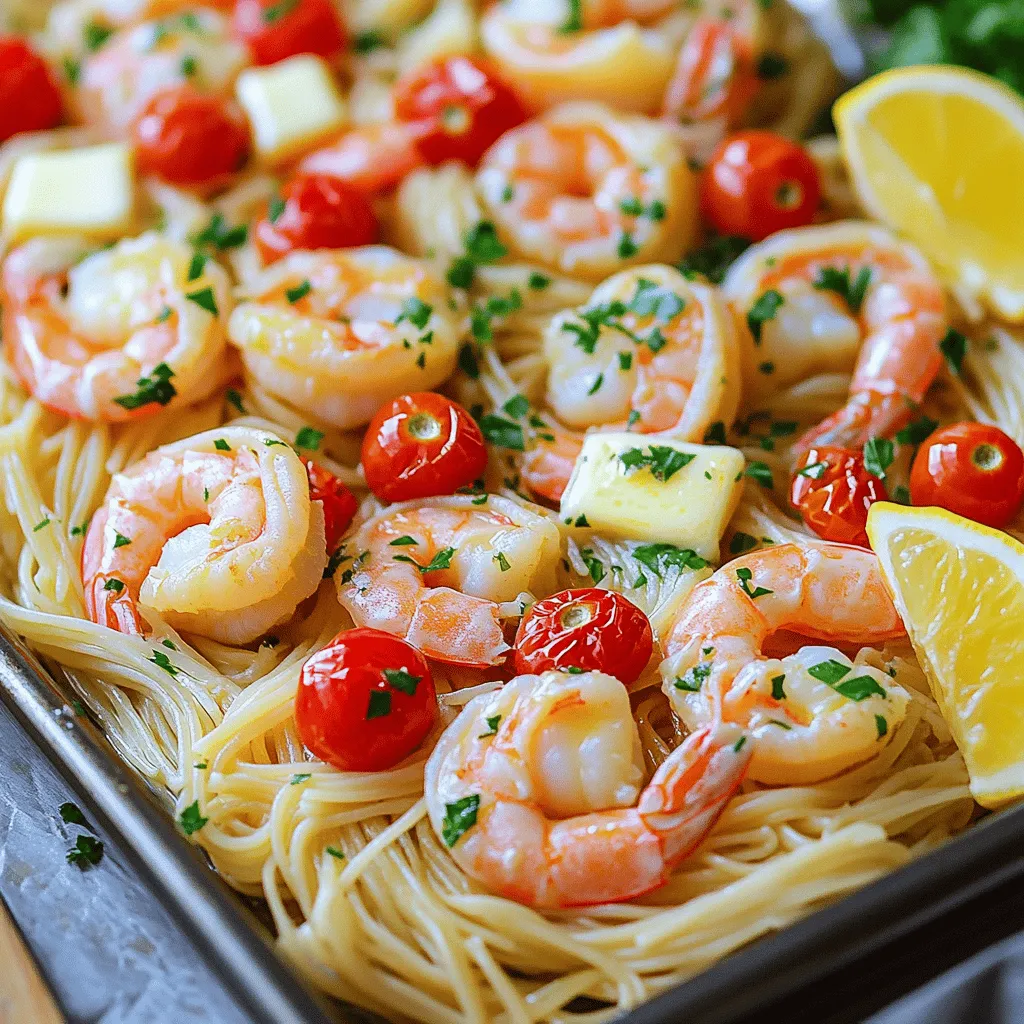
For pasta, I suggest 8 ounces of either uncooked linguine or spaghetti. Both types work well, so choose your favorite. You will also need 2 cups of vegetable broth. This keeps the pasta moist while cooking. It adds extra flavor to the dish, making it even better.
Step-by-Step Instructions
Preparation Steps
Start by preheating your oven to 400°F (200°C). This gets it ready for our shrimp scampi. Next, take a small bowl and mix six tablespoons of melted butter, five minced garlic cloves, one teaspoon of red pepper flakes, the juice and zest of one lemon. This mix will add great flavor.
On a large baking sheet, spread eight ounces of uncooked linguine evenly. Then, add one cup of halved cherry tomatoes on top of the pasta. Pour in two cups of vegetable broth. Make sure the pasta is mostly submerged. This helps it cook well.
Baking Process
Now, arrange one pound of peeled and deveined shrimp on top of the pasta and tomatoes. Drizzle the garlic butter sauce all over the dish. Don’t forget to sprinkle salt and pepper to taste.
Place the baking sheet in the oven. Bake for 15 to 20 minutes. You’ll know it’s ready when the shrimp turn pink and opaque. The pasta should be cooked al dente, just right!
Final Touches
Once it’s done, take the baking sheet out of the oven. Gently toss everything to combine the flavors. Garnish with one tablespoon of chopped fresh parsley for that pop of color.
Serve hot right from the baking sheet for a fun family-style meal. You can also plate it individually. Adding extra lemon wedges will brighten up the dish. Enjoy your meal!
Tips & Tricks
Cooking Tips for Perfect Shrimp
To cook great shrimp, start with fresh or thawed shrimp. The size matters, so choose large shrimp for this dish. Peel and devein them for the best flavor. When cooking, watch the color closely. Shrimp should turn pink and opaque. Overcooking makes them tough, so keep an eye on the time. Bake them for just 15-20 minutes. This way, they stay juicy.
Garlic Butter Sauce Enhancement
For a richer garlic butter sauce, use good quality unsalted butter. Fresh garlic gives the best taste. You can add more garlic if you love the flavor. Mix in lemon zest and juice to brighten the dish. If you want a kick, add a bit more red pepper flakes. This adds heat and flavor. Drizzle this sauce generously over the shrimp and pasta before baking.
Serving Suggestions
Serve the dish straight from the baking sheet for a casual style. This makes it easy and fun for everyone. Add extra lemon wedges and parsley on top for color. You can also sprinkle some grated Parmesan cheese for a creamy touch. Pair the meal with a fresh salad or crusty bread to soak up the sauce. This will make your dinner even better!

Variations
Ingredient Substitutions
You can easily change some ingredients to fit your taste or what you have. If you don’t have shrimp, try using chicken or scallops. Both will work well with the garlic butter sauce. For a vegetarian option, use mushrooms or zucchini instead of shrimp. If you need a dairy-free choice, swap the butter for olive oil or vegan butter. You can still enjoy rich flavors with these swaps.
Different Pasta Options
While linguine and spaghetti are great, you can use any pasta you like. Bowtie or penne work well too. If you want a low-carb version, try zucchini noodles or spaghetti squash. They will soak up the sauce nicely and add freshness to the dish. Just make sure to adjust the cooking time if using fresh pasta or alternatives.
Spice Level Adjustments
If you love heat, add more red pepper flakes. Try using a pinch more to kick it up a notch. For those who prefer milder flavors, use less or skip them altogether. You can also add fresh herbs like basil or cilantro to bring a different taste. If you want a tangy twist, add some capers or a splash of hot sauce.
Storage Info
Storing Leftovers
After you enjoy your meal, cool the leftovers. Place them in an airtight container. Store in the fridge for up to three days. This way, you keep the shrimp and pasta fresh. If you have a lot left, consider dividing it into smaller portions. This makes reheating easier later.
Reheating Instructions
To reheat, use a microwave-safe dish. Add a splash of broth or water to keep it moist. Heat in the microwave for one to two minutes. Stir halfway through to ensure even warming. You can also reheat on the stovetop. Just warm it over low heat in a pan. Stir gently until heated through.
Freezing Tips
If you want to save it longer, freezing is a good option. Place the cooled leftovers in a freezer-safe bag. Squeeze out as much air as possible before sealing. This helps prevent freezer burn. Label the bag with the date. You can freeze it for up to three months. When ready to eat, thaw in the fridge overnight. Reheat as mentioned above for the best taste.
FAQs
Can I use frozen shrimp for this recipe?
Yes, you can use frozen shrimp. Just make sure to thaw them first. Place the shrimp in a bowl of cold water for about 15-20 minutes. This will help them thaw quickly. After thawing, pat them dry with a paper towel. This step helps the shrimp cook evenly and get that nice flavor.
How do I tell when the shrimp are cooked?
Shrimp are done when they turn pink and opaque. Check the color; it should be bright pink. The flesh should also be firm to the touch. If you see that, your shrimp are ready. It usually takes about 15-20 minutes in the oven. Keep an eye on them to avoid overcooking.
What can I serve with Garlic Butter Shrimp Scampi?
This dish pairs well with many sides. Here are some ideas:
– A fresh green salad for crunch
– Garlic bread for that extra flavor
– Steamed vegetables for a healthy touch
– Rice or quinoa as a filling base
Serve any of these sides to make the meal even better!
This blog post covered all key steps to make perfect Garlic Butter Shrimp Scampi. You learned about essential ingredients, the best cooking methods, and great tips for great flavor. Don’t forget to try different pasta or spice adjustments to fit your taste. With these methods, you can create a delicious meal at home, impressing your family and friends. Enjoy your cooking journey, and remember, practice makes perfect!


![- 1 lb boneless, skinless chicken breasts - 2 tablespoons olive oil - Seasonings: chili powder, cumin, smoked paprika, garlic powder - Salt and pepper - Vegetables: red bell pepper, green bell pepper, yellow onion - Tortillas: flour or corn - Garnishes: fresh cilantro, lime wedges When you make easy chicken fajitas, you need fresh and tasty ingredients. Start with 1 pound of boneless, skinless chicken breasts. Cut them into thin strips for quick cooking. Next, add 2 tablespoons of olive oil. This oil helps the flavors stick. For the seasonings, use: - 1 teaspoon chili powder - 1 teaspoon cumin - 1 teaspoon smoked paprika - 1 teaspoon garlic powder These spices give the chicken a bold taste. Don't forget salt and pepper to enhance the flavor. Now, gather your vegetables. You will need: - 1 red bell pepper, sliced - 1 green bell pepper, sliced - 1 yellow onion, sliced These veggies add color and crunch. You will also need tortillas. Choose either 8 small flour or corn tortillas. Finally, fresh cilantro and lime wedges make great garnishes. The cilantro adds freshness, and the lime gives a zesty kick. With these ingredients, you can create a flavorful family dinner that everyone will enjoy. Check the Full Recipe for more tips! Start by mixing the marinade. In a large bowl, combine the olive oil with chili powder, cumin, smoked paprika, garlic powder, salt, and pepper. Stir it well until all the spices blend into the oil. Next, add the sliced chicken to the bowl. Toss the chicken strips in the marinade. Make sure each piece gets coated. Let it sit for 15 to 20 minutes. If you have more time, marinate it in the fridge for up to 2 hours. This gives the chicken great flavor. Heat a large skillet over medium-high heat. Once hot, add the marinated chicken to the skillet. It should sizzle when it hits the pan. Cook for about 5 minutes. Stir occasionally to make sure it cooks evenly. You want the chicken to be cooked through and browned. Check that it is no longer pink in the center. Now it’s time for the veggies! Add the sliced bell peppers and onions to the skillet with the chicken. Stir everything together. Cook for another 5 to 7 minutes. You want the vegetables to be tender but still crisp. This adds a nice texture to the dish. The colors from the peppers and onion will make your fajitas look amazing. For the complete recipe, check the [Full Recipe]. To make the best chicken fajitas, marinating is key. I suggest marinating the chicken for at least 15-20 minutes. If you have more time, try marinating for up to 2 hours in the fridge. This extra time allows the flavors to soak in deeply. For cooking, use medium-high heat. This ensures the chicken gets a nice sear without drying out. When it's time to serve, think about how to make your fajitas pop. I like to serve them on a large platter. You can layer the filling beautifully. Add a sprinkle of fresh cilantro on top for a bright touch. Lime wedges are a must-have for squeezing. They add a nice zing! For sides, consider guacamole, salsa, or a fresh salad. These pair well and add more flavors to your meal. One common mistake is overcooking the chicken. This can make it dry and tough. Keep an eye on it while it cooks. You want juicy, tender pieces. Another mistake is not choosing the right tortillas. Flour tortillas are soft and chewy, while corn tortillas are more traditional. Make sure to warm them up before serving. This step makes them easier to fold and enjoy. For the full recipe, check out the Easy Chicken Fajitas section above. {{image_2}} You can easily swap chicken for other proteins. Beef works great if you slice it thin. Use flank steak or sirloin for the best flavor. Shrimp is another tasty option. Just make sure to cook shrimp until it turns pink. Both options keep the dish fun and delicious. If you want a meatless meal, try using plant-based proteins. Tofu or tempeh can be great choices. You can also load up on veggies. Try mushrooms, zucchini, or even eggplant for a hearty bite. The mix of colors makes your fajitas look as good as they taste. To amp up the flavor, add jalapeños. They give a nice heat to the dish. You can also play with different spices. Try adding oregano or coriander for a unique twist. A squeeze of lime juice brightens the flavors, making your fajitas even more amazing. For the full recipe, check out the Easy Chicken Fajitas. To keep your leftover fajitas fresh, store them in airtight containers. Make sure the fajitas cool down to room temperature first. This helps prevent condensation, which can make them soggy. If you have extra tortillas, store them separately to keep them soft. Reheating chicken fajitas is easy. You can do this in a skillet over medium heat. Add a splash of water to steam them slightly and keep them moist. Stir occasionally for about 5 minutes. If you prefer the microwave, place them in a microwave-safe dish and cover with a damp paper towel. Heat for 1 to 2 minutes, checking every 30 seconds. Freezing chicken fajitas is a great way to save time. First, let the cooked fajitas cool completely. Then, portion them into freezer bags or containers. Remove as much air as possible to prevent freezer burn. You can freeze both the chicken and vegetables together. When you’re ready to eat them, thaw overnight in the fridge. Reheat as mentioned above for a quick meal. To add heat, you can use jalapeños. Slice them thin and toss in with the chicken. You could also add a pinch of cayenne pepper to the marinade. If you want more flavor, try a chipotle in adobo sauce. Just a small amount packs a punch. Adjust the spice to your taste. Yes, you can add many vegetables. Here are some great options: - Zucchini - Mushrooms - Corn - Asparagus - Cherry tomatoes These veggies will add color and flavor to your fajitas. Fajitas are great with various sides. Here are some tasty ideas: - Mexican rice - Refried beans - Guacamole - Salsa - Sour cream - Fresh corn salad These sides will complement your chicken fajitas well. You can find the full recipe for Easy Chicken Fajitas in the earlier section. You’ve learned how to make easy chicken fajitas that burst with flavor. We covered the key ingredients, easy steps, and helpful tips. You can customize your fajitas with different proteins and veggies, too. Remember, the right cooking method and storage will keep them fresh. Enjoy crafting your own delicious meals at home! Now, go ahead and impress your family or friends with your fajita skills!](https://dailydishly.com/wp-content/uploads/2025/06/bddc0842-410c-41cd-a0e7-7c4486f739b3-768x768.webp)
![To make smoky chipotle bean burritos, gather these key ingredients: - 1 cup black beans, cooked and mashed - 1 cup pinto beans, cooked and mashed - 1 tablespoon chipotle pepper in adobo sauce, minced - 4 large flour tortillas - 1 cup cooked brown rice - 1 cup corn kernels (fresh, frozen, or canned) - 1 cup shredded cheese (cheddar or a cheese blend) These ingredients create a rich and satisfying filling. The black and pinto beans add protein and flavor. The tortillas hold everything together, making it easy to enjoy. The right spices and seasonings elevate your burritos. Here’s what you need: - 1 teaspoon smoked paprika - 1 teaspoon ground cumin - ½ teaspoon garlic powder - ½ teaspoon onion powder - Salt and pepper to taste Smoked paprika gives a deep flavor. Ground cumin adds warmth and earthiness. Garlic and onion powders bring out the savory notes. Adjust the salt and pepper based on your taste. Toppings add freshness and fun to your burritos. Consider these options: - ½ cup sour cream or Greek yogurt - Fresh cilantro, chopped - Lime wedges for serving Sour cream or yogurt adds creaminess. Cilantro brings a touch of brightness. Lime juice adds zing and balances the flavors. Feel free to mix and match your toppings! Checking out the Full Recipe can help you see how to use these ingredients effectively. To start, gather your ingredients. In a medium bowl, mix 1 cup of black beans and 1 cup of pinto beans. Use a fork to mash them slightly, but leave some texture for bite. This adds a nice feel to the burrito. Next, add 1 tablespoon of minced chipotle pepper in adobo sauce. This gives the burrito its smoky kick. Then, sprinkle in 1 teaspoon of smoked paprika, 1 teaspoon of ground cumin, ½ teaspoon of garlic powder, and ½ teaspoon of onion powder. Season with salt and pepper to taste. Mix everything well, so the flavors blend nicely. Now, let’s assemble the burritos. Take a clean surface or a large plate. Lay out one large flour tortilla on the surface. Add an even scoop of the bean mixture down the center of the tortilla. Be generous, but don’t overfill! Next, add a scoop of cooked brown rice, followed by a sprinkle of corn kernels. Top it all off with a handful of shredded cheese. Now, fold the sides of the tortilla over the filling. Then, roll the burrito tightly from the bottom up. Repeat this with the remaining tortillas until all the filling is used. To cook the burritos, heat a non-stick skillet over medium heat. Place the burritos seam-side down in the skillet. Cook them for about 2-3 minutes on each side. Look for a golden brown and crispy texture. This step makes them extra tasty! Once cooked, remove the burritos from the skillet and let them cool slightly. Serve warm, topped with a dollop of sour cream or Greek yogurt, chopped cilantro, and lime wedges on the side for squeezing. Enjoy your smoky chipotle bean burritos! For more details, check out the Full Recipe. To boost the smoky taste, add more chipotle pepper. You can use two tablespoons if you like it hot. Smoked paprika also adds depth. I often sprinkle extra on top before serving. For a touch of sweetness, add a bit of honey. This balance makes the flavors pop. You can make these burritos in advance. Prepare the filling and wrap them in tortillas. Then, wrap each burrito in foil. Store them in the fridge for up to three days. When you're ready, heat them in the oven for a quick meal. This method keeps them tasty and fresh. A few tools help make this recipe easier. Use a large bowl for mixing the bean filling. A non-stick skillet is great for cooking the burritos. A spatula helps flip them without breaking. If you have a tortilla press, it can shape the tortillas perfectly. Lastly, kitchen scissors can cut cilantro quickly. For the full recipe, check out the [Full Recipe]. {{image_2}} You can make this recipe vegetarian or vegan easily. Use plant-based cheese for a vegan choice. You can also swap sour cream for cashew cream or avocado. Both options add creaminess without dairy. This way, everyone can enjoy these burritos. Feel free to add more veggies to your burritos. Try diced bell peppers, zucchini, or spinach. Sauté them before mixing with the beans for extra flavor. You can also add roasted veggies for a smoky taste. This adds color and nutrition, making your meal even better. If you want to change the protein, use lentils or quinoa. Both provide great texture and nutrients. You can also try chickpeas for a different flavor. They blend well with the smoky spices. These options keep your burritos hearty and satisfying. You can keep your Smoky Chipotle Bean Burritos in the fridge. Place them in an airtight container. They will stay fresh for about 3 to 4 days. If you want to keep them longer, consider freezing. To freeze the burritos, wrap each one tightly in plastic wrap. Then, place them in a freezer-safe bag. This keeps them safe from freezer burn. They can last in the freezer for up to 3 months. When you’re ready to eat, just thaw them in the fridge overnight. To reheat, you can use an oven or a skillet. If using the oven, preheat it to 350°F (175°C). Wrap the burrito in foil and heat for about 15-20 minutes. If using a skillet, heat it over medium heat. Cook the burrito for about 3-4 minutes on each side. This keeps them crispy and warm. For a quick option, you can use the microwave. Heat it for 1-2 minutes, but it may not stay crispy. Enjoy your delicious burritos! For the full recipe, check out the Smoky Chipotle Bean Burritos recipe. You can use any beans you like. Great options include kidney beans or chickpeas. You can also blend beans for a smoother texture. If you want a meat option, try shredded chicken or ground beef. Remember to adjust the seasoning to fit the new beans or meat. To add heat, try more chipotle peppers in adobo sauce. You can also mix in diced jalapeños or a splash of hot sauce. If you like it really spicy, use a pinch of cayenne pepper. Taste the filling as you go to reach your perfect heat level. Yes, you can use corn tortillas! They add a nice flavor and texture. Just be careful, as they can tear more easily than flour tortillas. Warm them slightly before filling to make them more pliable. This way, they’ll hold up better when you roll them. For the full recipe, check out the details above. In this post, I covered how to make smoky chipotle bean burritos. We explored key ingredients, spices, and toppings. I shared simple steps for preparation, assembly, and cooking. Helpful tips improved smoky flavors and storage methods. I also offered vegetarian options and variations. These burritos are easy, tasty, and fun to make. You can adapt them to your taste and enjoy any time. With these insights, you are ready to create a delicious meal. Happy cooking!](https://dailydishly.com/wp-content/uploads/2025/06/6af8d986-bcf9-4176-ab5b-3d565f261c50-768x768.webp)


