Sheet-Pan Garlic Herb Chicken and Veggies Delight

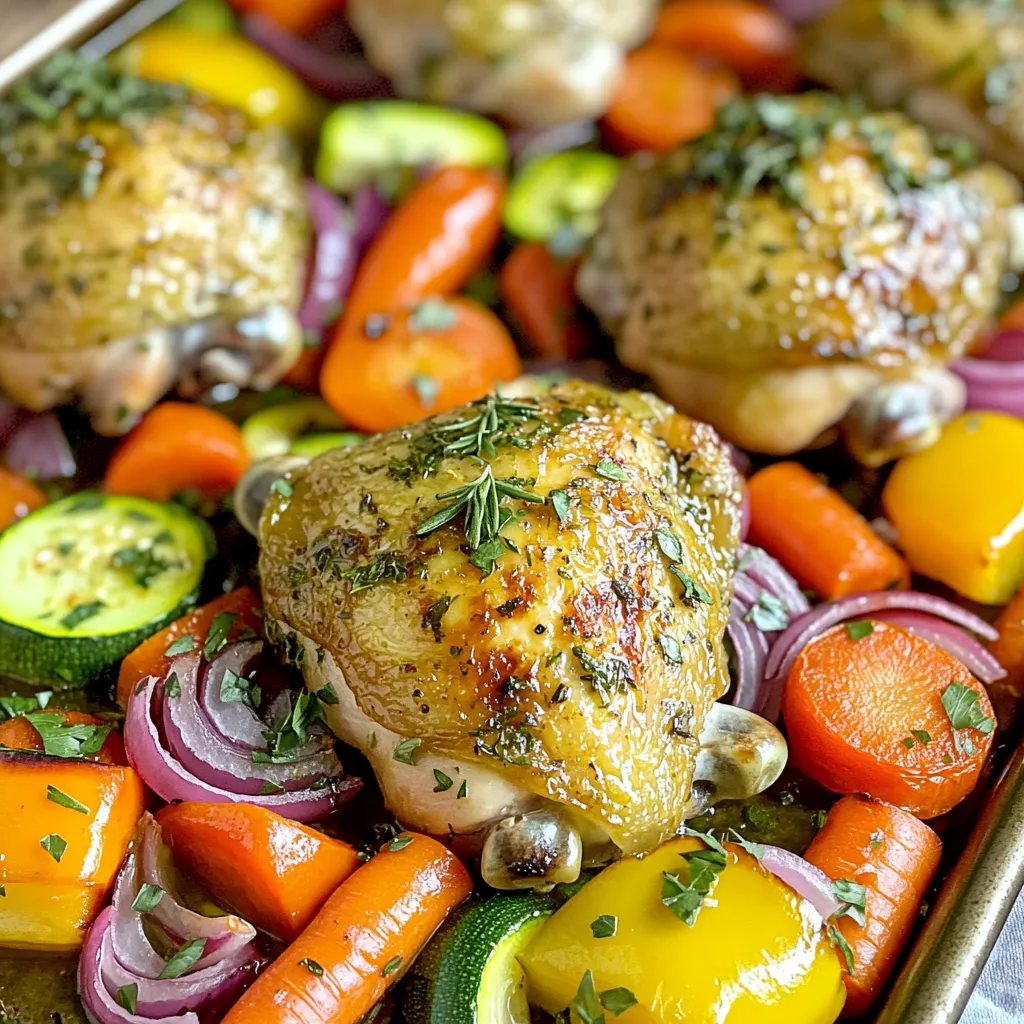
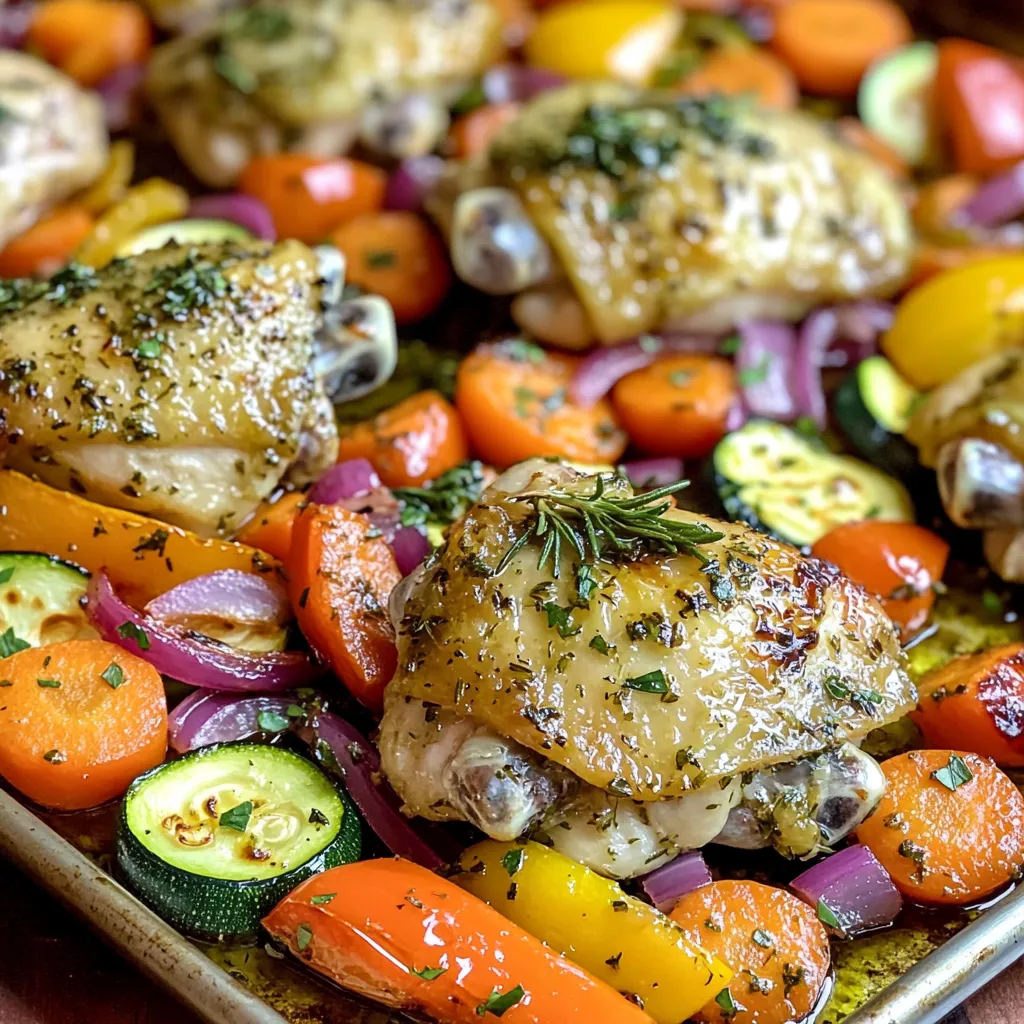
Looking for a meal that’s easy, healthy, and oh-so-delicious? You’ve hit the jackpot with my Sheet-Pan Garlic Herb Chicken and Veggies Delight! This recipe brings together juicy chicken thighs and vibrant veggies, all roasted to perfection. With simple steps and a handful of fresh ingredients, I’ll guide you through creating this flavorful dish. Get ready to impress your family and enjoy a tasty, hassle-free dinner!
Ingredients
List of Essential Ingredients
– 4 boneless, skinless chicken thighs
– 2 tablespoons olive oil
– 4 cloves garlic, minced
– 1 tablespoon fresh rosemary, chopped
– 1 tablespoon fresh thyme, chopped
– 1 teaspoon paprika
– Salt and pepper to taste
– 1 cup baby carrots
– 1 bell pepper (any color), sliced
– 1 zucchini, sliced
– 1 red onion, cut into wedges
– Fresh parsley, chopped (for garnish)
This recipe shines with a few key ingredients. First, you need chicken thighs. They stay juicy and tender while cooking. Olive oil adds richness and helps with browning. Garlic gives a strong flavor that compliments the chicken well.
Rosemary and thyme bring a fresh taste to the dish. Paprika adds a bit of color and warmth. Salt and pepper are essential to enhance all the flavors.
For veggies, baby carrots, bell peppers, zucchini, and red onion add color and crunch. Each veggie cooks well, creating a lovely mix. You can also use fresh parsley as a garnish for a bright finish.
Gather these ingredients, and you are ready to make a delightful meal. Each bite will be packed with flavor and nutrition.
Step-by-Step Instructions
Preparing the Chicken
First, mix the olive oil, minced garlic, rosemary, thyme, paprika, salt, and pepper in a large bowl. This garlic herb mixture is key for flavor. Add the chicken thighs to the bowl and coat them well. Let the chicken marinate for 15 minutes. This short time helps the flavors seep into the meat.
Veggie Preparation
Choose colorful veggies like baby carrots, bell peppers, zucchini, and red onions. Wash and cut them into pieces. For the bell pepper, slice it into strips. Toss all the veggies in another bowl with a drizzle of olive oil, salt, and pepper. Make sure they are well-coated. This seasoning enhances their natural taste.
Roasting Process
Preheat your oven to 425°F (220°C). On a large baking sheet, place the marinated chicken in the center. Arrange the seasoned veggies around the chicken. This setup allows the chicken juices to flavor the vegetables. Bake for 25-30 minutes. Check that the chicken reaches an internal temperature of 165°F (74°C). The chicken should be golden brown, and the veggies should be tender and slightly caramelized.
Tips & Tricks
Achieving the Best Flavor
Using high-quality ingredients makes a big difference. Fresh herbs bring bright flavor. Choose organic chicken for better taste.
For extra tenderness, marinate your chicken longer. Fifteen minutes is good, but thirty minutes is better. The garlic herb mix seeps in, making every bite juicy and full of flavor.
Perfecting the Cooking Method
To avoid overcooking your veggies, cut them into similar sizes. This helps them cook evenly. Keep an eye on them as they roast.
Using a meat thermometer ensures your chicken is safe to eat. The internal temperature should reach 165°F (74°C). This tool takes the guesswork out of cooking.
Presentation Tips
Garnish your dish with fresh parsley for a pop of color. It adds a nice touch and flavor.
For a complete meal, serve this dish with crusty bread or a simple salad. This adds texture and balances the meal. You can also pair it with rice or quinoa for added heartiness.

Variations
Ingredient Swaps
You can switch out the veggies based on what you have. In summer, use fresh tomatoes or corn. In winter, try root veggies like sweet potatoes or Brussels sprouts. This keeps your dish colorful and tasty.
For protein, chicken thighs are great, but chicken breasts work too. If you want a meat-free meal, tofu is a solid choice. Just cube it and marinate like the chicken. This keeps the dish light and healthy.
Flavor Profile Changes
To change the flavor, mix in different herbs and spices. Basil or oregano can give a fresh taste. You can also try cumin or chili powder for a warmer flavor.
If you like spice, add red pepper flakes or sliced jalapeños. This will give your dish a nice kick. Adjust the spice to suit your taste. These changes make your meal fun and unique!
Storage Info
Storing Leftovers
To keep your sheet-pan garlic herb chicken and veggies fresh, follow these steps:
– Cool Down: Let the dish cool to room temperature first.
– Use Airtight Containers: Place the chicken and veggies in airtight containers. This helps prevent moisture loss and keeps them fresh.
– Refrigerate: Store the containers in the fridge.
Leftovers can last up to 3-4 days. Always check for any signs of spoilage before eating. If you notice any odd smells or changes in color, it’s best to toss them out.
Reheating Guidelines
When it’s time to enjoy those leftovers, reheating properly is key. Here are some tips:
– Oven Method: Preheat your oven to 350°F (175°C). Place the chicken and veggies on a baking sheet. Bake for about 15-20 minutes. This helps keep the chicken juicy and the veggies tender.
– Microwave Method: If you’re short on time, place the leftovers on a microwave-safe plate. Heat them for 1-2 minutes, checking halfway. Stir the veggies to ensure even heating.
Always use a food thermometer to ensure the chicken reaches 165°F (74°C) for safe eating. Enjoy your meal!
FAQs
Can I use frozen chicken thighs for this recipe?
Yes, you can use frozen chicken thighs. Just remember to thaw them first. You can do this safely in the fridge overnight. For a quicker method, submerge them in cold water for about an hour. This method keeps the chicken safe and helps it cook evenly. Cooking from frozen might lead to uneven cooking, so thaw for the best taste and texture.
What is the best way to cut vegetables for even cooking?
Cut your vegetables into similar sizes. This helps them cook at the same rate. For baby carrots, you can leave them whole. Slice bell peppers and zucchini into pieces about the same thickness. Aim for 1-inch chunks for onions. Uniform cuts ensure that every bite is tender and delicious.
Can I make this recipe in advance?
Yes, you can prepare this dish ahead of time. Marinate the chicken and chop the veggies a day before. Store them in the fridge in separate containers. When you’re ready to cook, just arrange them on the baking sheet and roast. This saves time and makes dinner a breeze. If you have leftovers, they store well too!
This blog post covered how to make a tasty chicken and veggie dish. You learned about key ingredients and how to prepare them for the best flavor. I shared tips for marinating chicken and perfecting your cooking time. Remember to use fresh ingredients for rich taste and keep your veggies colorful. You can also swap ingredients for variety and store leftovers safely. This dish is simple and fun to make, so enjoy creating your meal with the steps provided!


![For creamy roasted red pepper pasta, you need: - 12 oz pasta (penne or fusilli) - 2 large red bell peppers - 1 cup heavy cream - 1/2 cup grated Parmesan cheese - 2 cloves garlic, minced - 2 tablespoons olive oil - 1 teaspoon dried basil - 1/2 teaspoon red pepper flakes (adjust for spice level) - Salt and pepper to taste - Fresh basil leaves for garnish These ingredients work together to create a rich and flavorful dish. The roasted red peppers give a sweet taste, while the cream adds a smooth texture. If you want to make this dish vegan, you can swap the heavy cream for coconut cream or a cashew cream. Use nutritional yeast instead of Parmesan cheese for a cheesy flavor. For gluten-free pasta, look for pasta made from rice, lentils, or chickpeas. If you want to make more or less pasta, here’s how to adjust the ingredients: - For every 4 oz of pasta, use about 1/3 cup of heavy cream. - For every 1 oz of cheese, use 2 tablespoons of cream. - Adjust the red bell peppers: 1 large pepper equals about 1 cup chopped. This way, you can easily scale the recipe to fit your needs. If you want the full recipe, refer to the top of the article. Start by preheating your oven to 400°F (200°C). This heat helps the peppers roast well. Place the two red bell peppers on a baking sheet. Drizzle with olive oil for flavor and moisture. Roast them for 25-30 minutes. You want the skins to char and blister. When done, take them out and let them cool. Once cool, peel off the charred skin and remove the seeds. Chop the flesh into small pieces. This step gives your pasta its rich flavor. While the peppers roast, bring a pot of water to a boil. Add salt to the water, which helps flavor the pasta. Add 12 oz of pasta, like penne or fusilli. Cook it according to the package instructions until it's al dente. This means it should be firm but not hard. Drain the pasta and save about 1 cup of the pasta water. This water helps create a creamy sauce later. Now, it’s time to make the sauce. In a blender, add the roasted red peppers, 1 cup of heavy cream, 2 cloves of minced garlic, and 1 teaspoon of dried basil. For a bit of heat, include 1/2 teaspoon of red pepper flakes. Add a pinch of salt too. Blend everything until it's smooth and creamy. In a large skillet, combine the creamy mixture with the drained pasta over medium heat. If the sauce is too thick, add a splash of reserved pasta water. Stir in 1/2 cup of grated Parmesan cheese until it melts. Taste and adjust with more salt and pepper if needed. Serve your dish hot. Garnish with fresh basil leaves and more Parmesan cheese if you like. For the full details, refer to the Full Recipe. To get the perfect pasta, cook it in a big pot of salted water. Use about a tablespoon of salt per quart. This adds flavor to your pasta. Cook it until it's al dente, which means it should still have a little bite. After draining, don't rinse your pasta. This keeps the starch that helps the sauce stick. If you like more heat, add extra red pepper flakes. Start with a pinch and taste. You can always add more later. If it's too spicy, balance it with more cream or cheese. The goal is to make it just right for your taste. For a smooth sauce, blend the roasted peppers well. Add the heavy cream slowly while blending. If the sauce is too thick, use some reserved pasta water to thin it. This water has starch that helps the sauce cling to the pasta. Don't forget to stir in the Parmesan cheese at the end. It adds creaminess and flavor. For the complete recipe, check out the Full Recipe. {{image_2}} You can make this dish vegetarian by using vegetable broth instead of chicken broth. Swap out the Parmesan for a plant-based cheese. You can also add veggies like spinach or mushrooms for extra flavor. They will add texture and nutrients. For a heartier meal, consider adding chicken or shrimp. Cook the protein separately and add it to the pasta after mixing in the sauce. Grilled chicken breast or sautéed shrimp both work well. They soak up the creamy flavors nicely. If you need a gluten-free option, use gluten-free pasta. Brands like brown rice or chickpea pasta are great choices. They cook similarly and absorb the sauce well. Just remember to adjust cooking times as needed for different pasta types. You can find the full recipe for this dish here: [Full Recipe]. To store leftovers, let the pasta cool first. Use an airtight container. This keeps the flavors fresh. Place in the fridge for up to three days. If you want to keep it longer, freeze it. When reheating, add a splash of water or cream. This helps restore the creamy texture. Warm it slowly on the stove over low heat. Stir often to avoid burning. You can also use the microwave, but watch it closely. You can freeze the roasted red pepper sauce. Let it cool, then pour it into freezer bags. Flatten the bags to save space. It will last up to three months. When ready to use, thaw it overnight in the fridge before reheating. Yes, you can use many types of pasta. Options like spaghetti, fettuccine, or even gluten-free pasta work well. The key is to choose a shape that holds sauce nicely. Try different types to find your favorite! You can make the sauce cream-free by using cashews or silken tofu. Blend soaked cashews or tofu with roasted peppers and a little vegetable broth. This gives a creamy texture while keeping it dairy-free. Adjust seasonings to taste. This dish pairs well with a fresh salad or garlic bread. You can also serve it with grilled vegetables or a light protein, like chicken or shrimp. These sides enhance the meal and make it more filling. For more ideas, check the Full Recipe. This blog post covered all you need for creamy roasted red pepper pasta. I shared ingredient lists, cooking steps, and tips for the best results. You can explore variations for diets and learn how to store leftovers. Remember, cooking is about having fun and trying new things. Your creations can be as unique as you are. Enjoy each bite and keep experimenting in the kitchen!](https://dailydishly.com/wp-content/uploads/2025/07/67c62068-3baa-44bf-b117-e4c3c451c449-768x768.webp)
![To make Pineapple Teriyaki Meatballs, you need simple and fresh ingredients. Here’s the list: - 1 lb ground chicken or turkey - 1 cup breadcrumbs - 1/4 cup green onions, finely chopped - 1/4 cup fresh pineapple, finely diced - 1 egg, beaten - 2 cloves garlic, minced - 1 teaspoon ginger, grated - 1/4 cup soy sauce (low sodium preferred) - 1/4 cup teriyaki sauce - 1 tablespoon sesame oil - 1 tablespoon cornstarch (optional, for thickening) - Sesame seeds for garnish - Fresh cilantro for garnish These ingredients blend well, giving the meatballs a sweet and savory taste. The fresh pineapple adds a fruity twist, making them unique. You can find most of these items at your local grocery store. For the best flavor, use fresh ingredients whenever you can. Check out the Full Recipe for more details on how to combine these elements into a delicious dish. - Set your oven to 400°F (200°C). - Prepare a baking sheet by lining it with parchment paper. - In a large bowl, mix ground chicken or turkey with breadcrumbs. - Add in the chopped green onions, diced pineapple, beaten egg, minced garlic, and grated ginger. - Season with salt and pepper. Mix until well combined. - Use your hands to shape the mixture into meatballs, about 1 to 1.5 inches wide. - Place the meatballs on the prepared baking sheet. Space them out evenly. - Bake in the oven for 15 to 20 minutes, or until they turn golden brown. - While the meatballs bake, grab a small saucepan. - Combine soy sauce, teriyaki sauce, and sesame oil in the pan. - If you want to thicken it, mix cornstarch with water and add that too. - Heat the mixture over medium heat until it simmers, then reduce to low. Let it thicken for about 5 minutes. - Once the meatballs are done, take them out of the oven. - Drizzle the teriyaki sauce over the meatballs. Toss gently to coat them. - Transfer them to a serving platter and garnish with sesame seeds and fresh cilantro. For the full recipe, check out the [Full Recipe]. - Avoid overmixing the meat mixture for tenderness. Mixing too much can make meatballs tough. - Use a cookie scoop for uniform sizing. This helps them cook evenly and look great. - Adjust baking time based on oven type. Every oven heats differently, so watch your meatballs closely. - Use an instant-read thermometer for doneness. Aim for an internal temperature of 165°F (74°C) for safety and juiciness. - Experiment with additional spices or herbs. Try adding garlic powder or fresh basil for a new twist. - Consider adding a splash of citrus for brightness. A little lime or lemon juice can really lift the flavors. Feel free to explore the [Full Recipe] for more detailed steps on making these delicious Pineapple Teriyaki Meatballs! {{image_2}} You can switch up the protein in this recipe. Ground beef or pork works great. If you prefer plant-based meals, use lentils or meat substitutes. Each option adds its own flavor and texture. Each choice makes the dish unique. The teriyaki sauce can be customized. For a homemade version, mix soy sauce, brown sugar, and ginger. If you like heat, add chili paste or sriracha. You can also use a store-bought spicy teriyaki sauce. Each sauce brings a new twist to the dish. You can add vegetables to your meatballs. Bell peppers or zucchini add color and crunch. They boost nutrition too. For heat, consider crushed red pepper. This adds a nice kick. Feel free to get creative with your additions! To keep your Pineapple Teriyaki Meatballs fresh, store leftovers in an airtight container. This method helps lock in flavor and moisture. You can keep them in the fridge for up to 3-4 days. Make sure they cool down before sealing them up. This way, they won’t trap steam and become soggy. If you want to save some meatballs for later, freeze them! First, lay the meatballs out on a tray. Freeze them individually for about an hour. This step makes sure they don’t stick together. Once frozen, transfer them to a container or a freezer bag. Use them within 3 months for the best quality. Label the container with the date so you don’t forget! When you're ready to enjoy your frozen meatballs, reheating is simple. Use the oven or microwave for even heating. If using the oven, preheat to 350°F (175°C) and bake for about 15 minutes. For the microwave, place meatballs on a plate and add a splash of water. This helps keep them moist. Heat for about 2-3 minutes, checking to ensure they are hot all the way through. Enjoy your flavorful meal again! For the complete recipe, check out the Full Recipe section. Pineapple Teriyaki Meatballs take about 40 minutes total to cook. This includes 15 minutes for prep and 15 to 20 minutes for baking. Bake them at 400°F (200°C) until they turn golden brown. Yes, you can make these meatballs ahead of time. Prepare the meatball mixture and shape them into balls. Place them on a tray and cover with plastic wrap. You can keep them in the fridge for up to 24 hours. When ready, bake them as usual. These meatballs pair well with many sides. Try serving them with steamed rice or quinoa for a filling meal. You can also add a fresh salad or stir-fried veggies for balance. Pineapple fried rice works great too! Yes, this recipe is great for meal prep. You can cook a large batch and store them in containers. They keep well in the fridge for 3 to 4 days. You can also freeze them for later use. Just thaw and reheat when needed. Absolutely! To make the meatballs gluten-free, use gluten-free breadcrumbs. Make sure the soy sauce is gluten-free as well. This way, you can enjoy the same great taste without gluten. To boost the flavor of teriyaki sauce, try adding fresh ginger or garlic. A splash of rice vinegar adds a nice tang. For some heat, include red pepper flakes. These simple tweaks can make a big difference! You can find the full recipe [here]. These Pineapple Teriyaki Meatballs are easy to make and full of flavor. You learned about the key ingredients, helpful tips, and tasty variations. From different proteins to sauce options, the choices are endless. Remember to store leftovers properly to enjoy them later. Experimenting with this recipe will lead to new favorites. So, roll up your sleeves and create some delightful meatballs today!](https://dailydishly.com/wp-content/uploads/2025/07/2108c202-57e5-4a3c-8ec5-e482c7f00875-768x768.webp)