Simple Roasted Mushrooms Flavorful and Easy Dish

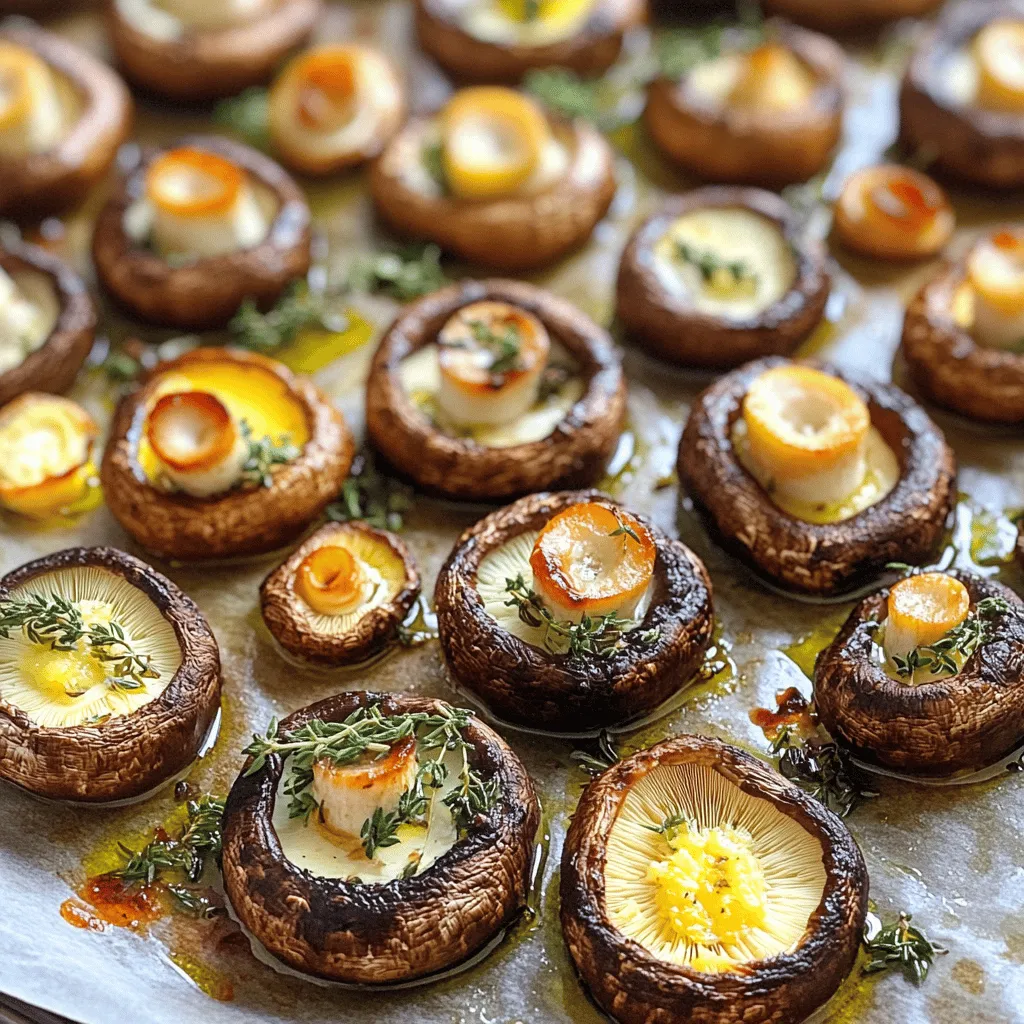
Get ready to savor the simple joy of roasted mushrooms! This easy dish combines fresh ingredients and bold flavors. With just a few steps, you’ll create a tasty side that pairs well with any meal. Whether you’re hosting a dinner or enjoying a quiet night in, my recipe for flavorful roasted mushrooms will delight your taste buds. Let’s dive into the ingredients and get cooking!
Ingredients
To make simple roasted mushrooms, you need just a few key items. This recipe is easy and quick. Here’s what you need:
– 500g mixed mushrooms (button, cremini, shiitake), cleaned and halved
– 4 tablespoons olive oil
– 4 cloves garlic, minced
– 2 tablespoons fresh thyme, chopped
– 1 tablespoon fresh rosemary, chopped
– Salt and pepper to taste
– Zest of 1 lemon
– 2 tablespoons freshly grated Parmesan cheese (optional)
These ingredients work together to create a dish that bursts with flavor. The mix of mushrooms adds different textures, while the garlic and herbs give depth. Olive oil helps the mushrooms roast nicely. The lemon zest adds a bright touch at the end. If you love Parmesan, it can give a creamy finish.
Step-by-Step Instructions
Preheat the Oven
Start by preheating your oven to 200°C (400°F). This step is key. A hot oven helps the mushrooms roast evenly. This keeps them juicy and tasty.
Mixing and Seasoning the Mushrooms
Next, take a large bowl. Add the cleaned and halved mushrooms. Pour in 4 tablespoons of olive oil. Then, add 4 cloves of minced garlic. Toss in 2 tablespoons of fresh thyme and 1 tablespoon of fresh rosemary. Season with salt and pepper to taste. Mix everything well. Make sure all the mushrooms are coated with that lovely oil and spice mix.
Roasting Process
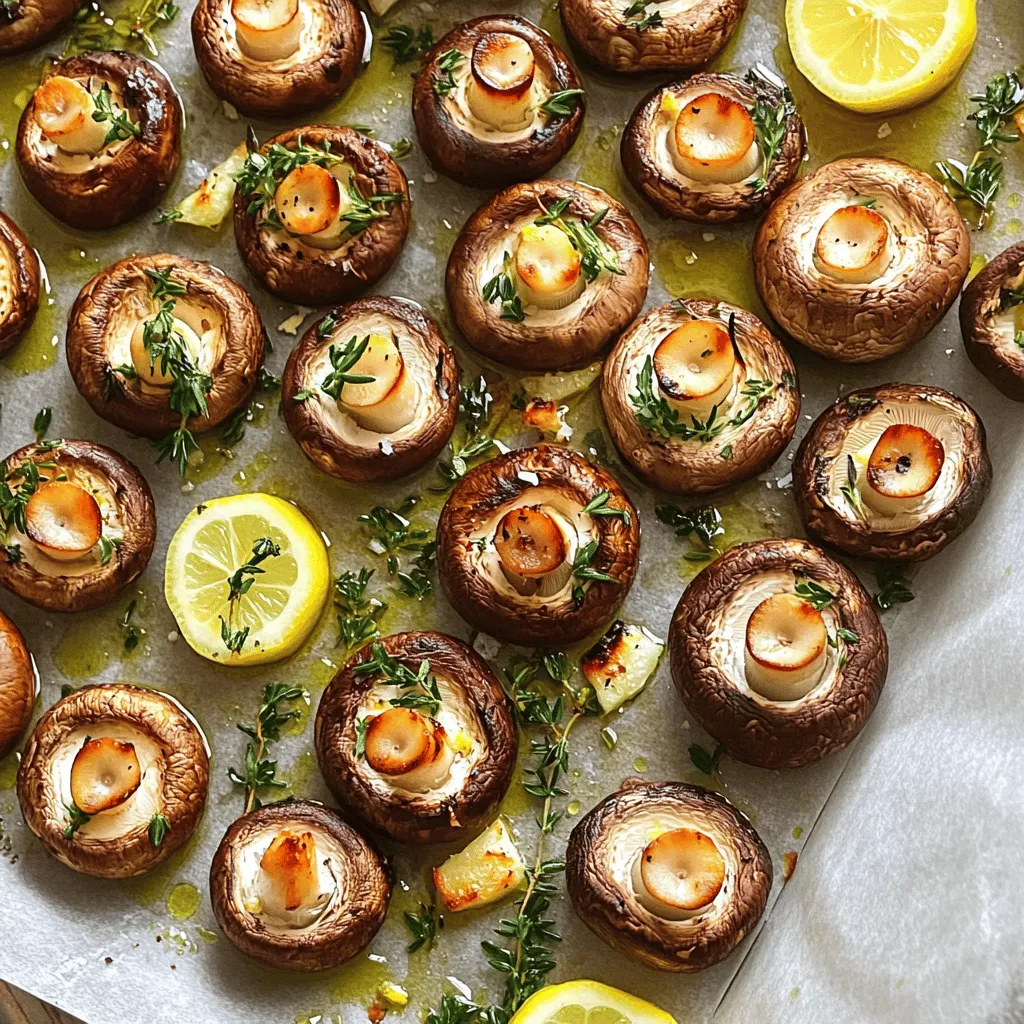
Now, take a baking sheet. Line it with parchment paper for easy cleanup. Spread the mushrooms in a single layer on the sheet. Roast them in the oven for about 20 to 25 minutes. Remember to stir halfway through. This helps them cook evenly. When they are golden brown and tender, they are done. Take them out of the oven and sprinkle the zest of 1 lemon over them. For an extra treat, add 2 tablespoons of freshly grated Parmesan cheese while they’re still warm. Enjoy this flavorful dish as a side or add it to your favorite pasta.
Tips & Tricks
Choosing the Right Mushrooms
When making roasted mushrooms, pick fresh ones. Look for firm and smooth mushrooms. Button, cremini, and shiitake work well. Each type adds its own flavor. You can mix them for a fun taste. Avoid mushrooms with dark spots. They may not taste good.
Enhancing Flavor with Additional Seasonings
You can boost the flavor using simple seasonings. Add garlic for a rich taste. Fresh herbs like thyme and rosemary spice things up. Lemon zest gives a bright kick. If you like cheese, sprinkle Parmesan on top. It melts beautifully and adds creaminess.
Perfecting the Roasting Time
Roast the mushrooms at 200°C (400°F) for 20-25 minutes. Stir them halfway for even cooking. They should turn golden brown and tender. If you want them crispier, roast a bit longer. Keep an eye on them. Each oven is different, so check often.

Variations
Adding Different Herbs and Spices
You can change the taste of roasted mushrooms by adding herbs and spices. Try basil or oregano for a fresh twist. A pinch of red pepper flakes can add heat, while smoked paprika gives a nice depth. Experiment with your favorite flavors to make it your own.
Incorporating Other Vegetables
Mushrooms pair well with many veggies. Consider adding bell peppers, zucchini, or asparagus. Cut them into similar sizes as the mushrooms. This way, they roast evenly. Mixing vegetables adds color and nutrition to your dish.
Transforming into a Main Dish
You can easily turn roasted mushrooms into a main dish. Serve them over rice, quinoa, or pasta. Add a sauce like marinara or creamy Alfredo for richness. Top with protein, such as grilled chicken or beans, to make it filling.
Storage Info
Proper Storage Techniques
After you make your savory garlic herb roasted mushrooms, let them cool. Store them in an airtight container. This keeps them fresh. Place the container in the fridge. They will last for about three to five days. If you add cheese, eat them within three days for the best taste.
Reheating Instructions
To reheat your roasted mushrooms, use a skillet. Heat it over medium heat. Add a splash of olive oil for flavor. Toss the mushrooms gently for a few minutes until warm. You can also use a microwave. Place them in a bowl and cover it. Heat for about 30 seconds. Stir and heat more if needed.
Freezing Roasted Mushrooms
You can freeze roasted mushrooms, but they change in texture. Cool them completely first. Spread them on a baking sheet in a single layer. Freeze for a few hours. Once frozen, transfer them to a freezer bag. They should last for about one month. When ready to use, thaw them in the fridge overnight. Reheat as needed.
FAQs
How long do mushrooms need to roast?
Mushrooms need about 20 to 25 minutes to roast. They should turn golden brown and soft. Make sure to stir them halfway through to cook evenly. The heat should be set to 200°C (400°F). This roasting time gives them a nice texture and enhances their flavor.
Can I use dried herbs instead of fresh?
Yes, you can use dried herbs instead of fresh. Use about one-third of the amount. Dried herbs are more potent. They will still add great taste to your mushrooms. Just remember to mix them in with the oil and garlic before adding the mushrooms.
What are the best dishes to serve with roasted mushrooms?
Roasted mushrooms pair well with many dishes. You can serve them as a side dish or mix them into pasta. They also work great on salads or in risottos. You can even top them on toast for a savory snack.
Roasting mushrooms is simple and rewarding. We explored the key ingredients, like mixed mushrooms and fresh herbs. You learned the steps to preheat, mix, and roast them perfectly. We shared tips to choose the best mushrooms and add flavor. Variations let you get creative, turning mushrooms into a main dish. Lastly, proper storage helps keep your dish fresh. Enjoy this tasty and versatile dish often!


![- 4 medium russet potatoes - 4 tablespoons unsalted butter, melted - 4 cloves garlic, minced - 1 teaspoon dried thyme - 1 teaspoon dried oregano - Salt and pepper to taste - Fresh parsley, chopped (for garnish) - 1 cup grated Parmesan cheese The main ingredients in this dish create a rich and satisfying flavor. The russet potatoes serve as a hearty base. Their starchy texture makes them perfect for baking. The melted butter adds a creamy touch while the minced garlic gives it a bold kick. For seasoning, dried thyme and oregano bring out herbal notes. Salt and pepper help balance the dish. Fresh parsley adds a burst of color and freshness at the end. The cheese component is key. Grated Parmesan cheese melts beautifully and provides a salty, nutty flavor. It also creates a lovely golden crust on top. This mix of ingredients turns simple potatoes into an irresistible delight. You can find the full recipe to make these Garlic Parmesan Hasselback Potatoes and enjoy this delicious dish. - Preheat the oven to 425°F (220°C). - Wash and scrub the potatoes thoroughly. This step cleans off dirt and helps the skin crisp up. - Make horizontal slices to create Hasselback cuts. - Cut about 1/8 inch apart, but do not cut all the way through. This keeps the potato intact. The cuts allow for crispiness and flavor to soak in. - Mix the melted butter, minced garlic, dried thyme, oregano, salt, and pepper in a bowl. - Brush this garlic butter mix over each potato. Let it seep into the cuts for maximum flavor. - Place the potatoes on a baking sheet lined with parchment paper. This helps with easy cleanup. - Bake the potatoes for 40-45 minutes, brushing with more garlic butter halfway through for extra flavor. These steps will help you create perfectly crispy and tasty Garlic Parmesan Hasselback Potatoes. For the complete recipe, check the Full Recipe section. To make sure your Hasselback potatoes cook evenly, slice them correctly. Cut the potatoes into thin slices, about 1/8 inch apart. Do not cut all the way through. Leave about 1/4 inch at the bottom. This helps the potato hold its shape and cook evenly. If your potatoes are larger, make deeper cuts. Always check if they are tender by sticking a fork in them. You can add more flavor to your Garlic Parmesan Hasselback potatoes. Try using smoked paprika for a smoky taste. A sprinkle of red pepper flakes gives it a nice kick. You can also add fresh herbs like rosemary or basil. Just chop them finely and mix them into your garlic butter. This will make the dish even more exciting. For a stunning presentation, arrange the potatoes on a serving platter. You can fan them out slightly for a beautiful look. Drizzle some of the leftover garlic butter over the top before serving. This adds shine and extra flavor. Finally, sprinkle chopped parsley on top. The green color will pop against the golden potatoes. For the best effect, serve them right away while they are hot. For the complete recipe, check out the [Full Recipe]. {{image_2}} You can easily change the herbs in this recipe. Use fresh herbs for a brighter taste. Here are some options to try: - Rosemary: Adds a pine-like flavor that pairs well with garlic. - Basil: Offers a sweet, slightly peppery taste. - Sage: Provides a warm, earthy flavor that complements the potatoes. Feel free to mix and match these herbs. Each one brings its unique touch, making your dish special. If you want to switch up the cheese, there are many tasty options. Each type of cheese gives a different flavor. Here are a few ideas: - Cheddar: Sharp and creamy, cheddar melts beautifully. - Gruyère: This Swiss cheese adds a nutty flavor. - Feta: Crumbled feta gives a salty and tangy twist. Experiment with these cheeses to find your favorite combination. You can make this recipe fit different diets. Here are some easy swaps: - Gluten-Free: Use certified gluten-free breadcrumbs instead of regular ones. - Dairy-Free: Replace butter with olive oil and use a dairy-free cheese option. These changes make it easier for everyone to enjoy this dish. Don't hesitate to customize it to fit your needs. For the complete recipe, check the Full Recipe section. To store leftover Garlic Parmesan Hasselback Potatoes, let them cool first. Place them in an airtight container. Make sure to keep them in the fridge. They will stay fresh for about three to four days. If you want to enjoy them later, store them without the cheese on top. This way, the potatoes will hold up better. When reheating, the goal is to keep the crispness. The best method is to use an oven. Preheat it to 350°F (175°C). Place the potatoes on a baking sheet. Heat them for about 15 to 20 minutes. This helps restore their crunch. You can cover them loosely with foil to prevent drying out. If you like, add a bit more cheese on top before reheating for extra flavor. Yes, you can freeze these delicious potatoes! To do this, let them cool completely. Wrap each potato tightly in plastic wrap. Then place them in a freezer-safe bag. They can last up to two months in the freezer. When you want to eat them, thaw them in the fridge overnight. After that, reheat in the oven as mentioned above. This keeps them tasty and fresh! For the full recipe, check out the details and get cooking! Hasselback potatoes are a fun and tasty style of baked potato. They have thin, evenly spaced slices cut into the potato, but not all the way through. This style lets the butter and seasonings seep in, making every bite delicious. The name comes from a restaurant in Sweden called Hasselbacken, where this style first appeared. The crispy edges and tender inside make them a favorite! Yes, you can! To prepare these potatoes ahead of time, follow these steps: - Wash and slice the potatoes as directed in the recipe. - Mix your garlic butter, but don't bake them yet. - Place the sliced potatoes in a bowl of water with lemon juice to stop browning. - Cover and store in the fridge for up to 24 hours. - When ready, brush with the garlic butter and bake according to the full recipe. This way, you can save time on busy days. Hasselback potatoes pair well with many dishes. Here are some ideas: - Grilled chicken for a hearty meal - A fresh salad to balance the flavors - Steamed vegetables for a healthy side - Steak or pork for a filling dinner These sides enhance the meal while keeping the focus on the garlic parmesan goodness of the potatoes. Enjoy your cooking! In this article, we explored making Garlic Parmesan Hasselback Potatoes. You learned about the ingredients, from russet potatoes to cheese options. I shared step-by-step instructions, helpful tips, and variations for personalization. Storing and reheating methods ensure delicious leftovers. Remember, this dish not only dazzles your guests but also adds a tasty twist to meals. Try different herbs and cheeses to make it your own. Enjoy the cooking process and share your creations!](https://dailydishly.com/wp-content/uploads/2025/07/b691fae6-fd13-450a-8675-22670865cf74-768x768.webp)


![- 1 bag (12 oz) tortilla chips - 1 cup black beans, rinsed and drained - 1 cup corn kernels (fresh or frozen) - 1 medium bell pepper, diced (any color) - 1 medium red onion, finely chopped - 1 jalapeño, sliced (seeds removed for less heat) - 1 ripe avocado, diced - 1 cup cherry tomatoes, halved - 1 cup shredded cheese (cheddar or a vegan alternative) - 1 tablespoon olive oil - 1 teaspoon chili powder - 1 teaspoon cumin - Salt and pepper to taste - Fresh cilantro, for garnish - Lime wedges, for serving Gathering fresh ingredients makes a big difference. Tortilla chips form the crunchy base. Black beans add protein and fiber. Sweet corn brings a pop of color and crunch. Diced bell pepper and red onion add flavor and texture. Slice jalapeños for some heat. Diced avocado gives a creamy touch. Halved cherry tomatoes offer freshness. Shredded cheese melts beautifully over the nachos. Olive oil helps sauté the veggies. Chili powder and cumin bring warmth. Lastly, season with salt and pepper for balance. Fresh cilantro and lime wedges are essential for that final zing. For the full recipe, check out the details above. - Preheat the oven: Set your oven to 400°F (200°C). This helps the nachos bake evenly. - Prepare the veggies: In a large skillet, heat one tablespoon of olive oil over medium heat. Add the finely chopped red onion and diced bell pepper. Sauté them for about 3-4 minutes. They should start to soften. Next, add the corn, rinsed black beans, sliced jalapeño, chili powder, cumin, salt, and pepper. Cook this mix for another 2-3 minutes, stirring now and then. This warms everything through and blends the flavors well. - Assemble the nachos: Grab a large baking sheet. Spread the tortilla chips in a single layer. Evenly spoon the sautéed veggie mix over the chips. Finish by sprinkling shredded cheese on top. - Place nachos in the oven: Carefully slide the baking sheet into your preheated oven. - Determine baking time: Let the nachos bake for 10-12 minutes. Keep an eye on them until the cheese melts and bubbles. - Add fresh toppings: Once baked, take the nachos out of the oven. Top them with diced avocado, halved cherry tomatoes, and fresh cilantro. - Serve with lime wedges: Place lime wedges on the side. A squeeze of lime adds a bright flavor to your nachos. Enjoy this loaded veggie nachos recipe! For the full recipe, refer to the above details. To enhance the flavors of your Loaded Veggie Nachos, focus on fresh ingredients. Fresh veggies add brightness. Use ripe avocados and sweet cherry tomatoes for the best taste. Sautéing veggies is key to good nachos. Start with olive oil in a hot pan. Add onions first, and wait until they soften. Then, add bell peppers and corn. This method brings out their natural sweetness. Remember, don’t overcrowd the pan. Give each piece room to cook. Garnishing your nachos makes them look great. Use fresh cilantro for a pop of green. Squeeze lime juice over the top for a fresh taste. You can also add a dollop of sour cream or a drizzle of salsa for color and flavor. When serving, stack the nachos high on a large platter. This makes them fun and inviting. You can also place lime wedges around the nachos for easy access. If you want vegan cheese, look for brands that melt well. Nutritional yeast is a good option for a cheesy flavor without dairy. For toppings, consider your diet. You can swap black beans for chickpeas. Add spinach or kale for more greens. If you want heat, try pickled jalapeños instead of fresh. Explore the [Full Recipe] to get cooking! {{image_2}} You can change up the veggies in loaded veggie nachos to fit the season. In summer, try fresh zucchini or squash. In fall, use roasted sweet potatoes for a sweet taste. Leafy greens, like spinach or kale, add flavor and nutrition. Just toss them in with other veggies before baking. They will wilt nicely and blend in well. Spices and herbs can really change nachos. Try adding smoked paprika or garlic powder for depth. Fresh herbs like cilantro or chives add brightness. For cheese, mix different types. A pepper jack offers heat, while a sharp cheddar gives bite. Vegan cheese can also melt beautifully, making it a great choice. You don't always need tortilla chips. Try baked veggie chips or even pita chips for a twist. Want to go even healthier? Use baked sweet potato slices or cauliflower chips. You can layer nachos on rice or quinoa for a filling meal. Get creative with the base to suit your tastes. For the complete recipe, check out the Full Recipe. To keep your leftover nachos fresh, use airtight containers. Glass or plastic containers work well. You can also wrap them tightly in aluminum foil. Store them in the fridge for up to three days. After that, the chips may get too soggy. To reheat nachos and keep them crunchy, use the oven. Preheat the oven to 350°F (175°C). Spread the nachos on a baking sheet. Heat them for about 10 minutes. This method helps maintain that crispy texture. For toppings, add fresh ingredients like diced avocado or tomatoes after reheating. This keeps them vibrant and tasty. You can freeze nachos before cooking. Just layer the chips and toppings in a freezer-safe bag. Remove all the air to prevent freezer burn. For baked nachos, cool them first. Then, wrap them tightly in plastic wrap and foil. You can store baked nachos for up to two months. To enjoy, just reheat them in the oven. For the full recipe, check out the guide above. Yes, you can prep Loaded Veggie Nachos ahead. Here are some tips for meal prep: - Prep the Veggies: Chop the bell pepper, onion, and other veggies. Store them in airtight containers. - Cook the Mixture: You can sauté the veggie mix in advance. Just reheat it before assembling. - Keep Chips Separate: Store tortilla chips in a sealed bag to keep them crispy. - Layer Right Before Serving: Assemble nachos just before baking for the best crunch. Nachos taste great with various dips. Here are some suggestions: - Guacamole: Creamy and fresh, it pairs well with the flavors. - Sour Cream: A classic choice that adds tanginess. - Salsa: Fresh or cooked, it adds a zesty kick. - Cheese Sauce: For extra creaminess, drizzle warm cheese sauce on top. Yes, you can make Loaded Veggie Nachos gluten-free. Here are some options: - Gluten-Free Chips: Look for tortilla chips labeled gluten-free. Many brands offer this. - Fresh Veggies: Use fresh vegetables, which are naturally gluten-free. - Check Ingredients: Always read labels on sauces and dips to ensure they are gluten-free. For the full recipe with all the steps, check out Loaded Veggie Nachos. Loaded veggie nachos are a fun and tasty dish. You saw the main ingredients, preparation steps, and baking process. With tips on presentation and storage, nachos can be an easy treat. I shared ideas for variations like different veggies or dips. You can even adapt them for any diet. Try making them ahead or freezing leftovers. These nachos can brighten your meal day anytime. Now it’s your turn to enjoy this fun dish!](https://dailydishly.com/wp-content/uploads/2025/07/20e01eb2-8eec-42a8-b556-644040b9c2c2-768x768.webp)
