Slow Cooker Beef Bean Chili Rich and Hearty Recipe

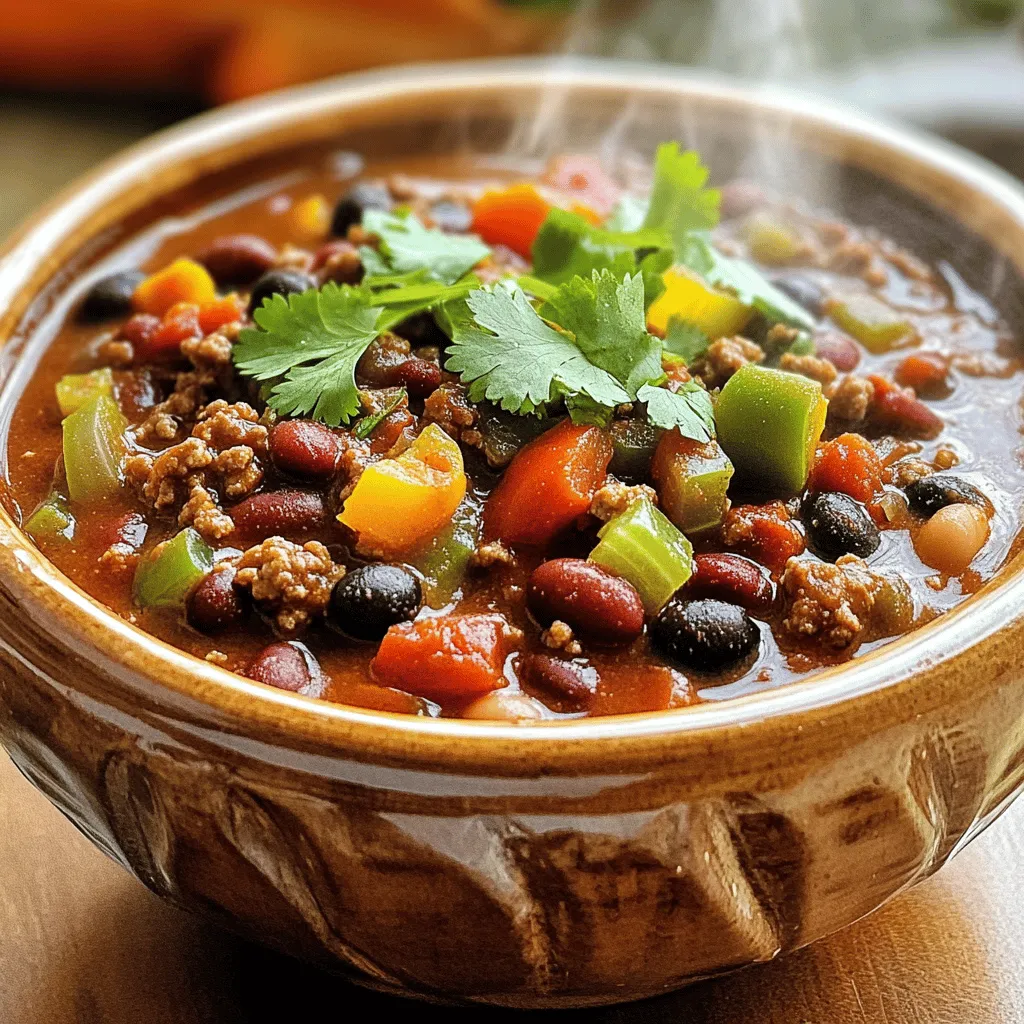
Are you ready for a meal that warms your soul? My Slow Cooker Beef Bean Chili is rich, hearty, and easy to make. With tender beef, flavorful beans, and vibrant veggies, this dish is perfect for chilly nights or gatherings with friends. I’ll show you step-by-step how to whip up this delicious chili that will leave everyone asking for seconds. Let’s dive into the comforting world of slow cooking!
Ingredients
Detailed Ingredients List
– 1 pound ground beef
– 1 can (15 oz) kidney beans, rinsed and drained
– 1 can (15 oz) black beans, rinsed and drained
– 1 can (14 oz) diced tomatoes with green chilies
– 1 medium onion, diced
– 2 cloves garlic, minced
– 1 tablespoon chili powder
– 1 teaspoon cumin
– 1 teaspoon smoked paprika
– 1 teaspoon oregano
– 1 cup beef broth
– 1 bell pepper (any color), diced
– 1 tablespoon olive oil
– Salt and pepper to taste
– Fresh cilantro for garnish (optional)
Gathering the right ingredients is key for a great chili. Start with ground beef. It gives the chili a rich flavor and hearty texture. You will need about one pound. Next, add beans for protein and fiber. Use a can of kidney beans and a can of black beans. Rinse and drain them well before adding.
For the base, diced tomatoes with green chilies bring a nice kick. This canned option saves time and adds flavor. You will also need a medium onion and a bell pepper for sweetness. Dice both to make them easy to mix in.
Spices make this chili pop. You’ll use chili powder for heat, cumin for warmth, smoked paprika for depth, and oregano for freshness. Don’t forget the minced garlic; it adds a lovely aroma.
Finally, you need beef broth to keep the chili moist. Olive oil will help you sauté the veggies. Salt and pepper will enhance all the flavors. If you like, top your chili with fresh cilantro before serving. This ingredient list is simple yet packs a lot of flavor.
Step-by-Step Instructions
Preparation Steps
1. Sautéing the vegetables
Start by heating 1 tablespoon of olive oil in a large skillet over medium heat. Add the diced onion and bell pepper. Cook for about 5 minutes until they are soft and fragrant. This step builds a tasty base for your chili.
2. Cooking the ground beef
Add 2 cloves of minced garlic and 1 pound of ground beef to the skillet. Cook the beef until it is browned. Make sure to break it apart with a spoon as it cooks. If you see extra fat, drain it off. This keeps your chili rich but not greasy.
3. Transferring to the slow cooker
Once the beef is cooked, transfer the mixture to your slow cooker. This sets you up for the next steps of mixing the ingredients.
Mixing and Cooking
1. Combining ingredients in the slow cooker
In the slow cooker, add 1 can of kidney beans, 1 can of black beans, and 1 can of diced tomatoes with green chilies. Pour in 1 cup of beef broth. Add the cooked beef mix along with chili powder, cumin, smoked paprika, oregano, salt, and pepper. Stir everything until it’s well combined. This blend makes the chili flavor pop.
2. Cooking times and settings
Cover the slow cooker and set it to low for 6-8 hours or high for 3-4 hours. The low setting lets the flavors meld nicely. If you’re short on time, the high setting works too. Just check to ensure it’s cooked through.
Final Touches
1. Tasting and adjusting flavors
Once the cooking time is up, taste your chili. If needed, adjust the seasoning with more salt or pepper. You want a balance that suits your taste buds.
2. Serving suggestions
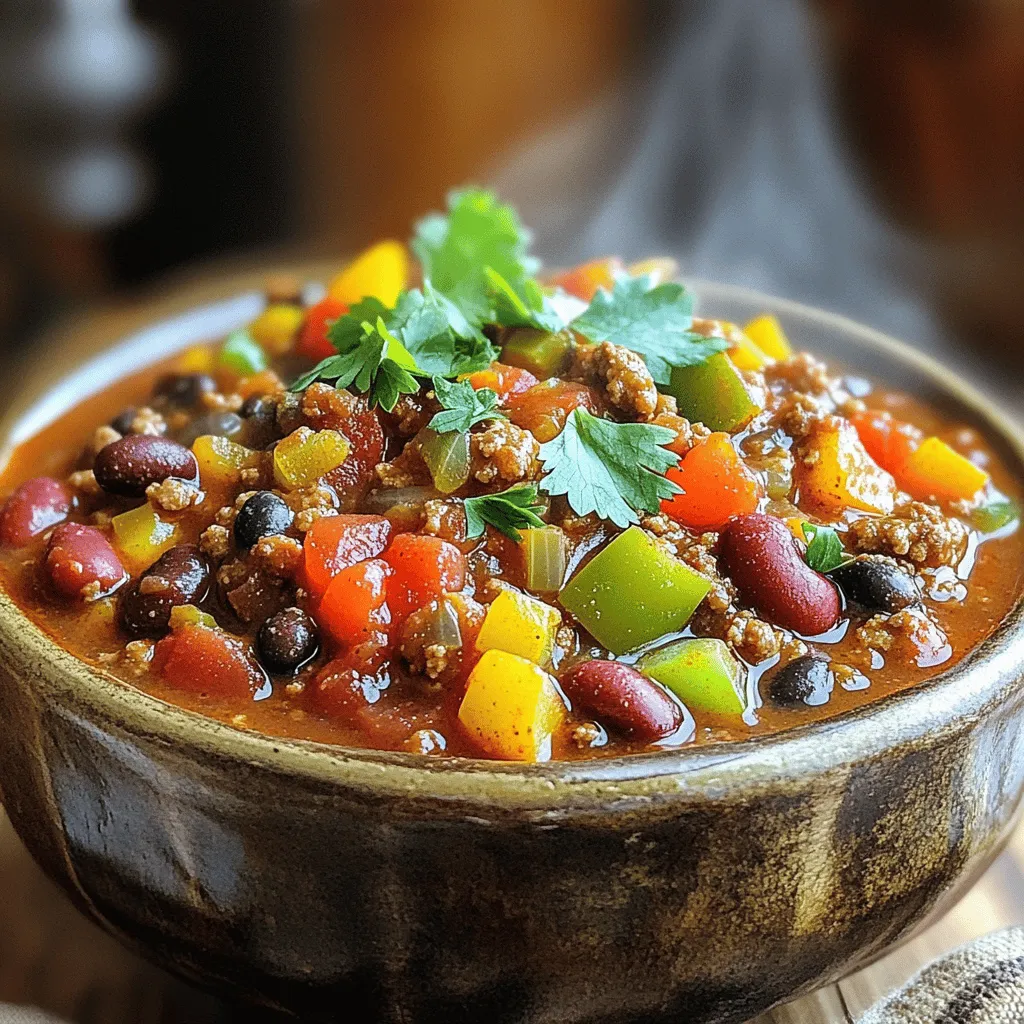
Serve the chili hot, garnished with fresh cilantro if you like. It pairs well with cornbread or tortilla chips. This hearty meal warms you up and fills you up. Enjoy!
Tips & Tricks
Enhancing Flavor
To make your chili pop, adjust the seasonings. You can add more chili powder for heat or more cumin for warmth. Try a dash of hot sauce for a kick. For toppings, consider shredded cheese, diced avocado, or sour cream. They add creaminess and balance the heat.
Cooking Techniques
Slow cooking works best with low heat. This method allows flavors to meld and beef to become tender. Avoid lifting the lid often, as this lets heat escape. To prevent overcooking, set a timer. Check your chili towards the end of the cooking time.
Serving Ideas
Pair your chili with cornbread or tortilla chips. Both add great texture and flavor. A fresh side salad complements the richness of the chili. For drinks, serve with iced tea or a light beer. These choices enhance your meal experience.

Variations
Different Meat Options
You can switch the ground beef for other meats. Ground turkey or chicken works well. They will give a lighter flavor. If you want something richer, try pork. For a vegetarian option, use lentils or mushrooms. Both add a nice texture. You can also use plant-based ground meat for a meat-free dish.
Bean Selection
While kidney and black beans are great, you can try others. Pinto beans or garbanzo beans can add new flavors. Canned beans save time, but dried beans are cheaper. If you use dried beans, soak them overnight. This helps them cook evenly and stay tender.
Spice Level Adjustments
If you want a milder chili, use less chili powder. You can also add a bit of sugar to balance the heat. For more heat, add cayenne pepper or jalapeños. Unique spice mixes can bring fun flavors. Consider adding cinnamon for warmth or cocoa powder for depth.
Storage Info
Storing Leftovers
To keep your beef bean chili fresh, use airtight containers. Glass or plastic containers work well. Fill each container with chili, leaving some space at the top. This space helps the chili expand when frozen. Store the chili in the fridge for up to four days. If you want to keep it longer, freezing is a great choice. You can freeze the chili for up to three months for best quality.
Reheating Tips
When it’s time to enjoy your leftovers, you have a few options. The best way to reheat chili is on the stove. Just pour it into a pot over medium heat. Stir it often until it’s hot. You can also use a microwave. Place the chili in a microwave-safe bowl. Heat it in short bursts, stirring in between. If you freeze the chili, let it thaw in the fridge overnight. Then, follow the reheating tips above. Enjoy every bite of your rich and hearty chili again!
FAQs
What type of beef is best for slow cooker chili?
For slow cooker chili, I recommend ground beef. It cooks evenly and blends well with beans and spices. You can also use chuck roast, which adds rich flavor. Just cut it into small pieces. Both options work great for this dish.
Can I cook this chili on the stovetop instead?
Yes, you can cook this chili on the stovetop. Just use a large pot. Brown the beef and sauté the veggies as you would in the slow cooker. Then add the beans, tomatoes, and spices. Let it simmer on low for about 30-45 minutes. This method cooks faster but requires more attention.
How do I make slow cooker chili thicker?
To thicken your chili, try these tips. First, mash some beans against the pot’s side. This adds creaminess. You can also add cornstarch mixed with water. Stir it in during the last hour of cooking. Lastly, let the chili cook uncovered for a bit to reduce liquid.
This blog post covered how to make delicious slow cooker chili from scratch. We explored the key ingredients, detailed preparation steps, and ways to enhance flavors. You learned about variations, storage tips, and even answered common questions.
In conclusion, slow cooker chili is versatile and rewarding. With a few simple ingredients and steps, you can craft a meal that delights everyone. Enjoy experimenting with flavors and make it your own!


![To make crispy chickpea tacos, you need the following main ingredients: - 1 can (15 oz) chickpeas, drained and rinsed - 1 tablespoon olive oil - 1 teaspoon paprika - 1 teaspoon cumin - ½ teaspoon garlic powder - ½ teaspoon chili powder - Salt and pepper to taste - 6 small corn tortillas - 1 cup shredded cabbage - ½ cup diced tomatoes - ¼ cup diced red onion - ½ avocado, sliced - Fresh cilantro for garnish - Lime wedges for serving Chickpeas are the star of this dish. They provide protein and fiber. The spices add depth and flavor. The tortillas hold all the goodness together. Fresh toppings bring crunch and color. You will need a few simple tools for this recipe: - Baking sheet - Mixing bowl - Dry skillet Using these tools makes the cooking process smooth. A baking sheet helps the chickpeas get crispy. A mixing bowl lets you combine ingredients easily. A dry skillet warms the tortillas just right. Here’s a quick look at the nutritional facts for one serving of these tacos: - Calories: About 200 - Protein: 8g - Carbohydrates: 30g - Fat: 7g These tacos are filling yet light. They are great for lunch or dinner. You get a good balance of protein, carbs, and healthy fats. For the full recipe, check out the other sections. 1. Preheating the oven Start by preheating your oven to 400°F (200°C). This will help the chickpeas get nice and crispy. 2. Tossing chickpeas with seasoning In a mixing bowl, add the drained and rinsed chickpeas. Pour in olive oil, then sprinkle paprika, cumin, garlic powder, chili powder, salt, and pepper. Toss everything well until the chickpeas are coated with the spices. This step is key for great flavor. 1. Spreading chickpeas on a baking sheet Take a baking sheet and spread the seasoned chickpeas in a single layer. Make sure they are not piled on top of each other. This helps them crisp up nicely. 2. Baking time and techniques for crispiness Bake the chickpeas in the oven for about 20 to 25 minutes. Halfway through, shake the pan to ensure even cooking. You'll know they are done when they are golden brown and crispy. 1. Heating tortillas While the chickpeas bake, heat your corn tortillas in a dry skillet over medium heat. Cook them for about 30 seconds on each side until they are warm and flexible. 2. Layering ingredients for optimal flavor Once your chickpeas are crispy, it’s time to assemble the tacos. Place a generous scoop of chickpeas in each tortilla. Add shredded cabbage, diced tomatoes, red onion, and avocado slices on top. For the final touch, sprinkle fresh cilantro and squeeze some lime juice over everything. This adds a fresh burst of flavor! For the full recipe, you can refer to the detailed instructions included earlier. Enjoy these tasty tacos! To get the best crunch from your chickpeas, rinse and dry them well. This step removes extra starch and moisture. Use a clean kitchen towel to pat them dry. This helps them crisp up nicely in the oven. When baking, spread the chickpeas out on the sheet. Give them space to breathe and cook evenly. Bake at 400°F (200°C) for 20-25 minutes. Shake the pan halfway through to ensure they get crispy all around. You can make your chickpeas even tastier! Try adding smoked paprika or cayenne pepper for a kick. Adjust the seasonings based on your taste. For toppings, think beyond the usual. Add fresh corn, diced jalapeños, or pickled radishes for a zesty touch. These will boost flavor and add crunch to your tacos. These tacos pair well with fresh sides. Try serving them with a simple avocado salad or black bean salsa. These sides add color and more flavor. For presentation, use a bright platter. Arrange the tacos neatly and add lime wedges on the side. This makes the meal more inviting. You can drizzle a bit of light ranch or yogurt dressing over the tacos for creamy goodness. For the full recipe, check out the earlier section. Enjoy your crispy chickpea tacos! {{image_2}} You can easily make these tacos fit your diet. For gluten-free options, use corn tortillas. They are tasty and safe for those who avoid gluten. You can also try lettuce wraps for a fresh twist. If you're vegan, this recipe is already perfect for you! The chickpeas provide protein and flavor without any animal products. Just make sure to check any additional toppings you use. Get creative with spices! Try adding curry powder or smoked paprika for a different taste. You can mix in some cayenne pepper for a spicy kick. Adjust the amounts to fit your spice level. Toppings are where you can really shine. Add jalapeños for heat or mango salsa for sweetness. Pickled onions can add a tangy crunch. You can even sprinkle some feta cheese on top for a creamy finish. Use seasonal vegetables for a fresh touch. In summer, add sweet corn or diced bell peppers. In fall, roasted butternut squash or pumpkin can add warmth. You can switch up the veggies based on what you find at the market. Don’t forget about dressings! In warmer months, a light lime vinaigrette works wonders. In cooler months, you might enjoy a creamy avocado dressing. Adjust based on what you have on hand or what’s in season. For the full recipe, check out the Crispy Chickpea Tacos section! To keep leftover chickpeas fresh, store them in an airtight container. Place them in the fridge. They will stay good for about three to four days. If you want to recook them, heat the chickpeas in a skillet. Add a splash of olive oil and your favorite spices. This helps restore their crispy texture. If you want to assemble your tacos in advance, do so carefully. Keep the ingredients separate until you are ready to eat. Store the chickpeas in one container and the toppings in another. For tortillas, wrap them in foil or wax paper. This keeps them soft. When you are ready to serve, warm the tortillas in a skillet for the best taste. Yes, you can freeze cooked chickpeas! Place them in a freezer-safe bag. Remove as much air as possible before sealing. They will stay fresh for up to three months. As for assembled tacos, I do not recommend freezing them. The tortillas become soggy when thawed. However, you can freeze the chickpeas and toppings separately. Just thaw and reheat when you’re ready to enjoy. For the full recipe, refer back to the beginning of this article. To make crispy chickpea tacos, start by preheating your oven to 400°F (200°C). Rinse one can of chickpeas and drain them well. In a bowl, toss the chickpeas with one tablespoon of olive oil and a mix of spices: one teaspoon of paprika, one teaspoon of cumin, half a teaspoon of garlic powder, and half a teaspoon of chili powder. Add salt and pepper to taste. Spread the seasoned chickpeas on a baking sheet in a single layer. Bake them for 20 to 25 minutes. Shake the pan halfway through. This gives them a nice crunch. While they bake, heat six small corn tortillas in a dry skillet over medium heat for about 30 seconds on each side. Once the chickpeas are crispy and golden, fill each tortilla with them. Add fresh toppings like shredded cabbage, diced tomatoes, diced red onion, and avocado slices. Finish with fresh cilantro and a squeeze of lime juice for a bright taste. For the full recipe, check out the [Full Recipe]. Chickpea tacos benefit from fresh and crunchy toppings. Here are some great options: - Shredded cabbage - Diced tomatoes - Diced red onion - Sliced avocado - Fresh cilantro - Lime wedges These toppings add color and flavor. You can also try pickled jalapeños for some heat or crumbled feta for a creamy touch. Mix and match to find your favorite combination! This recipe is already vegan-friendly! To keep it that way, ensure you use corn tortillas and skip any dairy toppings. For added creaminess, try using avocado or a vegan yogurt. You can also add a splash of hot sauce for extra flavor without any animal products. Crispy chickpea tacos pair well with various sides. Here are a few suggestions: - Mexican rice or quinoa - Black beans or refried beans - A simple green salad with lime vinaigrette - Chips and salsa or guacamole These sides not only complement the tacos but also make your meal more filling and satisfying. Enjoy! Crispy chickpea tacos are easy to make and pack great flavor. We covered the main ingredients, tools, and nutritional info to help you. You learned the step-by-step process, plus tips for crispiness and flavor. Don’t forget the variations and storage tips to keep your meals fresh. Experiment with different spices and toppings to find what you love. Enjoy creating your tacos and make them your own for delicious meals!](https://dailydishly.com/wp-content/uploads/2025/06/47f89152-e87e-483c-b85b-8fc38f5c57d2-768x768.webp)


