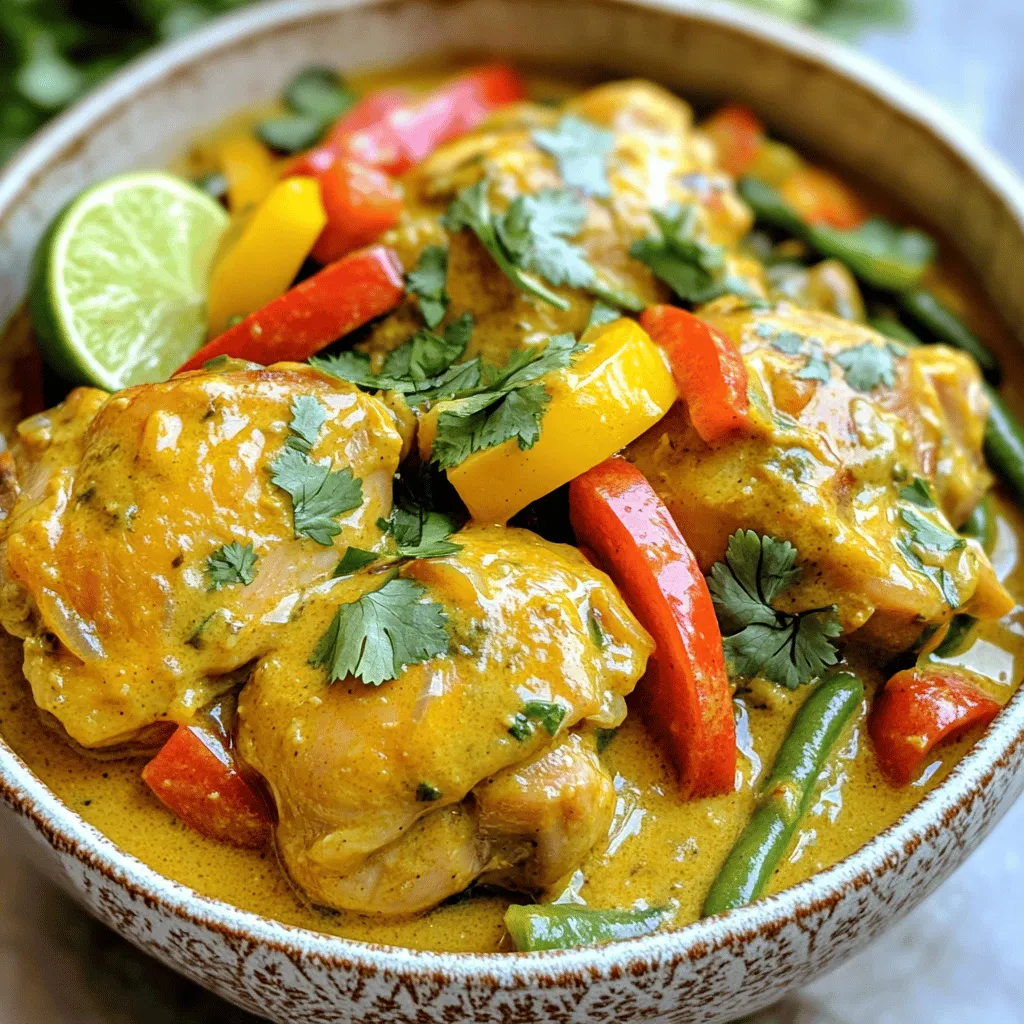
Are you ready for a delicious and easy dinner? This Slow Cooker Coconut Curry Chicken packs in flavor without the fuss. Using simple ingredients, you can create a creamy and rich dish that everyone will love. Whether you’re a busy parent or just want a tasty meal, this recipe is perfect for you. Let’s dive into the world of slow cooking and spice up your dinner routine!
Ingredients
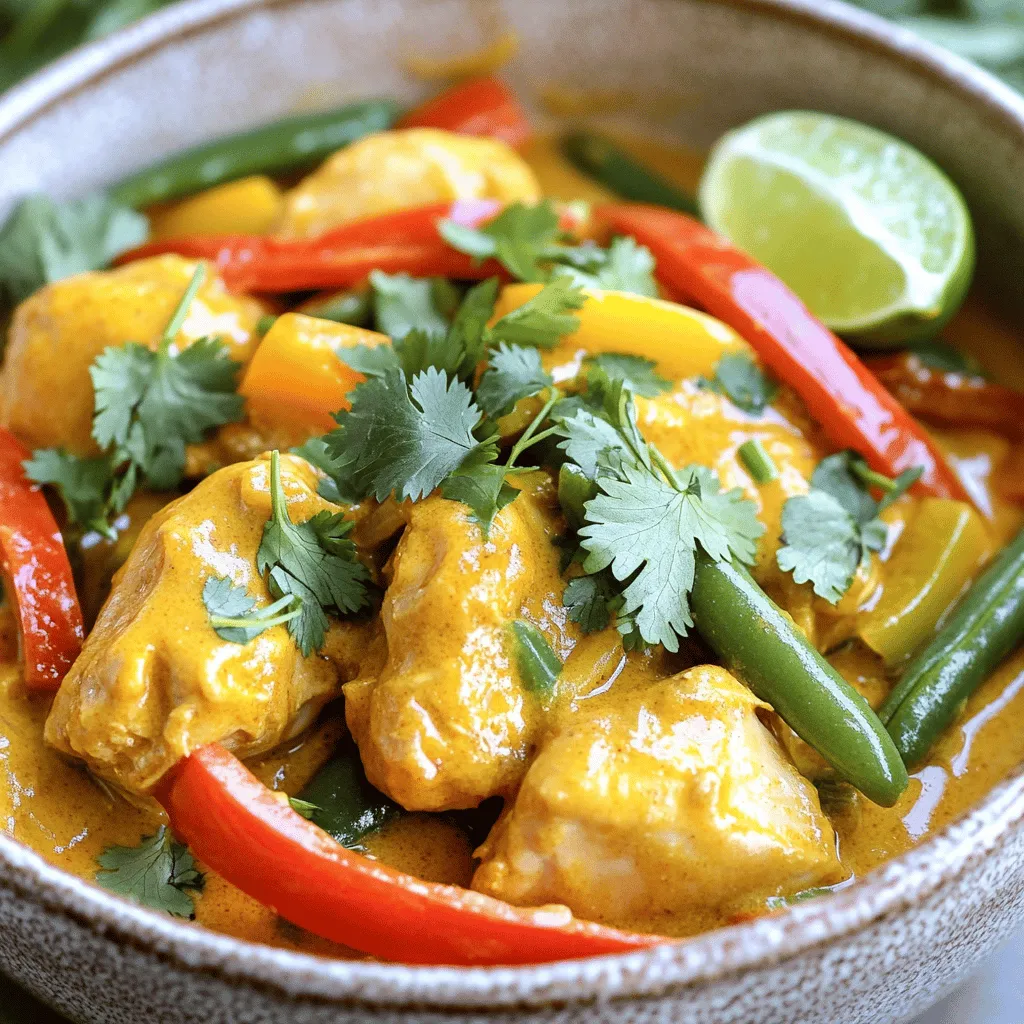
List of Ingredients
– 2 lbs boneless, skinless chicken thighs, cut into bite-sized pieces
– 1 can (13.5 oz) coconut milk
– 1 cup chicken broth
– 1 large onion, chopped
– 3 cloves garlic, minced
– 1 tablespoon fresh ginger, grated
– 2 tablespoons red curry paste
– 1 tablespoon fish sauce (optional, for depth of flavor)
– 1 cup bell peppers, sliced (red and yellow for color)
– 1 cup green beans, trimmed
– 1 tablespoon brown sugar
– Juice of 1 lime
– Fresh cilantro, for garnish
– Salt and pepper to taste
Optional Ingredients for Flavor Enhancement
Adding a few extras can boost the taste. Consider using:
– 1 tablespoon of soy sauce for umami
– 1 teaspoon of chili flakes for spice
– A splash of lime juice for brightness
These options can elevate the dish further, making it truly your own.
Suggested Fresh Herbs for Garnish
Fresh herbs add a pop of color and taste. I recommend:
– Cilantro for a fresh, citrusy note
– Basil for a sweet, aromatic flavor
– Mint for a cool contrast
Sprinkling these herbs on top of your curry can make your dish look and taste even better. Enjoy the process of making this dish your own!
Step-by-Step Instructions
Preparation Before Cooking
Start by gathering your ingredients. You will need chicken thighs, coconut milk, chicken broth, onion, garlic, ginger, red curry paste, and bell peppers.
1. Chop the onion into small pieces.
2. Mince the garlic into fine bits.
3. Grate the ginger to release its flavor.
4. Slice the bell peppers into thin strips.
These steps help build a strong flavor base for the curry.
Slow Cooking Process
Now, let’s get cooking!
1. In your slow cooker, add the chopped onion, minced garlic, and grated ginger. Mix them well.
2. Place the bite-sized chicken pieces on top.
3. Season the chicken with salt and pepper to taste.
4. In a bowl, whisk together the coconut milk, chicken broth, red curry paste, fish sauce, and brown sugar. This mix brings all the flavors together.
5. Pour this mixture over the chicken and onions, ensuring it covers them well.
6. Add the sliced bell peppers and green beans. Gently stir to mix everything.
7. Cover the slow cooker and set it to low for 6-7 hours or high for 3-4 hours. The chicken should be tender when done.
Final Touches and Serving Suggestions
When the cooking time is up, it’s time for the last steps.
1. Stir in the lime juice to brighten the flavors.
2. Taste and adjust the seasoning if needed.
3. Serve the curry over steamed rice or quinoa.
4. Don’t forget to garnish with fresh cilantro for a pop of color and fresh flavor.
Enjoy your delicious coconut curry chicken!
Tips & Tricks
How to Achieve the Best Flavor
To get the most flavor from your slow cooker coconut curry chicken, follow these tips:
– Use fresh ingredients: Fresh ginger and garlic add a bright taste.
– Pick quality chicken: Boneless, skinless thighs stay juicy and tender in the slow cooker.
– Mix the curry paste well: Blend it well with coconut milk for even flavor.
– Add fish sauce: Though optional, it deepens the flavor.
– Finish with lime juice: This adds a fresh zing right before serving.
Common Mistakes to Avoid
Here are some mistakes to steer clear of:
– Don’t skip browning the chicken: While not necessary, browning adds a rich layer of flavor.
– Avoid overcooking: Cooking too long can dry out the chicken. Check for doneness around 3 hours on high.
– Don’t forget to taste: Always taste and adjust seasoning before serving.
– Skip the salt until the end: Adding salt too early can make the dish too salty.
Tools and Equipment Recommendations
Having the right tools makes cooking easier:
– Slow cooker: A good quality slow cooker ensures even cooking.
– Cutting board and knife: A sharp knife makes chopping quick and easy.
– Measuring cups and spoons: Precision helps maintain flavor balance.
– Whisk: Use a whisk to blend the curry paste and coconut milk well.
– Ladle: A ladle helps serve this rich curry without mess.
These tips will help you create a delicious and flavorful dish that impresses everyone.
Variations
Alternative Proteins to Use
You can switch chicken with other proteins. Try using shrimp or tofu. Shrimp cooks fast, so add it in the last hour. Tofu gives a nice texture and soaks up the curry flavor. Use firm tofu and cut it into cubes. You can also use pork, but cook it longer for tender meat.
Vegetarian or Vegan Options
To make this dish vegetarian or vegan, skip the chicken. Use chickpeas instead. They add protein and a creamy texture. You can also use a mix of vegetables, like carrots and zucchini. These will soak up the curry flavor well. This way, everyone can enjoy the dish.
Add-ins for Extra Nutrients
Boost the nutrition of your curry with add-ins. Try adding spinach or kale for greens. These will wilt nicely into the sauce. Carrots add sweetness and crunch. You can also add lentils for extra fiber. Just make sure they are cooked before adding to the slow cooker. These simple changes make your meal even better.
Storage Info
How to Store Leftovers
After you enjoy your coconut curry chicken, let it cool. Then, put it in an airtight container. Store it in the fridge. It stays good for 3 to 4 days. If you see any signs of spoilage, throw it away. Always check before eating.
Freezing Instructions
To freeze, use a freezer-safe container. Leave some space at the top. The curry will expand when it freezes. Label the container with the date. You can freeze it for up to 3 months. When you’re ready to eat, thaw it in the fridge overnight.
Reheating Tips
For reheating, you can use the microwave or the stove. If using the microwave, heat it in short bursts. Stir between bursts for even heating. If using the stove, warm it in a pot over low heat. Add a splash of chicken broth if it looks thick. Enjoy your meal again!
FAQs
Can I use frozen chicken for this recipe?
Yes, you can use frozen chicken. Just add the frozen pieces directly to the slow cooker. Cooking time may increase by one to two hours. Always check that the chicken reaches 165°F for safety.
What can I substitute for coconut milk?
You can use almond milk or soy milk for a dairy-free option. For creaminess, add a bit of nut butter or silken tofu. These options change the flavor but can still taste good.
How do I make this curry spicier?
To amp up the heat, add more red curry paste. You can also add chopped fresh chilies or a pinch of cayenne pepper. Adjust slowly to find your perfect spice level.
This blog post covered the key ingredients needed for a delicious dish. We walked through step-by-step cooking instructions, ensuring the best flavor and common mistakes to avoid. You learned about tasty variations, storage tips, and answers to frequently asked questions.
Cooking can be fun and rewarding. With these tips, you can enjoy every bite. Experiment with flavors and find what you love best. Let’s make your next meal a hit!