Slow Cooker Creamy Coconut Lentil Curry Delight

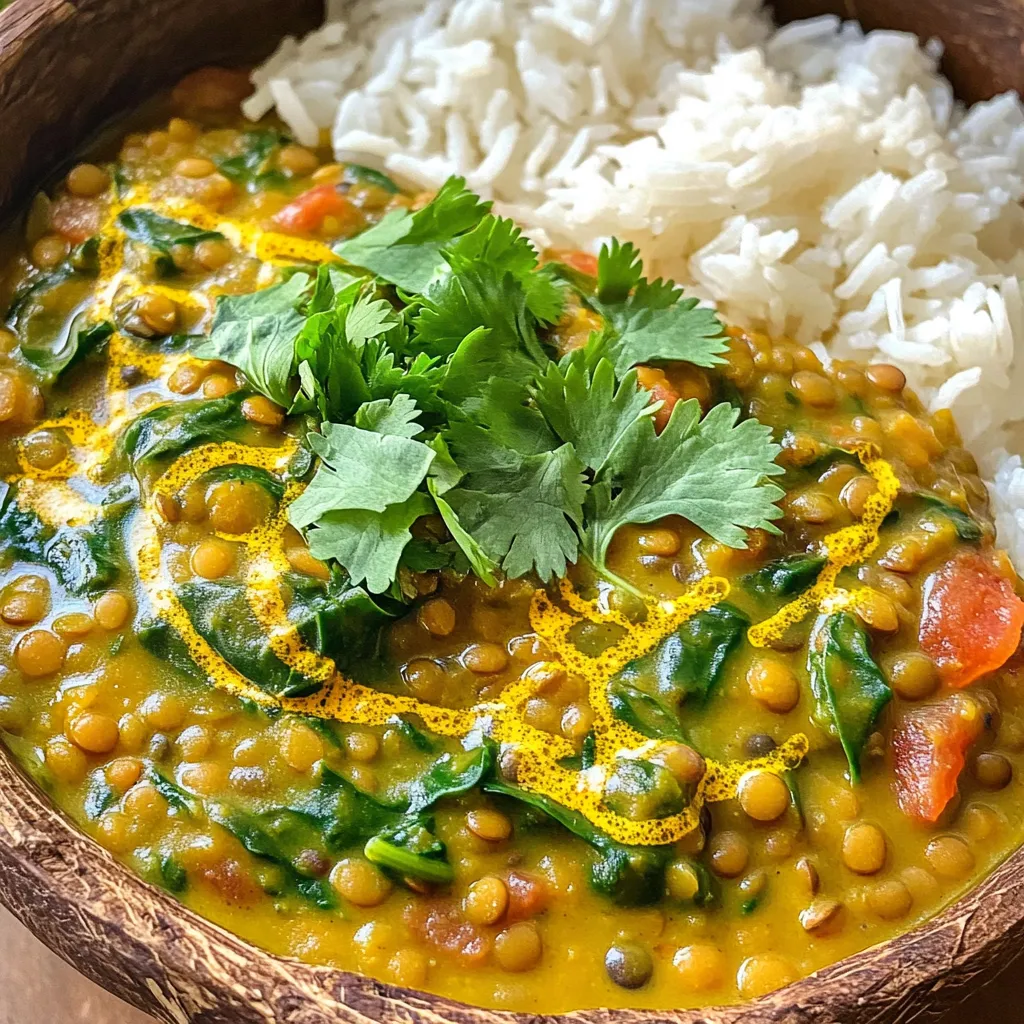
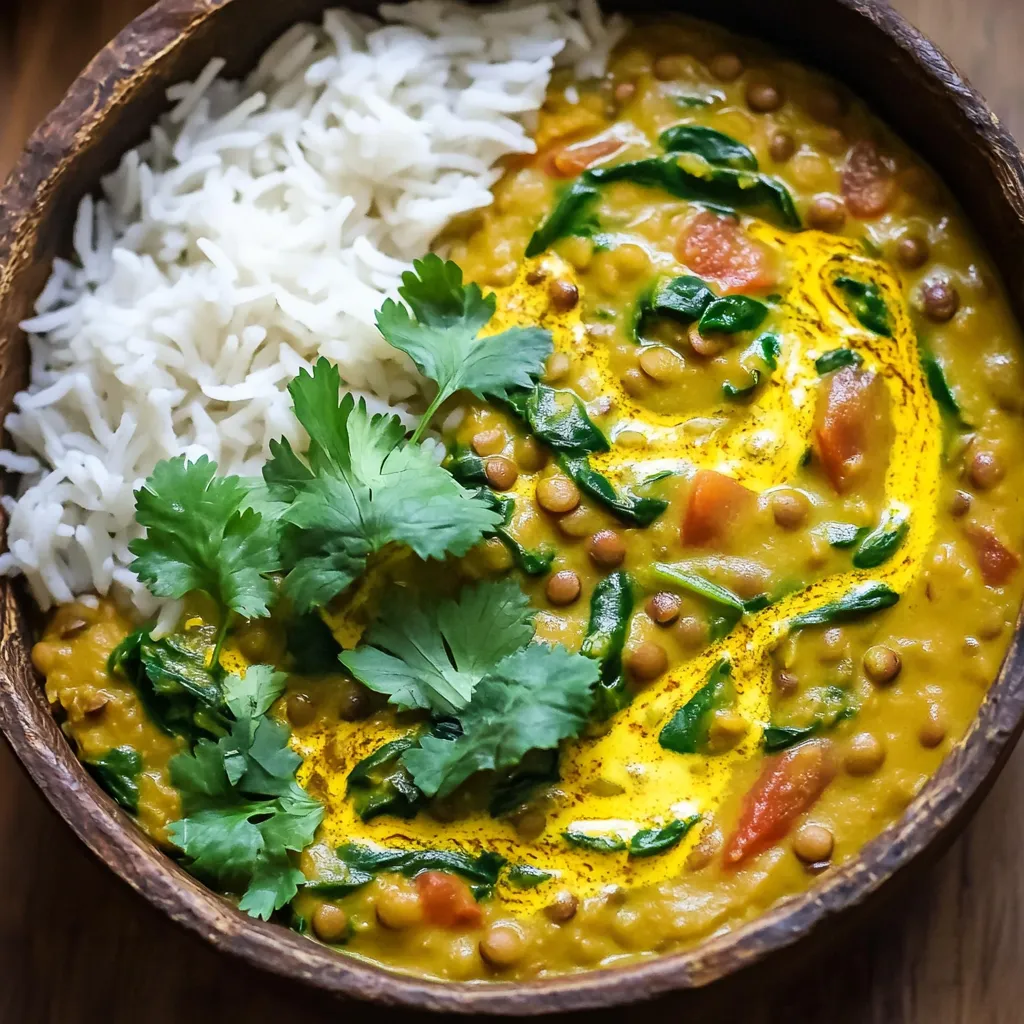
If you’re craving a warm, hearty meal, this Slow Cooker Creamy Coconut Lentil Curry is your perfect dish! Packed with flavor and simple to make, it’s an effortless way to enjoy healthy eating. With basic ingredients like lentils, coconut milk, and spices, you’ll love the rich taste that only a slow cooker can offer. Join me as we dive into a recipe that’s not only easy but also delightful!
Ingredients
Main Ingredients
– 1 cup green or brown lentils, rinsed
– 1 can (14 oz) coconut milk
– 3 cups vegetable broth
Additional Ingredients
– 1 medium onion, chopped
– 3 cloves garlic, minced
– 1 tablespoon fresh ginger, grated
– 2 medium tomatoes, diced
– 2 cups spinach, chopped
– 2 tablespoons olive oil
Seasonings and Garnish
– 1 tablespoon curry powder
– 1 teaspoon ground cumin
– 1 teaspoon turmeric
– 1 teaspoon chili powder (adjust for heat preference)
– Salt and pepper to taste
– Fresh cilantro for garnish
When I prepare this dish, I always start with the lentils. They are the heart of the curry. Green or brown lentils work best here. They cook well and soak up all those great flavors. Coconut milk adds creaminess and a touch of sweetness. It makes the dish rich and comforting. Vegetable broth adds depth. It helps blend all the tastes together.
Next, I chop one medium onion. Onions bring a nice base flavor. I also mince three cloves of garlic. Garlic adds a bold taste. Fresh ginger is key too. It gives the curry warmth and freshness. I grate one tablespoon of ginger to get the best flavor.
I like to add tomatoes for a bit of acidity. They balance the creaminess of the coconut milk. Spinach is another great addition. It adds color and nutrition to the dish. I chop two cups of spinach to stir in later.
Now, let’s talk about the spices. I use one tablespoon of curry powder. It gives the curry its signature taste. Ground cumin and turmeric add warmth and an earthy flavor. Adjust chili powder based on your heat preference. Salt and pepper help bring all the flavors together. Finally, I sprinkle fresh cilantro on top for a bright touch.
These ingredients come together to create a delicious and creamy coconut lentil curry. It’s simple, yet full of flavor!
Step-by-Step Instructions
Preparing the Sautéed Base
– Heat 2 tablespoons of olive oil in a skillet over medium heat.
– Add 1 medium chopped onion and sauté until translucent, about 5 minutes.
Sautéing the onion first adds a great flavor base to your curry. The oil helps release the onion’s natural sweetness. When the onion becomes soft and clear, it is ready for the next step.
Combining Ingredients in the Slow Cooker
– In your slow cooker, add the sautéed onion mixture.
– Next, include 1 cup of rinsed green or brown lentils and 2 medium diced tomatoes.
– Then, pour in 1 can (14 oz) of coconut milk and 3 cups of vegetable broth.
Mix these ingredients well. Each element adds its own taste. The lentils provide protein, while the coconut milk gives creaminess and richness.
Cooking Process
– Stir in spices: 1 tablespoon of curry powder, 1 teaspoon of ground cumin, 1 teaspoon of turmeric, and 1 teaspoon of chili powder.
– Add salt and pepper to taste. Mix everything thoroughly.
Now, set your slow cooker. You can choose low heat for 6-8 hours or high heat for 3-4 hours. The lentils will become tender and soak up all those delicious flavors.
About 30 minutes before serving, stir in 2 cups of chopped spinach. This adds color and nutrients. Taste your curry and adjust the seasonings if needed. Enjoy the delightful aroma filling your kitchen!
Tips & Tricks
Perfecting the Curry
To make your curry just right, adjust the spices. If you want more heat, add more chili powder. For less heat, cut back on the chili. You can also use fresh or dried herbs to add flavor. Taste your curry as it cooks, and adjust the seasonings to suit your taste.
Cooking Tips
When using a slow cooker, rinse the lentils well. This helps to remove dirt and makes them cook evenly. Make sure to add enough broth to cover the lentils. If the curry is too thick, add more broth or coconut milk. Stir occasionally to keep everything mixed well.
Serving Suggestions
Serve your lentil curry with warm basmati rice or soft naan bread. This adds a nice touch and makes it a full meal. For garnish, sprinkle fresh cilantro on top. This adds color and fresh flavor. You can also add a squeeze of lime for extra brightness.

Variations
Ingredient Swaps
Types of lentils to use
You can use green or brown lentils in this recipe. Both work well and add great flavor. If you want a different texture, try red lentils. They cook faster and get softer.
Coconut milk alternatives
If you need a change from coconut milk, use almond or soy milk. These will change the taste but can still be creamy. For a richer flavor, try cashew cream or oat milk instead.
Add-ins and Enhancements
Optional vegetables to include
Feel free to add more veggies! Carrots, bell peppers, or peas are great choices. You can toss them in at the start with the lentils. They will add color and nutrition.
Protein additions like chickpeas or tofu
Want to boost protein? Add canned chickpeas or cubed tofu. Chickpeas add a nice bite, while tofu soaks up the curry’s flavors. Mix them in about halfway through the cooking time.
Dietary Modifications
Vegetarian and vegan adjustments
This recipe is already vegetarian and vegan. You can enjoy it without worry! If you want to make it more filling, add nuts or seeds for crunch.
Gluten-free options
This dish is gluten-free as it is. Just make sure all your ingredients are gluten-free. Check the broth and spices to be sure. Enjoy your comforting curry without any gluten concerns!
Storage Info
Storing Leftovers
To keep your Slow Cooker Creamy Coconut Lentil Curry fresh, place it in an airtight container. Store it in the fridge for up to five days. If you want to save it longer, freezing is a great option. Use a freezer-safe container or bag. This way, it can last up to three months. Just remember to label it with the date.
Reheating Instructions
When it’s time to enjoy your leftovers, you can reheat them easily. The microwave works well. Heat in short bursts, stirring in between. You can also warm it on the stove over low heat. Adding a splash of broth or water helps maintain creaminess. Stir well to keep the flavors bright.
Shelf Life
Expect your lentil curry to last about five days in the fridge. If you freeze it, it stays good for three months. Watch for signs of spoilage, like off smells or changes in texture. If it looks or smells strange, it’s best to toss it. Always trust your nose and eyes!
FAQs
How long does it take to cook lentils in a slow cooker?
Cooking lentils in a slow cooker takes different times based on heat settings. On low heat, it takes about 6 to 8 hours. If you use high heat, it only takes about 3 to 4 hours. The lentils will be tender when done.
Can I use dried lentils instead of canned?
Yes, you can use dried lentils. They need more time to cook compared to canned lentils. If you choose dried lentils, rinse them well and add them to the slow cooker without pre-cooking. Adjust the cooking time to 6 to 8 hours on low or 3 to 4 hours on high.
What can I serve with lentil curry?
Lentil curry pairs well with several side dishes. Here are some great options:
– Fluffy basmati rice
– Warm naan bread
– Quinoa
– Roasted vegetables
– A fresh green salad
These sides enhance the meal and add flavor.
This blog covered a delicious lentil curry recipe, sharing key ingredients and cooking steps. You learned how to sauté a base, combine ingredients in a slow cooker, and adjust for taste. I shared tips for perfecting the dish and suggested variations for dietary needs. Remember to store leftovers properly and reheat wisely to keep flavors intact. Explore this recipe and make it your own. Enjoy your cooking journey!


![- 1 lb (450g) flank steak, sliced thinly against the grain - 2 cups broccoli florets - 1 red bell pepper, thinly sliced - 3 cloves garlic, minced - 1 inch ginger, grated - 3 tablespoons soy sauce - 2 tablespoons oyster sauce (optional) - 1 tablespoon cornstarch - 1 tablespoon sesame oil - 2 tablespoons vegetable oil - Cooked jasmine rice, for serving - Sesame seeds, for garnish - Green onions, sliced, for garnish The flank steak is key to this dish. It cooks fast and stays tender. When you slice it against the grain, you get a nice, soft bite. Broccoli adds crunch and bright green color. The red bell pepper brings sweetness and color, making it look great. Garlic and ginger provide a warm, aromatic flavor that makes your dish shine. Soy sauce adds saltiness and umami. Oyster sauce, if you choose to use it, gives a rich depth. Cornstarch helps thicken the sauce. Sesame oil adds a nutty flavor to finish it off. For the best flavor, choose fresh, high-quality flank steak. Look for a nice, bright red color with good marbling. Fresh broccoli should be bright green, firm, and not wilted. When choosing bell peppers, look for ones that are firm and shiny. Fresh garlic and ginger can make a big difference in taste. Use low-sodium soy sauce for a healthier option. If you can, find a good-quality oyster sauce. Finally, use pure sesame oil for the best flavor. Each ingredient plays a role in making your Beef and Broccoli Stir-Fry delicious. Check the [Full Recipe] for more detailed cooking steps. To start, you want to make the beef tender and tasty. Take 1 pound of flank steak and slice it thinly. Slice against the grain for the best texture. In a medium bowl, mix the sliced beef with 3 tablespoons of soy sauce, 2 tablespoons of oyster sauce (if you like), and 1 tablespoon of cornstarch. Make sure all the beef is coated well. Let it sit for 15 minutes. This step makes a big difference in flavor. While the beef marinates, it’s time to prep the broccoli. Grab 2 cups of broccoli florets. Bring a pot of water to a boil. Once boiling, add the broccoli and blanch it for 2 minutes. This keeps the broccoli bright and crisp. After 2 minutes, put the florets in an ice bath to stop cooking. Drain the broccoli and set it aside. This step ensures the broccoli stays green and crunchy. Now, let’s get cooking! Heat a large pan or wok over medium-high heat. Add 2 tablespoons of vegetable oil once it's hot. Next, add the marinated beef in a single layer. Cook for about 2 to 3 minutes until it turns brown. Remove the beef and set it aside. In the same pan, add 3 cloves of minced garlic and 1 inch of grated ginger. Sauté for 30 seconds until it smells great. Then, add the red bell pepper and your blanched broccoli. Stir for another 2 to 3 minutes. Finally, return the beef to the pan. Pour in 1 tablespoon of sesame oil. Stir everything together and cook for 2 more minutes. This helps the flavors mix well. Taste your stir-fry and add more soy sauce if you want. Serve it hot over jasmine rice. Don’t forget to garnish with sesame seeds and sliced green onions for an extra touch. For the full recipe, check the details above. To get tender beef, choose flank steak. Slice it thinly against the grain. This helps break down tough fibers. Marinate the beef for at least 15 minutes. Use soy sauce and cornstarch for extra tenderness. The cornstarch creates a nice coating that locks in juices. Don't cook the beef too long. Just 2-3 minutes in a hot pan will do. Remove it quickly to keep it tender. For bright green, crisp broccoli, blanch it first. Boil water and add the florets for 2 minutes. This softens them but keeps their color. After boiling, quickly transfer them to an ice bath. This stops the cooking and keeps the crunch. Stir-fry the blanched broccoli for just a few minutes. This will make it hot without losing its color or texture. To boost flavor, add garlic and ginger when cooking. These ingredients bring a strong, fresh taste. You can also add red bell pepper for sweetness. If you want a richer taste, use oyster sauce. Just a tablespoon can add depth. Taste your dish before serving. If it needs more saltiness, add extra soy sauce. A sprinkle of sesame seeds and green onions on top adds a nice touch. For the detailed recipe, check the Full Recipe. {{image_2}} You can switch beef for other proteins. Chicken works great in this dish. You can also use shrimp or tofu for a different taste. Each choice brings its own flavor and texture. Try marinating them the same way. This keeps the dish simple and tasty, just like the Full Recipe. Feel free to add more veggies for color and taste. Carrots, snap peas, or mushrooms can enhance the dish. Just chop them up and toss them in with the broccoli. They will cook quickly, adding crunch and nutrition. If you need a gluten-free version, use tamari instead of soy sauce. For a vegan meal, replace the beef with tofu or seitan. You can also skip the oyster sauce or use a vegan version. This way, you can enjoy a delicious meal while meeting your dietary needs. To keep your beef and broccoli stir-fry fresh, store it in an airtight container. Let the dish cool down to room temperature before sealing it. Place the container in the fridge and eat the leftovers within three days. This helps maintain flavor and quality. When you're ready to enjoy your leftovers, reheat them in a pan. Add a splash of water or broth to avoid drying out the meal. Heat on medium until warm, stirring often. You can also use the microwave. Cover the dish and heat in short bursts, stirring in between. This ensures even heating. If you want to freeze your stir-fry, first let it cool completely. Portion it into freezer bags or containers. Remove as much air as possible before sealing. Label the bags with the date. You can freeze it for up to three months. When you’re ready to eat, thaw it overnight in the fridge before reheating. This method preserves taste and texture well. For the full recipe, check out the Beefy Broccoli Bonanza. Making Beef and Broccoli Stir-Fry takes about 30 minutes. This time includes prep and cooking. You will spend 15 minutes prepping the ingredients and marinating the beef. The cooking process will take about 15 minutes. This quick time makes it perfect for busy weeknights. Yes, you can use frozen broccoli. Frozen broccoli is convenient and saves time. It also cooks quickly, which fits well with stir-frying. Just make sure to thaw it before use. Drain any excess water to avoid sogginess in your dish. Beef and Broccoli Stir-Fry pairs well with jasmine rice. This rice soaks up the savory sauce nicely. You can also serve it with noodles for a different twist. Adding spring rolls or dumplings makes it a complete meal. For a fresh touch, include a side salad with crisp greens. Check out the Full Recipe for more ideas! Beef and broccoli stir-fry is simple and fun to make. You learned about key ingredients and best cooking practices. I offered tips for tender beef and tasty broccoli. You can also try different proteins and some easy swaps. Lastly, I explained how to store leftovers well. Enjoy this dish tonight or any night. It fits any table and delights many tastes. Your kitchen will shine with this easy recipe!](https://dailydishly.com/wp-content/uploads/2025/06/c1b8a640-846d-4588-a3be-4e7860c53d8e-768x768.webp)
![- 2 cups cooked chicken, shredded - 2 cups enchilada sauce (homemade or canned) - 1 can black beans, drained and rinsed - 1 cup corn kernels (fresh, frozen, or canned) - 1 red bell pepper, diced - 1 cup chopped onions - 2 cups shredded cheddar cheese - 8 corn tortillas, cut into strips - 1 teaspoon cumin - 1 teaspoon chili powder - ½ teaspoon garlic powder - Salt and pepper to taste - Fresh cilantro for garnish - Sour cream (optional) for serving You can swap chicken for other proteins. Turkey works well too. If you prefer plant-based options, try tofu or beans. For the enchilada sauce, you can use low-sodium canned sauce. Homemade sauce is another great choice. Just mix tomatoes, spices, and broth. If you follow a gluten-free diet, use corn tortillas. They add a nice crunch. For a vegetarian version, skip the chicken. Add more beans or vegetables. This way, you keep all the flavor without meat. You can also use vegan cheese if you want a plant-based option. 1. Preheat the oven to 350°F (175°C). This step helps cook the casserole evenly. 2. Prepare your baking dish. Use a 9x13 inch dish, as it fits all the layers well. 3. Sauté the vegetables. In a large skillet, heat over medium. Add the chopped onions and diced bell pepper. Cook until soft, about 5 minutes. 4. Combine with chicken. Stir in the cooked chicken, black beans, corn, cumin, chili powder, garlic powder, salt, and pepper. Cook for 3-4 more minutes until heated through. 1. Start with enchilada sauce. Spread a thin layer at the bottom of your baking dish. 2. Add tortilla strips. Layer half of the strips over the sauce. This creates a solid base. 3. Add chicken mixture. Spoon half of the chicken mix on top of the tortillas. This ensures each bite is flavorful. 4. Sprinkle cheese. Add a cup of shredded cheddar cheese on top of the chicken mixture. The cheese melts beautifully in the oven. 5. Repeat the layers. Add more enchilada sauce, the rest of the tortilla strips, the remaining chicken mixture, and finish with the remaining cheese. Even distribution of flavors matters for a tasty casserole. 1. Cover the casserole. Use aluminum foil to cover the dish. This helps steam the ingredients while baking. 2. Bake for 25 minutes. This allows the flavors to meld and the cheese to start melting. 3. Uncover and bake again. Remove the foil and bake for an additional 10-15 minutes. You want the cheese to be bubbly and slightly golden. 4. Check for doneness. Look for a golden top and warm filling. Let it cool for a few minutes before cutting. Garnish with fresh cilantro for a lovely finish. For the complete recipe, check out the [Full Recipe]. To shred chicken well, use two forks. Hold one fork steady and pull the chicken apart with the other. This method gives you nice, even shreds. If you have a stand mixer, you can use it too. Just place the cooked chicken in the bowl and mix on low for a few seconds. When sautéing vegetables, heat the pan first. Add a splash of oil, then toss in the chopped onions and bell peppers. Stir them often until they are soft, about five minutes. This method brings out the sweet flavors and keeps the veggies bright. Boost flavor with garnishes. Fresh cilantro adds a fresh taste. A dollop of sour cream gives a nice creamy touch. You can also add sliced jalapeños for some heat. Pair chicken enchilada casserole with sides like rice, beans, or a simple salad. These add color and balance to the meal. You can serve tortilla chips for a fun crunch. To reheat leftovers, use the oven for the best results. Preheat it to 350°F (175°C). Place the casserole in a baking dish, cover it with foil, and heat for about 20 minutes. If you're in a hurry, the microwave works too. Just heat in short bursts, stirring in between. This helps keep the texture nice. Avoid overheating, as it can dry out the dish. {{image_2}} You can easily change the flavor of your Chicken Enchilada Casserole. Add spices like jalapeños or cayenne for extra heat. These spices can bring a nice kick to the dish. If you love cheese, try using pepper jack or Monterey Jack. These cheeses melt well and add a creamy texture. You can also switch up the style of your casserole. For a vegetarian version, use black beans and your favorite veggies. This version is healthy and full of flavor. You can even try a green enchilada sauce instead of the red. This gives the dish a fresh twist that many enjoy. If you're on a keto diet, you can make some changes. Use cauliflower rice instead of tortillas. This keeps the carbs low. For vegan options, swap chicken for plant-based proteins like lentils or chickpeas. Both options work well and keep the dish hearty and filling. For the full recipe, check out the Cheesy Chicken Enchilada Casserole. To store your Chicken Enchilada Casserole, let it cool first. Then, place it in an airtight container. I recommend using glass or plastic containers with tight lids. This keeps the casserole fresh and prevents any spills in your fridge. If you want to freeze portions, cut the casserole into squares. Wrap each piece tightly in plastic wrap, then place them in a freezer bag. This method saves space and protects the flavors. When ready to eat, take a piece out and thaw it in the fridge overnight. Reheat in the oven at 350°F until warm. In the refrigerator, Chicken Enchilada Casserole lasts about 3 to 4 days. If you freeze it, it can last up to 3 months. Just remember to label your containers with the date. This helps you keep track of freshness. You can swap chicken for many tasty options. If you want a vegetarian dish, use black beans or lentils. For a vegan choice, try jackfruit or tofu. Shredded mushrooms can also add nice texture. If you prefer meat, turkey is a great substitute. You can also use shredded beef or pork for a different flavor. Yes, you can prepare the Chicken Enchilada Casserole in advance! Assemble it in the baking dish, cover it, and store it in the fridge for up to 24 hours. When you're ready, just bake it straight from the fridge. If you want to freeze it, wrap it well and store for up to three months. Thaw it overnight in the fridge before baking. To make a complete meal, pair your casserole with simple sides. A fresh green salad adds crunch. You can serve rice or quinoa for a hearty touch. Guacamole and tortilla chips are also fun options. For a cooling effect, try a dollop of sour cream on the side. Chicken Enchilada Casserole comes from Mexican cuisine. Enchiladas are rolled tortillas filled with meat and sauce. The casserole form makes it easier to serve. It blends flavors from different regions, showcasing spices and fresh ingredients. This dish brings families together at the table and is a favorite for gatherings. This blog post covered how to make a tasty Chicken Enchilada Casserole. We started with a list of ingredients, including different proteins and sauces. Next, we shared easy step-by-step instructions for preparation, layering, and baking. We explored tips for cooking and serving, as well as variations to suit dietary needs. Lastly, we discussed storage options and common questions. Enjoy making this dish your own. It's simple, flexible, and full of flavor!](https://dailydishly.com/wp-content/uploads/2025/07/9970a47c-7c3f-446c-bbbe-f15e5a47e982-768x768.webp)

