
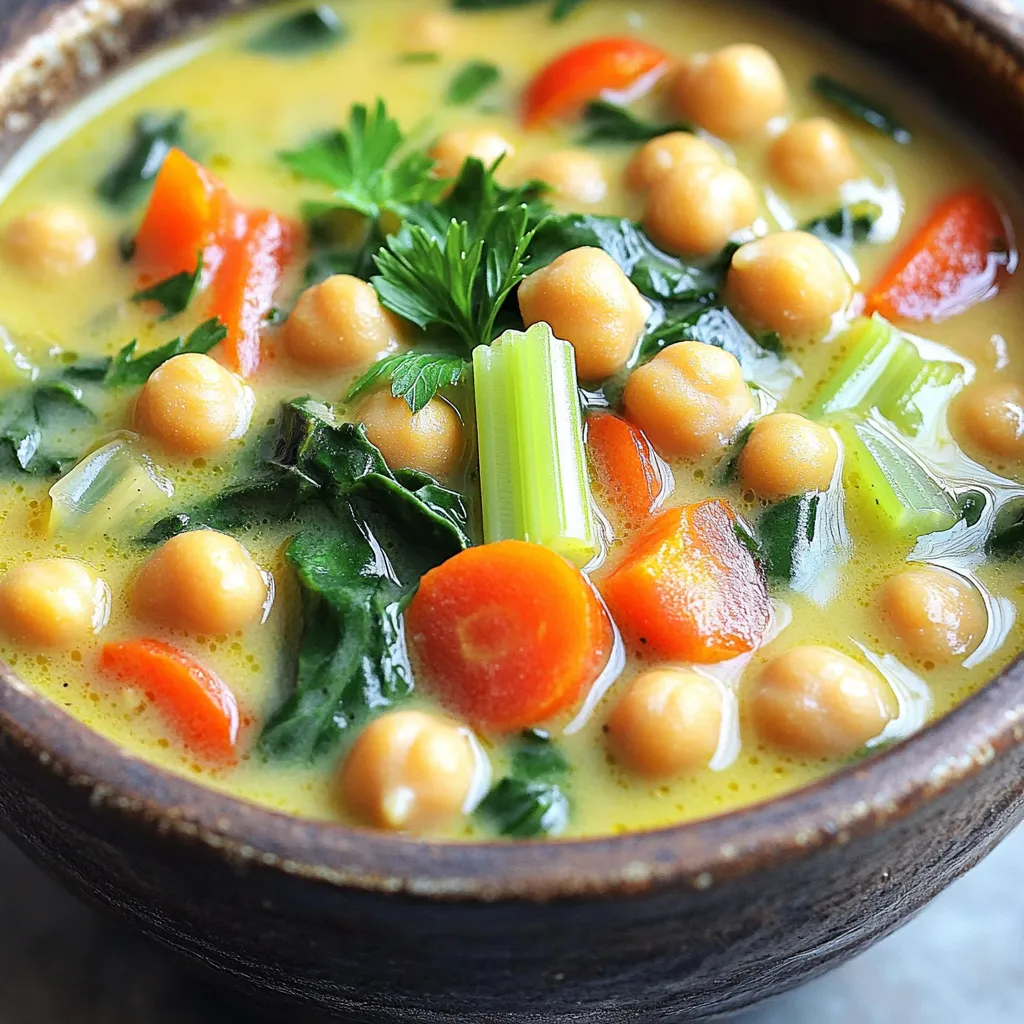
Welcome to my kitchen! Today, I’m excited to share my recipe for Slow Cooker Creamy Tuscan Chickpea Soup. This tasty meal is packed with chickpeas, veggies, and creamy goodness. Perfect for chilly days, it warms you up and fills you with comfort. I’ll guide you through simple steps and helpful tips, so you can make this dish flawlessly every time. Let’s dive in and make this delicious soup together!
Ingredients
List of Required Ingredients
– 2 cans (15 oz each) chickpeas, drained and rinsed
– 1 medium onion, diced
– 3 cloves garlic, minced
– 2 medium carrots, diced
– 2 stalks celery, diced
– 1 can (14 oz) diced tomatoes
– 4 cups vegetable broth
– 1 teaspoon dried basil
– 1 teaspoon dried oregano
– 1 teaspoon red pepper flakes (adjust to taste)
– Salt and pepper to taste
– 1 cup coconut milk or heavy cream
– 2 cups fresh spinach
– Juice of 1 lemon
– Fresh parsley, chopped for garnish
Gather these ingredients to make a rich, creamy soup. The chickpeas and legumes form the base. They provide protein and fiber. The vegetables add texture and flavor. Onions, garlic, carrots, and celery create a savory mix. Diced tomatoes bring in a splash of acidity.
You will need vegetable broth to keep it hearty. The dried herbs, like basil and oregano, add depth. For a bit of heat, use red pepper flakes. Season with salt and pepper to enhance all the flavors.
The creaminess of the soup comes from coconut milk or heavy cream. Fresh spinach adds a pop of color and nutrients. A squeeze of lemon juice brightens the taste. Finally, sprinkle fresh parsley on top for a lovely finish.
With these ingredients, you will create a comforting bowl of soup. Each component plays a key role in the overall taste and feel. Enjoy the process of preparing this delightful dish!
Step-by-Step Instructions
Preparation of Ingredients
How to properly rinse and drain chickpeas
Start by opening two cans of chickpeas. Pour the chickpeas into a colander. Rinse them under cool water for about a minute. This removes excess salt and improves flavor. Let the chickpeas drain well before using them in the soup.
Dicing vegetables
Next, take a medium onion and peel it. Cut it in half, then slice it into small pieces. For the carrots, peel them and chop into tiny cubes. Do the same with the celery. Aim for uniform sizes so they cook evenly. Mince three cloves of garlic finely. This will add a strong, rich flavor to your soup.
Cooking Process
Combining ingredients in the slow cooker
In your slow cooker, add the rinsed chickpeas, diced onion, minced garlic, carrots, and celery. Pour in one can of diced tomatoes and four cups of vegetable broth. Sprinkle in one teaspoon each of dried basil and oregano. To add some heat, toss in red pepper flakes. Stir everything well to mix the flavors.
Seasoning tips for best flavor
Add salt and pepper to taste. Start with a small amount, as you can always add more later. Mix again and make sure all the ingredients are coated in the broth. Cover the slow cooker and set it to cook. For best results, cook it on low for 6 to 8 hours or on high for 3 to 4 hours.
Final Steps and Serving
Adding cream and spinach
About 30 minutes before you want to serve, take the lid off. Stir in one cup of coconut milk or heavy cream, depending on your preference. Then add two cups of fresh spinach. Stir until the spinach wilts down. This will give your soup a lovely creamy texture.
Importance of lemon juice
Before serving, squeeze the juice of one lemon into the soup. This adds a bright flavor that balances the creaminess. Taste the soup and adjust the seasoning if needed. Serve it hot, garnished with fresh chopped parsley for a pop of color and flavor. Enjoy your delicious creation!
Tips & Tricks
Slow Cooker Adjustments
Cooking times depend on your slow cooker type. If you use a high setting, cook for 3 to 4 hours. On low, aim for 6 to 8 hours. Always check your soup for the right tenderness of veggies. If it seems watery, you can let it cook longer without the lid. This helps thicken the soup by letting some steam escape. If your slow cooker runs hot, reduce the cooking time to prevent overcooking.
Enhancing Flavor
Seasoning is key to a great soup. Taste your soup before serving and adjust as needed. You can add more salt, pepper, or red pepper flakes for heat. Using fresh herbs makes a big difference. Fresh parsley adds bright notes, while dried herbs work well too. Just remember, dried herbs are stronger, so use less.
Presentation Suggestions
Garnish your soup with fresh parsley for a pop of color. A drizzle of coconut milk or cream adds elegance. You can also sprinkle red pepper flakes on top for a spicy kick. Pair this soup with crusty bread or a green salad. These sides complement the creamy texture and rich flavors of the soup.
Variations
Ingredient Swaps
You can easily swap out the chickpeas for other beans. Try black beans or lentils. They add different flavors and textures. If you want a creamier soup, use navy beans instead. For dairy-free options, coconut milk works well. You can also use almond milk or cashew cream. These keep your soup rich and tasty.
Spice Level Adjustments
Do you like more heat? Add extra red pepper flakes or a pinch of cayenne. For milder soup, reduce the red pepper flakes. You can also try adding smoked paprika or cumin for a new taste. These spices provide warmth without too much heat.
Seasonal Additions
Incorporate seasonal veggies for a fresh twist. In spring, add peas or asparagus. In winter, try root vegetables like parsnips or sweet potatoes. You can also add protein. Shredded chicken or cooked sausage can boost the soup. This makes it heartier and more filling.
Storage Info
How to Store Leftovers
To store your soup, use airtight containers. Glass containers work best. They keep the soup fresh and let you see what’s inside. Make sure the soup cools down before sealing it. This helps prevent condensation, which can make the soup watery.
Refrigerate the soup within two hours of cooking. It will stay fresh in the fridge for up to five days. If you plan to eat it later, it’s best to freeze some.
Freezing Instructions
You can freeze the soup for later use. Pour the cooled soup into freezer-safe bags or containers. Leave some space at the top for expansion.
When you want to enjoy the soup again, thaw it in the fridge overnight. For a quick thaw, place the bag in cold water. Reheat the soup in a pot on the stove or in the microwave until hot. Stir well to ensure even heating.
Shelf Life
In the fridge, your Slow Cooker Creamy Tuscan Chickpea Soup lasts about five days. In the freezer, it stays good for up to three months. Always check for signs of spoilage before eating. If it smells off or has changed color, it’s best to toss it.
FAQs
Common Questions About Slow Cooker Creamy Tuscan Chickpea Soup
Can I make this recipe without a slow cooker?
Yes, you can make this soup on the stove. Use a large pot. Cook the veggies and spices on medium heat for about 10 minutes. Then add the chickpeas and broth. Simmer for 30 minutes. Stir in the cream and spinach last.
How do I thicken the soup if desired?
To thicken the soup, you have a few options. You can mash some chickpeas with a fork. This adds body to the soup. Another way is to stir in a cornstarch slurry. Mix equal parts cornstarch and water, then add it to the soup.
What can I serve with this soup?
This soup pairs well with crusty bread. You can also serve it with a fresh salad. A sprinkle of cheese on top adds a nice touch. Enjoy it with a glass of white wine for a special meal.
Is Slow Cooker Creamy Tuscan Chickpea Soup vegan-friendly?
Yes, this soup is vegan-friendly! Simply use coconut milk instead of heavy cream. All the other ingredients are plant-based. You can enjoy this soup without any animal products.
In this blog post, we explored how to make Slow Cooker Creamy Tuscan Chickpea Soup. We covered the main ingredients, preparation steps, and cooking tips to bring out the best flavors. Remember to adjust seasonings and enjoy using seasonal veggies. Don’t forget the lemon juice for that fresh kick! This soup is easy to store and freeze, making it a great meal prep option. Try the variations and let your taste buds be adventurous. Enjoy your cooking journey and feel proud of your tasty creation!


