Are you ready for a fresh and flavorful dish that is both easy and fun to make? Smashed Cucumber Salad brings together cool cucumbers, zesty dressing, and a burst of flavors in every bite. With just a few ingredients and simple steps, you can create a salad that delights your taste buds and impresses your friends. Join me as we explore this tasty recipe that’s perfect for any meal!
Ingredients
List of Ingredients
– 2 large cucumbers
– 1 teaspoon salt
– 2 tablespoons rice vinegar
– 1 tablespoon sesame oil
– 1 tablespoon soy sauce
– 1 tablespoon honey or maple syrup
– 1 teaspoon grated ginger
– 2 cloves garlic, minced
– 1 tablespoon sesame seeds
– Fresh cilantro or mint leaves for garnish
Optional Ingredients
– Additional herbs (e.g., dill or parsley)
– Chili flakes for heat
– Alternative sweeteners (e.g., agave syrup)
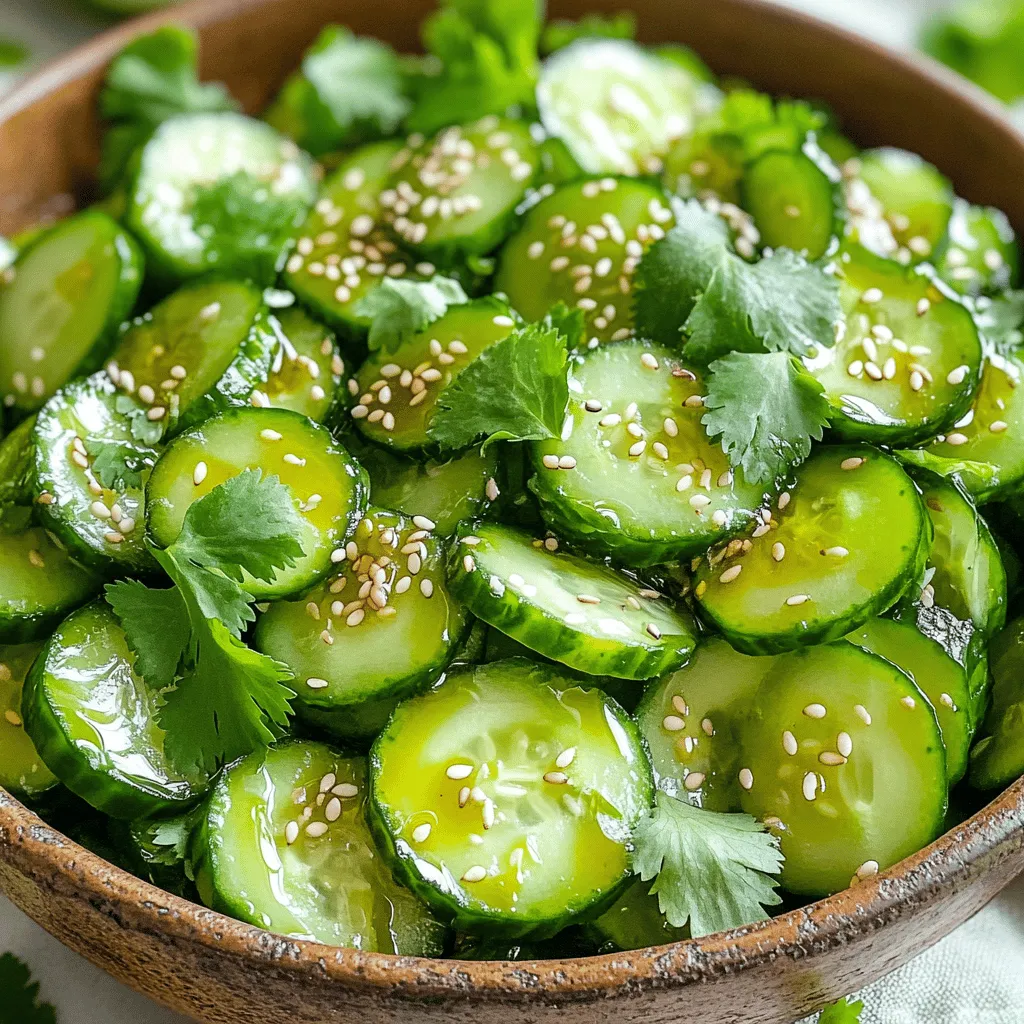
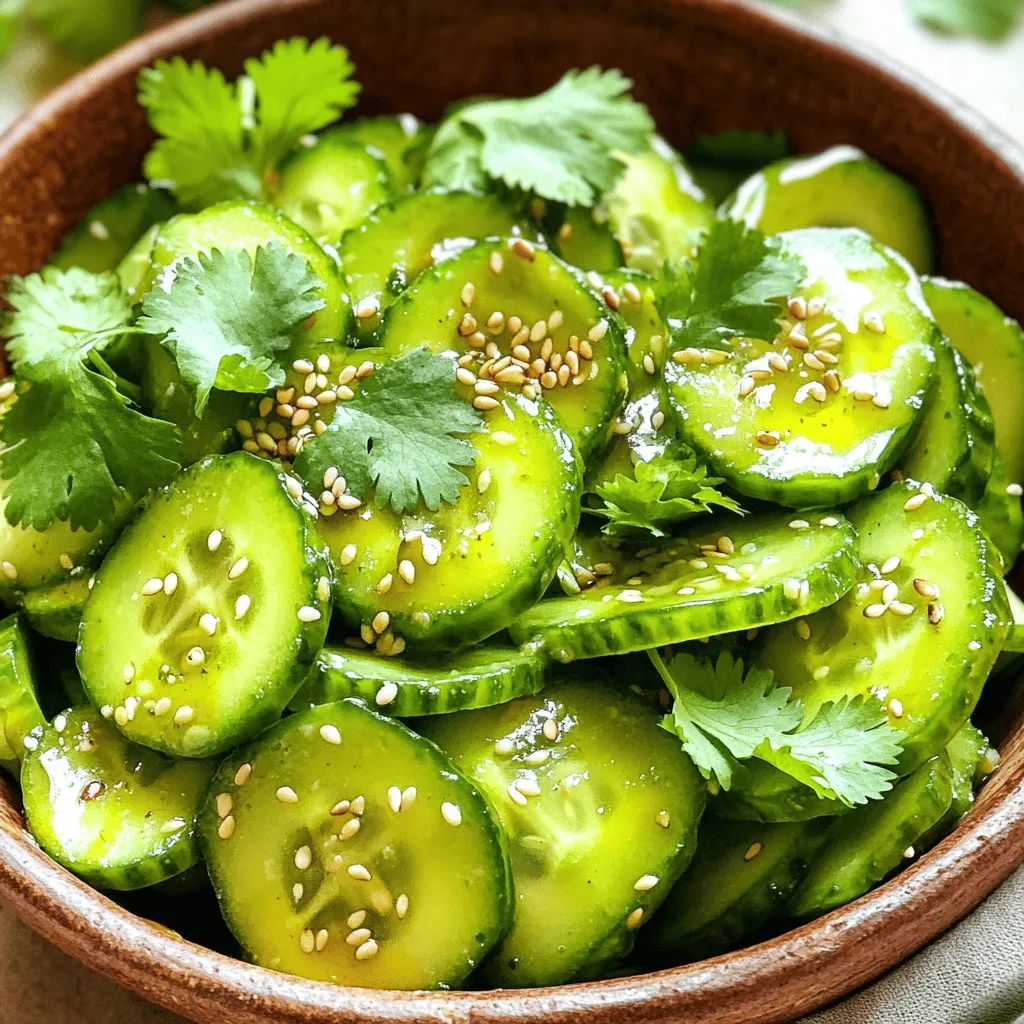
In Smashed Cucumber Salad, fresh cucumbers shine. They add crunch and flavor. You need two large cucumbers for this dish. The salt helps draw out water, keeping them crisp. Rice vinegar adds a tangy kick, while sesame oil gives depth.
Soy sauce offers umami, and honey or maple syrup balances the flavors. Ginger and garlic add zest. Sesame seeds sprinkle on top for crunch. You can garnish with fresh herbs like cilantro or mint. For extra flavor, consider adding herbs like dill or parsley. If you like heat, chili flakes work well. You can switch sweeteners too, using agave syrup if preferred.
This salad is fresh and bright. Each bite bursts with flavor. You can prepare it quickly, and it is perfect for any meal.
Step-by-Step Instructions
Preparation Steps
First, rinse the cucumbers under cool water. This removes dirt and helps them stay fresh. Next, slice each cucumber in half lengthwise. This step is key for smashing.
Now, it’s time to smash the cucumbers. Use the flat side of a knife or a rolling pin. Gently hit each cucumber half. You want to crack it open but not turn it mushy. After smashing, cut them into bite-sized pieces. Place these pieces in a mixing bowl.
Sprinkle one teaspoon of salt over the cucumbers. Let them sit for about ten minutes. This draws out extra moisture and enhances the flavor.
Dressing Preparation
While the cucumbers rest, prepare the dressing. In a separate bowl, whisk together the following:
– 2 tablespoons rice vinegar
– 1 tablespoon sesame oil
– 1 tablespoon soy sauce
– 1 tablespoon honey or maple syrup
– 1 teaspoon grated ginger
– 2 cloves garlic, minced
Make sure all the ingredients blend well. This dressing brings a burst of flavor to the salad.
Combining Ingredients
After ten minutes, drain any liquid from the cucumbers. Pour the dressing over the cucumbers and toss gently. Make sure each piece is coated evenly.
Let the salad marinate in the fridge for at least ten minutes. This time allows the flavors to blend beautifully. Just before serving, sprinkle sesame seeds on top. Garnish with fresh cilantro or mint leaves for a pop of color. Enjoy this fresh and flavorful delight!
Tips & Tricks
Best Practices for Smashing Cucumbers
To get that perfect texture with cucumbers, you need to smash them just right. Use the flat side of a knife or a rolling pin. This method breaks open the cucumber without making it mushy. It’s all about the gentle pressure. You want to crack the skin and create crevices for the dressing to soak in. Remember to smash evenly, so every piece has that great flavor.
Flavor Enhancements
Want to boost the flavor of your salad? Consider adding a splash of hot sauce for some heat. You can also mix in fresh herbs, like dill or parsley, for a fresh taste. A little squeeze of lime can add a zesty kick. Experiment with these flavors to find your favorite combination. You can really make this salad your own with just a few tweaks.
Serving Suggestions
Serve your Smashed Cucumber Salad in a large bowl, and let it shine! It pairs well with grilled meats or as a side for Asian dishes. You can also place it on a bed of greens for a colorful presentation. For a fun twist, use it as a topping on tacos or as a filling in rice paper rolls. Enjoy the crunch and the vibrant flavors this salad brings!
Variations
Alternative Dressing Ideas
You can change the flavor of your smashed cucumber salad with different dressings. Instead of the usual dressing, try a peanut sauce. This adds a rich and nutty taste. You can make it by mixing peanut butter, soy sauce, and lime juice. Another option is a yogurt dressing. Just mix plain yogurt with garlic, lemon, and herbs. This gives a fresh and creamy twist to the salad.
Adding Proteins
Want to make your salad heartier? Add protein! Tofu works well for a vegetarian option. Just cube it and toss it in. Shrimp is another great choice. It cooks quickly and adds a nice taste. If you prefer chicken, grill or roast it first, then slice it thinly. All these proteins blend well with the flavors of the salad.
Seasonal Variations
You can also switch things up with seasonal vegetables and herbs. In summer, add ripe tomatoes or bell peppers for extra color. In fall, try adding diced apples or nuts for crunch. Fresh herbs like dill or basil can brighten the salad. Using what’s in season makes the dish taste even better. It keeps your smashed cucumber salad fresh and exciting throughout the year.
Storage Info
Proper Storage Methods
To keep your Smashed Cucumber Salad fresh, use a clean glass or plastic container. Make sure it has a tight lid. This helps prevent air exposure. Before sealing, remove excess moisture from the salad. Store it in the fridge, where it can stay cool. This keeps the cucumbers crunchy and the flavors bright.
Refreezing and Shelf Life
You can store the salad in the fridge for up to three days. After that, the cucumbers may get too soft. I recommend enjoying it fresh for the best taste. If you find leftovers, check for any changes in color or texture before eating.
Reheating Suggestions
Smashed Cucumber Salad is best served cold. If you made it ahead, just give it a gentle stir. If it seems dry, add a splash of rice vinegar or sesame oil. This refreshes the flavors. You can also add more herbs for an extra boost. Enjoy your salad at its best!
FAQs
Can I make Smashed Cucumber Salad ahead of time?
Yes, you can make Smashed Cucumber Salad ahead of time. To keep it fresh, follow these tips:
– Prepare the cucumbers and smash them.
– Mix the dressing separately.
– Combine everything just before serving. This keeps the cucumbers crunchy.
– Store any leftovers in an airtight container in the fridge for up to two days.
What are the health benefits of cucumbers?
Cucumbers are low in calories and high in water. Here are some key benefits:
– They hydrate your body.
– Cucumbers are rich in vitamins A and C.
– They contain antioxidants that help fight free radicals.
– They support digestion due to their fiber content.
What should I serve with Smashed Cucumber Salad?
Smashed Cucumber Salad pairs well with many dishes. Here are some great options:
– Grilled chicken or shrimp adds protein.
– Serve it alongside rice or quinoa for a complete meal.
– A bowl of noodles can complement the salad nicely.
– It also works well with spicy dishes, balancing the heat.
How to prevent cucumbers from getting soggy?
To keep cucumbers crunchy, try these techniques:
– Sprinkle salt on the cucumbers early. This helps draw out excess water.
– Drain the liquid after letting them sit.
– Use firm cucumbers, as they hold up better.
– Keep the salad cold before serving to maintain its texture.
This blog post covered how to make a tasty smashed cucumber salad. We explored the simple ingredients and the easy steps to prepare it. I provided tips for enhancing flavors and ways to store your salad. Think about trying different dressings or proteins to switch things up.
Enjoy experimenting with this salad. It’s fresh, healthy, and super easy to make. You will impress your friends and family with this dish. Happy cooking!


