Craving something fun and tasty? You’ll love this Snickers Inspired Dessert Dip! It’s simple to make and perfect for any gathering. Imagine creamy goodness with sweet chocolate and crunchy nuts. This dip is a crowd-pleaser and a delightful twist on your favorite candy bar. Let’s dive in and create a dessert that everyone will ask about!
Ingredients
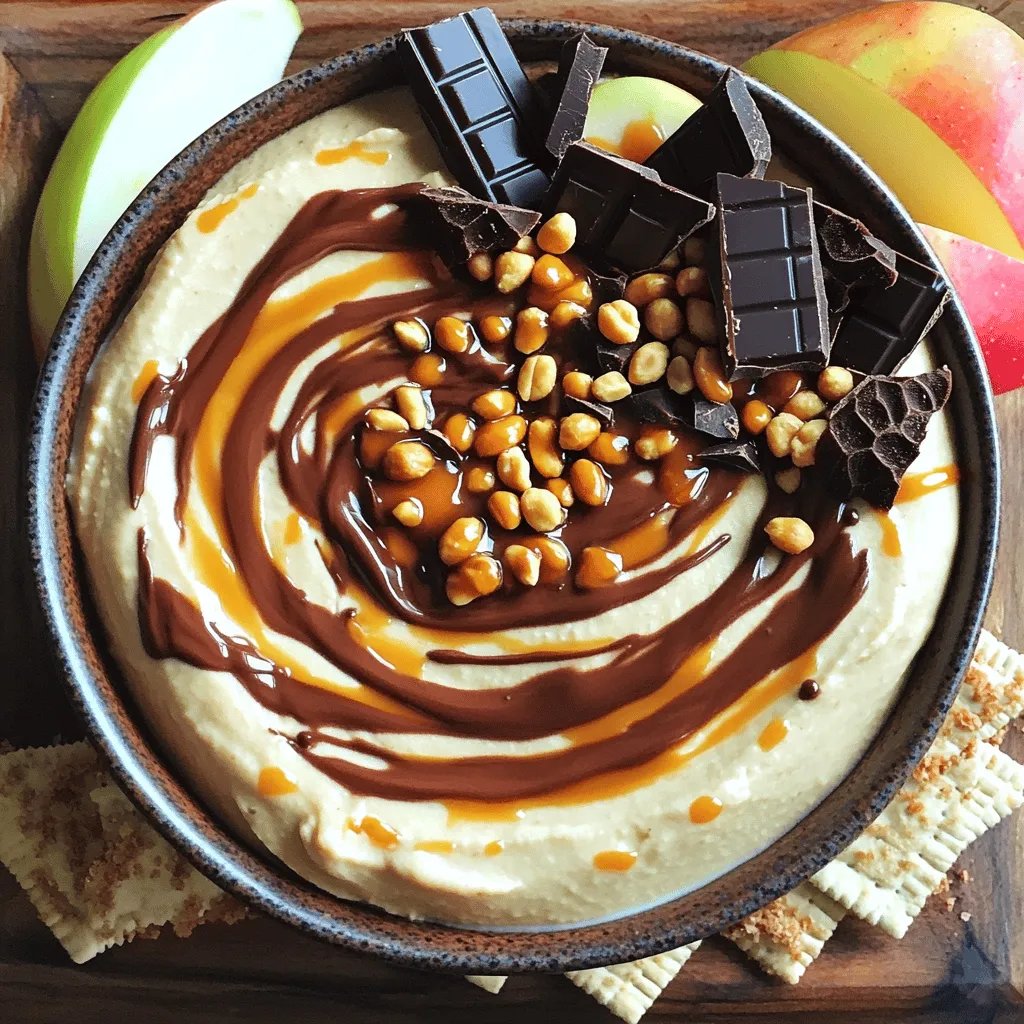
Essential Ingredients for Snickers Inspired Dessert Dip
To make this tasty dip, you need simple ingredients. Here they are:
– 8 oz cream cheese, softened
– 1 cup powdered sugar
– 1 cup whipped topping (like Cool Whip)
– 1 cup chocolate syrup
– 1 cup chopped peanuts
– 1/2 cup caramel sauce
– 1 teaspoon vanilla extract
These ingredients blend to create a rich and creamy treat. The cream cheese gives it a smooth base, while the chocolate syrup adds sweetness. The chopped peanuts bring a nice crunch.
Suggested Garnishes
Garnishes make your dip look special. You can use:
– Mini chocolate bars
– Extra chopped peanuts
These add fun and flavor. Just sprinkle them on top for a great look. They also give a hint of what is inside the dip.
Alternative Dipping Options
You can dip many things in this dessert dip. Some tasty choices are:
– Apple slices
– Graham crackers
These options work well. The apple slices add crispness, while graham crackers give a sweet touch. You can even try pretzels for a salty crunch.Enjoy making this fun and easy Snickers Inspired Dessert Dip!
Step-by-Step Instructions
Preparation and Mixing Process
Start by placing the softened cream cheese in a mixing bowl. Use an electric mixer to beat it until smooth. This step is key for a creamy dip. Next, slowly add the powdered sugar while mixing. This will sweeten your dip nicely. After that, gently fold in the whipped topping with a spatula. This helps keep the dip fluffy.
Now, stir in the chocolate syrup and vanilla extract. Mix until you see a lovely chocolate color. Finally, add the chopped peanuts and caramel sauce. Fold them in carefully to keep the texture nice.
Tips for Achieving Creamy Consistency
To get a perfect creamy dip, ensure your cream cheese is very soft. Let it sit at room temperature for about 30 minutes before mixing. Mixing well at each step is also important. If you find your dip too thick, add a bit more whipped topping or caramel sauce. This will help make it smooth.
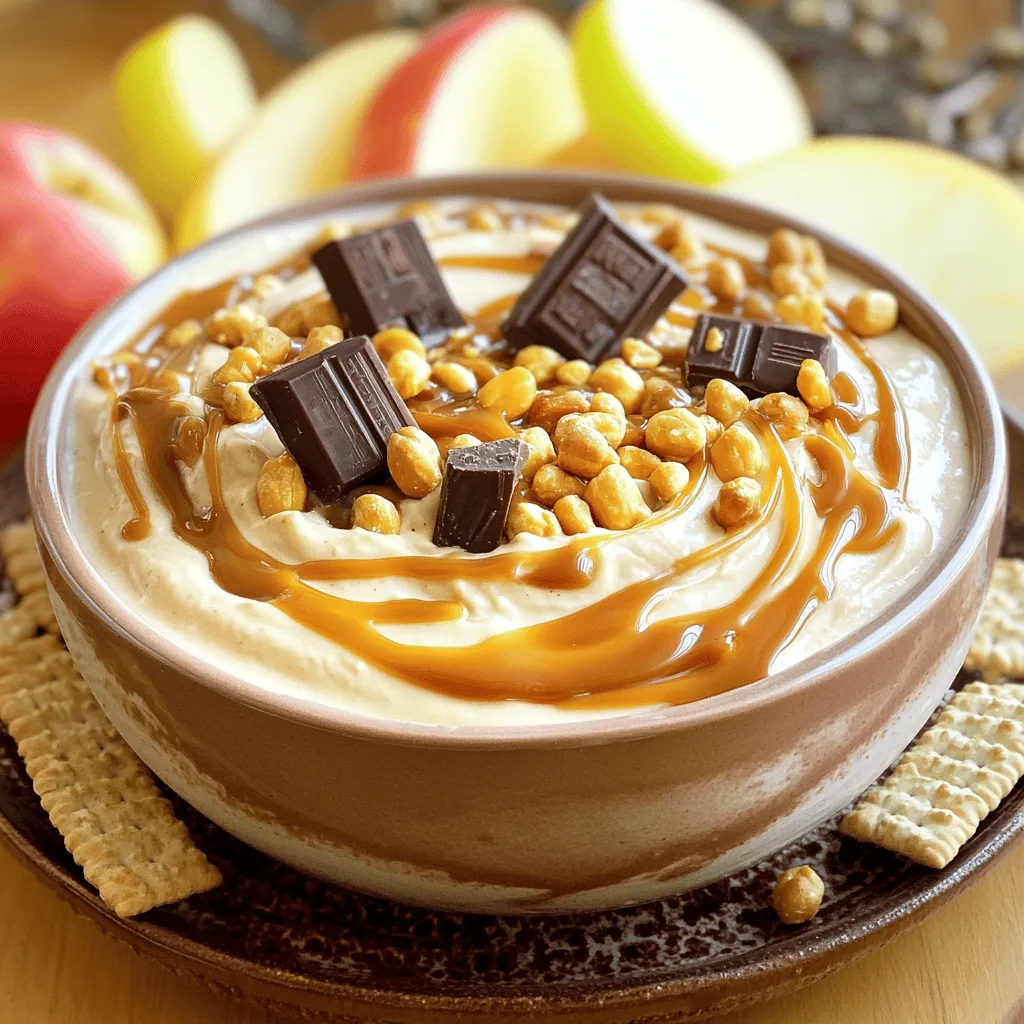
Presentation Tips for Serving the Dip
For a great presentation, transfer the dip to a nice serving bowl. Drizzle extra caramel sauce and chocolate syrup on top. This adds visual appeal and flavor. You can also garnish with mini chocolate bars or chopped peanuts. Serve with apple slices or graham crackers on the side. This way, everyone can enjoy dipping!
Tips & Tricks
How to Perfect the Flavor Balance
To get the best flavor, mix sweet and salty. The cream cheese gives a nice base. The powdered sugar adds sweetness. The chopped peanuts bring salt and crunch. This dip tastes best when you balance these flavors. You can add more caramel or chocolate syrup to suit your taste. A little extra caramel can enhance the sweet notes.
Common mistakes to avoid when making dessert dips
One common mistake is overmixing. If you mix too much, the dip can become runny. Always fold in the whipped topping gently. Another mistake is not tasting as you go. Always sample your dip while mixing. This way, you can adjust flavors as needed. Don’t skip the vanilla extract. It adds a nice depth to your dip.
Recommended Serving Suggestions
Serve this dip with fresh apple slices for a fruity twist. Graham crackers also work well for dipping. For a fun touch, use pretzel sticks for a sweet-salty combo. You can even put the dip in small cups for easy serving. Arrange mini chocolate bars on top for a great look. This makes the dip look extra special, perfect for parties or gatherings. Enjoy this tasty treat with friends and family!
Variations
How to Customize Flavors with Different Nuts
You can switch up the nuts to change the flavor. Try using almonds or walnuts. They add a nice crunch and a different taste. If you prefer no nuts, simply leave them out. The dip will still taste great!
Making it Low-Carb or Sugar-Free
To make a low-carb or sugar-free version, use sugar-free powdered sugar. You can also swap the caramel sauce for a sugar-free option. This way, you keep the sweet taste without the extra carbs. It remains a tasty treat for everyone!
Alternative Ingredients for Dietary Restrictions
If you have dietary needs, you can adjust the recipe. Use dairy-free cream cheese for a vegan option. You can also use gluten-free graham crackers or apple slices for dipping. These changes make the dip friendly for more diets without losing flavor.
Storage Information
How to Store Leftovers
To keep your Snickers Inspired Dessert Dip fresh, store it in an airtight container. This helps maintain its creamy texture and flavor. Place it in the fridge right after serving. If you have a large bowl, cover it tightly with plastic wrap. This way, you avoid any odors from other foods in the fridge.
Freezing Options for Long-term Storage
You can freeze this dip for later use. First, scoop it into a freezer-safe container. Leave some space at the top, as the dip may expand when frozen. Seal it well to avoid freezer burn. When you’re ready to eat it, thaw it in the fridge overnight before serving. Make sure to stir it well after thawing to regain its smooth texture.
Shelf Life of the Dessert Dip
In the fridge, this dessert dip lasts about 3 to 5 days. If you freeze it, it can last up to 2 months. Always check for any changes in smell or texture before eating. If it looks or smells off, it’s best to toss it. Enjoy your sweet treat knowing you can store it safely for future cravings!
FAQs
What can I use as a dipper for Snickers Inspired Dessert Dip?
You can use many tasty options as dippers. I love using fresh apple slices. They add a nice crunch and sweetness. Graham crackers are another great choice. They have a mild flavor that pairs well with the dip. You can also try pretzels for a salty twist. If you want a little more fun, use cookies like vanilla wafers or chocolate chip cookies. Each dipper brings a different taste and texture.
Can I make this dip ahead of time?
Yes, you can make this dip ahead of time. I recommend preparing it a day in advance. This way, the flavors mix and deepen. Just cover the dip well with plastic wrap or a lid. Store it in the fridge until you’re ready to serve.
How long does the dip last in the fridge?
The dip stays fresh for about 3 to 5 days in the fridge. Make sure to keep it in an airtight container. If you notice any changes in smell or texture, it’s best to toss it. Enjoy it while it’s fresh for the best taste!
This blog post covered everything you need to know about making a Snickers inspired dessert dip. We looked at key ingredients, step-by-step instructions, and tips for great flavor. I shared fun variations and how to store leftovers.
In the end, this dip is easy and fun to make. Enjoy it with friends or family! With a few tweaks, it fits any diet. Get creative and have fun with your flavors!


