If you’re searching for a tasty, healthy meal, you’ve found it in my Southwest Black Bean Salad. Packed with vibrant ingredients, this salad is a feast for the eyes and your taste buds. I’ll guide you through each step, from gathering fresh ingredients to perfecting texture and flavor. Plus, I’ll share tips for storing leftovers and offer variations to keep it exciting. Ready to whip up a bowl of goodness? Let’s dive in!
Ingredients
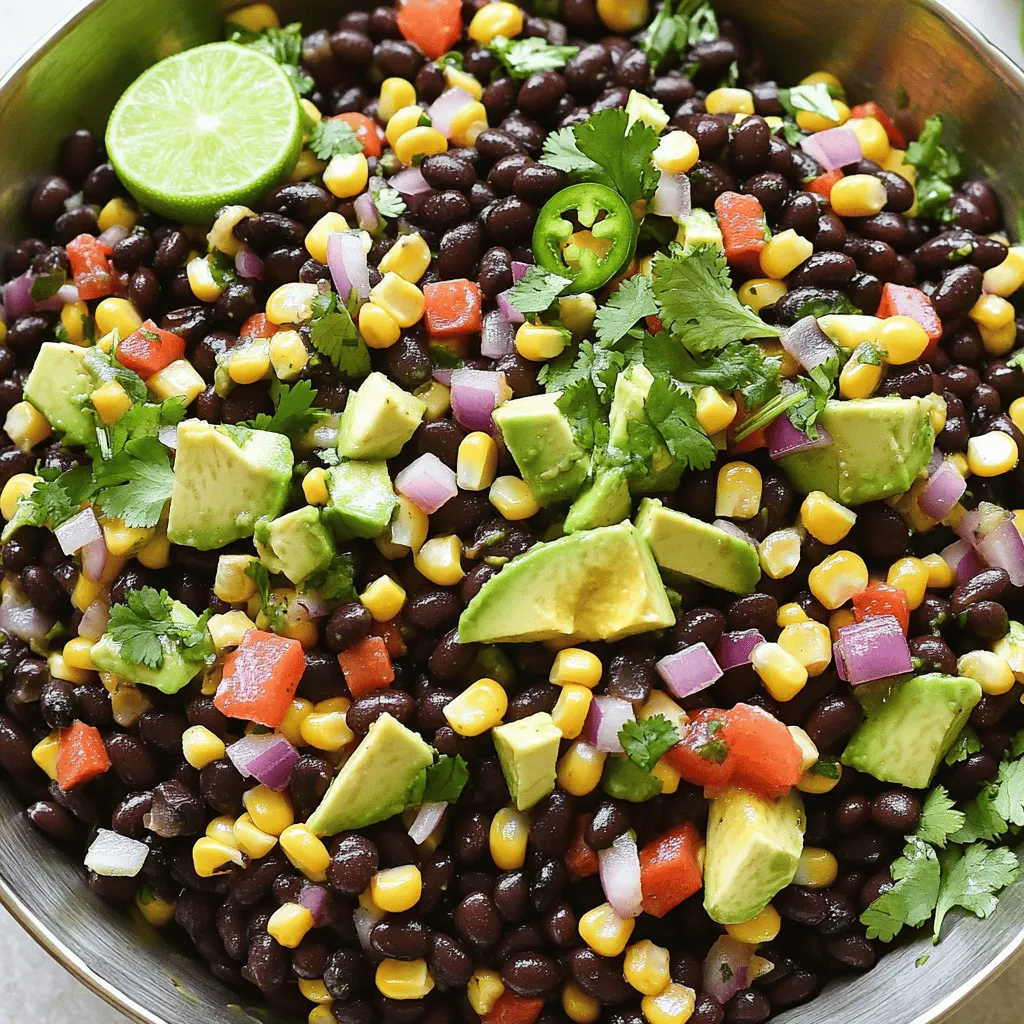
Main Ingredients List
For this tasty Southwest Black Bean Salad, gather the following main ingredients:
– 1 can (15 oz) black beans, rinsed and drained
– 1 cup corn kernels (fresh, frozen, or canned)
– 1 red bell pepper, diced
– 1/2 cup red onion, finely chopped
– 1 jalapeño, deseeded and minced
– 1 avocado, diced
– 1/4 cup fresh cilantro, chopped
– Juice of 2 limes
– 3 tablespoons olive oil
– 1 teaspoon cumin
– 1 teaspoon smoked paprika
– Salt and pepper to taste
These ingredients create a colorful salad full of flavor and nutrition.
Optional Ingredients for Extra Flavor
You can add extra ingredients to enhance taste. Consider:
– 1 cup cherry tomatoes, halved
– 1/2 cup feta cheese, crumbled
– 1/4 cup chopped green onions
– 1 teaspoon chili powder
These additions bring new textures and flavors to your salad.
Substitutions for Key Ingredients
Not every ingredient may be on hand. Here are some easy swaps:
– Use black-eyed peas instead of black beans.
– Swap fresh corn for canned or frozen corn.
– Replace avocado with diced mango for a sweeter touch.
– If you don’t have cilantro, parsley works too.
Feel free to mix and match based on what you like.
Step-by-Step Instructions
Preparation Preparation Steps
To start, gather all your ingredients. You need a can of black beans, corn, a red bell pepper, red onion, jalapeño, avocado, cilantro, limes, olive oil, cumin, smoked paprika, salt, and pepper. Rinse and drain the black beans first. This helps remove excess salt. Next, chop the vegetables. Dice the bell pepper and onion into small pieces. Mince the jalapeño, but you can adjust the heat by removing the seeds. Dice the avocado last. This keeps it fresh and intact.
Mixing and Dressing the Salad
In a large mixing bowl, combine the black beans, corn, diced bell pepper, chopped onion, and minced jalapeño. Gently fold in the avocado and cilantro. Be careful not to mash the avocado. In a smaller bowl, whisk the lime juice, olive oil, cumin, smoked paprika, salt, and pepper together. Pour this dressing over the salad. Toss the salad gently to coat all the ingredients. Taste it and adjust the seasoning if needed. Let the salad sit for 10-15 minutes. This allows the flavors to mix well.
Tips for Perfecting Texture
For the best texture, use fresh ingredients. Make sure your avocado is ripe but not overripe. This keeps it firm. You can also chill the salad before serving. This gives it a refreshing taste. If you want crunch, add some tortilla chips right before serving. This keeps them crispy. For a fun twist, layer the salad in jars. It looks great and is easy to grab. Follow these steps, and you’ll have a vibrant Southwest Black Bean Salad.
Tips & Tricks
How to Choose the Best Avocado
When picking an avocado, look for one that feels slightly soft. Press gently with your fingers. If it gives a little but isn’t mushy, it’s ripe. The skin should be dark green to black, but not too wrinkled. Avoid any with large dents or dark spots. A perfect avocado adds creaminess to your salad.
Make-Ahead Tips for the Salad
You can prepare this salad ahead of time. Make it up to a day before serving. Store the salad without the avocado. Add the avocado just before serving to keep it fresh. This way, it stays green and tasty. The flavors mix well when you let it sit for a bit, too.
Serving Suggestions and Pairings
Serve this salad on its own or with grilled chicken. It also goes great with tacos or burritos. You can use it as a topping for nachos for an extra kick. Try it with a side of tortilla chips for crunch. For a refreshing drink, pair it with lemonade or iced tea. This salad is both filling and fun!

Variations
Protein Additions (Chicken, Shrimp, etc.)
You can change up the salad by adding protein. Cooked chicken or shrimp works well. Grilled chicken adds a nice smoky taste. You can also use rotisserie chicken for quick prep. For shrimp, sauté them gently with garlic and lime. This extra protein makes the salad more filling.
Vegan or Vegetarian Modifications
This salad is already vegan-friendly. If you want to keep it vegetarian, you can add cheese. Feta or cotija cheese adds a creamy touch. For a protein boost, consider adding tofu. Just cube the tofu and toss it in with the other ingredients. You can also add nuts or seeds for crunch and extra nutrition.
Seasonal Variations (Summer, Winter)
You can make this salad fit the seasons. In summer, use fresh tomatoes and cucumbers. They add a refreshing crunch. In winter, consider roasted vegetables like sweet potatoes or squash. This adds warmth and depth to the dish. Using seasonal ingredients keeps the salad fresh and exciting.
Storage Info
How to Properly Store Leftovers
To keep your Southwest Black Bean Salad fresh, place leftovers in an airtight container. Make sure to seal it tightly. If you know you won’t eat it right away, store the dressing separately. Combine it with the salad just before serving. This keeps the salad crisp and tasty.
Best Containers for Storage
Choose clear glass or plastic containers for storage. Glass containers are great because they do not stain or hold odors. If you use plastic, pick BPA-free options. Always pick containers with tight-fitting lids. This helps keep air out and preserves freshness.
Shelf Life of Southwest Black Bean Salad
When stored correctly, your salad lasts about 3 to 5 days in the fridge. If you see any signs of spoilage, like off smells or mold, toss it out. For the best taste, eat it within the first few days.
FAQs
How Long does Southwest Black Bean Salad Last?
Southwest Black Bean Salad can last for about three days in the fridge. Store it in an airtight container. The vegetables will stay crisp, but the flavors get better. After a day, the taste intensifies. If you notice any browning on the avocado, it’s best to eat it soon. To keep it fresh, add the avocado right before serving.
Can I Use Dried Beans Instead of Canned?
Yes, you can use dried beans, but they need extra time. First, soak the dried black beans for at least 6-8 hours. After soaking, cook them until tender. This can take 1-2 hours. Using dried beans may add a deeper flavor, and you can control the salt. Just make sure to rinse them well after cooking.
What Are the Best Seasonings for Extra Flavor?
To boost flavor, consider these seasonings:
– Cumin
– Smoked paprika
– Chili powder
– Garlic powder
– Lime zest
These spices add depth and warmth. You can adjust the amount based on your taste. For a kick, try adding cayenne pepper or more jalapeño. If you want a touch of sweetness, mix in some honey or maple syrup. Explore different combinations to find your favorite blend.
In this post, we explored all you need for a great Southwest Black Bean Salad. We discussed the main and optional ingredients and shared some key substitutions. I provided step-by-step instructions for preparing, mixing, and perfecting the salad’s texture. You learned tips on choosing avocados and how to serve this dish. We also covered protein options and seasonal variations.
Remember, this salad is flexible and fun. Experiment with ingredients to make it your own! Enjoy fresh flavors any time of year.


