Spicy Black Bean Burgers Flavorful and Healthy Option
![To make spicy black bean burgers, you need a few key ingredients: - 1 can (15 oz) black beans, drained and rinsed - 1/2 cup cooked quinoa - 1/2 cup breadcrumbs (gluten-free if needed) These ingredients form the base of the burger. The black beans provide protein and taste. Quinoa adds texture and nutrition. Breadcrumbs help bind the mix together. You can make these burgers your own with some fun additions: - Toppings Suggestions: avocado slices, lettuce, tomato, salsa, or spicy mayo - Spice Enhancements: jalapeño and garlic for extra kick Feel free to swap ingredients based on your taste. Want more heat? Add more jalapeño. Prefer a fresh crunch? Load up on lettuce and tomato. These spicy black bean burgers are not only tasty but also healthy: - Calories per serving: About 180 - Protein: 10g - Fats: 5g - Carbs: 28g This burger packs a punch of flavor while keeping a balanced profile. It is a great option for lunch or dinner. For the full recipe, check out the details above. To make the base, start by mashing the black beans. Use a fork or a potato masher. You want them mostly smooth, but keep some chunks for texture. This adds a nice bite to your burger. Next, add the additional ingredients to the bowl. Combine cooked quinoa, breadcrumbs, chopped red onion, minced jalapeño, minced garlic, cumin, smoked paprika, soy sauce, lime juice, salt, and pepper. Mix well until all ingredients are combined. If the mixture feels too wet, add a bit more breadcrumbs. This step helps hold the patties together. Now, it’s time to shape your burgers. Divide the mixture into equal portions, about four patties. Form each portion into a round shape. If you want them to hold together better, chill the patties in the fridge for 30 minutes. This makes them firmer. For cooking, heat a non-stick skillet or grill over medium heat. Drizzle a bit of olive oil to prevent sticking. Cook the patties for about 4 to 5 minutes on each side. You want them crispy and heated through. The smell will be amazing! When it’s time to serve, choose your toppings wisely. Avocado slices add creaminess, while lettuce and tomato add freshness. Salsa or spicy mayo can enhance the flavor even more. Pair your spicy black bean burgers with a side salad or some crispy fries. This makes for a delicious meal that’s both filling and healthy. You can find the full recipe above for more details on how to make these tasty burgers! To make your spicy black bean burgers great, focus on texture. Start by mashing the black beans well, but leave some chunks. This gives your burgers a nice bite. Chilling the patties is key. After you shape them, put them in the fridge for about 30 minutes. This helps them hold together better during cooking. Baking is a great alternative to frying. Preheat your oven to 375°F (190°C) and place the patties on a baking sheet. Bake for 20-25 minutes, flipping halfway. This method makes them crispy without extra oil. You can also adjust the flavors. Want more heat? Add more jalapeño or a dash of hot sauce. Feel free to mix in fresh herbs like cilantro for a fresh twist. Binding agents are crucial. If your mixture feels too wet, add more breadcrumbs. You can also use flaxseed meal or chia seeds mixed with water for a nice binder. Watch the moisture content closely. If you use canned beans, make sure to drain them well. Excess liquid can turn your patties into a mushy mess. For the full recipe of these tasty spicy black bean burgers, check out the recipe provided above. {{image_2}} You can change the taste of your spicy black bean burgers in fun ways. One option is the Southwest spicy black bean burger. For this, add corn, diced red pepper, and taco seasoning. This gives a bold, zesty flavor. Another tasty choice is the chipotle black bean burger. Mix in chipotle peppers in adobo sauce. This adds a smoky heat that spice lovers will enjoy. If you want a low-carb meal, try lettuce wraps. Instead of buns, use large lettuce leaves. They keep the burger juicy and fresh. You can also make black bean burger bowls. Simply place the patty on a bed of rice or quinoa. Top it with your favorite veggies and salsa for a hearty meal. Making these burgers fit your diet is easy. For gluten-free versions, use gluten-free breadcrumbs. This keeps the burger tasty without the gluten. If you’re vegan, skip the eggs and use mashed flax seeds instead. This keeps the burgers bound together while being plant-based. Whether you’re vegan or vegetarian, these burgers can fit your needs. You can enjoy them without missing out on flavor. For the full recipe, check here: [Full Recipe]. To keep uncooked patties fresh, place them in the fridge. Use an airtight container. They stay good in the fridge for about 2-3 days. If you want to keep them longer, freezing is a great option. Wrap each patty in plastic wrap or parchment paper. Then, put them in a freezer bag. They can last up to 3 months in the freezer. After cooking, let the black bean burgers cool down. Store them in an airtight container. This keeps them moist and flavorful. They can last in the fridge for about 4-5 days. When you want to eat them, simply reheat in a skillet or microwave. For the skillet, heat for about 3-4 minutes on medium. If using the microwave, heat for about 1-2 minutes, checking to avoid overheating. In the fridge, uncooked patties last for 2-3 days. Cooked black bean burgers stay fresh for 4-5 days. Always check for signs of spoilage. If you see mold or an off smell, it’s best to throw them away. Enjoy your spicy black bean burgers while they’re fresh! For the full recipe, check out [Full Recipe]. To make your spicy black bean burgers less mushy, focus on two main areas: ingredient adjustments and binding tips. - Ingredient adjustments: Use less black beans and add more breadcrumbs or quinoa. This helps absorb moisture and creates a firmer texture. - Tips for better binding: Chilling the patties for about 30 minutes in the fridge helps them hold their shape. You can also add a bit of ground flaxseed mixed with water as a natural binder. Yes, you can make these burgers ahead of time! Here are some best practices for meal prep: - Prep the patties: Form the patties and place them on a baking sheet lined with parchment paper. You can freeze them for later use. - Store in the fridge: If you plan to cook them within a day or two, simply cover the patties with plastic wrap and keep them in the fridge. If you want to substitute black beans, here are some great alternatives: - Alternative legumes: Use kidney beans, pinto beans, or chickpeas. Each will give a different taste and texture. - Other ingredients: You can also use lentils or cooked mushrooms for a unique flavor profile. These options provide good nutrition and maintain the burger's heartiness. For a full recipe, check out the Spicy Black Bean Burgers section above! You can create delicious spicy black bean burgers using simple, healthy ingredients. Start with black beans and quinoa, then customize them with tasty toppings. Follow clear steps to make perfect patties, and try different cooking methods. Remember the tips for texture and binding to avoid mushiness. Store uncooked or cooked burgers properly for later meals. In summary, these burgers are easy, versatile, and packed with flavor. Enjoy experimenting with your own twists!](https://dailydishly.com/wp-content/uploads/2025/06/fb468978-fb40-4fbf-9ebe-b248e91fb409.webp)
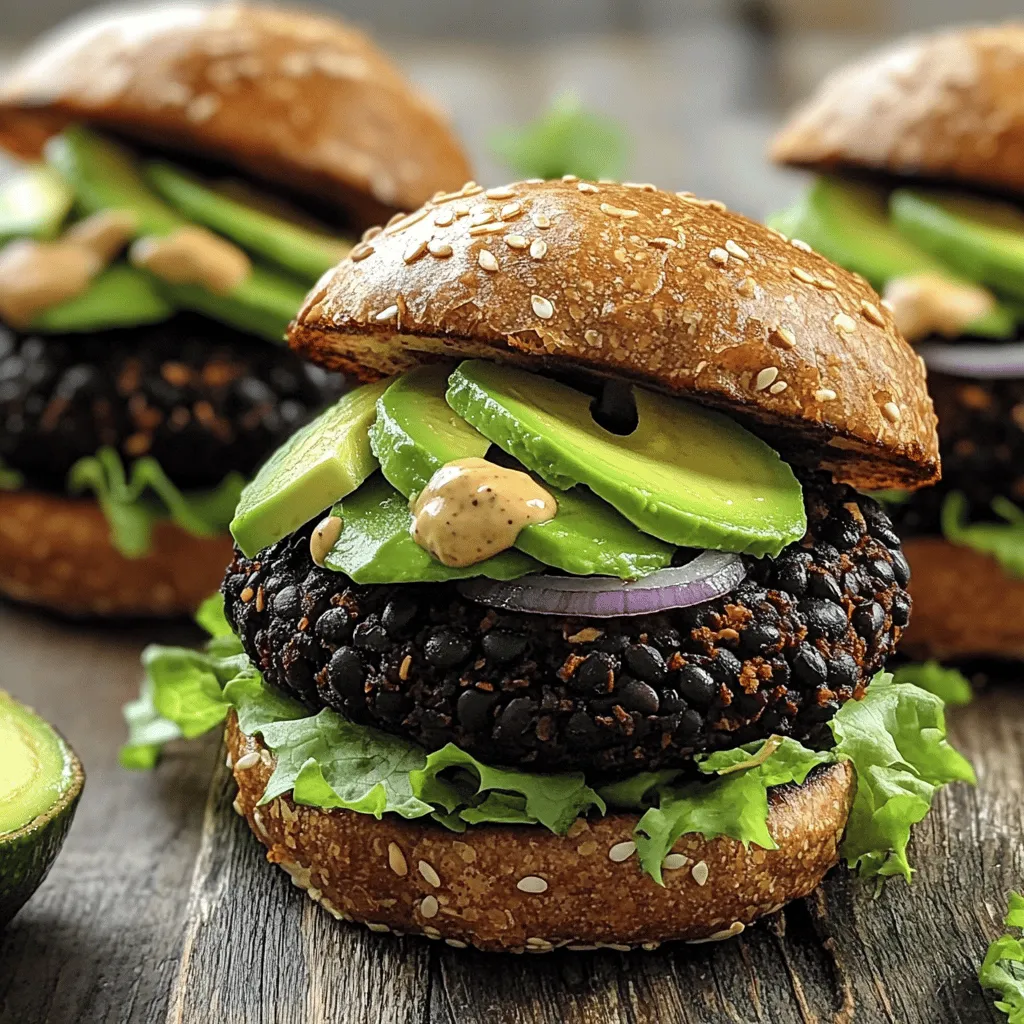
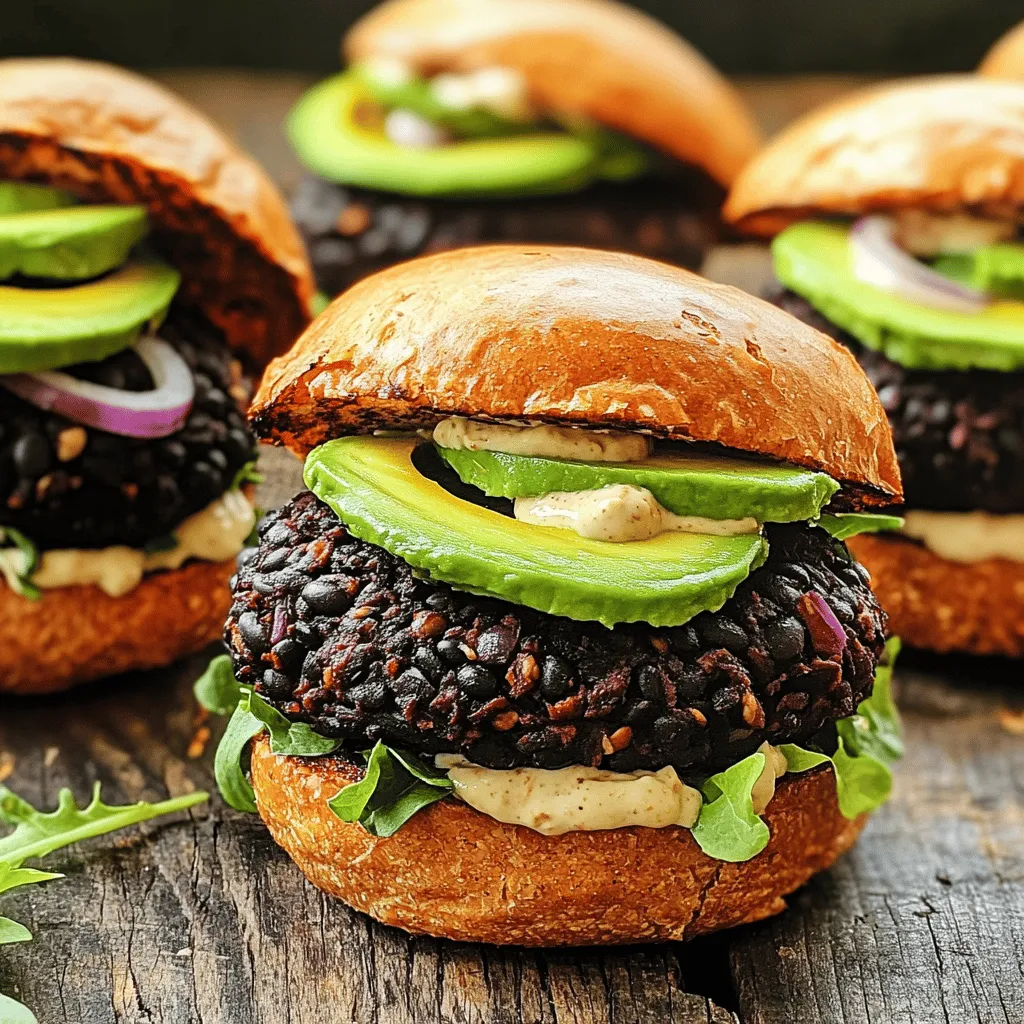
Looking for a tasty and healthy burger option? Try my Spicy Black Bean Burgers! Packed with flavor and nutrients, these burgers make meal prep easy. With simple ingredients like black beans and quinoa, you can create a dish everyone will love. Whether you want to spice things up or keep it mild, this guide covers everything from preparation to storage. Let’s dive in and make some delicious burgers today!
Ingredients
Essential Ingredients for Spicy Black Bean Burgers
To make spicy black bean burgers, you need a few key ingredients:
– 1 can (15 oz) black beans, drained and rinsed
– 1/2 cup cooked quinoa
– 1/2 cup breadcrumbs (gluten-free if needed)
These ingredients form the base of the burger. The black beans provide protein and taste. Quinoa adds texture and nutrition. Breadcrumbs help bind the mix together.
Optional Ingredients for Customizing Your Burgers
You can make these burgers your own with some fun additions:
– Toppings Suggestions: avocado slices, lettuce, tomato, salsa, or spicy mayo
– Spice Enhancements: jalapeño and garlic for extra kick
Feel free to swap ingredients based on your taste. Want more heat? Add more jalapeño. Prefer a fresh crunch? Load up on lettuce and tomato.
Nutritional Information
These spicy black bean burgers are not only tasty but also healthy:
– Calories per serving: About 180
– Protein: 10g
– Fats: 5g
– Carbs: 28g
This burger packs a punch of flavor while keeping a balanced profile. It is a great option for lunch or dinner.
Step-by-Step Instructions
How to Prepare the Black Bean Mixture
To make the base, start by mashing the black beans. Use a fork or a potato masher. You want them mostly smooth, but keep some chunks for texture. This adds a nice bite to your burger.
Next, add the additional ingredients to the bowl. Combine cooked quinoa, breadcrumbs, chopped red onion, minced jalapeño, minced garlic, cumin, smoked paprika, soy sauce, lime juice, salt, and pepper. Mix well until all ingredients are combined. If the mixture feels too wet, add a bit more breadcrumbs. This step helps hold the patties together.
Forming and Cooking the Patties
Now, it’s time to shape your burgers. Divide the mixture into equal portions, about four patties. Form each portion into a round shape. If you want them to hold together better, chill the patties in the fridge for 30 minutes. This makes them firmer.
For cooking, heat a non-stick skillet or grill over medium heat. Drizzle a bit of olive oil to prevent sticking. Cook the patties for about 4 to 5 minutes on each side. You want them crispy and heated through. The smell will be amazing!
Serving Suggestions
When it’s time to serve, choose your toppings wisely. Avocado slices add creaminess, while lettuce and tomato add freshness. Salsa or spicy mayo can enhance the flavor even more.
Pair your spicy black bean burgers with a side salad or some crispy fries. This makes for a delicious meal that’s both filling and healthy.
Tips & Tricks
Making Perfect Spicy Black Bean Burgers
To make your spicy black bean burgers great, focus on texture. Start by mashing the black beans well, but leave some chunks. This gives your burgers a nice bite.
Chilling the patties is key. After you shape them, put them in the fridge for about 30 minutes. This helps them hold together better during cooking.
Cooking Variations
Baking is a great alternative to frying. Preheat your oven to 375°F (190°C) and place the patties on a baking sheet. Bake for 20-25 minutes, flipping halfway. This method makes them crispy without extra oil.
You can also adjust the flavors. Want more heat? Add more jalapeño or a dash of hot sauce. Feel free to mix in fresh herbs like cilantro for a fresh twist.
Keeping Burgers from Falling Apart
Binding agents are crucial. If your mixture feels too wet, add more breadcrumbs. You can also use flaxseed meal or chia seeds mixed with water for a nice binder.
Watch the moisture content closely. If you use canned beans, make sure to drain them well. Excess liquid can turn your patties into a mushy mess.

Variations
Different Flavor Profiles
You can change the taste of your spicy black bean burgers in fun ways. One option is the Southwest spicy black bean burger. For this, add corn, diced red pepper, and taco seasoning. This gives a bold, zesty flavor. Another tasty choice is the chipotle black bean burger. Mix in chipotle peppers in adobo sauce. This adds a smoky heat that spice lovers will enjoy.
Alternative Serving Options
If you want a low-carb meal, try lettuce wraps. Instead of buns, use large lettuce leaves. They keep the burger juicy and fresh. You can also make black bean burger bowls. Simply place the patty on a bed of rice or quinoa. Top it with your favorite veggies and salsa for a hearty meal.
Dietary Adjustments
Making these burgers fit your diet is easy. For gluten-free versions, use gluten-free breadcrumbs. This keeps the burger tasty without the gluten. If you’re vegan, skip the eggs and use mashed flax seeds instead. This keeps the burgers bound together while being plant-based. Whether you’re vegan or vegetarian, these burgers can fit your needs. You can enjoy them without missing out on flavor.
Storage Info
How to Store Uncooked Patties
To keep uncooked patties fresh, place them in the fridge. Use an airtight container. They stay good in the fridge for about 2-3 days. If you want to keep them longer, freezing is a great option. Wrap each patty in plastic wrap or parchment paper. Then, put them in a freezer bag. They can last up to 3 months in the freezer.
Storing Cooked Black Bean Burgers
After cooking, let the black bean burgers cool down. Store them in an airtight container. This keeps them moist and flavorful. They can last in the fridge for about 4-5 days. When you want to eat them, simply reheat in a skillet or microwave. For the skillet, heat for about 3-4 minutes on medium. If using the microwave, heat for about 1-2 minutes, checking to avoid overheating.
Shelf Life
In the fridge, uncooked patties last for 2-3 days. Cooked black bean burgers stay fresh for 4-5 days. Always check for signs of spoilage. If you see mold or an off smell, it’s best to throw them away. Enjoy your spicy black bean burgers while they’re fresh!
FAQs
How do I make my spicy black bean burgers less mushy?
To make your spicy black bean burgers less mushy, focus on two main areas: ingredient adjustments and binding tips.
– Ingredient adjustments: Use less black beans and add more breadcrumbs or quinoa. This helps absorb moisture and creates a firmer texture.
– Tips for better binding: Chilling the patties for about 30 minutes in the fridge helps them hold their shape. You can also add a bit of ground flaxseed mixed with water as a natural binder.
Can I make these burgers ahead of time?
Yes, you can make these burgers ahead of time! Here are some best practices for meal prep:
– Prep the patties: Form the patties and place them on a baking sheet lined with parchment paper. You can freeze them for later use.
– Store in the fridge: If you plan to cook them within a day or two, simply cover the patties with plastic wrap and keep them in the fridge.
What can I substitute for black beans in the recipe?
If you want to substitute black beans, here are some great alternatives:
– Alternative legumes: Use kidney beans, pinto beans, or chickpeas. Each will give a different taste and texture.
– Other ingredients: You can also use lentils or cooked mushrooms for a unique flavor profile. These options provide good nutrition and maintain the burger’s heartiness.
You can create delicious spicy black bean burgers using simple, healthy ingredients. Start with black beans and quinoa, then customize them with tasty toppings. Follow clear steps to make perfect patties, and try different cooking methods. Remember the tips for texture and binding to avoid mushiness. Store uncooked or cooked burgers properly for later meals.
In summary, these burgers are easy, versatile, and packed with flavor. Enjoy experimenting with your own twists!
![To make spicy black bean burgers, you need a few key ingredients: - 1 can (15 oz) black beans, drained and rinsed - 1/2 cup cooked quinoa - 1/2 cup breadcrumbs (gluten-free if needed) These ingredients form the base of the burger. The black beans provide protein and taste. Quinoa adds texture and nutrition. Breadcrumbs help bind the mix together. You can make these burgers your own with some fun additions: - Toppings Suggestions: avocado slices, lettuce, tomato, salsa, or spicy mayo - Spice Enhancements: jalapeño and garlic for extra kick Feel free to swap ingredients based on your taste. Want more heat? Add more jalapeño. Prefer a fresh crunch? Load up on lettuce and tomato. These spicy black bean burgers are not only tasty but also healthy: - Calories per serving: About 180 - Protein: 10g - Fats: 5g - Carbs: 28g This burger packs a punch of flavor while keeping a balanced profile. It is a great option for lunch or dinner. For the full recipe, check out the details above. To make the base, start by mashing the black beans. Use a fork or a potato masher. You want them mostly smooth, but keep some chunks for texture. This adds a nice bite to your burger. Next, add the additional ingredients to the bowl. Combine cooked quinoa, breadcrumbs, chopped red onion, minced jalapeño, minced garlic, cumin, smoked paprika, soy sauce, lime juice, salt, and pepper. Mix well until all ingredients are combined. If the mixture feels too wet, add a bit more breadcrumbs. This step helps hold the patties together. Now, it’s time to shape your burgers. Divide the mixture into equal portions, about four patties. Form each portion into a round shape. If you want them to hold together better, chill the patties in the fridge for 30 minutes. This makes them firmer. For cooking, heat a non-stick skillet or grill over medium heat. Drizzle a bit of olive oil to prevent sticking. Cook the patties for about 4 to 5 minutes on each side. You want them crispy and heated through. The smell will be amazing! When it’s time to serve, choose your toppings wisely. Avocado slices add creaminess, while lettuce and tomato add freshness. Salsa or spicy mayo can enhance the flavor even more. Pair your spicy black bean burgers with a side salad or some crispy fries. This makes for a delicious meal that’s both filling and healthy. You can find the full recipe above for more details on how to make these tasty burgers! To make your spicy black bean burgers great, focus on texture. Start by mashing the black beans well, but leave some chunks. This gives your burgers a nice bite. Chilling the patties is key. After you shape them, put them in the fridge for about 30 minutes. This helps them hold together better during cooking. Baking is a great alternative to frying. Preheat your oven to 375°F (190°C) and place the patties on a baking sheet. Bake for 20-25 minutes, flipping halfway. This method makes them crispy without extra oil. You can also adjust the flavors. Want more heat? Add more jalapeño or a dash of hot sauce. Feel free to mix in fresh herbs like cilantro for a fresh twist. Binding agents are crucial. If your mixture feels too wet, add more breadcrumbs. You can also use flaxseed meal or chia seeds mixed with water for a nice binder. Watch the moisture content closely. If you use canned beans, make sure to drain them well. Excess liquid can turn your patties into a mushy mess. For the full recipe of these tasty spicy black bean burgers, check out the recipe provided above. {{image_2}} You can change the taste of your spicy black bean burgers in fun ways. One option is the Southwest spicy black bean burger. For this, add corn, diced red pepper, and taco seasoning. This gives a bold, zesty flavor. Another tasty choice is the chipotle black bean burger. Mix in chipotle peppers in adobo sauce. This adds a smoky heat that spice lovers will enjoy. If you want a low-carb meal, try lettuce wraps. Instead of buns, use large lettuce leaves. They keep the burger juicy and fresh. You can also make black bean burger bowls. Simply place the patty on a bed of rice or quinoa. Top it with your favorite veggies and salsa for a hearty meal. Making these burgers fit your diet is easy. For gluten-free versions, use gluten-free breadcrumbs. This keeps the burger tasty without the gluten. If you’re vegan, skip the eggs and use mashed flax seeds instead. This keeps the burgers bound together while being plant-based. Whether you’re vegan or vegetarian, these burgers can fit your needs. You can enjoy them without missing out on flavor. For the full recipe, check here: [Full Recipe]. To keep uncooked patties fresh, place them in the fridge. Use an airtight container. They stay good in the fridge for about 2-3 days. If you want to keep them longer, freezing is a great option. Wrap each patty in plastic wrap or parchment paper. Then, put them in a freezer bag. They can last up to 3 months in the freezer. After cooking, let the black bean burgers cool down. Store them in an airtight container. This keeps them moist and flavorful. They can last in the fridge for about 4-5 days. When you want to eat them, simply reheat in a skillet or microwave. For the skillet, heat for about 3-4 minutes on medium. If using the microwave, heat for about 1-2 minutes, checking to avoid overheating. In the fridge, uncooked patties last for 2-3 days. Cooked black bean burgers stay fresh for 4-5 days. Always check for signs of spoilage. If you see mold or an off smell, it’s best to throw them away. Enjoy your spicy black bean burgers while they’re fresh! For the full recipe, check out [Full Recipe]. To make your spicy black bean burgers less mushy, focus on two main areas: ingredient adjustments and binding tips. - Ingredient adjustments: Use less black beans and add more breadcrumbs or quinoa. This helps absorb moisture and creates a firmer texture. - Tips for better binding: Chilling the patties for about 30 minutes in the fridge helps them hold their shape. You can also add a bit of ground flaxseed mixed with water as a natural binder. Yes, you can make these burgers ahead of time! Here are some best practices for meal prep: - Prep the patties: Form the patties and place them on a baking sheet lined with parchment paper. You can freeze them for later use. - Store in the fridge: If you plan to cook them within a day or two, simply cover the patties with plastic wrap and keep them in the fridge. If you want to substitute black beans, here are some great alternatives: - Alternative legumes: Use kidney beans, pinto beans, or chickpeas. Each will give a different taste and texture. - Other ingredients: You can also use lentils or cooked mushrooms for a unique flavor profile. These options provide good nutrition and maintain the burger's heartiness. For a full recipe, check out the Spicy Black Bean Burgers section above! You can create delicious spicy black bean burgers using simple, healthy ingredients. Start with black beans and quinoa, then customize them with tasty toppings. Follow clear steps to make perfect patties, and try different cooking methods. Remember the tips for texture and binding to avoid mushiness. Store uncooked or cooked burgers properly for later meals. In summary, these burgers are easy, versatile, and packed with flavor. Enjoy experimenting with your own twists!](https://dailydishly.com/wp-content/uploads/2025/06/fb468978-fb40-4fbf-9ebe-b248e91fb409-300x300.webp)


![For creamy roasted red pepper pasta, you need: - 12 oz pasta (penne or fusilli) - 2 large red bell peppers - 1 cup heavy cream - 1/2 cup grated Parmesan cheese - 2 cloves garlic, minced - 2 tablespoons olive oil - 1 teaspoon dried basil - 1/2 teaspoon red pepper flakes (adjust for spice level) - Salt and pepper to taste - Fresh basil leaves for garnish These ingredients work together to create a rich and flavorful dish. The roasted red peppers give a sweet taste, while the cream adds a smooth texture. If you want to make this dish vegan, you can swap the heavy cream for coconut cream or a cashew cream. Use nutritional yeast instead of Parmesan cheese for a cheesy flavor. For gluten-free pasta, look for pasta made from rice, lentils, or chickpeas. If you want to make more or less pasta, here’s how to adjust the ingredients: - For every 4 oz of pasta, use about 1/3 cup of heavy cream. - For every 1 oz of cheese, use 2 tablespoons of cream. - Adjust the red bell peppers: 1 large pepper equals about 1 cup chopped. This way, you can easily scale the recipe to fit your needs. If you want the full recipe, refer to the top of the article. Start by preheating your oven to 400°F (200°C). This heat helps the peppers roast well. Place the two red bell peppers on a baking sheet. Drizzle with olive oil for flavor and moisture. Roast them for 25-30 minutes. You want the skins to char and blister. When done, take them out and let them cool. Once cool, peel off the charred skin and remove the seeds. Chop the flesh into small pieces. This step gives your pasta its rich flavor. While the peppers roast, bring a pot of water to a boil. Add salt to the water, which helps flavor the pasta. Add 12 oz of pasta, like penne or fusilli. Cook it according to the package instructions until it's al dente. This means it should be firm but not hard. Drain the pasta and save about 1 cup of the pasta water. This water helps create a creamy sauce later. Now, it’s time to make the sauce. In a blender, add the roasted red peppers, 1 cup of heavy cream, 2 cloves of minced garlic, and 1 teaspoon of dried basil. For a bit of heat, include 1/2 teaspoon of red pepper flakes. Add a pinch of salt too. Blend everything until it's smooth and creamy. In a large skillet, combine the creamy mixture with the drained pasta over medium heat. If the sauce is too thick, add a splash of reserved pasta water. Stir in 1/2 cup of grated Parmesan cheese until it melts. Taste and adjust with more salt and pepper if needed. Serve your dish hot. Garnish with fresh basil leaves and more Parmesan cheese if you like. For the full details, refer to the Full Recipe. To get the perfect pasta, cook it in a big pot of salted water. Use about a tablespoon of salt per quart. This adds flavor to your pasta. Cook it until it's al dente, which means it should still have a little bite. After draining, don't rinse your pasta. This keeps the starch that helps the sauce stick. If you like more heat, add extra red pepper flakes. Start with a pinch and taste. You can always add more later. If it's too spicy, balance it with more cream or cheese. The goal is to make it just right for your taste. For a smooth sauce, blend the roasted peppers well. Add the heavy cream slowly while blending. If the sauce is too thick, use some reserved pasta water to thin it. This water has starch that helps the sauce cling to the pasta. Don't forget to stir in the Parmesan cheese at the end. It adds creaminess and flavor. For the complete recipe, check out the Full Recipe. {{image_2}} You can make this dish vegetarian by using vegetable broth instead of chicken broth. Swap out the Parmesan for a plant-based cheese. You can also add veggies like spinach or mushrooms for extra flavor. They will add texture and nutrients. For a heartier meal, consider adding chicken or shrimp. Cook the protein separately and add it to the pasta after mixing in the sauce. Grilled chicken breast or sautéed shrimp both work well. They soak up the creamy flavors nicely. If you need a gluten-free option, use gluten-free pasta. Brands like brown rice or chickpea pasta are great choices. They cook similarly and absorb the sauce well. Just remember to adjust cooking times as needed for different pasta types. You can find the full recipe for this dish here: [Full Recipe]. To store leftovers, let the pasta cool first. Use an airtight container. This keeps the flavors fresh. Place in the fridge for up to three days. If you want to keep it longer, freeze it. When reheating, add a splash of water or cream. This helps restore the creamy texture. Warm it slowly on the stove over low heat. Stir often to avoid burning. You can also use the microwave, but watch it closely. You can freeze the roasted red pepper sauce. Let it cool, then pour it into freezer bags. Flatten the bags to save space. It will last up to three months. When ready to use, thaw it overnight in the fridge before reheating. Yes, you can use many types of pasta. Options like spaghetti, fettuccine, or even gluten-free pasta work well. The key is to choose a shape that holds sauce nicely. Try different types to find your favorite! You can make the sauce cream-free by using cashews or silken tofu. Blend soaked cashews or tofu with roasted peppers and a little vegetable broth. This gives a creamy texture while keeping it dairy-free. Adjust seasonings to taste. This dish pairs well with a fresh salad or garlic bread. You can also serve it with grilled vegetables or a light protein, like chicken or shrimp. These sides enhance the meal and make it more filling. For more ideas, check the Full Recipe. This blog post covered all you need for creamy roasted red pepper pasta. I shared ingredient lists, cooking steps, and tips for the best results. You can explore variations for diets and learn how to store leftovers. Remember, cooking is about having fun and trying new things. Your creations can be as unique as you are. Enjoy each bite and keep experimenting in the kitchen!](https://dailydishly.com/wp-content/uploads/2025/07/67c62068-3baa-44bf-b117-e4c3c451c449-768x768.webp)

![- 400g spaghetti - 6 cloves garlic, thinly sliced - ½ cup extra virgin olive oil - 1 teaspoon red pepper flakes - Grated Parmesan cheese for serving - Freshly cracked black pepper - 1 cup fresh parsley, chopped - 1 lemon (zest and juice) - Salt to taste When making Spaghetti Aglio e Olio, you want to keep it simple. The main ingredients shine through. Start with quality spaghetti, as it forms the base of your dish. I always use 400g for four servings. For that distinct flavor, thinly slice 6 cloves of garlic. The garlic adds a rich aroma and taste as it cooks. Don't forget the olive oil! Use ½ cup of extra virgin olive oil to sauté the garlic. To kick it up a notch, consider some optional ingredients. A teaspoon of red pepper flakes adds heat. Adjust it to fit your spice level. If you love cheese, grated Parmesan is a nice touch for serving. Freshly cracked black pepper adds a lovely finish. For freshness, I like to add a cup of chopped parsley. It brings color and taste to the dish. The zest and juice from one lemon brighten the flavors. Salt is essential for enhancing every ingredient. Feel free to adjust the salt to your preference. This recipe is all about balance and freshness. Gather these ingredients for a quick and delicious meal. For the complete recipe, check out the [Full Recipe]. 1. Boil water and salt: Start by filling a large pot with water. Add a generous amount of salt to make it flavorful. Bring it to a rolling boil. 2. Cook until al dente: Add the spaghetti to the boiling water. Stir occasionally. Cook according to package instructions until it is al dente, which means firm to the bite. 3. Reserve pasta water before draining: Before you drain the pasta, remember to save about one cup of that starchy pasta water. It helps to make the sauce creamy later. 1. Heat olive oil in a skillet: In a large skillet, pour in the olive oil. Turn the heat to medium. Let the oil warm up but not smoke. 2. Sauté garlic until golden: Add the thinly sliced garlic to the warm oil. Cook it gently for about 2-3 minutes. Watch it closely until it turns golden and fragrant. Be careful not to let it burn. 3. Mix in red pepper flakes: Stir in the red pepper flakes. Let them cook for an extra minute. This step adds a nice kick to the oil. 1. Toss spaghetti with garlic oil: Add the drained spaghetti to the skillet with the garlic oil. Toss it well to coat every strand. 2. Add reserved pasta water: Pour in a bit of the reserved pasta water. This helps to keep the spaghetti moist and binds the flavors. 3. Incorporate parsley, lemon, and seasoning: Off the heat, mix in the chopped parsley, lemon zest, and juice. Taste it and adjust the salt if needed. This easy recipe gives you a simple yet flavorful dish. For the full recipe, check out the details above. Enjoy every bite of your savory spaghetti aglio e olio! - Avoid overcooking pasta: Cook spaghetti until it's al dente. This means it should be firm when you bite into it. This texture helps the pasta hold up better when you mix it with the sauce. - Importance of seasoning the boiling water: Always add salt to your boiling water. This helps flavor the pasta from the inside. Use about 1-2 tablespoons for every 4 quarts of water. - Timing for sautéing garlic: Add sliced garlic to the oil once it’s hot. Cook it for about 2-3 minutes. This timing helps unlock its rich flavor without going too far. - How to avoid burning garlic: Keep an eye on the garlic as it cooks. If it starts to turn brown too quickly, lower the heat. Burnt garlic can taste bitter and ruin your dish. - Presentation tips for a restaurant-style dish: Serve your spaghetti on warmed plates. This keeps the pasta hot longer. Add a sprinkle of fresh parsley on top for color. A lemon wedge on the side adds a nice touch. - Pairing options for sides or drinks: A simple green salad pairs well with spaghetti. You can also serve it with garlic bread for a full meal. For drinks, a glass of white wine complements the flavors nicely. For more details on how to make this dish, check out the Full Recipe. {{image_2}} You can change some ingredients to fit your needs. If you want gluten-free spaghetti, you can find many great options in stores. These work well in this recipe. If you prefer garlic-infused oil, use it instead of plain olive oil. This option adds even more garlic flavor to your dish. Adding vegetables makes this dish even better. Try mixing in fresh spinach or sweet cherry tomatoes. These add color and nutrients. You can also mix in proteins like shrimp or grilled chicken. Both options create a heartier meal and offer more flavors. Fresh herbs can brighten up this dish. Basil or oregano are great choices. Just chop them finely and mix them in at the end. If you like heat, adjust the spice level. Use different types of peppers, like jalapeños or serranos, to switch things up. Each pepper brings its own unique flavor to your spaghetti. For the Full Recipe, check out the complete details! To keep your Spaghetti Aglio e Olio fresh, store it in the fridge. Place the leftover pasta in an airtight container. This helps to keep moisture in and prevents the pasta from drying out. You can also cover the container tightly with plastic wrap. The best containers for storage are glass or BPA-free plastic. Glass containers allow you to see the food inside. They also do not absorb odors. Plastic containers are lightweight and easy to stack. Just make sure they seal well. When it's time to eat your leftovers, you have two options: the microwave or the stove. The microwave is quick. Place the pasta in a microwave-safe dish. Cover it with a lid or damp paper towel to keep moisture in. Heat for 1-2 minutes, stirring halfway through. Using the stove gives you better results. Add a splash of olive oil or water to a skillet. Heat over low to medium heat. Stir gently until warm. This method helps keep the pasta moist. Yes, you can freeze Spaghetti Aglio e Olio! Freezing is great for making meals ahead of time. First, let the pasta cool completely. Then, place it in a freezer-safe container. Make sure to leave some space at the top for expansion. To freeze, follow these steps: 1. Portion the pasta into single servings. 2. Seal each portion tightly in a plastic bag or container. 3. Label the bags with the date for easy tracking. When you want to eat it, thaw it in the fridge overnight. Reheat as described above. Enjoy your easy dinner later! For the full recipe, check the Full Recipe section above. Spaghetti Aglio e Olio can last in the fridge for up to three days. Store it in an airtight container to keep it fresh. It’s best to eat it within this time for the best flavor. Yes, you can make Spaghetti Aglio e Olio ahead of time. Cook the pasta and sauce, then cool them down. You can store them separately in the fridge. When ready to serve, just reheat and combine. This dish is quick to prepare, so making it fresh is great too. You can serve Spaghetti Aglio e Olio with many tasty options. Consider garlic bread for a crunchy side. A simple salad with fresh greens works well too. You might also enjoy antipasto or bruschetta to start your meal. To reheat Spaghetti Aglio e Olio, follow these steps: 1. Place the pasta in a skillet over low heat. 2. Add a splash of reserved pasta water or olive oil to prevent sticking. 3. Stir gently until heated through, about 5 minutes. 4. Serve hot to enjoy the full flavor of the dish. For the full recipe, check out the detailed instructions for a perfect dish every time! Spaghetti Aglio e Olio is simple yet flavorful. We covered the main and optional ingredients, how to cook and combine them, plus tips for the best results. Variations allow for personal twists, making this dish your own. Proper storage and reheating ensure you enjoy it later. Whether you stick to tradition or experiment, this dish will impress. Enjoy cooking and sharing this tasty meal!](https://dailydishly.com/wp-content/uploads/2025/05/5a127dfa-b261-495f-ad6e-6f110f891143-768x768.webp)

![To make Chicken and Cheese Enchiladas Casserole, you need the right ingredients. Here they are: - 2 cups cooked chicken, shredded - 1 can (15 oz) black beans, rinsed and drained - 1 cup frozen corn - 1 can (10 oz) enchilada sauce (red or green) - 2 cups shredded cheese (cheddar and Monterey Jack mix) - 8 corn tortillas - 1 small red onion, diced - 1 teaspoon ground cumin - 1 teaspoon chili powder - Salt and pepper to taste - Fresh cilantro, for garnish - Sliced jalapeños, for garnish (optional) Each ingredient serves a purpose. The chicken adds protein, while the beans and corn provide fiber. The enchilada sauce gives a rich flavor. The cheese melts beautifully, creating a creamy texture. Tortillas hold it all together. Don't forget the spices! They bring warmth and depth to the dish. Using fresh ingredients makes a big difference. Fresh cilantro adds color and bright flavor. If you want a kick, sliced jalapeños can spice things up. For a full guide on making this dish, check the Full Recipe. - Preheat the oven to 350°F (175°C). - In a large bowl, mix the cooked chicken, black beans, corn, half the enchilada sauce, cumin, chili powder, diced onion, salt, and pepper. Stir it well. This mix gives your casserole a great flavor. - Take a 9x13 inch baking dish and spread a thin layer of the remaining enchilada sauce on the bottom. - Place 4 corn tortillas over the sauce. Overlap them slightly. This helps keep everything together. - Spoon half of your chicken and bean mix over the tortillas. Then sprinkle half of the cheese on top. - Repeat this with another layer of tortillas, the rest of the chicken mixture, and the remaining cheese. - End with a final layer of tortillas and drizzle any remaining enchilada sauce on top. This keeps the dish moist. - Cover the baking dish with aluminum foil. Bake in the preheated oven for 20 minutes. - After 20 minutes, remove the foil. Bake for an extra 10-15 minutes. This lets the cheese get bubbly and golden brown. - Once done, take it out and let it sit for about 5 minutes before slicing. This helps it hold its shape. - For the full recipe, check the detailed instructions above. To make shredding chicken easy, use two forks. Hold one fork in each hand. Pull the chicken apart in opposite directions. This method works great and saves time. You can also use a stand mixer with a paddle attachment. Just place the cooked chicken in the bowl and mix on low speed. To prevent soggy tortillas, lightly fry them in oil first. This step makes them crisp and adds flavor. You can also warm them in the oven for a few minutes. This keeps them from getting too soft when layered in the casserole. For a great side dish, serve Mexican rice or refried beans. These pair nicely with the creamy casserole. You can also add a fresh green salad on the side. A simple salad with lettuce, tomatoes, and avocado adds freshness. To enhance your casserole's look, garnish with fresh cilantro and jalapeño slices. These colorful toppings add a nice touch. A drizzle of extra enchilada sauce can also make it pop. You can serve the casserole on individual plates for a nice presentation. For the full recipe, check out the Chicken and Cheese Enchiladas Casserole section above. {{image_2}} If you have leftover ingredients, use them! You can swap cooked chicken for shredded beef or even pork. If you have extra veggies, toss in bell peppers or zucchini for added color and nutrients. You can also switch the black beans for pinto beans or kidney beans. They add a nice texture and flavor. For a twist, try chickpeas for a protein boost. Adjust the spice levels to fit your taste. Use mild chili powder for a gentle heat or add cayenne pepper for a kick. You can also mix in diced green chiles for extra flavor without too much heat. If you want a meatless version, skip the chicken and add more beans. You can use lentils or quinoa for protein. Toss in spinach or kale for a healthy touch. Enjoy the variety! For the full recipe, check out the [Full Recipe]. To keep your Chicken and Cheese Enchiladas Casserole fresh, store it in an airtight container in the fridge. It will last for about 3 to 4 days. If you want to keep it longer, freeze it. Wrap it well in plastic wrap and aluminum foil. It can last in the freezer for up to 3 months. Just remember to label it with the date. When you're ready to enjoy leftovers, preheat your oven to 350°F (175°C). Place the casserole in an oven-safe dish. Cover it with aluminum foil to keep it moist. Bake for about 20 minutes. If you prefer to use a microwave, slice a portion and place it on a microwave-safe plate. Heat it for 1-2 minutes, checking often. Make sure it is hot throughout. Avoid overheating, as it can make the dish dry. For the best taste, use the oven when possible. How can I make Chicken and Cheese Enchiladas Casserole gluten-free? To make this casserole gluten-free, use corn tortillas. Check that your enchilada sauce is gluten-free too. Many brands offer gluten-free options. Can I prepare this casserole in advance? Yes, you can prepare it a day ahead. Assemble the casserole, then cover and refrigerate. Bake it just before serving. What are the best sides to serve with Chicken and Cheese Enchiladas Casserole? Some great sides include refried beans, Mexican rice, or a fresh salad. These add color and flavor to your meal. Is it possible to add more vegetables to the recipe? Absolutely! You can add bell peppers, zucchini, or spinach. Just chop them small and mix them in with the chicken. Can I use other types of cheese besides cheddar and Monterey Jack? Yes, feel free to experiment! You can use pepper jack for spice or even queso fresco for a creamy touch. This post covered the tasty Chicken and Cheese Enchiladas Casserole. We looked at the main ingredients, steps to create it, tips to perfect it, and storage methods. You can customize this dish easily with varied ingredients or toppings. Remember, cooking should be fun and creative. I hope you enjoy making this hearty casserole as much as I do. Happy cooking!](https://dailydishly.com/wp-content/uploads/2025/06/88aadb9b-53ae-4392-a371-8958c664e0d2-768x768.webp)