Spicy Buffalo Chicken Wraps Bold and Flavorful Meal

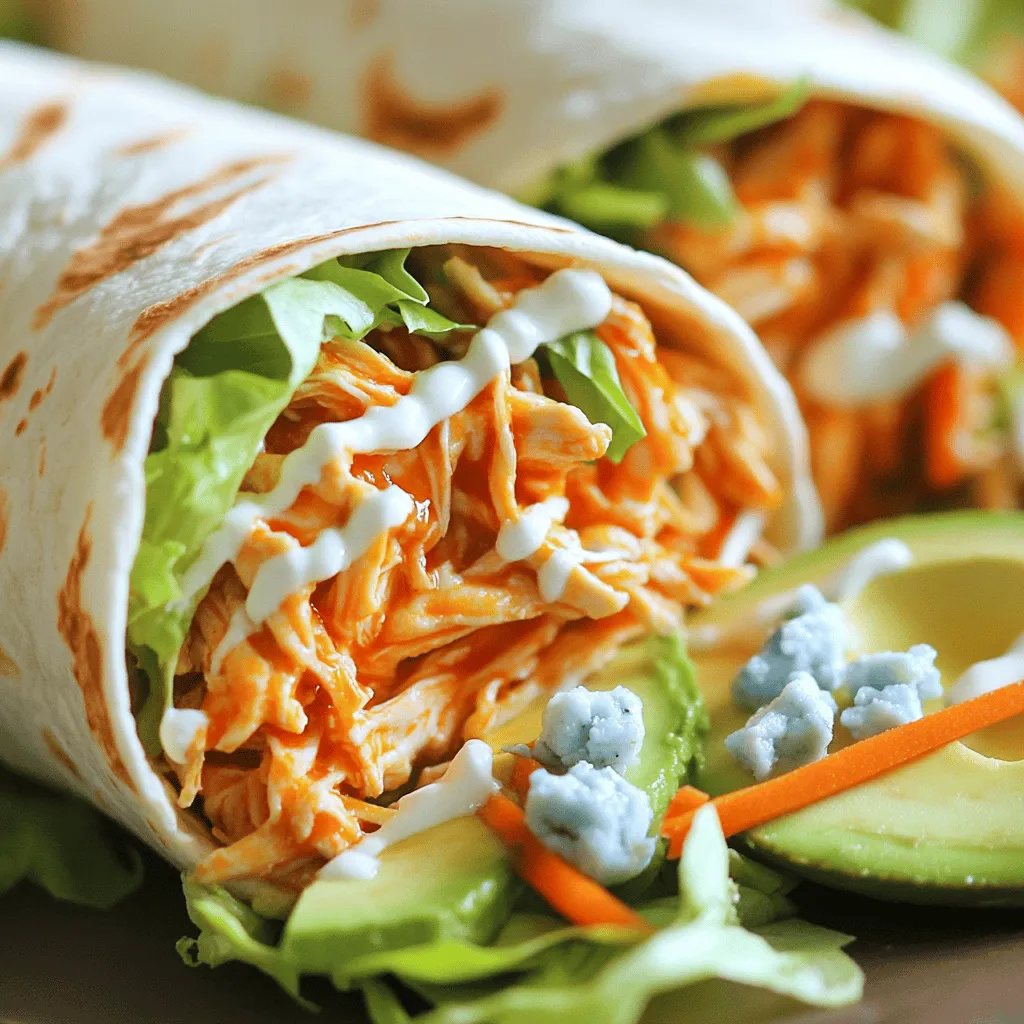
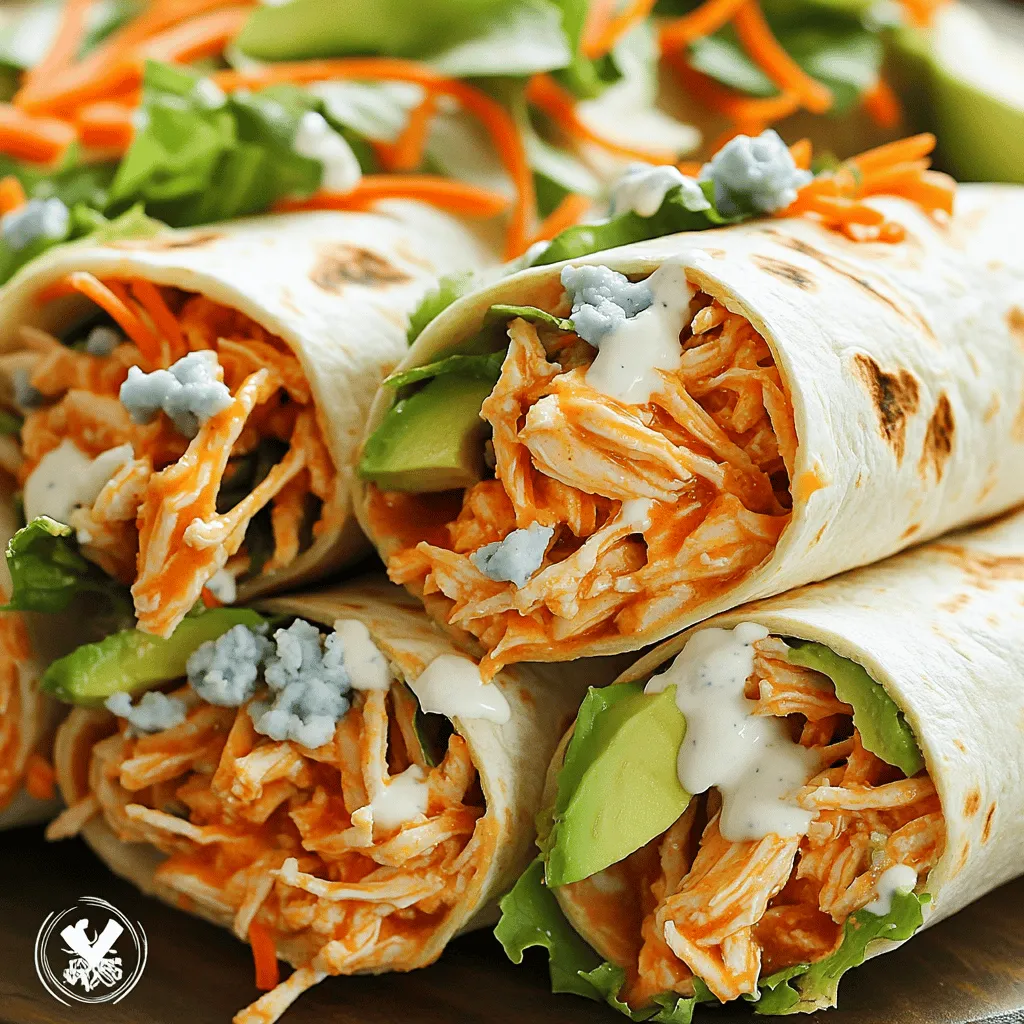
Get ready to spice up your lunch with my bold and flavorful Spicy Buffalo Chicken Wraps! With tender chicken mixed in zesty buffalo sauce and fresh veggies, these wraps are a tasty twist on a classic meal. In this post, I’ll guide you through easy steps to create a wrap that’s not just filling but also bursting with flavor. Perfect for busy days or game nights, let’s dive in and make your taste buds dance!
Ingredients
Main Ingredients
– 2 cups cooked chicken, shredded
– ½ cup buffalo sauce
– 1 cup lettuce, shredded
Additional Ingredients
– ½ cup ripe avocado, sliced
– ½ cup shredded carrots
– ½ cup blue cheese crumbles (optional)
Tortillas and Dressing
– 4 large flour tortillas
– 2 tablespoons ranch dressing
– Salt and pepper to taste
To make these spicy buffalo chicken wraps, start with the main ingredients. Shredded chicken is key. You can use rotisserie chicken for ease. The buffalo sauce brings the heat. Adjust it based on your spice preference. Fresh lettuce adds crunch and freshness.
Next, we add extra ingredients for flavor and texture. Sliced avocado gives a creamy touch. Shredded carrots add sweetness and color. Blue cheese crumbles can enhance flavor but are optional.
Finally, choose large flour tortillas to wrap everything up. Ranch dressing complements the spice well. Don’t forget to season with salt and pepper for taste.
Step-by-Step Instructions
Preparing the Chicken
First, take your cooked chicken and shred it into small pieces. Add the shredded chicken to a mixing bowl. Pour in the buffalo sauce and stir well. Make sure every piece of chicken gets coated. If you like it hotter, add more buffalo sauce. If you want it milder, use less. This step is key for flavor.
Cooking the Chicken
Next, grab a skillet and heat some olive oil over medium heat. Once the oil is hot, add the buffalo chicken mixture. Stir it around and cook for about five minutes. You want it heated through but not dry. This step blends the flavors nicely.
Assembling the Wrap
Now, lay your flour tortillas flat on a clean surface. Take a tablespoon of ranch dressing and spread it in the center of each tortilla. Then, evenly distribute the sautéed buffalo chicken mixture on top. Add your veggies, like lettuce, avocado, and carrots. If you like blue cheese, sprinkle some on too.
To wrap it up, fold in the sides of the tortilla first. Then, roll it from the bottom to the top, making sure it’s tight. This keeps all the tasty bits inside. Finally, slice the wraps in half diagonally. You can garnish with fresh cilantro or parsley if you like. Enjoy your Spicy Buffalo Chicken Wraps!
Tips & Tricks
Choosing the Right Chicken
You have great options for cooked chicken. Rotisserie chicken works well. It’s tender and full of flavor. Grilled chicken is another good choice. It adds a nice smoky taste. Shredding the chicken makes it easy to mix with buffalo sauce. Both options save you time and effort.
Adjusting Spice Levels
You can easily adjust the spice level. Add more buffalo sauce for extra heat. If you want it milder, just use less sauce. Balancing spice with creamy ingredients helps too. A little ranch dressing or avocado can cool things down. These creamy ingredients mix well with the spicy chicken. They create a nice contrast.
Wrapping Techniques
Wrapping is important to keep everything inside. Make sure to fold in the sides first. Then, roll from the bottom to the top. This helps prevent spillage. For a neat presentation, slice the wrap diagonally. It looks nice and makes it easy to eat. You’ll impress your friends with these tasty, well-wrapped meals.

Variations
Alternative Proteins
You can switch up the protein in your wraps. Turkey makes a great choice. It has a mild flavor that blends well with buffalo sauce. Plus, it’s leaner than chicken. If you want a plant-based option, use tofu. Firm tofu absorbs flavors well. Just press it to remove water, then cube it. Sauté with buffalo sauce until it’s warm.
Extra Flavor Boosts
To amp up the heat, add jalapeños. They bring a fresh kick to each bite. You can slice them thin or dice them small. Another option is to drizzle in extra hot sauce. This adds a layer of spice that many love. For more depth of flavor, consider herbs and spices. Garlic powder, onion powder, or smoked paprika work well. They enhance the taste without overpowering the dish.
Different Dressings
Try different dressings to mix things up. Blue cheese dressing pairs perfectly with the buffalo taste. It adds creaminess and tang. If blue cheese isn’t your thing, try Caesar dressing. Its rich flavor complements the spicy chicken nicely. You can even make your own ranch dressing for a fun twist.
Storage Info
Storing Leftovers
To keep your spicy buffalo chicken wraps fresh, wrap them tightly in plastic wrap or foil. Place them in an airtight container. This helps prevent air from drying them out. Store them in the fridge. Make sure to eat the leftovers within three days for the best taste.
Freezing Options
You can freeze these wraps for later. Wrap each one in plastic wrap and then in foil. This double layer keeps them safe from freezer burn. When you’re ready to eat, let them thaw in the fridge overnight. Reheat them in the oven for about 15 minutes at 350°F. This keeps the wrap crispy.
Shelf Life
Spicy buffalo chicken wraps last about three to four days in the fridge. If they contain fresh veggies, use them sooner. Always check for any signs of spoilage before eating. If it looks or smells off, it’s best to toss it. Enjoy your meal while it’s fresh for the best flavor!
FAQs
Can I make Spicy Buffalo Chicken Wraps ahead of time?
Yes, you can make these wraps ahead of time. To meal prep, follow these tips:
– Cook the chicken and mix it with buffalo sauce. Store this in a container.
– Prepare your veggies, like lettuce, avocado, and carrots. Keep them separate.
– Assemble the wraps just before eating. This keeps the tortillas from getting soggy.
– You can also wrap them tightly in foil or plastic wrap. This helps keep them fresh.
What can I serve with these wraps?
These wraps pair well with different sides and dips. Here are some ideas:
– Serve with carrot sticks or celery for crunch.
– Try a side of potato wedges for a filling meal.
– Pair with ranch or blue cheese dressing for dipping.
– A simple green salad adds freshness and balance.
Is there a vegetarian version of this recipe?
Yes, you can make a vegetarian version. Here are some plant-based alternatives:
– Use shredded jackfruit or tofu instead of chicken.
– Toss in some roasted veggies for flavor.
– Replace the ranch dressing with a vegan option.
– Add more avocado to keep it creamy and satisfying.
This blog post covered how to make delicious spicy buffalo chicken wraps. We shared main and additional ingredients, step-by-step instructions, and useful tips. You can choose chicken or alternatives and even adjust spice levels to suit your taste. Remember to store your leftovers properly and have fun experimenting with different flavors. Enjoy making these wraps, and don’t forget to share them with friends. You’ll find they are a tasty option for any meal!


![To make a tasty Roasted Red Pepper Quinoa Salad, gather these ingredients: - 1 cup quinoa, rinsed - 2 large red bell peppers - 1/2 cup cherry tomatoes, halved - 1/4 cup red onion, finely chopped - 1/2 cup cucumber, diced - 1/4 cup feta cheese, crumbled (optional) - 3 tablespoons olive oil - 2 tablespoons balsamic vinegar - 1 teaspoon garlic powder - Salt and pepper to taste - Fresh parsley, chopped for garnish This salad is not just delicious; it’s healthy too. Here’s why each ingredient matters: - Quinoa: A great source of protein and fiber. It helps keep you full and satisfied. - Red bell peppers: High in vitamins A and C, these add color and crunch. They also support your immune system. - Cherry tomatoes: Packed with antioxidants, they boost heart health and add sweetness. - Red onion: Contains quercetin, which may help lower blood pressure and cholesterol. - Cucumber: Hydrating and low in calories, cucumbers make your salad light and fresh. - Feta cheese: Adds creaminess and flavor; it’s a source of calcium. - Olive oil: A source of healthy fats, it’s good for your heart. - Balsamic vinegar: Adds tanginess and may help regulate blood sugar levels. - Garlic powder: Great for flavor, it also has health benefits like boosting your immune system. - Fresh parsley: Rich in vitamins K and C, it also freshens your breath. Fresh veggies make the salad shine. Here are some tips: - Red bell peppers: Look for bright colors and firm skin. Avoid soft spots. - Cherry tomatoes: Choose shiny, plump tomatoes. They should smell sweet. - Cucumber: Pick cucumbers that feel firm and are dark green. - Red onion: Look for heavy onions with smooth skin. Avoid any that feel soft or have dark spots. - Fresh parsley: Choose parsley that is bright green and crisp. Avoid yellow or wilting leaves. When you use fresh ingredients, your Roasted Red Pepper Quinoa Salad will taste amazing. Don't forget to check the [Full Recipe] for all the steps! To make the quinoa, start by rinsing one cup under cold water. This helps remove any bitter taste. In a medium saucepan, mix the rinsed quinoa with two cups of water. Bring it to a boil over high heat. Once it boils, lower the heat to a simmer. Cover the pot and let it cook for about 15 minutes. The water should absorb fully. After that, fluff the quinoa with a fork and let it cool. This fluffy base gives the salad its nice texture. Next, we need to roast the red peppers. Preheat your oven to 425°F (220°C). Cut the peppers in half and remove the seeds. Place them skin-side up on a baking sheet. Roast them for about 25 minutes. You want the skins to be blistered and slightly charred. Once roasted, take them out and let them cool. After cooling, peel off the skin and chop the peppers into bite-sized pieces. This smoky flavor adds depth to our salad. Now it’s time to bring everything together. In a large mixing bowl, combine the cooled quinoa, chopped roasted peppers, halved cherry tomatoes, diced cucumber, and finely chopped red onion. To make the dressing, whisk together three tablespoons of olive oil, two tablespoons of balsamic vinegar, one teaspoon of garlic powder, and salt and pepper to taste in a small bowl. Pour this dressing over the salad mixture. Toss gently to combine everything well. If you like, add some crumbled feta cheese for extra creaminess. Finally, garnish with fresh parsley before serving. You can find the full recipe here. To get the best texture for your quinoa, rinse it well. This step removes any bitterness. Use a fine mesh strainer and run cold water over the quinoa for about a minute. After rinsing, cook it with a 2:1 water-to-quinoa ratio. Bring it to a boil, then lower the heat and cover it. Let it simmer for 15 minutes. When done, fluff it with a fork. This keeps the grains separate and light. Use fresh herbs to boost the flavor of your salad. Fresh parsley adds brightness. You can also try basil or cilantro for a twist. For extra flavor, add spices like cumin or smoked paprika. These spices will give depth and warmth to your dish. Just a pinch can make a big difference. Mix them into your dressing or sprinkle them on top before serving. A beautiful presentation makes your salad more inviting. Use a large, shallow bowl to showcase the colors. Arrange the ingredients in sections for a vibrant look. You can also serve it in individual bowls for a personal touch. Garnish with extra parsley or a sprinkle of feta on top. Drizzle a little olive oil or balsamic vinegar just before serving to add shine. Check out the Full Recipe for more serving ideas! {{image_2}} To make this salad vegan, skip the feta cheese. You can add nuts or seeds for creaminess. Toasted sunflower seeds or sliced almonds work well. They add crunch and flavor without dairy. You can also swap balsamic vinegar for a splash of lemon juice. This keeps the salad bright and fresh. Good news! Quinoa is naturally gluten-free. This salad is a great choice for those with gluten issues. Just ensure that all your other ingredients are also gluten-free. Check labels on dressings and canned items. You can enjoy this dish without worry. Want to boost the protein? You have options! Chickpeas are a great choice. They add fiber and taste. Just rinse and toss them in. Grilled chicken is another option. Cook it simply with salt and pepper, then slice it up. This makes the salad filling and tasty. Feel free to mix and match proteins based on your needs. For the full recipe, check out the details above. To keep your roasted red pepper quinoa salad fresh, store it in an airtight container. This will help lock in flavor and moisture. If you have extra dressing, store it separately. This way, the salad won’t get soggy. Place the container in the fridge right away. You can eat this salad cold, but if you prefer it warm, reheat it gently. Use the microwave for quick warming. Heat for 30 seconds, then stir. Check if it’s warm enough. You can also use a skillet. Heat on low for a few minutes, stirring often. This salad stays fresh in the fridge for about three days. After that, the veggies may lose their crunch, and the flavors might fade. Always check for any strange smells or changes in color before eating. If you see any signs of spoilage, it’s best to toss it out. Enjoy your meal while it's fresh! For the complete recipe, see the [Full Recipe]. Yes, you can make this salad ahead of time. I often prepare it in the morning for lunch later. The flavors blend well after sitting for a few hours. Just keep it in the fridge. If you want, hold off on adding the dressing until you're ready to eat. This keeps everything fresh and crisp. If you need a substitute for quinoa, try brown rice or farro. Both add great texture. You can also use couscous or bulgur for a quick cook time. Each option gives a unique taste and feel. Just make sure to adjust the cooking time based on what you choose. To adjust spice levels, use less garlic powder or add more veggies. If you like heat, try adding red pepper flakes or diced jalapeños. For a milder taste, skip the feta cheese. Taste as you go, so you get it just right for you. This blog post covered how to create a tasty salad. We discussed each ingredient, their benefits, and how to choose fresh veggies. You learned clear steps to prepare quinoa, roast peppers, and mix your salad well. We shared tips for perfect texture, flavor boosts, and neat serving ideas. You can also explore vegan or gluten-free options and add proteins. Lastly, proper storage keeps your leftovers fresh. Use this guide to enjoy healthy salads any time!](https://dailydishly.com/wp-content/uploads/2025/06/1f28db07-8093-4cb7-8796-796da85cb13a-768x768.webp)
![For a vibrant and tasty treat, use a mix of colorful fruits. Here’s what you need: - 1 cup strawberries, hulled - 1 cup orange segments - 1 cup pineapple chunks - 1 cup green grapes - 1 cup blueberries - 1 cup purple grapes or blackberries These fruits not only look great, but they also pack in vitamins. Each fruit adds its own flavor and texture. You can choose fresh, ripe fruits for the best taste. If you want to add a bit of sweetness, consider these options: - 2 tablespoons honey (optional) Honey brings a natural sweetness to the skewers. Drizzle it on before serving. It works well with all the fruits. Garnishing makes your skewers look even better. Use fresh mint leaves for a pop of color. Arrange the skewers on a platter for a fun display. You can also place them in a glass jar for a playful touch. This way, everyone can grab their own skewer! For the full recipe, check the detailed steps to make these beautiful treats. Start by washing all the fruits well. Rinse strawberries, grapes, blueberries, and oranges under cool water. Hull the strawberries, removing the green tops. Cut large strawberries in half for easier skewering. Peel the oranges and break them into segments. For the pineapple, slice it into bite-sized pieces. Finally, rinse the green and purple grapes. Grab wooden skewers and now it’s time to thread the fruits. Begin with a strawberry, then add an orange segment. Next, add a pineapple chunk and follow with a green grape. Then, add a blueberry and finish with a purple grape or blackberry. Aim for a vibrant pattern with all the colors of the rainbow. Each skewer should look fun and inviting! If you want to add a bit of sweetness, drizzle honey over the skewers. This step is optional, but it can enhance the flavors. For a refreshing treat, chill the skewers in the fridge for about 30 minutes before serving. Arrange them on a lovely platter and add fresh mint leaves for a pop of color. These simple steps make your rainbow fruit skewers look and taste amazing. For more detailed instructions, check the Full Recipe. Choosing ripe fruits is key for tasty skewers. Look for bright colors and firm texture. For strawberries, pick those that are deep red. Oranges should feel heavy and have smooth skin. Pineapples should have a sweet smell and give slightly when pressed. Grapes are ripe when they are plump and not wrinkled. Blueberries should be deep blue, while purple grapes should show no signs of green. When skewering, use sturdy wooden sticks or metal skewers. Start with a strawberry at the bottom. Follow with an orange segment and then a pineapple chunk. Next, add a green grape and a blueberry. Finish with a purple grape or blackberry on top. This order keeps the colors bright and fun. Space the fruits a bit apart to allow for easy eating. For parties, arrange your skewers on a big platter. Display them upright in a tall glass or jar. This makes them easy to grab. You can add a small bowl of honey for dipping. Fresh mint leaves add a nice touch and flavor. Guests will love the colors and the taste! For more ideas, check out the Full Recipe. {{image_2}} You can switch up the fruits in your skewers. Try using kiwi instead of orange for a tangy taste. Swap in mango for a sweeter flavor, or use raspberries for a tart kick. Here are some great options: - Kiwi - Mango - Raspberries - Peaches - Apples These fruits add different colors, flavors, and textures. You can mix and match based on what you like. Get creative with your combinations! Dips can make your fruit skewers even more fun. You can serve them with yogurt or chocolate sauce. Here are some tasty ideas: - Vanilla yogurt - Honey yogurt - Chocolate sauce - Nut butter Dipping adds a new layer of flavor. You can make a small bowl for each dip. This way, everyone can enjoy their favorite! Make your skewers special for holidays or parties. For a birthday, use colorful sprinkles on your yogurt dip. For summer picnics, create a “beach” theme with coconut flakes. You can also arrange the fruits in shapes, like stars or hearts. This adds a fun touch to your dish. For more details on making these colorful treats, check the Full Recipe. To keep your rainbow fruit skewers fresh, store them in the fridge. Place them in an airtight container. This helps prevent the fruits from drying out or absorbing odors. If you plan to serve them later, keep the honey separate until just before serving. This way, the skewers stay crisp and colorful. When prepping your skewers, wash and cut your fruits ahead of time. Keep them in separate containers for easy access. This makes it simple to assemble the skewers when you’re ready. If you want to make them in advance, prepare them a few hours before serving. Just remember to refrigerate them to keep them fresh. Most fruits have a good shelf life when stored correctly. Here’s a quick guide: - Strawberries: 3–5 days - Oranges: 1–2 weeks - Pineapple: 3–5 days - Grapes: 1 week - Blueberries: 1 week - Blackberries: 3–5 days Always check for freshness before using any fruit. By following these tips, your rainbow fruit skewers will stay vibrant, tasty, and ready to enjoy! For the full recipe, check back on the main article. Yes, you can use frozen fruits for skewers. However, they may not hold their shape well. Frozen fruits often lose some water when thawed. This can make them mushy. If you want to use them, let them thaw first. Pat them dry with a towel to reduce excess moisture. This way, they won’t drip and make a mess. To boost the nutrition of your rainbow fruit skewers, consider these tips: - Add a source of protein. Use yogurt, cheese cubes, or nuts. - Include seeds. Sprinkle chia or flaxseed on the fruit. - Use whole fruits instead of fruit juice. Whole fruits have more fiber. - Mix in some veggies. Cherry tomatoes or cucumber slices can add crunch. These small changes can make your skewers even healthier without losing flavor. For a summer picnic, the best fruits are those that are sweet and refreshing. Here are some great choices: - Strawberries: Juicy and easy to eat. - Watermelon: Hydrating and fun to slice. - Pineapple: Sweet and tangy. - Grapes: Bite-sized and portable. - Blueberries: Packed with antioxidants. - Raspberries: Tart and flavorful. These fruits not only taste great but also look beautiful on your skewers. You can find the full recipe for rainbow fruit skewers [here]. Enjoy! Rainbow fruit skewers are fun and easy to make. We covered the best fruits, optional sweeteners, and cool presentation ideas. You learned how to prep the fruit and assemble the skewers step by step. I shared tips on choosing ripe fruit and serving them at gatherings. We also explored variations, like adding dips and themed designs. Finally, I discussed how to store your skewers for freshness. Now, grab your favorites and get creative with your skewers! Enjoy these tasty treats while having fun with friends and family.](https://dailydishly.com/wp-content/uploads/2025/06/1f4123b9-dd53-4d15-af26-e58167d567ef-768x768.webp)


