Spicy Chicken Pad Thai Flavorful and Simple Delight

Craving a dish that’s both spicy and satisfying? Our Spicy Chicken Pad Thai is just what you need! This easy recipe brings bold flavors and fresh ingredients right to your table. With just a few simple steps, you’ll create a meal that impresses. Whether you’re a novice cook or a kitchen pro, I’ll show you how to make this delightful dish full of flavor. Ready to spice up your dinner? Let’s dive in!
Ingredients
Main Ingredients
– 8 oz rice noodles
– 1 pound chicken breast, thinly sliced
– 2 tablespoons vegetable oil
– 2 cloves garlic, minced
Additional Ingredients
– 2 cups bean sprouts
– 1 carrot, julienned
– 3 green onions, chopped
– 1/4 cup peanuts, chopped
– 1/4 cup fresh cilantro, chopped
Sauces and Spices
– 3 tablespoons fish sauce
– 2 tablespoons tamarind paste
– 1 tablespoon brown sugar
– 1 tablespoon sriracha
– Lime wedges
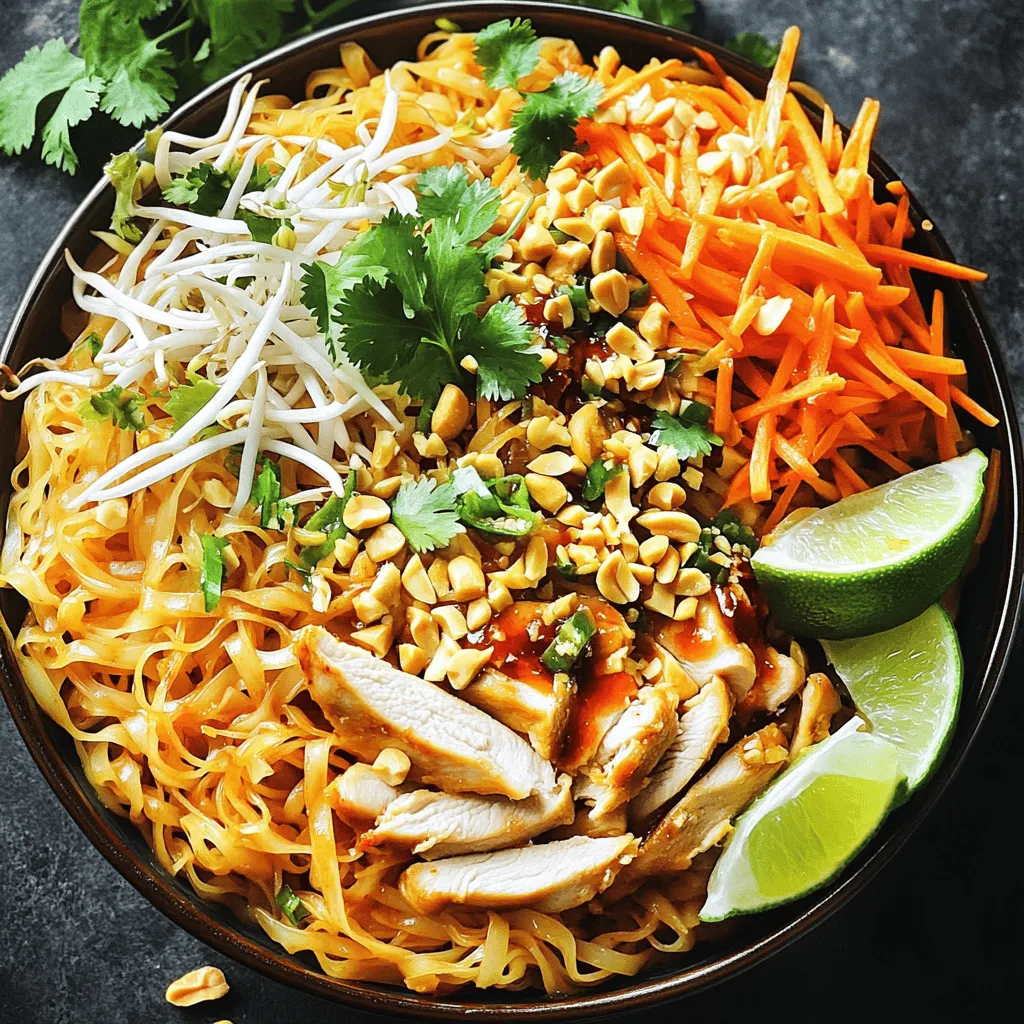
To make Spicy Chicken Pad Thai, gather these fresh ingredients. The rice noodles are the base of the dish. They soak up all the flavors. The chicken adds protein and heartiness. I love using thinly sliced chicken breast for its quick cooking time.
Next, you need vegetable oil and garlic. These create a fragrant base. As you cook, the garlic will add depth. For crunch and freshness, include bean sprouts, julienned carrots, and chopped green onions. They bring life to the dish!
Chopped peanuts add a nice crunch. Fresh cilantro gives a bright note. For the sauces, fish sauce and tamarind paste provide that signature flavor. Brown sugar balances the heat from sriracha. Lastly, serve with lime wedges for a zesty finish.Enjoy the process!
Step-by-Step Instructions
Preparing the Noodles
Soak the rice noodles in hot water for about 15-20 minutes. After soaking, they should be soft. Drain them well and set them aside. This step is key for a great texture in your Pad Thai.
Cooking the Chicken
Next, heat the vegetable oil in a large skillet or wok over medium-high heat. Add the sliced chicken and cook until it is no longer pink. This should take about 5-7 minutes. Season the chicken with salt and pepper to enhance its flavor. The chicken should be cooked through and tender.
Combining Ingredients
Now, stir in the minced garlic and cook for about 30 seconds. You want it to be fragrant but not burnt. Push the chicken to one side, then pour the beaten eggs into the empty space. Scramble the eggs until fully set. Mix the eggs back with the chicken. Next, add the softened noodles to the pan along with the fish sauce, tamarind paste, brown sugar, and sriracha. Toss everything gently to coat the noodles with the sauce. Finally, fold in the bean sprouts, julienned carrot, and chopped green onions. Stir-fry for another 2-3 minutes until everything is heated through. Finish by mixing in the chopped peanuts and cilantro. Adjust the seasoning if needed. Serve your dish right away!
Tips & Tricks
Ensuring Perfect Noodles
To get the best noodles, soak them in hot water. Soak for 15-20 minutes. The noodles should be soft but not mushy. After soaking, drain them well. This step helps them cook evenly. When you add them to the pan, they’ll absorb flavors better.
Enhancing Flavor
The sauce makes your Spicy Chicken Pad Thai shine. To adjust spice, add more sriracha. If you like it sweeter, increase the brown sugar. The balance of fish sauce and tamarind paste is key. Taste as you mix to find your perfect blend.
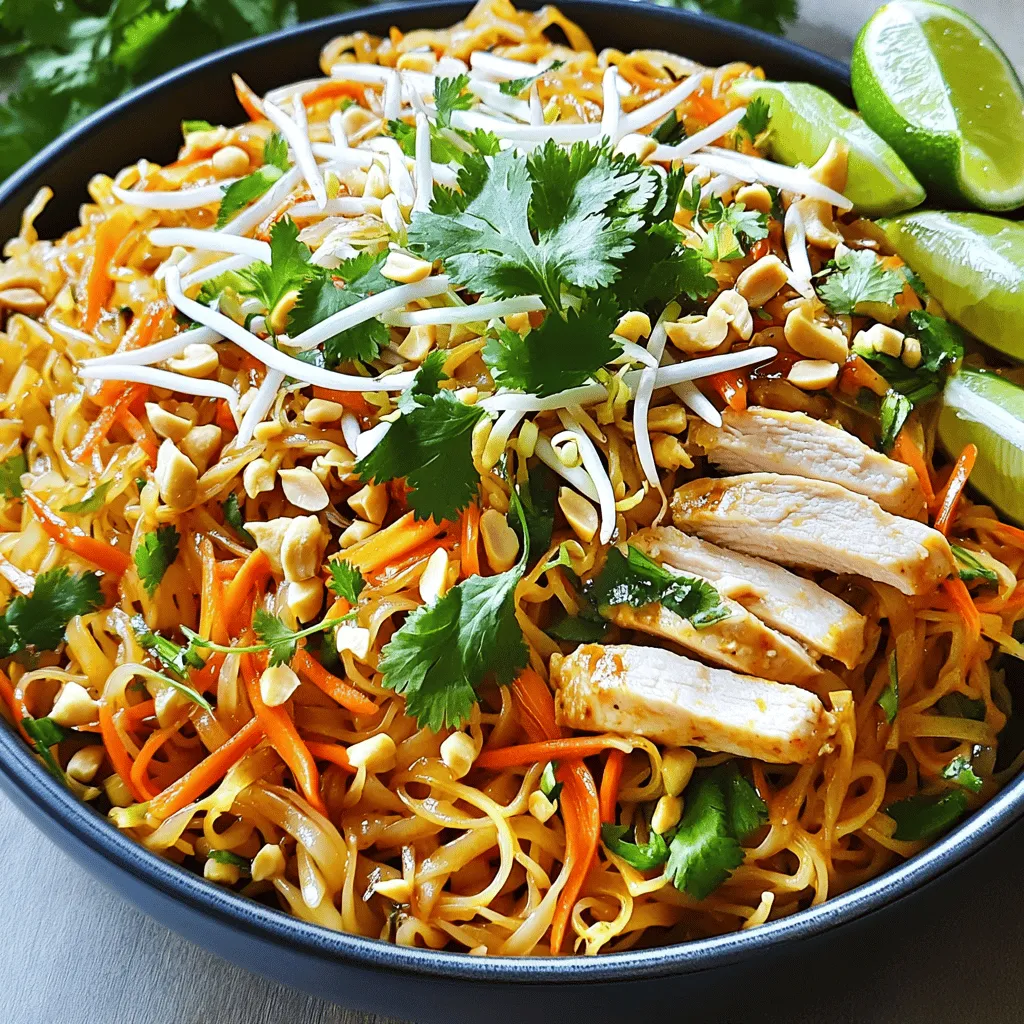
Presentation Ideas
Make your dish pop with garnishes. Use extra chopped peanuts for crunch. Fresh cilantro adds a nice touch too. Arrange lime wedges on the side for a burst of flavor. Serve in large bowls for a cozy feel. This makes your meal look as good as it tastes.

Variations
Protein Options
You can easily swap the chicken for shrimp or tofu. Shrimp cooks fast and adds a nice seafood flavor. Just add it when you cook the garlic and let it turn pink. For tofu, use firm or extra-firm. Press it to remove water, then cut it into cubes. Stir-fry it until golden before adding other ingredients. This way, you can enjoy different tastes in your Spicy Chicken Pad Thai.
Vegetable Additions
Adding more veggies can boost flavor and nutrition. Try bell peppers for sweetness and color. Slice them thin and toss them in with the chicken. Snap peas also work great. They stay crisp and add a nice crunch. You can mix and match your favorite veggies, like broccoli or zucchini, for more variety.
Gluten-Free Alternatives
If you need a gluten-free version, choose gluten-free rice noodles. They cook just like regular ones. For sauces, use tamari instead of soy sauce. It has a similar taste without gluten. Always check labels to make sure any sauces are gluten-free. These swaps keep your Spicy Chicken Pad Thai tasty and safe for everyone.
Storage Info
Refrigeration Guidelines
To keep your Spicy Chicken Pad Thai fresh, store leftovers in an airtight container. Place it in the fridge within two hours of cooking. This helps prevent bacteria growth. The dish will stay fresh for up to three days. When you’re ready to eat, just reheat it on the stove or microwave. Add a splash of water for moisture if needed.
Freezing Recommendations
If you want to save some for later, you can freeze Spicy Chicken Pad Thai. First, let it cool completely. Then, pack it into freezer-safe containers or bags. Make sure to remove as much air as possible. It will last for up to three months in the freezer. To reheat, thaw it in the fridge overnight, then warm it on the stove over low heat. Stir occasionally for even heating.
Shelf Life Information
Refrigerated Spicy Chicken Pad Thai lasts about three days. After that, the quality may fade. For frozen Pad Thai, expect about three months of good taste. After that, it may still be safe but lose some flavor and texture. Always check for any off smells or changes in color before eating.
FAQs
What is the best way to reheat Pad Thai?
To reheat Pad Thai, use a skillet or wok. Heat the pan over medium heat. Add a splash of water or oil to keep it moist. Stir the Pad Thai frequently. This method helps keep the noodles from sticking together. You can also use the microwave but be careful. Heat in short bursts and stir often to avoid overcooking.
Can Pad Thai be made vegetarian?
Yes, you can make Pad Thai vegetarian! Swap chicken for tofu or tempeh. Use soy sauce instead of fish sauce. You can add more veggies like bell peppers, broccoli, or snap peas. For protein, chickpeas work well too. These changes keep the dish delicious and satisfying.
How can I make Pad Thai less spicy?
To make Pad Thai less spicy, reduce the sriracha in the recipe. You can also leave it out completely. Instead, add a little more brown sugar for sweetness. Serving lime wedges on the side helps too. Squeeze lime over the dish to balance flavors without adding heat. Enjoy the taste without the burn!
In this article, we explored how to make Spicy Chicken Pad Thai. We covered the main ingredients, preparation steps, tips for the best flavors, and variations for different diets. Pad Thai can fit many tastes, whether you prefer chicken, shrimp, or tofu.
Making it at home allows you to enjoy this dish fresh. With the right techniques, your Pad Thai will impress family and friends. Don’t be afraid to experiment with flavors and toppings. Enjoy your culinary adventure!


![For creamy roasted red pepper pasta, you need: - 12 oz pasta (penne or fusilli) - 2 large red bell peppers - 1 cup heavy cream - 1/2 cup grated Parmesan cheese - 2 cloves garlic, minced - 2 tablespoons olive oil - 1 teaspoon dried basil - 1/2 teaspoon red pepper flakes (adjust for spice level) - Salt and pepper to taste - Fresh basil leaves for garnish These ingredients work together to create a rich and flavorful dish. The roasted red peppers give a sweet taste, while the cream adds a smooth texture. If you want to make this dish vegan, you can swap the heavy cream for coconut cream or a cashew cream. Use nutritional yeast instead of Parmesan cheese for a cheesy flavor. For gluten-free pasta, look for pasta made from rice, lentils, or chickpeas. If you want to make more or less pasta, here’s how to adjust the ingredients: - For every 4 oz of pasta, use about 1/3 cup of heavy cream. - For every 1 oz of cheese, use 2 tablespoons of cream. - Adjust the red bell peppers: 1 large pepper equals about 1 cup chopped. This way, you can easily scale the recipe to fit your needs. If you want the full recipe, refer to the top of the article. Start by preheating your oven to 400°F (200°C). This heat helps the peppers roast well. Place the two red bell peppers on a baking sheet. Drizzle with olive oil for flavor and moisture. Roast them for 25-30 minutes. You want the skins to char and blister. When done, take them out and let them cool. Once cool, peel off the charred skin and remove the seeds. Chop the flesh into small pieces. This step gives your pasta its rich flavor. While the peppers roast, bring a pot of water to a boil. Add salt to the water, which helps flavor the pasta. Add 12 oz of pasta, like penne or fusilli. Cook it according to the package instructions until it's al dente. This means it should be firm but not hard. Drain the pasta and save about 1 cup of the pasta water. This water helps create a creamy sauce later. Now, it’s time to make the sauce. In a blender, add the roasted red peppers, 1 cup of heavy cream, 2 cloves of minced garlic, and 1 teaspoon of dried basil. For a bit of heat, include 1/2 teaspoon of red pepper flakes. Add a pinch of salt too. Blend everything until it's smooth and creamy. In a large skillet, combine the creamy mixture with the drained pasta over medium heat. If the sauce is too thick, add a splash of reserved pasta water. Stir in 1/2 cup of grated Parmesan cheese until it melts. Taste and adjust with more salt and pepper if needed. Serve your dish hot. Garnish with fresh basil leaves and more Parmesan cheese if you like. For the full details, refer to the Full Recipe. To get the perfect pasta, cook it in a big pot of salted water. Use about a tablespoon of salt per quart. This adds flavor to your pasta. Cook it until it's al dente, which means it should still have a little bite. After draining, don't rinse your pasta. This keeps the starch that helps the sauce stick. If you like more heat, add extra red pepper flakes. Start with a pinch and taste. You can always add more later. If it's too spicy, balance it with more cream or cheese. The goal is to make it just right for your taste. For a smooth sauce, blend the roasted peppers well. Add the heavy cream slowly while blending. If the sauce is too thick, use some reserved pasta water to thin it. This water has starch that helps the sauce cling to the pasta. Don't forget to stir in the Parmesan cheese at the end. It adds creaminess and flavor. For the complete recipe, check out the Full Recipe. {{image_2}} You can make this dish vegetarian by using vegetable broth instead of chicken broth. Swap out the Parmesan for a plant-based cheese. You can also add veggies like spinach or mushrooms for extra flavor. They will add texture and nutrients. For a heartier meal, consider adding chicken or shrimp. Cook the protein separately and add it to the pasta after mixing in the sauce. Grilled chicken breast or sautéed shrimp both work well. They soak up the creamy flavors nicely. If you need a gluten-free option, use gluten-free pasta. Brands like brown rice or chickpea pasta are great choices. They cook similarly and absorb the sauce well. Just remember to adjust cooking times as needed for different pasta types. You can find the full recipe for this dish here: [Full Recipe]. To store leftovers, let the pasta cool first. Use an airtight container. This keeps the flavors fresh. Place in the fridge for up to three days. If you want to keep it longer, freeze it. When reheating, add a splash of water or cream. This helps restore the creamy texture. Warm it slowly on the stove over low heat. Stir often to avoid burning. You can also use the microwave, but watch it closely. You can freeze the roasted red pepper sauce. Let it cool, then pour it into freezer bags. Flatten the bags to save space. It will last up to three months. When ready to use, thaw it overnight in the fridge before reheating. Yes, you can use many types of pasta. Options like spaghetti, fettuccine, or even gluten-free pasta work well. The key is to choose a shape that holds sauce nicely. Try different types to find your favorite! You can make the sauce cream-free by using cashews or silken tofu. Blend soaked cashews or tofu with roasted peppers and a little vegetable broth. This gives a creamy texture while keeping it dairy-free. Adjust seasonings to taste. This dish pairs well with a fresh salad or garlic bread. You can also serve it with grilled vegetables or a light protein, like chicken or shrimp. These sides enhance the meal and make it more filling. For more ideas, check the Full Recipe. This blog post covered all you need for creamy roasted red pepper pasta. I shared ingredient lists, cooking steps, and tips for the best results. You can explore variations for diets and learn how to store leftovers. Remember, cooking is about having fun and trying new things. Your creations can be as unique as you are. Enjoy each bite and keep experimenting in the kitchen!](https://dailydishly.com/wp-content/uploads/2025/07/67c62068-3baa-44bf-b117-e4c3c451c449-768x768.webp)

![- Chicken breast - Marinade components: - 3 tablespoons olive oil - Zest and juice of 2 lemons - 3 cloves garlic, minced - 1 teaspoon dried oregano - 1 teaspoon dried thyme - Salt and pepper to taste The main star here is chicken breast. It is lean and cooks quickly. It absorbs flavors well, making it perfect for skewers. The marinade combines olive oil, lemon, garlic, and herbs. This mix adds brightness and depth to the chicken. The lemon zest and juice bring a fresh, tangy taste. - 1 bell pepper, cut into 1-inch pieces - 1 red onion, cut into wedges Bell pepper and red onion bring color and sweetness. They also add crunch to each bite. I love alternating them with the chicken on the skewers. This adds variety and makes the skewers look nice. - Wooden or metal skewers - Grill or grill pan You will need skewers for this recipe. If you use wooden skewers, soak them in water for 30 minutes. This prevents burning on the grill. A grill or grill pan is also essential. It gives the skewers that nice char and smoky flavor. For the full recipe, refer to the instructions provided. To begin, mix the marinade ingredients in a large bowl. You will need: - 3 tablespoons olive oil - Zest and juice of 2 lemons - 3 cloves garlic, minced - 1 teaspoon dried oregano - 1 teaspoon dried thyme - Salt and pepper to taste Whisk these items until they blend well. The marinade is vital for flavor. Marinate the chicken for at least 30 minutes. If you have time, let it sit for 2 hours. This helps the chicken absorb all the tasty flavors. Next, prepare the skewers. If you use wooden skewers, soak them in water for 30 minutes. This step helps prevent them from burning while grilling. Now, it’s time to thread the chicken and veggies. Take the marinated chicken and thread it onto the skewer. Add pieces of bell pepper and onion. Alternate between chicken and veggies. This mix not only looks great but also adds flavor. Before grilling, preheat your grill or grill pan to medium-high heat. This ensures even cooking. Grill the skewers for about 10 to 12 minutes. Turn them occasionally to get nice char marks. Use a meat thermometer to check if the chicken has reached 165°F (75°C). This step is crucial for food safety. Once cooked, take the skewers off the grill. Let them rest for a few minutes before serving. You can drizzle them with any leftover marinade for extra flavor. Enjoy your Greek Lemon Chicken Skewers! For the full recipe, check out the details above. To make your chicken full of flavor, marinate it well. I like to mix olive oil, lemon zest, lemon juice, garlic, and herbs. This blend really boosts the taste. Aim to marinate the chicken for at least 30 minutes. For even more flavor, you can go for up to 2 hours. Just don’t leave it in too long, or the acid from the lemon can make it mushy. To get those perfect grill marks, heat your grill to medium-high. This gives the chicken a nice char. Place the skewers on the grill and turn them every few minutes. This helps cook the chicken evenly. Keep an eye on the time; grill them for about 10 to 12 minutes. The chicken should reach an internal temperature of 165°F (75°C). This ensures it’s safe to eat and juicy. For a great presentation, serve the skewers on a nice platter. Add lemon wedges and sprinkle some fresh parsley on top. It looks colorful and inviting. I also suggest serving tzatziki sauce on the side for dipping. It adds a cool, creamy contrast to the warm chicken. Check out the Full Recipe for more detailed instructions! {{image_2}} If you want to switch things up, you can use other proteins. Pork and shrimp are great options. They both soak up the lemony marinade well. For shrimp, just adjust the cooking time to avoid overcooking. You can also change the vegetables on your skewers. Try zucchini, mushrooms, or cherry tomatoes. Each veggie brings its own flavor and texture. Mixing these will keep your dish fresh every time. To boost flavor, add more herbs and spices. Fresh parsley or dill can add a nice touch. You could also sprinkle some paprika for a mild kick. Changing the marinade can also create new flavors. For a spicy twist, add red pepper flakes. You could even try a yogurt-based marinade for a creamy contrast. These tweaks can take your Greek Lemon Chicken Skewers to a new level. You have options for cooking these skewers. Grilling is popular, but broiling works well too. Broiling gives a nice char and cooks the chicken quickly. If you prefer, you can bake the skewers in the oven. Set it to 400°F (200°C) and cook for about 15-20 minutes. This method is great for making skewers indoors, especially on rainy days. For the full recipe, visit the link above. Enjoy exploring these variations! To keep your Greek Lemon Chicken Skewers fresh, store them in the fridge. Place the skewers in an airtight container. This will help keep them from drying out. Consume the leftovers within 3 days for the best taste. If you want to store them longer, consider freezing. Wrap each skewer in plastic wrap, then place them in a freezer bag. This method can keep them good for up to three months. Remember to label the bag with the date. When you're ready to eat your leftovers, reheating is key. I suggest using an oven for the best results. Preheat your oven to 350°F (175°C). Place the skewers on a baking sheet and cover them with foil. This keeps the moisture in while they heat. Bake for about 10-15 minutes or until warm. You can also use a microwave for quick reheating. Place the skewers on a microwave-safe plate. Cover them with a damp paper towel to keep the chicken moist. Heat in short bursts of 30 seconds. Check often to avoid overcooking. Enjoy your Greek Lemon Chicken Skewers warm, just like fresh off the grill! For the full recipe, click [Full Recipe]. I suggest marinating the chicken for at least 30 minutes. This time gives the chicken a nice flavor boost. If you can, try marinating for up to 2 hours. The longer it sits in the marinade, the more the flavors mix in. You will taste the lemon, garlic, and herbs in every bite. To avoid burning, make sure to soak wooden skewers for 30 minutes. This step helps prevent charring. When grilling, keep the heat medium to medium-high. Turn the skewers often to cook evenly. Watch the chicken closely. Cook until the internal temperature reaches 165°F (75°C). This way, you enjoy juicy chicken without burnt bits. Yes, you can prepare Greek Lemon Chicken Skewers ahead of time. Marinate the chicken a few hours before grilling. You can also assemble the skewers in advance. Store them in the fridge until you're ready to grill. This makes meal prep easy and quick, leaving you more time to enjoy your meal. For the complete recipe, check out the Full Recipe. In this post, I shared how to make Greek Lemon Chicken Skewers. We covered the main ingredients like chicken, marinade, and vegetables. I walked you through steps for marinade prep, skewer assembly, and grilling. I also offered tips for flavor and cooking techniques. Lastly, we explored storage and reheat options for leftovers. Now you have all the tools to grill skewers like a pro. Enjoy your tasty creations!](https://dailydishly.com/wp-content/uploads/2025/07/9e2cfe4b-078f-41fe-970c-814b799e8851-768x768.webp)


