Spicy Chickpea Tacos Flavorful and Easy Recipe

Get ready to spice up your dinner with my easy Spicy Chickpea Tacos! This recipe is packed with flavor and simple to make, perfect for busy weeknights or fun gatherings. With rich spices and crispy chickpeas, these tacos are sure to impress. Plus, I’ll show you how to customize them to fit your taste. Let’s dive into this delicious journey and make taco night a hit!
Ingredients
List of Ingredients for Spicy Chickpea Tacos
To make these tasty tacos, gather these simple ingredients:
– 1 can (15 oz) chickpeas, drained and rinsed
– 2 tablespoons olive oil
– 1 teaspoon chili powder
– 1 teaspoon cumin
– 1/2 teaspoon smoked paprika
– 1/4 teaspoon cayenne pepper (adjust to taste)
– Salt and pepper to taste
– 8 small corn or flour tortillas
– 1 avocado, sliced
– 1 cup shredded purple cabbage
– Fresh cilantro leaves for garnish
– Lime wedges for serving
Alternative Ingredients for Flavor Variations
You can change the flavors easily. Try these swaps:
– Use black beans instead of chickpeas for a different texture.
– Swap olive oil for avocado oil for a richer taste.
– Try adding garlic powder or onion powder for extra depth.
– Use different spices like taco seasoning for a unique twist.
– Add jalapeños for extra heat, or mix in corn for sweetness.
Nutritional Information per Serving
Each serving is packed with nutrients. Here’s what you get:
– Calories: 350
– Protein: 12g
– Carbohydrates: 45g
– Fiber: 10g
– Fat: 15g
– Sodium: 400mg
These tacos are not just tasty but also healthy. They provide good protein and fiber.
Step-by-Step Instructions
Preparing the Chickpeas
Start with one can of chickpeas. Drain and rinse them well. Then, place the chickpeas in a medium bowl. Use a fork or potato masher to mash them. You want them slightly chunky. This helps them hold their shape while cooking.
Cooking the Chickpeas with Spices
Heat a skillet over medium heat. Add two tablespoons of olive oil. Once hot, add the mashed chickpeas. Now, sprinkle your spices: one teaspoon of chili powder, one teaspoon of cumin, half a teaspoon of smoked paprika, and a quarter teaspoon of cayenne pepper. Adjust the cayenne to fit your taste. Add salt and pepper to taste. Stir everything well. Cook for about five to seven minutes. This will make the chickpeas crispy and flavorful.
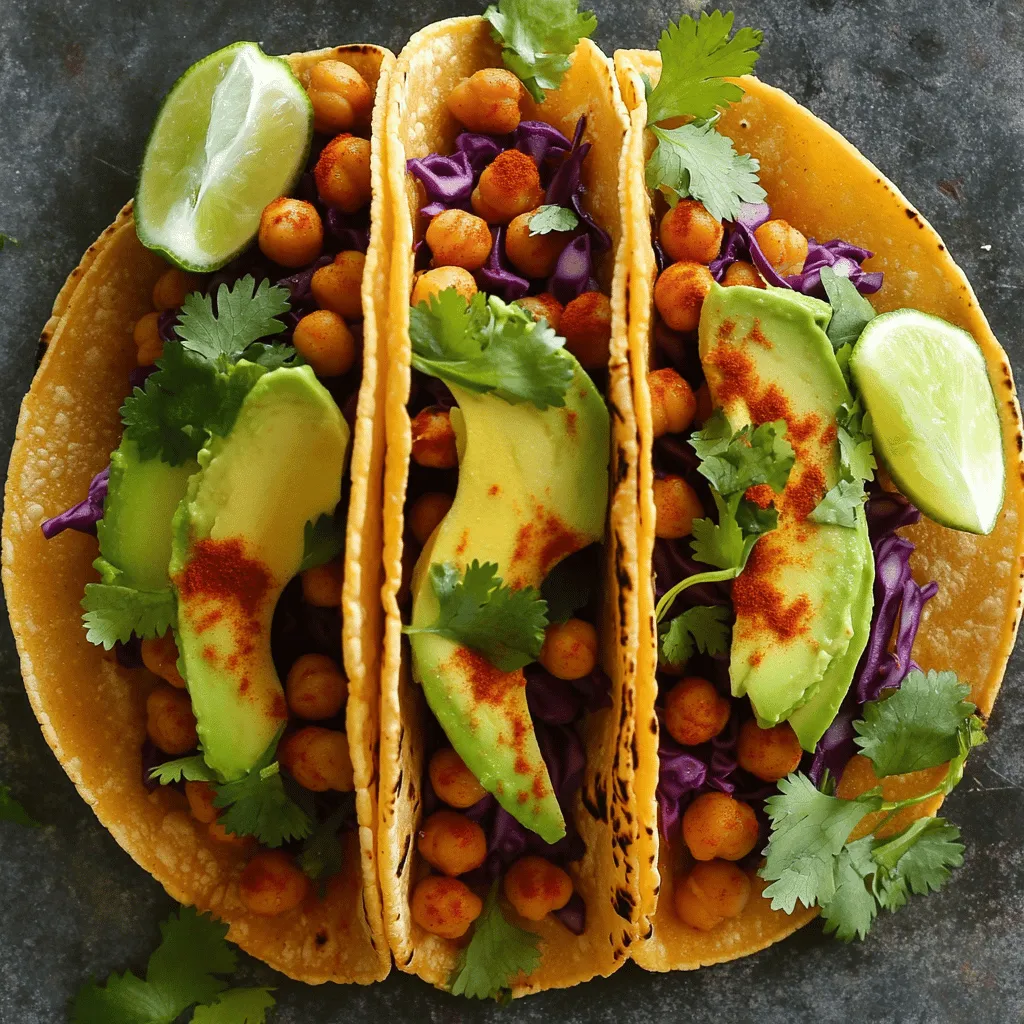
Assembling the Spicy Chickpea Tacos
While the chickpeas cook, warm your tortillas. You can do this in a separate skillet for thirty seconds on each side. Or, wrap them in foil and place them in a warm oven. Now, take a tortilla and add a spoonful of the spicy chickpea mix. Top it with sliced avocado and shredded purple cabbage. Finally, sprinkle fresh cilantro leaves on top. Serve with lime wedges for a zesty finish.Enjoy your tasty tacos!
Tips & Tricks
Ensuring the Right Texture for Chickpeas
To get great texture, mash the chickpeas lightly. You want them chunky, not smooth. This keeps them from becoming mushy during cooking. Use a fork or a potato masher. Aim for a mix of whole and mashed chickpeas. This gives your tacos a nice bite.
Perfectly Warming Tortillas
Warm tortillas make a big difference. They should be soft and flexible. I like to heat them in a skillet for about 30 seconds on each side. You can also wrap them in foil and place them in a warm oven. This keeps them nice and warm until you are ready to serve.
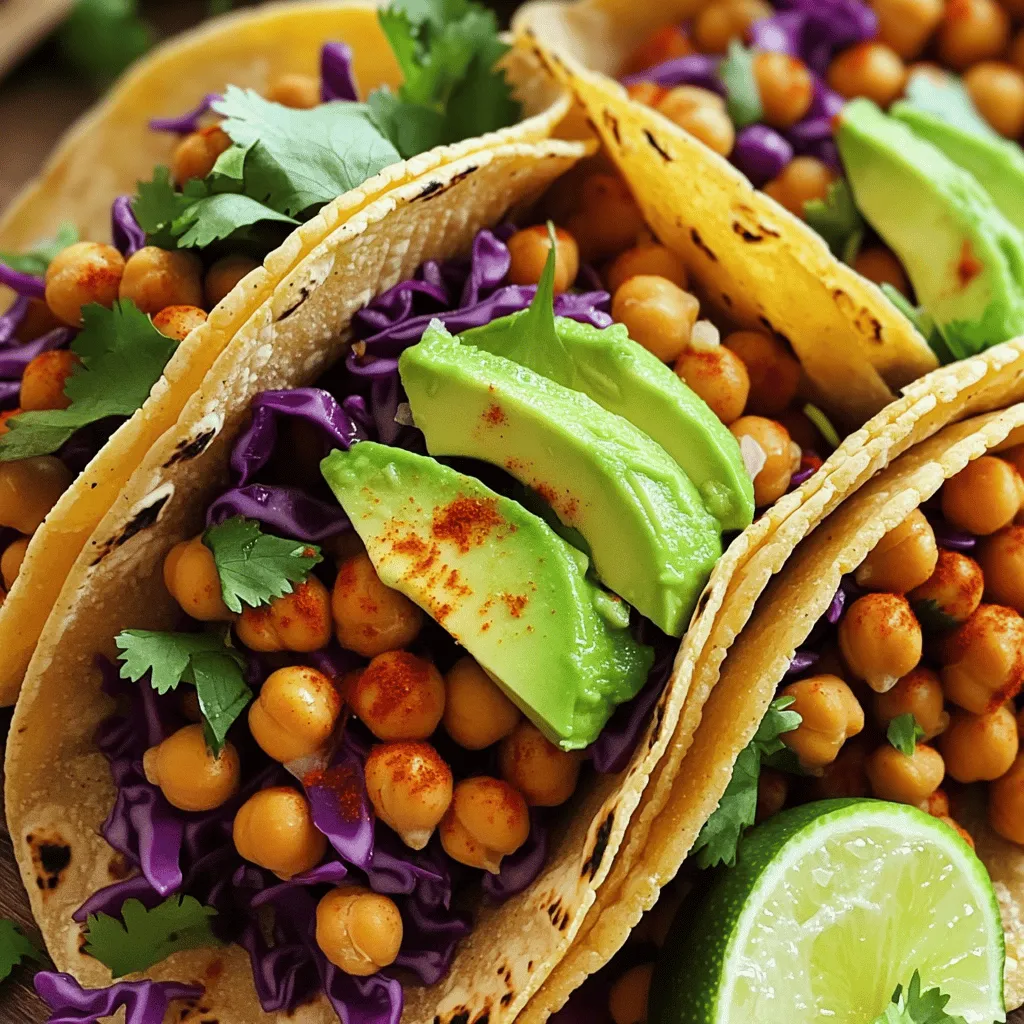
Enhancing Flavor with Toppings
Toppings add layers of flavor. Fresh cilantro brings a burst of freshness. Avocado adds creaminess, while purple cabbage adds crunch. Lime juice brightens the whole dish. Feel free to mix and match toppings to suit your taste.

Variations
Spicy Chickpea Taco Bowl Idea
You can turn these tacos into a tasty taco bowl. Start with a base of rice or quinoa. Add your spicy chickpeas on top. Next, layer in fresh toppings like avocado, cabbage, and cilantro. Drizzle lime juice over everything for a bright kick. This bowl is great for meal prep or a quick lunch.
Adding More Vegetables to the Mix
Want to make this dish even better? Toss in more veggies while cooking the chickpeas. Diced bell peppers or onions add great flavor. You can also use corn or zucchini for extra crunch. Keep your veggies colorful to make the dish pop. Cooking them with the chickpeas gives a nice, rich taste.
Customizing Heat Levels
You can easily change how spicy your tacos are. Adjust the amount of cayenne pepper to fit your taste. If you like it mild, use less cayenne. For more heat, try adding jalapeños or hot sauce. Don’t forget to taste as you go! This way, you can find the perfect level of spice for you.
Storage Info
How to Store Leftover Tacos
To store leftover tacos, first, separate the ingredients. Place the chickpea mix in one container and the tortillas in another. This keeps the tortillas from getting soggy. Seal each container tightly. You can store them in the fridge for up to three days.
Reheating Tips for Chickpeas and Tortillas
When you’re ready to eat, reheat the chickpeas in a skillet. Use medium heat for about five minutes. Stir them often to warm them through. For the tortillas, heat them in a dry skillet for about 30 seconds on each side. This will make them soft and warm again.
Best Storage Containers for Freshness
Use airtight containers for the best results. Glass containers work well since they do not stain. If you prefer plastic, choose BPA-free options. Make sure the containers are the right size to avoid excess air. This helps keep your tacos fresh longer.
FAQs
What are the best toppings for spicy chickpea tacos?
I love topping my spicy chickpea tacos with fresh ingredients. Here are my favorites:
– Sliced avocado
– Shredded purple cabbage
– Fresh cilantro leaves
– Diced tomatoes
– Crumbled feta or queso fresco
– A squeeze of lime juice
These toppings add color, crunch, and flavor. You can mix and match as you like!
Can I make spicy chickpea tacos ahead of time?
Yes, you can make the chickpea mix ahead. Cook it, let it cool, and store it in the fridge. Just heat it up when you’re ready to serve. Warm tortillas and toppings can be prepped too. This saves time for busy days!
Are spicy chickpea tacos suitable for meal prep?
Absolutely! Spicy chickpea tacos are great for meal prep. The chickpeas stay tasty for a few days. Just portion them out with tortillas and toppings. This way, you have quick meals ready to go!
How to make this recipe gluten-free?
To make spicy chickpea tacos gluten-free, use corn tortillas. They are a great option. Always check the label to ensure they’re gluten-free. You can enjoy these tacos without worry!
Spicy Chickpea Tacos are easy to make and fun to enjoy. We discussed ingredients and how to prepare them step-by-step. You learned about texture, toppings, and flavorful variations. Storing leftovers lets you enjoy these tacos later. Finally, I answered common questions to wrap up the topic. This meal is healthy and versatile, perfect for any day. Dive in and try these delicious tacos for yourself!


![- 2 boneless, skinless chicken breasts, diced - 2 cups broccoli florets For this dish, I love using fresh chicken and broccoli. The chicken gives a nice, juicy bite. The broccoli adds color and crunch. You can cut the chicken into small pieces. This helps it cook evenly and quickly. For the broccoli, I recommend using florets. They will cook just right and look great on your plate. - 8 ounces fettuccine or pasta of choice - 1 tablespoon olive oil - 3 cloves garlic, minced - 1 cup heavy cream - 1 cup grated Parmesan cheese For the pasta, fettuccine works best. It holds the sauce well. You can use any pasta you like. Just remember to cook it al dente. Olive oil keeps the chicken moist. Garlic adds amazing flavor to the dish. Heavy cream and Parmesan cheese create a rich, creamy sauce. Together, they make this meal feel special. - Salt and pepper to taste - 1/2 teaspoon dried Italian herbs - Fresh parsley, chopped (for garnish) Seasoning is key to great flavor. Use salt and pepper to taste. Italian herbs add warmth and depth. I like to finish the dish with fresh parsley for color. It brightens the plate and makes it look fresh. These simple ingredients elevate the dish without being overwhelming. For the full recipe, check out the details above! First, heat 1 tablespoon of olive oil in a large skillet over medium heat. While the oil heats, dice 2 boneless, skinless chicken breasts. Once the oil is hot, add the chicken to the skillet. Season it with salt, pepper, and 1/2 teaspoon of dried Italian herbs. Cook the chicken for about 5 to 7 minutes. Stir it occasionally to brown all sides. When it’s done, it should be golden and cooked through. Remove the chicken from the skillet and set it aside for now. In the same skillet, add 3 cloves of minced garlic. Sauté the garlic for about 1 minute until it smells good. Then, add 2 cups of broccoli florets to the skillet. Stir and cook for 3 to 4 minutes. You want the broccoli to be tender but still bright green. This will keep it crisp and flavorful. Next, cook 8 ounces of fettuccine or your favorite pasta in a separate pot. Follow the package instructions and drain it once it's al dente. Now, back in the skillet with the broccoli, pour in 1 cup of heavy cream. Bring it to a gentle simmer. Stir in 1 cup of grated Parmesan cheese. Keep stirring until the cheese melts and the sauce is smooth. Add the chicken and drained pasta back into the skillet. Toss everything together so it’s coated in the creamy sauce. Let it heat through for 2 to 3 minutes. Adjust the taste with more salt or pepper if needed. Serve hot, and don’t forget to garnish with fresh parsley! For the full recipe, check out the [Full Recipe]. To get juicy chicken, start with diced pieces. This helps them cook evenly. Cook the chicken until it is a nice golden brown. This usually takes about 5 to 7 minutes. Make sure to not overcrowd the skillet. This allows each piece to sear well. After cooking, let the chicken rest for a few minutes. This keeps the juices inside. Broccoli should stay bright green and crisp. Add it to the skillet after the garlic. Sauté for just 3 to 4 minutes. You want it tender but still crunchy. If you cook it too long, it will turn dull. To keep that vibrant color, you can also shock it in cold water after cooking. This method locks in color and nutrition. The sauce should be creamy and smooth. If it’s too thick, add a little pasta water. This water has starch from cooking the pasta. It helps make the sauce silkier. If it’s too thin, let it simmer a bit longer. Stir in more cheese if you want it richer. Taste as you go to get the perfect balance. For the full recipe, check the details above. {{image_2}} You can swap out chicken for other meats. Shrimp works well and cooks quickly. You can also use turkey or even tofu for a vegetarian twist. Each protein adds its unique flavor. Just adjust cooking times to ensure your choice is fully cooked. Broccoli is excellent, but you can mix in other veggies. Bell peppers add sweetness and crunch. Zucchini or spinach also fit well in this dish. Feel free to experiment! Each vegetable brings a new taste and color. Just make sure to adjust cooking time based on what you use. If you need a gluten-free meal, choose gluten-free pasta. Many brands offer great options that taste good. You can also skip pasta and use rice instead. This keeps the dish hearty while meeting dietary needs. Always check labels to ensure your ingredients are gluten-free. For the full recipe, check the section above. You can store leftovers in the fridge. Place the Chicken and Broccoli Alfredo in an airtight container. It stays fresh for up to three days. Make sure to let it cool down before you seal it. This helps keep the flavor and texture. If you want to save some for later, freezing works well. Use a freezer-safe container or bag. Leave some space for expansion. You can freeze it for up to two months. When you're ready to eat, thaw it in the fridge overnight. To reheat, use the stovetop or microwave. If using the stovetop, add a splash of cream or water. This keeps the dish moist. Stir it often over low heat until warm. If using a microwave, cover the dish to trap steam. Heat in short bursts and stir in between. This way, you'll enjoy a creamy meal again! Yes, you can use frozen broccoli. Just add it to the skillet while cooking the garlic. Frozen broccoli may need a few extra minutes to cook. Make sure it is heated through and tender before serving. This option saves time and works well in this dish. Fettuccine is the best choice for this recipe. It holds the creamy sauce well. However, you can use other pasta types too. Penne, rotini, or even whole wheat pasta are great options. Choose what you like or have at home for this meal. To make this dish healthier, consider these tips: - Use whole-grain pasta for more fiber. - Swap heavy cream for low-fat milk or a plant-based cream. - Add more vegetables like bell peppers or spinach for extra nutrients. - Use less cheese or a lighter cheese option to cut calories. These changes can keep the dish tasty while boosting its nutrition. Check out the Full Recipe for even more ideas! This blog post covered how to make Chicken and Broccoli Alfredo. We explored key ingredients, like chicken, pasta, and sauce. I shared step-by-step instructions for cooking and sautéing. You learned tips for perfect chicken and bright broccoli. We also talked about variations, like swapping proteins or veggies. Lastly, I provided storage info to keep leftovers fresh. Try this recipe to impress. Remember, cooking is fun and easy!](https://dailydishly.com/wp-content/uploads/2025/06/4029d33c-44d0-458a-b053-e8bf24c75967-768x768.webp)


![To make this tasty zucchini corn chowder, you need: - 2 medium zucchinis, diced - 2 cups sweet corn kernels (fresh or frozen) - 1 medium onion, chopped - 2 cloves garlic, minced - 3 medium potatoes, peeled and diced - 4 cups vegetable broth - 1 cup coconut milk (or cream) - 2 tablespoons olive oil - 1 teaspoon smoked paprika - 1 teaspoon ground cumin - Salt and pepper to taste - Fresh cilantro or parsley for garnish These ingredients blend well, giving you a creamy and delicious chowder. Each bite bursts with flavor! You can swap some ingredients if needed. For coconut milk, use almond milk or cream. If you want a different broth, chicken broth works too. For spices, feel free to add your favorites. Try chili powder or Italian herbs for a twist. Fresh corn tastes sweet and bright. It adds a nice crunch to the chowder. However, frozen corn is just as good. It is picked at its peak and frozen right away. Both options work well in this recipe. Choose what you have on hand! 1. Heat olive oil in a large pot over medium heat. 2. Add chopped onion and sauté for about 5 minutes. Wait until the onion turns clear. 3. Add minced garlic and cook for 1 more minute. The smell will be great! 4. Toss in diced zucchini and potatoes. Stir well and cook for 5 minutes. 5. Sprinkle in smoked paprika and cumin. Mix to coat the veggies with spices. 6. Pour in the vegetable broth and bring it to a boil. 7. Lower the heat and let it simmer for 15-20 minutes. Check if the potatoes are tender. 8. Mix in corn kernels and coconut milk. Stir well and simmer for another 5 minutes. 9. Use an immersion blender. Blend until you like the texture. 10. Taste and add salt and pepper as needed. 11. Serve hot and add cilantro or parsley on top. - Prep Time: 15 minutes - Cook Time: 30 minutes - Total Time: 45 minutes - Serve the chowder hot in bowls. - Add fresh cilantro or parsley for color and taste. - Pair it with crusty bread or a fresh salad for a complete meal. - Enjoy this dish with friends and family for a cozy meal. For the Full Recipe, check the main article. To adjust the thickness of your chowder, you have a few options. If you want it thicker, blend more of the soup. You can also add a bit of cornstarch mixed with water. For creaminess, use more coconut milk or cream. Just remember, the more you blend, the smoother it gets. I like to keep some chunks for a nice bite. Try adding fresh herbs like basil or dill for extra taste. A pinch of thyme can also boost the flavor. If you want a kick, add some red pepper flakes or a dash of hot sauce. These small changes can really elevate your chowder and make it unique. Serve the chowder hot for the best taste. If you have leftovers, cool them down quickly and store them in the fridge. When you reheat, do it slowly on low heat. This keeps all the flavors intact. If you need a quick meal, you can also freeze the chowder. Just make sure it’s in a safe container. {{image_2}} To make this chowder vegan and dairy-free, simply swap out the coconut milk for a plant-based milk. Almond or oat milk works well too. You can also skip any cream or dairy-based toppings. This keeps the chowder light and fresh while still being creamy. The flavor stays rich with the right spices and broth. You can add protein to your chowder for a heartier dish. Beans are a great option. Black beans or chickpeas blend well and add fiber. If you prefer meat, shredded chicken is tasty. For seafood lovers, shrimp or crab adds a nice twist. Just add these ingredients when you mix in the corn. Do you love heat? You can spice up your chowder easily. Add diced jalapeños or crushed red pepper for a kick. You can also use spicy sausage for an extra punch. Just sauté them with the onions for the best flavor. Adjust the spice level to fit your taste. To keep your chowder fresh, store it in an airtight container. Place it in the fridge if you plan to eat it within three days. If you want it to last longer, freezing is the best option. Pour the chowder into freezer-safe containers, leaving some space at the top. This space helps prevent the container from breaking when the chowder expands while freezing. When you're ready to enjoy your chowder again, reheat it gently. Pour the chowder into a pot over low heat. Stir it often to keep it from sticking and burning. If the chowder is too thick, add a splash of vegetable broth or coconut milk to loosen it. You can also use the microwave. Heat it in a microwave-safe bowl, stirring every minute until it’s hot. Zucchini corn chowder can last up to three days in the fridge. If frozen, it can stay good for up to three months. Make sure to label the containers with the date so you know when to use them. Enjoying the chowder within these time frames ensures it tastes fresh and delicious! Yes, you can make this chowder ahead of time. It tastes even better after resting. Just cool it down after cooking, then store it in an airtight container in the fridge. It will stay fresh for about three days. When you are ready to eat, just heat it up on the stove. If you want to serve it later, you can follow the [Full Recipe] and prepare it in advance. Absolutely! This chowder freezes well. To freeze it, let it cool completely. Then, pour it into a freezer-safe container, leaving some space at the top for expansion. It can last up to three months in the freezer. When ready to enjoy, thaw it in the fridge overnight. Then heat it gently on the stove until warm. This chowder pairs nicely with crusty bread or a fresh salad. You can serve it with garlic bread for a tasty twist. A simple green salad with a light dressing also complements the chowder well. For a heartier meal, consider grilled cheese sandwiches or quesadillas. These sides make a lovely balance with the chowder's creamy texture. This blog post covered making Zucchini Corn Chowder. We looked at key ingredients and substitutions. I shared tips for texture and flavor, plus variations for dietary needs. You learned about storage and reheating for the best taste. In conclusion, this chowder is easy, tasty, and customizable. With the right ingredients and techniques, you can enjoy it anytime. Take these tips and make your own delicious chowder!](https://dailydishly.com/wp-content/uploads/2025/06/cd1de928-f35a-4c16-bb66-d32b01de5a86-768x768.webp)