Spicy Chipotle Chicken Quesadillas Flavorful Delight

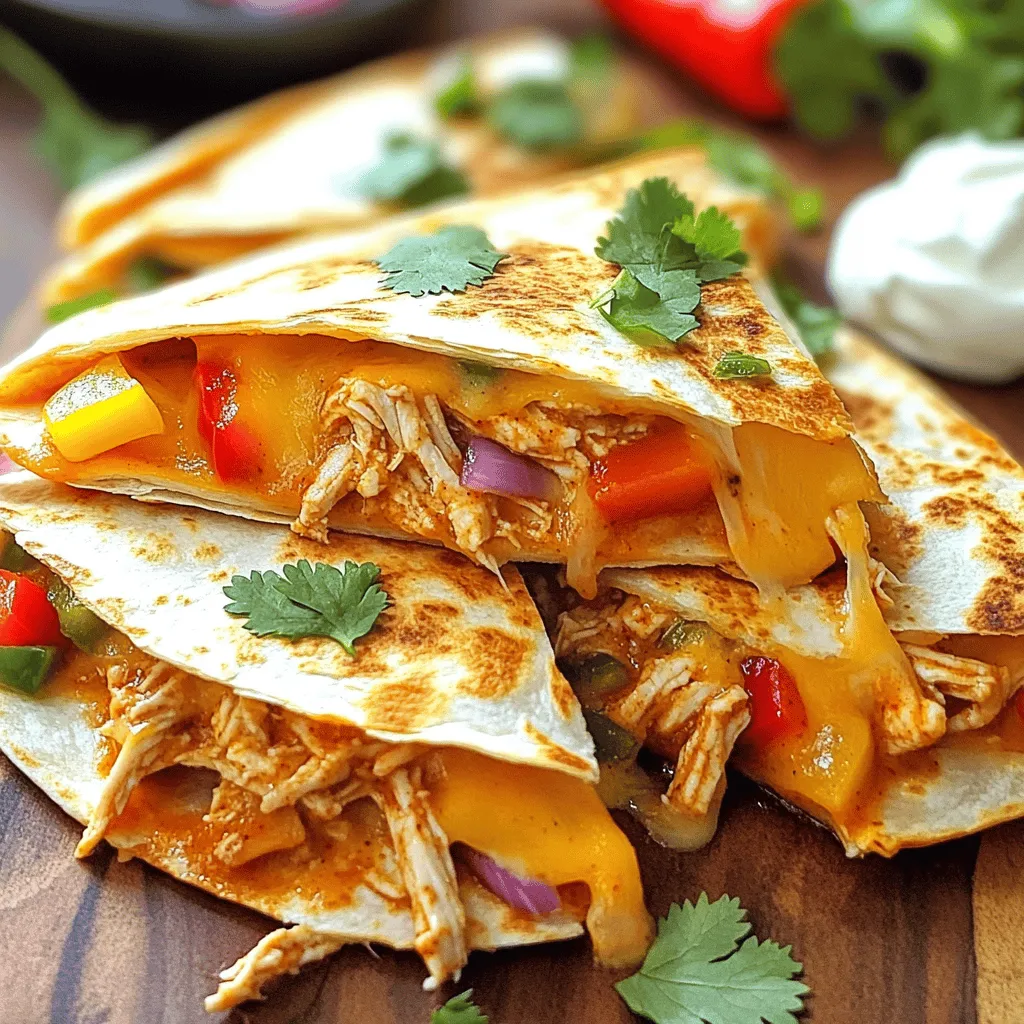
Get ready to spice up your meal with my Spicy Chipotle Chicken Quesadillas! This easy recipe combines tender chicken, vibrant veggies, and melty cheese. You’ll love the burst of flavor from chipotle peppers. Plus, these quesadillas are quick to make and perfect for any day of the week. Let’s dive into the ingredients and get cooking!
Ingredients
To make spicy chipotle chicken quesadillas, gather these ingredients:
– 2 cups cooked chicken, shredded
– 1 tablespoon chipotle pepper in adobo sauce, minced
– 1 cup shredded Monterey Jack cheese
– 1 cup shredded cheddar cheese
– 1/2 cup bell peppers, thinly sliced
– 1/4 cup red onion, finely chopped
– 4 large flour tortillas
– 2 tablespoons olive oil
– 1 teaspoon garlic powder
– 1 teaspoon cumin
– Salt and pepper, to taste
– Optional toppings: Sour cream and fresh cilantro
These simple ingredients come together to create a tasty treat. The cooked chicken brings a nice base, while the chipotle pepper adds spice. The blend of cheeses gives a creamy texture. Bell peppers and red onion add crunch and sweetness. You can adjust the spice level with more or less chipotle. Don’t forget the olive oil; it helps achieve a crispy quesadilla.
Step-by-Step Instructions
Preparation of Chicken Mixture
To start, I take a large bowl and combine the shredded chicken with a tablespoon of minced chipotle pepper. I add garlic powder, cumin, salt, and pepper. I mix everything well. This step coats the chicken in the spicy chipotle blend. It gives the chicken a bold flavor that excites the taste buds.
Sautéing Vegetables
Next, I heat two tablespoons of olive oil in a large skillet over medium heat. I toss in thinly sliced bell peppers and finely chopped red onion. I sauté the veggies until they are soft, about 3 to 4 minutes. The smell fills the kitchen and adds extra flavor to the quesadillas.
Assembling Quesadillas
Now, I grab a tortilla and place it in the same skillet. I sprinkle half of it with a mix of Monterey Jack and cheddar cheese. Then, I spread half of the spicy chicken mixture over the cheese. I add the sautéed veggies on top and finish with more cheese. This layering creates a tasty filling.
Cooking Quesadillas
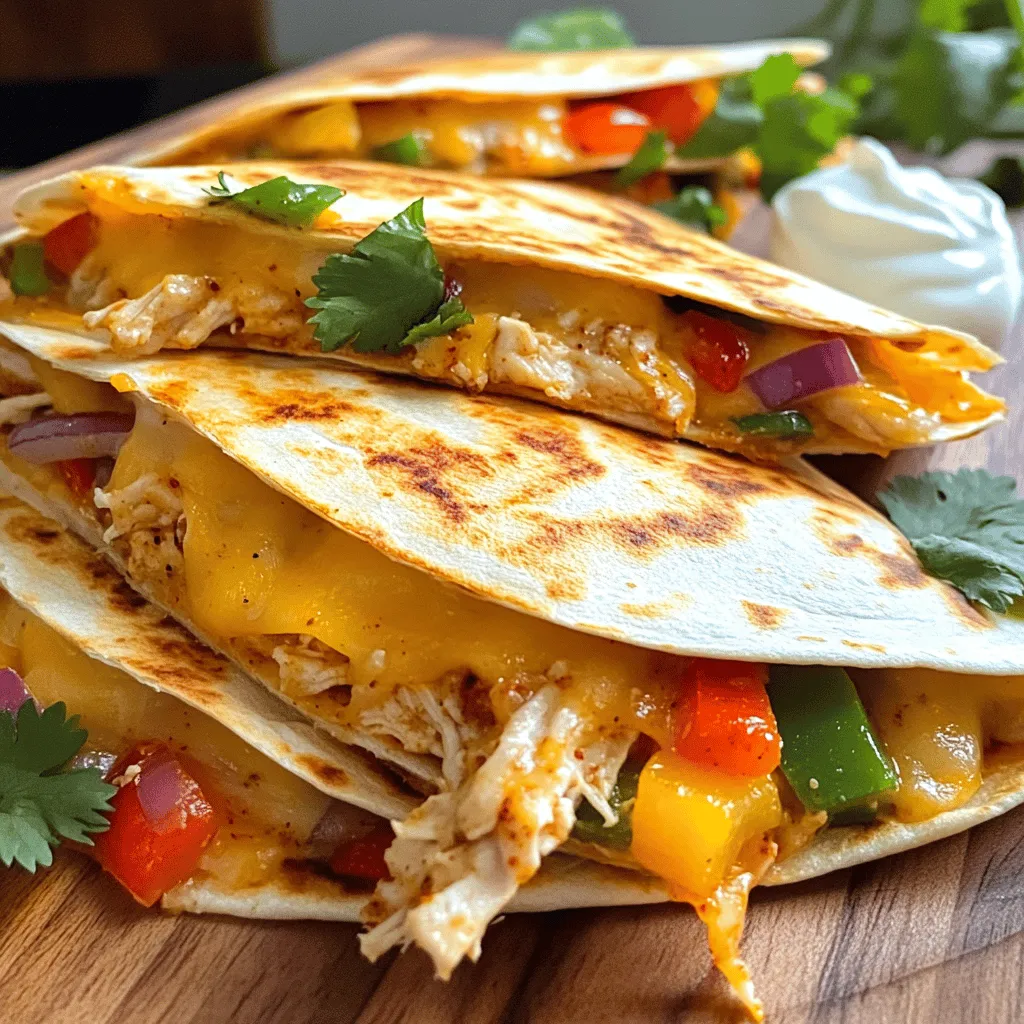
I fold the tortilla in half and cook it for about 3 to 4 minutes on each side. I look for a golden brown color and melted cheese. The crispy tortilla gives a nice crunch. I repeat this process with the other tortillas and fillings until I have a stack of golden quesadillas.
Serving Suggestions
Once cooked, I take the quesadillas out of the skillet and let them rest for a minute. I cut them into wedges, making them easy to grab. I serve them warm with dollops of sour cream and fresh cilantro on top. This adds a creamy, fresh touch that pairs perfectly with the spicy flavors.
Tips & Tricks
Cooking Tips
– Ensure your skillet is hot to get a crispy tortilla.
– Avoid overfilling your quesadilla to prevent spills.
Getting the temperature right is key. A hot skillet ensures the tortilla crisps up nicely. If your skillet is too cool, the tortilla may turn soggy. You want that golden color and crunch.
When filling your quesadilla, remember less is more. Too much filling can make it hard to flip. It can also lead to mess as the filling spills out. Stick to a good balance for the best results.
Flavor Enhancements
– Add jalapeños for extra heat.
– Mix in other vegetables like mushrooms or spinach.
If you like heat, try adding sliced jalapeños. They bring a fresh kick that pairs well with chipotle. You can also adjust the amount based on your spice level.
Want more veggies? Toss in mushrooms or spinach. They add flavor and nutrients. Plus, they mix well with chicken and cheese. You can customize this dish to fit your taste.

Variations
Different Proteins
You can change the protein in your quesadillas. If you want steak, use thin slices and season them well. Shrimp is another great choice. Just sauté them until they turn pink and tender. For a meat-free option, black beans work wonders. They add fiber and protein while keeping things hearty.
Cheese Alternatives
Switching up the cheese can give you a new taste. Pepper jack cheese adds a spicy kick that pairs well with the chipotle flavor. If you’re vegan or lactose intolerant, try a vegan cheese option. Many brands melt well and taste great in quesadillas.
Tortilla Options
The type of tortilla can also change your dish. Whole wheat tortillas are a healthier option, packed with fiber. Corn tortillas have a nice, earthy flavor and are gluten-free. If you need a gluten-free option, check for gluten-free tortillas at your store. Each option adds a unique twist to your spicy chipotle chicken quesadillas.
Storage Info
Refrigeration
Store leftovers in an airtight container for up to 3 days. Keeping them sealed helps maintain freshness. If you want to enjoy them later, make sure they cool down before sealing. Reheat them in a skillet or microwave when you’re ready to eat. This way, you keep the flavors intact.
Freezing Quesadillas
To freeze quesadillas, let them cool completely. Place them in a single layer on a baking sheet. Freeze for about 1-2 hours until firm. Then, wrap each quesadilla in plastic wrap and place them in a freezer bag. They can stay frozen for up to 2 months. When you want to enjoy them, simply reheat in a skillet over medium heat for about 5-7 minutes, flipping halfway through until hot. You can also use the microwave, but the skillet gives a better texture. Enjoy your spicy chipotle chicken quesadillas anytime!
FAQs
How can I make quesadillas crispy?
To make your quesadillas crispy, use a hot skillet. Heat your skillet on medium-high heat before adding oil. Use just enough oil to coat the pan. Avoid overfilling the quesadillas. This helps keep the edges sealed. Press down lightly on the quesadilla while it cooks. Flip carefully to get both sides golden brown.
Can I use raw chicken?
Yes, you can use raw chicken. Start by cooking the chicken fully before adding it to the quesadilla. Cut the chicken into small pieces. Sauté the pieces in the skillet until they are no longer pink. Once cooked, mix with the chipotle and spices. This method ensures safe eating and adds flavor.
What sides pair well with spicy chipotle chicken quesadillas?
Several sides work well with spicy chipotle chicken quesadillas. Consider serving a fresh salad. A simple green salad adds crunch and freshness. Guacamole is another great option. It balances the spice with creaminess. You can also serve salsa for an extra kick.
You’ve learned how to make tasty Spicy Chipotle Chicken Quesadillas. We gathered key ingredients and steps to guide you. The tips on cooking and flavor add fun twists. Don’t shy away from trying different fillings or tortillas. Remember, leftovers can be stored and enjoyed later. I hope you feel ready to make this dish at home. Enjoy every bite and share with friends. Your kitchen adventure starts now!


![- 2 cups sushi rice - 4 sheets nori (seaweed) - 1 avocado, sliced - 1 cucumber, julienned - 1 carrot, julienned - 1 red bell pepper, julienned To make easy veggie sushi rolls, you need key ingredients that create the perfect base and flavor. Sushi rice is sticky and helps hold the rolls together. Nori provides a tasty wrap. Fresh veggies add crunch and color. - 1/4 cup rice vinegar - 1 tablespoon sugar - 1/2 teaspoon salt These seasoning ingredients enhance the rice's flavor. Rice vinegar gives a slight tang. Sugar adds a hint of sweetness, while salt balances the taste. This mixture makes the sushi rice shine. - Soy sauce for dipping - Optional garnishes (sesame seeds, wasabi) When serving, soy sauce adds a salty kick. You can sprinkle sesame seeds for added crunch. Wasabi provides a spicy option for those who like heat. Enjoying these rolls with the right dips makes them even better. For the full recipe, check the Easy Veggie Sushi Rolls section. To start, rinse the sushi rice under cold water. This helps remove the excess starch. Keep rinsing until the water runs clear. You can cook the rice in a rice cooker or on the stovetop. If using a rice cooker, add 2 ½ cups of water and follow the machine's instructions. For stovetop cooking, bring the rice and water to a boil. Then, lower the heat, cover, and simmer for about 20 minutes until the water is gone. Next, mix rice vinegar, sugar, and salt in a small bowl. After cooking, transfer the rice to a large bowl. While it is still warm, gently fold in the vinegar mixture. This adds great flavor to the rice. Allow the rice to cool to room temperature before using it. While the rice cools, slice your fresh veggies. Take an avocado and slice it into thin pieces. Next, julienne the cucumber and carrot. Finally, slice the red bell pepper into thin strips. Each vegetable adds a nice crunch and color to your sushi. Place a bamboo sushi mat on a flat surface. Put a sheet of nori on top, shiny side down. Wet your hands to stop the rice from sticking. Take about a handful of rice and spread it evenly over the nori, leaving a small margin at the top edge. Now it's time to roll! Add a few pieces of each vegetable horizontally across the center of the rice. Starting from the bottom edge, carefully roll the mat away from you, holding the filling with your fingers. Make sure to roll tightly, but not too tight. Moisten the top edge with water to seal the roll. Use a sharp knife to slice the roll into bite-sized pieces. Wipe the knife with a damp cloth between cuts for clean slices. Arrange the sushi rolls on a serving platter. If you like, sprinkle sesame seeds on top and serve with soy sauce for dipping. Enjoy your beautiful veggie sushi rolls! For the complete recipe, check out [Full Recipe]. - Overcooking rice: If you cook the rice too long, it becomes mushy. This ruins the texture of your sushi. Keep an eye on your timer! - Squashing the roll while slicing: When you cut the sushi, press too hard. This squashes the roll and makes a mess. Use a sharp knife and gentle pressure. - How to roll sushi without a mat: No mat? No problem! Use a clean kitchen towel instead. Place the nori on the towel, add rice and fillings, and roll tightly. Keep your hands wet to avoid sticking. - Adding sauces or spices: Soy sauce is classic, but you can try others too. Add a splash of sriracha for heat or sprinkle sesame seeds for crunch. Experiment with flavors you love! For the complete recipe, you can refer to the Full Recipe section. {{image_2}} You can add protein to your sushi rolls for extra flavor and nutrition. Tofu is a great choice. Try firm or extra-firm tofu. It holds its shape well. You can marinate it in soy sauce or sesame oil for added flavor. Then, grill or sauté it until golden. Tempeh is another tasty option. This soy product has a nutty flavor. Slice it thin and cook it the same way. Both tofu and tempeh make your rolls filling and satisfying. Don’t feel limited to just avocado and cucumber! Use seasonal veggies for variety. In spring, try adding asparagus or snap peas. They add a nice crunch. In summer, bell peppers and zucchini are perfect. They are sweet and juicy. In fall, consider roasted sweet potatoes or beets for earthiness. Winter brings hearty greens like kale or spinach. You can even use radishes for a spicy kick. Mix and match to find your favorite combinations. Get creative by blending cuisines! Add cream cheese for a sushi-style bagel roll. You can also try spicy kimchi for a Korean twist. Consider using hummus and roasted red peppers for a Mediterranean flair. For a Mexican spin, add black beans and corn. Top it with fresh cilantro and lime juice. Each fusion idea brings new flavors to your rolls. It makes sushi fun and exciting! For the complete recipe, check out the Full Recipe section. To store leftover sushi rolls, wrap them tightly in plastic wrap or foil. This keeps them fresh and prevents the rice from drying out. Place the wrapped rolls in an airtight container. Store them in the fridge for up to 24 hours. The sooner you eat them, the better they taste. Freezing sushi rolls is simple. Wrap each roll in plastic wrap, then place them in a freezer-safe bag. Squeeze out as much air as possible. You can freeze sushi for about one month. When you are ready to eat, thaw it in the fridge overnight. Avoid microwaving, as it can make the rice mushy. Sushi rolls taste best when fresh. If stored properly in the fridge, they last for one day. After that, they may lose their flavor and texture. If you freeze the rolls, they can stay fresh for one month. Always check for any off smells or changes in color before eating. The best rice for sushi is short-grain sushi rice. This rice is sticky and holds its shape well. It gives sushi rolls their unique texture. When cooked, this rice becomes chewy, which is great for sushi. Look for sushi rice in Asian grocery stores or online. You can also use medium-grain rice if sushi rice is hard to find. Just remember not to use long-grain rice, as it will not stick well. Yes, you can use other ingredients besides nori. If you don’t like nori, try using lettuce leaves. They are fresh and crunchy. You can also use rice paper, which adds a different texture. Another option is to use thinly sliced cucumber as a wrap. This keeps your sushi light and refreshing. Just be creative with your wraps and fillings. The choice is all yours! Absolutely! This recipe is great for meal prep. You can make sushi rolls in advance and store them. Just keep them in an airtight container in the fridge. They will stay fresh for about 24 hours. If you prep the rice and veggies ahead of time, it makes rolling easy. You can also cut the rolls into pieces before storing. This way, you have quick snacks or lunches ready to go. Enjoy making your sushi rolls ahead of time! For the full recipe, check out the Easy Veggie Sushi Rolls section. In this blog post, I covered how to create sushi from start to finish. We looked at key ingredients like sushi rice, nori, and fresh veggies. I shared step-by-step instructions to prepare the rice, slice the vegetables, and assemble your rolls. I also offered tips to avoid common mistakes and enhance flavor. You can add your favorite proteins and try different veggies or fusion styles. With proper storage, your sushi can stay fresh for days. Now, it’s time to roll up your sleeves and enjoy making sushi at home!](https://dailydishly.com/wp-content/uploads/2025/07/11ef977b-69a9-4776-8bce-81e4c28b3d11-768x768.webp)


![To make a great creamy feta pasta salad, you'll need a few simple ingredients. Here’s what you should gather: - 8 oz (225 g) fusilli pasta - 1 cup feta cheese, crumbled - 1/2 cup Greek yogurt - 1/4 cup olive oil - 1 tablespoon lemon juice - 1 teaspoon dried oregano - 1/2 teaspoon garlic powder - 1 cup cherry tomatoes, halved - 1 cucumber, diced - 1/4 red onion, finely chopped - Salt and pepper to taste - Fresh basil leaves for garnish Each ingredient brings its own flavor to the dish. The fusilli pasta adds a fun twist, while the feta cheese offers a rich, creamy taste. Greek yogurt makes the dressing smooth and adds a nice tang. Olive oil brings depth, and lemon juice gives a bright kick. Herbs like oregano and garlic powder enhance the taste. The cherry tomatoes and cucumber add freshness, and red onion brings a mild crunch. Finally, salt, pepper, and basil leaves round out this delightful salad. For the full recipe, you can check out the complete instructions. This creamy feta pasta salad is sure to be a hit! To make this creamy feta pasta salad, start by cooking the fusilli. Bring a large pot of salted water to a boil. Add the fusilli and cook it according to the package instructions. I recommend checking the pasta a minute or two early. You want it al dente, meaning it should have a slight bite to it. Once cooked, drain the pasta in a colander. Rinse it under cold water to stop the cooking process. This step cools the pasta quickly and keeps it from becoming mushy. Set it aside while you prepare the dressing. Now, let’s make the creamy dressing. In a medium bowl, combine the crumbled feta cheese and Greek yogurt. Add olive oil, lemon juice, dried oregano, and garlic powder. Use a fork to mash the feta and yogurt together. Mix until you get a creamy texture. Taste the dressing and adjust the seasoning. You may want to add more salt or pepper. This step is key for a flavor-packed salad. In a large mixing bowl, add the cooled fusilli, halved cherry tomatoes, diced cucumber, and chopped red onion. Pour the creamy feta dressing over the pasta and mix gently. Toss until everything is coated well. Chill the salad in the fridge for at least 30 minutes. This time allows the flavors to blend and deepen. Before serving, stir again and garnish with fresh basil leaves. Enjoy your fresh and delicious creamy feta pasta salad! To get the best creamy texture, mix your ingredients well. Start by mashing the feta with a fork. This helps it blend smoothly. Next, add Greek yogurt and olive oil. Use the fork to mix until you see no lumps. This step is key for a silky dressing. When you combine the dressing with the pasta, do it gently. Toss the pasta slowly to coat every piece. If you mix too hard, the pasta may break. You want it smooth, not mushy. To boost the flavor, think about adding fresh herbs. Basil and parsley work well with feta. You can also try adding a dash of chili flakes for some heat. If you're feeling adventurous, a sprinkle of smoked paprika can add depth. You can include optional ingredients too. Consider adding olives for a briny kick. Roasted red peppers can bring sweetness. These add-ins make your salad more exciting and unique. Creamy feta pasta salad pairs nicely with grilled chicken or fish. It also goes great with a side of crusty bread. For a complete meal, serve it alongside a fresh green salad. To make your dish look appealing, use a large, colorful bowl. Garnish with whole basil leaves on top. This not only adds beauty but also enhances the fresh aroma. Enjoy your delicious salad! For the full recipe, check out the [Full Recipe]. {{image_2}} You can switch up the pasta type for your creamy feta pasta salad. Try using penne, rotini, or even whole wheat pasta. Each type brings a new texture to the dish. If you prefer gluten-free options, choose rice or chickpea pasta. These options taste great and work well with the creamy feta dressing. Adding extra veggies and proteins boosts the nutrition of your salad. Consider mixing in spinach, bell peppers, or even artichokes. For protein, grilled chicken or chickpeas are fantastic choices. You can also experiment with cheese. Try adding mozzarella or goat cheese for a different flavor. Seasonal ingredients can change the taste of your pasta salad. In summer, use fresh corn, zucchini, or basil. These bright flavors make a refreshing dish. For winter, think about roasted vegetables like sweet potatoes or Brussels sprouts. The flavors will warm you up and keep the dish hearty. To keep your creamy feta pasta salad fresh, use an airtight container. Make sure it seals well. This will help keep the salad from drying out. You can store it in the fridge for up to three days. If you notice any changes in smell or texture, it is best to throw it away. When reheating the pasta salad, use the microwave. Heat it in short bursts to avoid overcooking. Stir it gently to ensure even warmth. If the salad feels dry, add a little olive oil or a splash of water. This will help bring back its creamy texture. Can you freeze creamy feta pasta salad? It’s not the best option. Freezing can change the texture of the feta and yogurt. If you still want to freeze it, use a freezer-safe container. Make sure to remove as much air as possible. You can keep it in the freezer for up to a month. When ready to eat, thaw it in the fridge overnight before serving. I recommend using classic feta cheese for this salad. Classic feta has a tangy and salty taste. It crumbles well and mixes nicely with the other ingredients. You can also try flavored feta. Flavored feta may include herbs or spices. These add different tastes to your pasta salad. However, classic feta keeps the dish light and fresh. Yes, you can make this pasta salad ahead of time. I suggest preparing it at least two hours before serving. This allows the flavors to mingle well. You can also store it in the fridge overnight. Just be sure to stir it before serving. This will help mix the dressings again. If you don't have Greek yogurt, you can try sour cream. Sour cream gives a similar creamy texture. Another option is cream cheese. Just mix it well to keep it smooth. For dairy-free options, consider using coconut yogurt. Almond or cashew yogurt also works well. These will change the flavor slightly but still taste great. For the complete list of ingredients and instructions, check out the [Full Recipe](#). In this blog post, we explored how to make a delicious creamy feta pasta salad. We covered the key ingredients, including fusilli, feta cheese, and fresh veggies. You learned the best cooking methods and how to create the perfect dressing. I shared tips to enhance flavor and storage advice for leftovers. Ready to impress your friends with this dish? A creamy feta pasta salad will please everyone. Enjoy making it and let the flavors shine!](https://dailydishly.com/wp-content/uploads/2025/07/1e04cd5b-2977-4013-97be-e6e1a5f7ba16-768x768.webp)
