Spicy Garlic Chicken Noodles Quick and Flavorful Meal

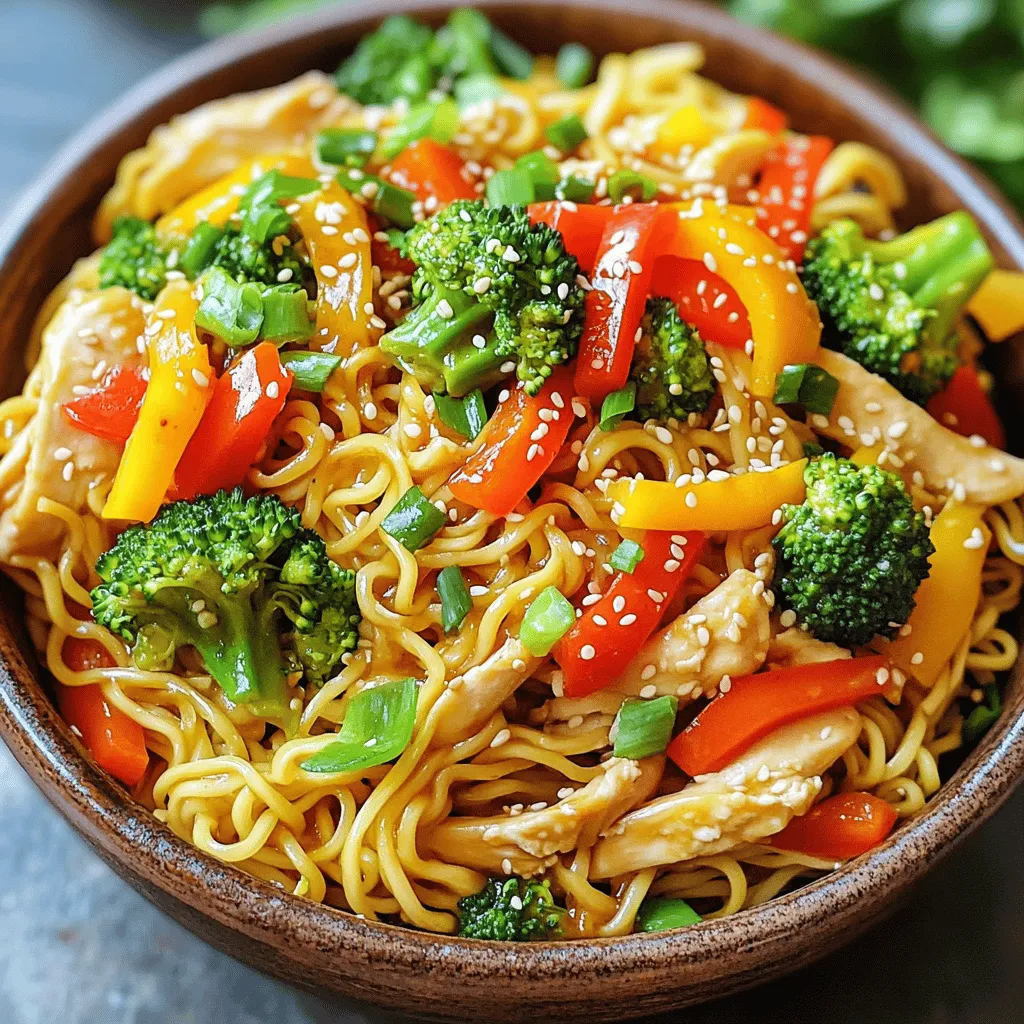
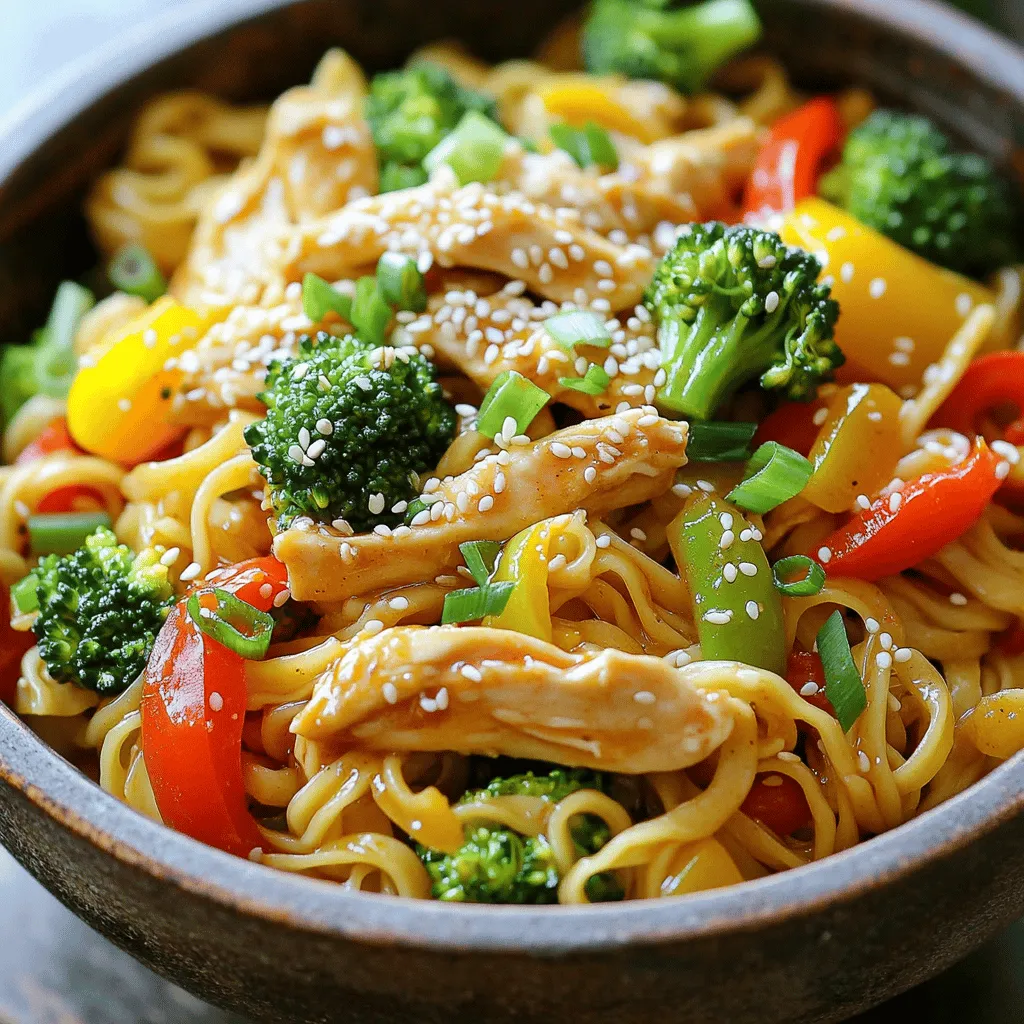
Are you craving a quick and tasty meal? Spicy Garlic Chicken Noodles deliver bold flavors that satisfy any hunger. With just a few simple steps, you can whip up this delightful dish in no time. I’ll guide you through the fresh ingredients, easy instructions, and helpful tips to make it your own. Let’s dive into this spicy adventure and transform your dinner routine!
Ingredients
Main Ingredients List
– 300g egg noodles
– 1 lb chicken breast, thinly sliced
– 4 cloves garlic, minced
– 2 tablespoons soy sauce
– 1 tablespoon chili paste (adjust for heat preference)
– 1 tablespoon sesame oil
– 1 bell pepper, sliced (red or yellow for color)
– 1 cup broccoli florets
– 2 green onions, chopped
– Salt and pepper to taste
– Sesame seeds for garnish
For this dish, I love using egg noodles. They absorb the sauce well and have a great texture. The thinly sliced chicken provides protein and flavor. Garlic is key here; it gives a warm, rich taste. The soy sauce adds umami, while chili paste brings the heat. Adjust the chili to fit your spice level.
Optional Ingredients for Extra Flavor
– Fresh ginger, minced
– Crushed red pepper flakes
– Bell pepper (orange or green)
– Snap peas or carrots
If you want more flavor, add ginger. It gives a fresh zing. Crushed red pepper can spice up the dish even more. Swap bell peppers or add snap peas for some crunch.
Substitutions and Alternatives
– Chicken can be replaced with tofu for a vegetarian option.
– Use rice noodles if you prefer a different texture.
– Tamari can be a gluten-free alternative to soy sauce.
You can switch chicken for tofu if you want a plant-based meal. I also love rice noodles as an option. For a gluten-free version, tamari works well instead of soy sauce. These small changes can help you make this dish fit your taste!
Step-by-Step Instructions
Cooking the Noodles
Start by boiling water in a large pot. Add 300g of egg noodles. Cook them according to the package instructions. Once they are soft, drain them in a colander. Set the noodles aside for later.
Sautéing the Garlic and Chicken
In a large skillet or wok, heat 1 tablespoon of sesame oil over medium-high heat. Once the oil is hot, add 4 minced garlic cloves. Sauté them for about 30 seconds. You want them fragrant but not burnt. Next, add 1 pound of thinly sliced chicken breast. Season it with salt and pepper. Cook the chicken for about 5 to 7 minutes. Make sure it turns brown and is fully cooked.
Combining Broccoli, Bell Peppers, and Sauce
Now, add in 1 sliced bell pepper and 1 cup of broccoli florets. Cook these for another 3 to 4 minutes. You want the veggies to stay tender-crisp. In a small bowl, mix 2 tablespoons of soy sauce and 1 tablespoon of chili paste. Pour this mixture over the chicken and veggies. Stir well to combine everything.
Mixing in the Noodles
Finally, bring back the cooked noodles. Toss them into the skillet with the chicken and veggies. Make sure the noodles are well coated in the spicy garlic sauce. Remove the skillet from heat. Mix in 2 chopped green onions for a fresh taste. Adjust the seasoning if needed. Serve hot, garnished with sesame seeds. Enjoy your meal!
Tips & Tricks
How to Cook Perfect Noodles
To cook perfect noodles, follow these simple steps:
– Start with a large pot of water.
– Bring the water to a full boil.
– Add a pinch of salt to the water.
– Stir in the egg noodles and cook as per package instructions.
– Taste a noodle to check for doneness.
– Drain the noodles and rinse with cold water to stop cooking.
This keeps them firm and prevents sticking.
Adjusting Spiciness Levels
Do you want to control the heat? Here’s how:
– Use less chili paste if you prefer mild flavors.
– For more heat, add an extra spoon of chili paste.
– You can also add red pepper flakes for a kick.
– Serve with lime wedges for a fresh twist.
This way, everyone can enjoy their meal to their liking.
Presentation Tips for Serving
Serving your dish well makes it more appealing:
– Use a large bowl or platter for a family-style look.
– Garnish with sesame seeds and extra green onions.
– Add a few colorful veggies on top for contrast.
– Drizzle with extra soy sauce for shine.
These small touches make your meal look as good as it tastes!

Variations
Vegetarian Version Using Tofu
You can easily make a vegetarian version of Spicy Garlic Chicken Noodles using tofu. Start by replacing the chicken with firm tofu. Cut the tofu into cubes and press it to remove extra moisture. Then, sauté the tofu in sesame oil until it’s golden brown. Follow the same steps as the original recipe, adding the tofu in place of chicken. This keeps all the great flavors while making it plant-based.
Gluten-Free Adaptation
To make Spicy Garlic Chicken Noodles gluten-free, swap the soy sauce for a gluten-free alternative. You can use tamari, which offers a similar taste without gluten. Check your noodle package too. Some egg noodles may contain gluten, so look for rice noodles or gluten-free egg noodles instead. This way, you can enjoy this dish without worry.
Adding Different Vegetables
Feel free to mix in other vegetables for extra color and nutrition. Carrots, snap peas, or bok choy work well in this dish. Just chop them into bite-sized pieces and add them when you cook the broccoli and bell peppers. This adds more flavor and makes your meal even healthier. Remember to adjust cooking times based on how long each vegetable takes to become tender-crisp.
Storage Info
How to Store Leftover Noodles
To store leftover spicy garlic chicken noodles, first let them cool down. Place them in an airtight container. Make sure to use a container that seals well to keep the flavors intact. Refrigerate the noodles within two hours of cooking. They will stay fresh for up to three days.
Reheating Instructions
When you’re ready to eat your leftovers, reheat them on the stove or in the microwave. If using the stove, add a splash of water to help them steam. Heat over low to medium heat until warm. If using a microwave, cover the container and heat in short intervals. Stir after each interval to ensure even heating.
Freezing Options and Tips
You can freeze these noodles if you want to keep them longer. First, let the noodles cool completely. Then, place them in a freezer-safe bag or container. Try to remove as much air as possible to prevent freezer burn. They can be frozen for up to three months. When you want to enjoy them again, thaw them in the fridge overnight. Reheat as mentioned before.
FAQs
What can I serve with Spicy Garlic Chicken Noodles?
You can serve this dish with many sides. A fresh salad pairs well. You might try a simple cucumber salad or a side of steamed veggies. Fried rice also complements this meal nicely. If you want something crispy, egg rolls are a great choice.
How can I make this dish less spicy?
To make it less spicy, reduce the chili paste. Start with half a tablespoon. You can also add more soy sauce to balance the heat. Another option is to include more vegetables, like carrots or peas. This will help tone down the spice while keeping flavor.
Can I use other types of noodles?
Yes, you can! Rice noodles or udon noodles work well in this dish. You can even use whole wheat or gluten-free noodles if you prefer. Just be sure to adjust the cooking time based on the noodles you choose.
How long does it take to make this dish?
This dish takes about 30 minutes to make. You will spend 15 minutes prepping ingredients and cooking. The rest is just mixing everything together. It’s a quick and tasty meal!
What are some possible side dishes?
Some great side dishes include steamed broccoli, sautéed greens, or a light soup. You could also serve it with pickled vegetables for a tangy touch. Another option is to have a bowl of miso soup alongside. Each side adds a new flavor to your meal.
This blog post covered how to make Spicy Garlic Chicken Noodles. We explored the main ingredients and optional ones for extra flavor. I shared step-by-step cooking instructions for perfect noodles, sautéed chicken, and mixed veggies. You learned tips for cooking, serving, and storing this dish.
You can adapt this recipe to fit your tastes or dietary needs. I hope you feel ready to create a delicious meal that’s right for you. Enjoy your cooking journey!


![- 1 lb boneless, skinless chicken breasts - 2 tablespoons olive oil - Seasonings: chili powder, cumin, smoked paprika, garlic powder - Salt and pepper - Vegetables: red bell pepper, green bell pepper, yellow onion - Tortillas: flour or corn - Garnishes: fresh cilantro, lime wedges When you make easy chicken fajitas, you need fresh and tasty ingredients. Start with 1 pound of boneless, skinless chicken breasts. Cut them into thin strips for quick cooking. Next, add 2 tablespoons of olive oil. This oil helps the flavors stick. For the seasonings, use: - 1 teaspoon chili powder - 1 teaspoon cumin - 1 teaspoon smoked paprika - 1 teaspoon garlic powder These spices give the chicken a bold taste. Don't forget salt and pepper to enhance the flavor. Now, gather your vegetables. You will need: - 1 red bell pepper, sliced - 1 green bell pepper, sliced - 1 yellow onion, sliced These veggies add color and crunch. You will also need tortillas. Choose either 8 small flour or corn tortillas. Finally, fresh cilantro and lime wedges make great garnishes. The cilantro adds freshness, and the lime gives a zesty kick. With these ingredients, you can create a flavorful family dinner that everyone will enjoy. Check the Full Recipe for more tips! Start by mixing the marinade. In a large bowl, combine the olive oil with chili powder, cumin, smoked paprika, garlic powder, salt, and pepper. Stir it well until all the spices blend into the oil. Next, add the sliced chicken to the bowl. Toss the chicken strips in the marinade. Make sure each piece gets coated. Let it sit for 15 to 20 minutes. If you have more time, marinate it in the fridge for up to 2 hours. This gives the chicken great flavor. Heat a large skillet over medium-high heat. Once hot, add the marinated chicken to the skillet. It should sizzle when it hits the pan. Cook for about 5 minutes. Stir occasionally to make sure it cooks evenly. You want the chicken to be cooked through and browned. Check that it is no longer pink in the center. Now it’s time for the veggies! Add the sliced bell peppers and onions to the skillet with the chicken. Stir everything together. Cook for another 5 to 7 minutes. You want the vegetables to be tender but still crisp. This adds a nice texture to the dish. The colors from the peppers and onion will make your fajitas look amazing. For the complete recipe, check the [Full Recipe]. To make the best chicken fajitas, marinating is key. I suggest marinating the chicken for at least 15-20 minutes. If you have more time, try marinating for up to 2 hours in the fridge. This extra time allows the flavors to soak in deeply. For cooking, use medium-high heat. This ensures the chicken gets a nice sear without drying out. When it's time to serve, think about how to make your fajitas pop. I like to serve them on a large platter. You can layer the filling beautifully. Add a sprinkle of fresh cilantro on top for a bright touch. Lime wedges are a must-have for squeezing. They add a nice zing! For sides, consider guacamole, salsa, or a fresh salad. These pair well and add more flavors to your meal. One common mistake is overcooking the chicken. This can make it dry and tough. Keep an eye on it while it cooks. You want juicy, tender pieces. Another mistake is not choosing the right tortillas. Flour tortillas are soft and chewy, while corn tortillas are more traditional. Make sure to warm them up before serving. This step makes them easier to fold and enjoy. For the full recipe, check out the Easy Chicken Fajitas section above. {{image_2}} You can easily swap chicken for other proteins. Beef works great if you slice it thin. Use flank steak or sirloin for the best flavor. Shrimp is another tasty option. Just make sure to cook shrimp until it turns pink. Both options keep the dish fun and delicious. If you want a meatless meal, try using plant-based proteins. Tofu or tempeh can be great choices. You can also load up on veggies. Try mushrooms, zucchini, or even eggplant for a hearty bite. The mix of colors makes your fajitas look as good as they taste. To amp up the flavor, add jalapeños. They give a nice heat to the dish. You can also play with different spices. Try adding oregano or coriander for a unique twist. A squeeze of lime juice brightens the flavors, making your fajitas even more amazing. For the full recipe, check out the Easy Chicken Fajitas. To keep your leftover fajitas fresh, store them in airtight containers. Make sure the fajitas cool down to room temperature first. This helps prevent condensation, which can make them soggy. If you have extra tortillas, store them separately to keep them soft. Reheating chicken fajitas is easy. You can do this in a skillet over medium heat. Add a splash of water to steam them slightly and keep them moist. Stir occasionally for about 5 minutes. If you prefer the microwave, place them in a microwave-safe dish and cover with a damp paper towel. Heat for 1 to 2 minutes, checking every 30 seconds. Freezing chicken fajitas is a great way to save time. First, let the cooked fajitas cool completely. Then, portion them into freezer bags or containers. Remove as much air as possible to prevent freezer burn. You can freeze both the chicken and vegetables together. When you’re ready to eat them, thaw overnight in the fridge. Reheat as mentioned above for a quick meal. To add heat, you can use jalapeños. Slice them thin and toss in with the chicken. You could also add a pinch of cayenne pepper to the marinade. If you want more flavor, try a chipotle in adobo sauce. Just a small amount packs a punch. Adjust the spice to your taste. Yes, you can add many vegetables. Here are some great options: - Zucchini - Mushrooms - Corn - Asparagus - Cherry tomatoes These veggies will add color and flavor to your fajitas. Fajitas are great with various sides. Here are some tasty ideas: - Mexican rice - Refried beans - Guacamole - Salsa - Sour cream - Fresh corn salad These sides will complement your chicken fajitas well. You can find the full recipe for Easy Chicken Fajitas in the earlier section. You’ve learned how to make easy chicken fajitas that burst with flavor. We covered the key ingredients, easy steps, and helpful tips. You can customize your fajitas with different proteins and veggies, too. Remember, the right cooking method and storage will keep them fresh. Enjoy crafting your own delicious meals at home! Now, go ahead and impress your family or friends with your fajita skills!](https://dailydishly.com/wp-content/uploads/2025/06/bddc0842-410c-41cd-a0e7-7c4486f739b3-768x768.webp)


![To make a delicious Margherita pizza, you need the following items: - 2 cups all-purpose flour - 1 teaspoon active dry yeast - ¾ cup warm water (about 110°F) - 1 teaspoon sugar - 1 teaspoon salt - 1 tablespoon olive oil These ingredients create a perfect dough. The flour gives it structure, while the yeast helps it rise. The sugar feeds the yeast, and the salt adds flavor. For the toppings, gather these simple ingredients: - 1 cup canned San Marzano tomatoes, crushed - 1 cup fresh mozzarella cheese, sliced - Fresh basil leaves (about 8-10 leaves) - Salt and pepper to taste - Extra olive oil for drizzling San Marzano tomatoes are sweeter and richer in taste. Fresh mozzarella melts beautifully, and basil adds a fragrant touch. The salt and pepper boost the flavors, while olive oil gives a nice finish. This combination makes the pizza flavorful and fresh, just like you would find in Italy. For the full recipe, check out the details above. - Combine warm water, sugar, and yeast. Let it foam for about 5-10 minutes. - Mix flour and salt in a bowl. Create a well in the center, then add the yeast mixture. - Knead the dough on a floured surface until it's smooth and elastic, about 8-10 minutes. - Shape the dough into a ball. Place it in an oiled bowl and cover it with a damp cloth. - Preheat your oven to its highest setting, usually between 475°F and 500°F. - Prepare the sauce using crushed San Marzano tomatoes. Season it with salt and pepper. - After the dough rises, punch it down. Shape it into a 12-inch round. - Transfer the dough to a pizza peel or baking sheet. Spread the sauce thinly over the dough. - Evenly place slices of fresh mozzarella on top of the sauce. Tear fresh basil leaves and sprinkle them over the cheese. - Bake the pizza in the oven for about 10-12 minutes. Look for a golden crust and bubbling cheese. Use the Full Recipe for detailed steps and measurements to create this classic dish! To make great dough, you want it elastic but not sticky. When you knead, aim for about eight to ten minutes. This builds the right texture. If the dough feels too wet, add a bit more flour. If it’s too dry, a splash of water helps. The goal is a smooth and stretchy dough. For the sauce, use high-quality San Marzano tomatoes. They make a big difference in taste. Crush them gently, and add salt and pepper to enhance the flavor. Be careful not to overload your pizza with toppings. Less is more for a perfect bake. This lets the dough rise and crisp up nicely. A pizza stone is a fantastic tool for a crispier crust. Preheat it in the oven to get it really hot. If you don’t have one, a baking sheet works too. Just keep an eye on your pizza while it bakes. You might need to adjust the baking time based on your oven and your taste. Aim for a golden crust and bubbling cheese for the best results. Using these tips will help you craft a classic Margherita pizza that impresses. For the full recipe, check out our detailed instructions and ingredient list. {{image_2}} You can make your Margherita pizza even better by trying different cheeses. Burrata adds a creamy texture that melts beautifully. Smoked mozzarella brings a rich, savory flavor. Both options will change the taste while keeping it classic. Don’t be afraid to get creative with toppings. Arugula adds a peppery bite that pairs well with the cheese. Prosciutto gives a salty, savory kick. A drizzle of truffle oil can elevate the dish with its earthy aroma. These changes can delight your taste buds while keeping the pizza true to its roots. If you want to mix things up, consider using different sauces. Pesto offers a fresh, herbal twist that complements the cheese. White sauce can add a creamy richness that contrasts nicely with the crust. These variations keep the spirit of Margherita while letting you explore new flavors. For the full recipe, check out the [Full Recipe] section! Store your leftover pizza in the refrigerator. Use an airtight container to keep it fresh. It will stay good for up to 3 days. This way, you can enjoy your pizza a bit longer. Want to save pizza for later? You can freeze unbaked pizza for easy meals. Wrap it tightly in plastic wrap and then in foil. This keeps the flavors intact for future enjoyment. To reheat your pizza, the oven is the best choice. Set it to 375°F and bake for about 10 minutes. This method keeps the crust crispy and the cheese melty. If you're in a hurry, use a skillet. Heat it on medium-low for quicker results. Just cover it with a lid to warm the toppings evenly. Margherita pizza comes from Naples, Italy. It was created in 1889 for Queen Margherita of Savoy. The colors of the pizza match the Italian flag: red tomatoes, white mozzarella, and green basil. This dish is simple but full of flavor. It shows how good food can be made from just a few fresh ingredients. To make gluten-free Margherita pizza, use gluten-free flour. You can mix it with xanthan gum for better texture. Here’s a simple list of gluten-free ingredients: - 2 cups gluten-free flour - 1 teaspoon active dry yeast - ¾ cup warm water - 1 teaspoon sugar - 1 teaspoon salt - 1 tablespoon olive oil Follow the same steps as the regular recipe, and you’ll have a tasty gluten-free pizza. Yes, you can make Margherita pizza without a pizza stone. You can use a baking sheet instead. Just preheat the baking sheet in the oven. It helps to create a nice crust. Place the assembled pizza on the hot sheet and bake as directed. You may also use a cast-iron skillet for a crispy base. An authentic Margherita pizza has key elements. It uses San Marzano tomatoes, fresh mozzarella, and basil. The dough must be hand-stretched and thin. The pizza should be baked at a high temperature for a short time. This method creates a soft inside and crisp outside. This recipe yields 2 to 4 servings. It depends on how big you slice the pizza. If you want more, just double the ingredients. You can also make smaller pizzas for a fun meal with friends or family. The number 19 is special because it refers to the recipe's order in this article. Each recipe is numbered for easy reference. In this case, Margherita pizza is recipe number 19. It highlights the importance of classic dishes in my collection. Classic Margherita pizza combines simple ingredients for a delightful dish. You learned the essential components, from fresh basil to San Marzano tomatoes. Following clear steps, you can create perfect dough and rich toppings. Remember to use quality ingredients for the best taste. Feel free to experiment with variations and storage tips. Making this pizza at home is rewarding and fun. Enjoy the process, and savor the delicious results every time.](https://dailydishly.com/wp-content/uploads/2025/06/379b831d-c22e-427f-bef4-29b7c3a1d548-768x768.webp)
