Spicy Roasted Pumpkin Seeds Crispy Easy Snack

Looking for a simple yet tasty snack? Try my Spicy Roasted Pumpkin Seeds! They’re easy to whip up and packed with flavor. You only need a few ingredients like raw pumpkin seeds, olive oil, and spices, plus optional honey for a hint of sweetness. Perfect for game day or a quick munch. Let’s dive into how to turn these seeds into your new favorite crunchy treat!
Ingredients
Here’s what you need to make spicy roasted pumpkin seeds:
– 1 cup raw pumpkin seeds (pepitas)
– 2 tablespoons olive oil
– 1 teaspoon chili powder
– 1/2 teaspoon paprika
– 1/2 teaspoon cayenne pepper (adjust to taste)
– 1/2 teaspoon garlic powder
– 1/2 teaspoon salt
– 1/4 teaspoon black pepper
– 1 tablespoon honey (optional, for sweetness)
These ingredients create a delicious snack that packs a punch. The pumpkin seeds offer a nice crunch while the spices add heat and flavor. If you like it spicy, feel free to add more cayenne pepper. If you prefer a hint of sweetness, the honey is a great choice. This recipe is easy, fun, and perfect for sharing!
Step-by-Step Instructions
Preparing the Seeds
– Preheat the oven to 350°F (175°C).
– Rinse and pat dry the pumpkin seeds.
Start by preheating the oven. This helps the seeds roast evenly. Rinse the fresh pumpkin seeds under cold water to clean them. You want to remove any bits of pumpkin. After rinsing, lay the seeds on a clean towel. Gently pat them dry. This step is key for crispiness.
Seasoning the Seeds
– Combine ingredients in a mixing bowl.
– Toss until well-coated.
In a large mixing bowl, add the dried pumpkin seeds. Pour in olive oil, chili powder, paprika, cayenne pepper, garlic powder, salt, and black pepper. If you like a touch of sweetness, add honey now. Toss everything together. Make sure each seed gets coated well with the spices. This mixture gives the seeds their spicy kick.
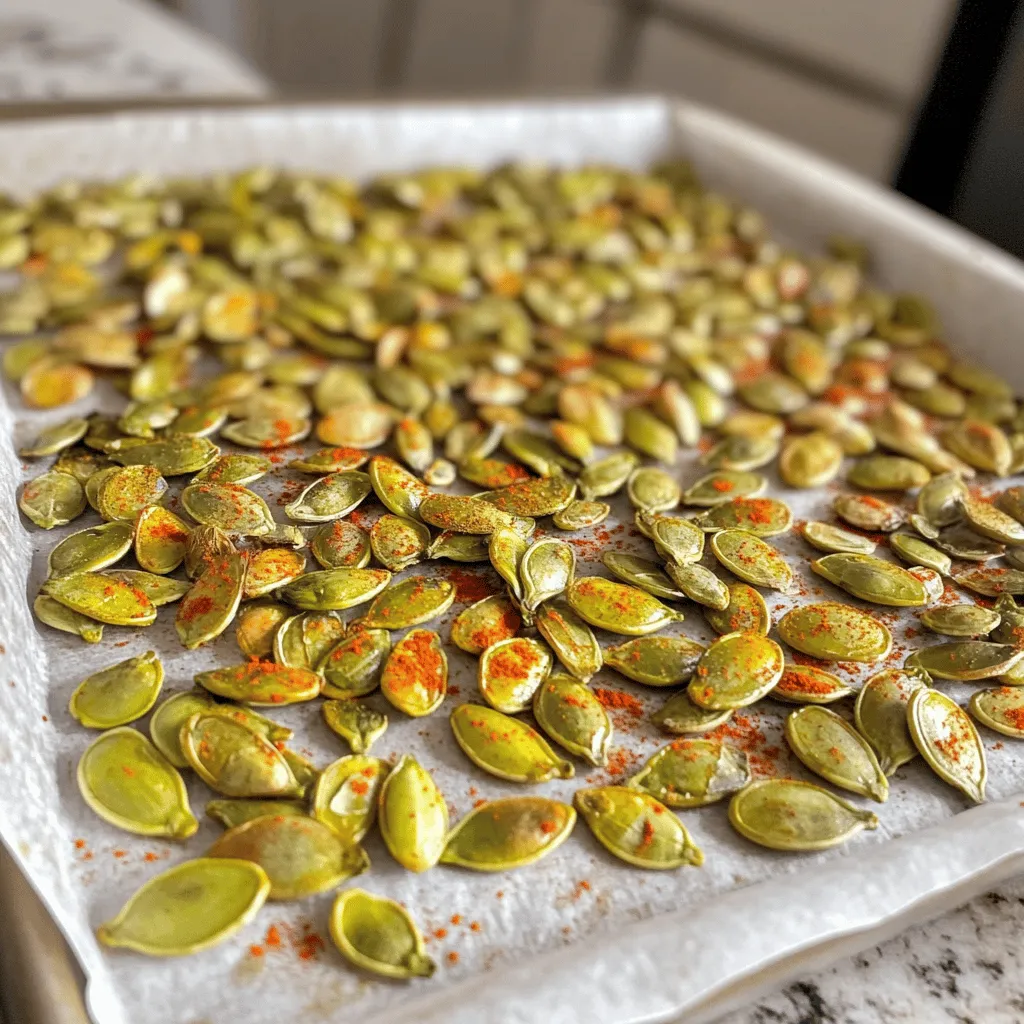
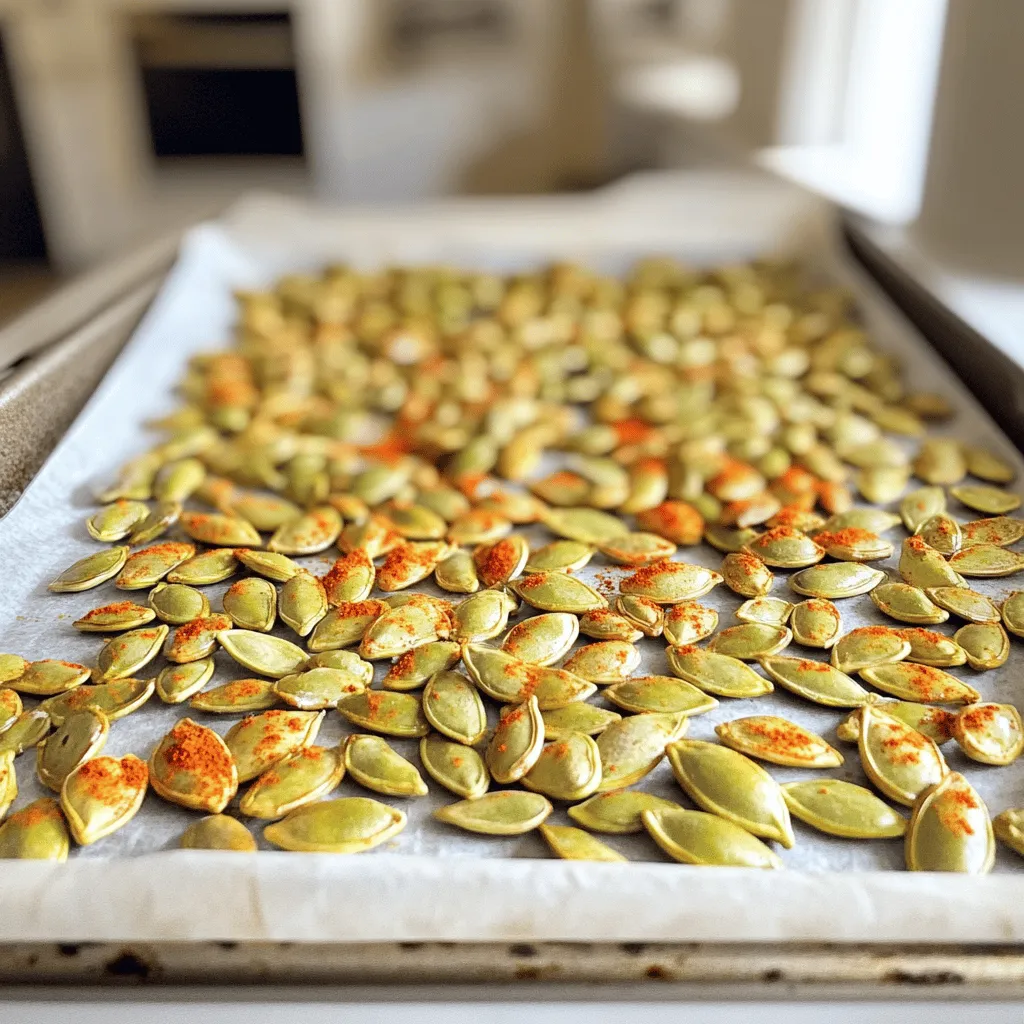
Roasting the Seeds
– Spread on a lined baking sheet.
– Roast and stir periodically for even cooking.
Line a baking sheet with parchment paper. This makes cleanup easy. Spread the seasoned pumpkin seeds in a single layer. Avoid overcrowding for even roasting. Place the baking sheet in the oven. Roast the seeds for 15-20 minutes. Stir every 5-7 minutes to ensure they cook evenly. Watch closely to prevent burning. When they turn golden brown and smell amazing, they are done. Remove from the oven and let them cool. Once cool, they will be crispy and ready to enjoy as a snack or topping.
Tips & Tricks
Achieving the Perfect Roast
To get the best crispy pumpkin seeds, check them often while roasting. The seeds can burn quickly, so I usually set a timer for every 5 minutes. Stirring helps them cook evenly. If you like more spice, add more cayenne. You can also cut back if you prefer it milder. Adjusting the seasoning is key to finding your perfect taste.
Sweet vs. Savory
If you want a hint of sweetness, try adding honey. It gives a nice contrast to the heat. You can drizzle it over the seeds before roasting. For other flavors, think about adding spices like cumin or cinnamon. These can change the whole vibe of your snack. Mixing flavors keeps things fun and interesting.

Variations
Different Flavors
You can change the taste of your spicy roasted pumpkin seeds by using different spices. Try cumin for a warm, earthy flavor. Turmeric adds a bright color and a hint of bitterness. If you prefer something sweet, mix in cinnamon and sugar. It creates a lovely twist on the classic recipe. These variations keep your snack exciting and fun.
Combining Ingredients
To make your snack even better, mix in other nuts or seeds. Almonds or sunflower seeds add a nice crunch. You can also create a crunchy trail mix by adding dried fruits like cranberries or raisins. This mix of textures and flavors will make your snack more interesting. Plus, it’s a great way to enjoy a variety of tastes in one bowl.
Storage Info
Best Storage Practices
After you make your spicy roasted pumpkin seeds, store them in an airtight container. This keeps them fresh and crunchy. Use a glass jar or a plastic container with a tight lid. Make sure to keep them in a cool, dry place. Avoid areas with high heat or humidity, as these can make the seeds soggy.
Shelf Life
When stored properly, the spicy roasted pumpkin seeds last about two weeks. You can enjoy them as a quick snack or add them to meals. If you want to keep them longer, consider freezing them. Place the seeds in a freezer-safe bag or container. They can last for up to three months in the freezer. Just remember to let them thaw before snacking!
FAQs
Can I use raw pumpkin seeds?
Yes, you can use raw pumpkin seeds for roasting. Raw seeds, also known as pepitas, work very well. They have a great texture and flavor when roasted. Just make sure to rinse them if they are fresh from the pumpkin. This removes any leftover pulp. Dry them well before seasoning.
How can I customize the spice level?
You can easily adjust the spice level to fit your taste. If you like things mild, use less cayenne pepper or skip it entirely. For more heat, add extra cayenne or even some hot sauce. You can also try spices like cumin or smoked paprika. These will add depth without making it too hot.
What are the health benefits of pumpkin seeds?
Pumpkin seeds are packed with nutrients. They are rich in magnesium, zinc, and healthy fats. These seeds also provide a good amount of protein. Eating pumpkin seeds may help improve heart health and support your immune system. Plus, they are full of antioxidants, which are great for your body.
This blog outlined a simple way to roast pumpkin seeds. We covered ingredients, cooking steps, and storage tips. You now know how to season and customize your seeds for any taste. Remember, you can mix in nuts or try different spices for a fun twist. Store them well, and they’ll last longer. Enjoy your roasted seeds as a healthy snack or topping!


![- 12 mini bell peppers (assorted colors) - 1 cup cooked quinoa - 1 cup black beans, rinsed and drained - 1 cup corn (fresh, frozen, or canned) - 1/2 cup diced tomatoes (fresh or canned) - 1 cup shredded cheese (cheddar or pepper jack) The mini bell peppers are the stars here. Their sweet crunch makes a great bite. They come in many colors, adding fun to your dish. Quinoa adds protein and a nice texture. Black beans bring fiber and heartiness. Corn adds sweetness and color, while diced tomatoes add moisture and flavor. Finally, shredded cheese melts into a gooey topping that ties everything together. - 1 teaspoon cumin - 1 teaspoon smoked paprika - 1 teaspoon garlic powder - 1/2 teaspoon onion powder - Salt and pepper to taste Seasonings bring life to your dish. Cumin adds warmth and earthiness. Smoked paprika gives a touch of smokiness. Garlic powder adds depth, while onion powder enhances flavor. Salt and pepper balance everything out. This blend will make your stuffed mini bell peppers burst with flavor. - Fresh cilantro, chopped (for garnish) - 1 tablespoon olive oil Garnishes make your dish pretty and fresh. Fresh cilantro adds a pop of color and brightness. Olive oil adds richness and ties the flavors together. Together, they make your stuffed mini bell peppers look and taste amazing. You can find the full recipe [here]. 1. Preheat the oven to 375°F (190°C). This step gets your oven ready for baking. 2. Cut the tops off the mini bell peppers. Use a sharp knife for a clean cut. 3. Remove the seeds and any white parts inside the peppers. This helps reduce bitterness. 1. In a large mixing bowl, combine the cooked quinoa, black beans, corn, and diced tomatoes. 2. Add half a cup of shredded cheese to the mix. This adds creaminess and flavor. 3. Stir in the cumin, smoked paprika, garlic powder, onion powder, salt, and pepper. Mix well until everything is combined. 4. Drizzle one tablespoon of olive oil over the filling and stir again. This keeps it moist. 1. Carefully fill each mini bell pepper with the quinoa mixture. Press down gently to pack it in. 2. Arrange the stuffed peppers upright in a baking dish. If they tip over, use crumpled aluminum foil to help them stand. 3. Sprinkle the rest of the cheese on top of the stuffed peppers. This will melt into a tasty layer. 4. Cover the dish with aluminum foil. Bake for 20 minutes, then remove the foil. 5. Bake for an additional 10-15 minutes, until the peppers are tender and the cheese is bubbly and golden. 6. After baking, let them cool for a few minutes before garnishing with fresh cilantro. For the Full Recipe, refer to the ingredients and precise steps above. Enjoy! You can easily change this recipe. Try using ground turkey instead of black beans. It adds a nice flavor. For some heat, add chili powder or cayenne pepper. This can spice things up! If you want vegan options, skip the cheese and use tofu. For gluten-free, ensure you select gluten-free grains and beans. You have options for cooking. Baking is simple and gives a soft texture. You can also use an air fryer. Air frying makes them crispy and quick. If you want a smoky taste, grilling is great. Just watch the peppers so they don’t burn. Dips enhance the meal. Salsa and guacamole pair well with the stuffed peppers. You can serve them as appetizers or as a fun main dish. They are colorful and bright, making your table look good. For a complete meal, add a fresh salad on the side. You can find the full recipe above, so you have all the details you need. {{image_2}} You can make stuffed mini bell peppers in many tasty ways. For a Mexican twist, add taco seasoning to the filling. This adds spice and flavor. You can use ground meat or keep it vegetarian. For a Mediterranean style, mix in feta cheese and olives. This creates a salty and creamy taste. The tangy flavors work great with the sweet peppers. Both options are fun and easy to try. Feel free to play with the main ingredients. You can swap quinoa for rice if you prefer it. Rice adds a nice texture and flavor. If you want a change, use lentils instead of beans. Lentils cook fast and have a great taste. They also boost the protein in your dish. These swaps let you customize the recipe to your liking. Seasonal changes can inspire new stuffed pepper ideas. In summer, use fresh garden veggies like zucchini or corn. These add brightness and flavor. In winter, try heartier vegetables like mushrooms or kale. They give warmth and comfort to your meal. These seasonal changes keep things interesting and delicious. For the full recipe, check out the details above. After you enjoy your stuffed mini bell peppers, store the leftovers in the fridge. Place them in an airtight container. This keeps them fresh and tasty. If you have a lot, you can stack them, but make sure they are not too crowded. The best containers are glass or BPA-free plastic. They seal well and help keep the flavor. To freeze stuffed peppers, let them cool first. Then, wrap each pepper tightly in plastic wrap. After that, put them in a freezer-safe bag or container. This helps prevent freezer burn. When you want to eat them, take them out. Thaw them in the fridge overnight. You can reheat them in the oven or microwave. If using the oven, bake at 350°F (175°C) until warmed through. Stuffed mini bell peppers last about 3 to 5 days in the fridge. If frozen, they can last up to 3 months. For the best taste, eat them sooner rather than later. Always check for any signs of spoilage before eating. Keeping track of freshness helps you enjoy your meal at its best. Stuffed mini bell peppers are small, colorful peppers filled with a tasty mix. They are often stuffed with ingredients like quinoa, beans, corn, and cheese. After baking, they become soft and flavorful. The peppers add a nice crunch and sweetness. This dish is perfect as an appetizer or a main course. You can enjoy them warm or at room temperature. Yes, you can make stuffed mini bell peppers in advance. Prepare the filling and stuff the peppers. Then, cover and refrigerate them for up to a day. When ready to bake, take them out and let them sit for 15 minutes. This helps them cook evenly. You can also freeze them before baking. To do this, wrap them tightly and store them for up to three months. Thaw in the fridge overnight before baking. Stuffed mini bell peppers pair well with many sides. Here are a few tasty options: - A fresh green salad with vinaigrette - Guacamole and tortilla chips - Rice or quinoa pilaf - A light soup, like tomato or corn chowder - Sparkling water or a light white wine These sides complement the flavors of the stuffed peppers and make the meal more complete. You can tell stuffed mini bell peppers are done by checking a few signs. First, look for the peppers to be tender and slightly wrinkled. The cheese on top should be golden and bubbly. If you poke a pepper with a fork, it should feel soft but not mushy. Cooking time is usually 30 to 35 minutes at 375°F (190°C). If unsure, a food thermometer should read 165°F (74°C) inside the filling. Stuffed mini bell peppers are fun, tasty, and easy to make. We explored their main ingredients, seasonings, and garnishes. You learned how to prep, mix, and bake them perfectly. Plus, I shared great tips for customizing and serving your dish. Don’t forget about storing leftovers for later! Experiment with flavors and try different options. There’s so much you can do with this dish. Enjoy making stuffed peppers that please everyone at your table!](https://dailydishly.com/wp-content/uploads/2025/07/7be91d44-d02b-4978-8cdb-a2e2cd47e9c1-768x768.webp)
