Spicy Zucchini Relish Quick and Flavorful Recipe

Looking for a way to spice up your meals? This Spicy Zucchini Relish is quick and full of flavor. Perfect for sandwiches, tacos, or as a side dish, this recipe is great for using fresh veggies. You’ll love how simple it is to make, plus it features ingredients you probably have on hand. Let’s dive in and whip up this tasty treat together!
Ingredients
List of Ingredients
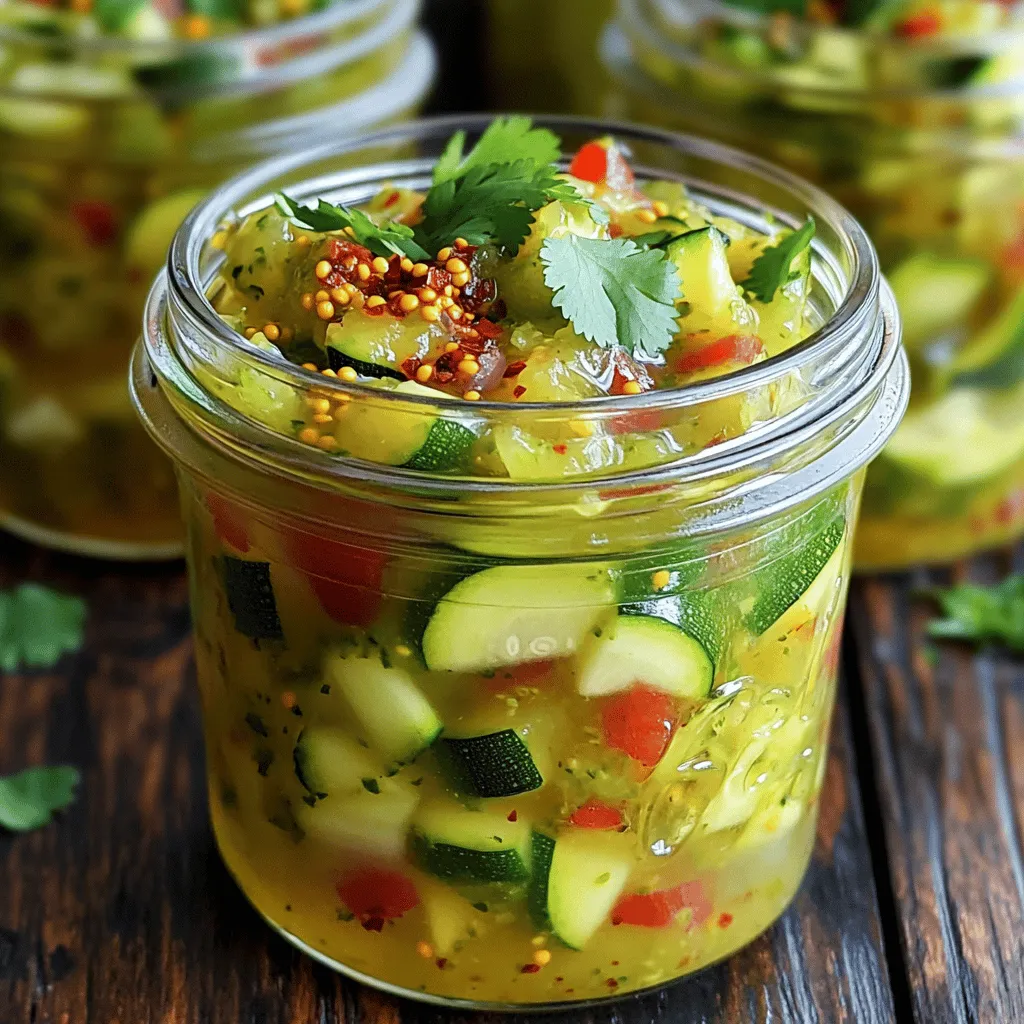
– 4 medium zucchinis, finely chopped
– 1 large onion, minced
– 1 red bell pepper, finely diced
– 2 cloves garlic, minced
– 1 tablespoon ginger, grated
– 1 cup apple cider vinegar
– ¾ cup sugar
– 1 tablespoon mustard seeds
– 1 tablespoon chili flakes (adjust to taste)
– 1 teaspoon turmeric powder
– 1 teaspoon salt
– ¼ cup fresh cilantro, chopped
Gather these ingredients before you start. Each one adds a unique flavor. The zucchinis give a fresh taste, while the onion and garlic add depth. The ginger brings warmth, and the vinegar balances everything with a tangy kick.
You can customize the chili flakes to match your heat level. If you love spice, add more! The mustard seeds pop for a fun texture. Turmeric adds color and a hint of earthiness.
Kitchen Tools Needed
– Large mixing bowl
– Pot for cooking
– Measuring cups and spoons
– Knife and cutting board
– Sterilized jars for storage
Make sure you have all these tools ready. A large mixing bowl helps mix the veggies well. The pot needs to be big enough to hold everything while it simmers. A sharp knife makes chopping easy. Use sterilized jars to keep your relish fresh.
With these ingredients and tools, you’re set to make a delicious spicy zucchini relish.
Step-by-Step Instructions
Preparation
First, wash the zucchinis well under cold water. This removes dirt and ensures they are clean. Next, cut off both ends of the zucchinis. Now, finely chop the zucchinis into small pieces. This helps them cook evenly. For the other veggies, mince the onion and garlic. Dice the red bell pepper. Lastly, grate the ginger. Gather all the chopped veggies in a large mixing bowl.
Cooking Process
In a large pot, pour in the apple cider vinegar. Add the sugar, mustard seeds, chili flakes, turmeric powder, and salt. Stir the mixture well, making sure the sugar dissolves. Heat this blend over medium heat until it simmers. Once it’s simmering, add your chopped vegetables to the pot. Bring everything to a gentle boil. After boiling, lower the heat and let it simmer for 30 to 40 minutes. Stir occasionally to prevent sticking. This helps all the flavors blend together.
Cooling and Storing
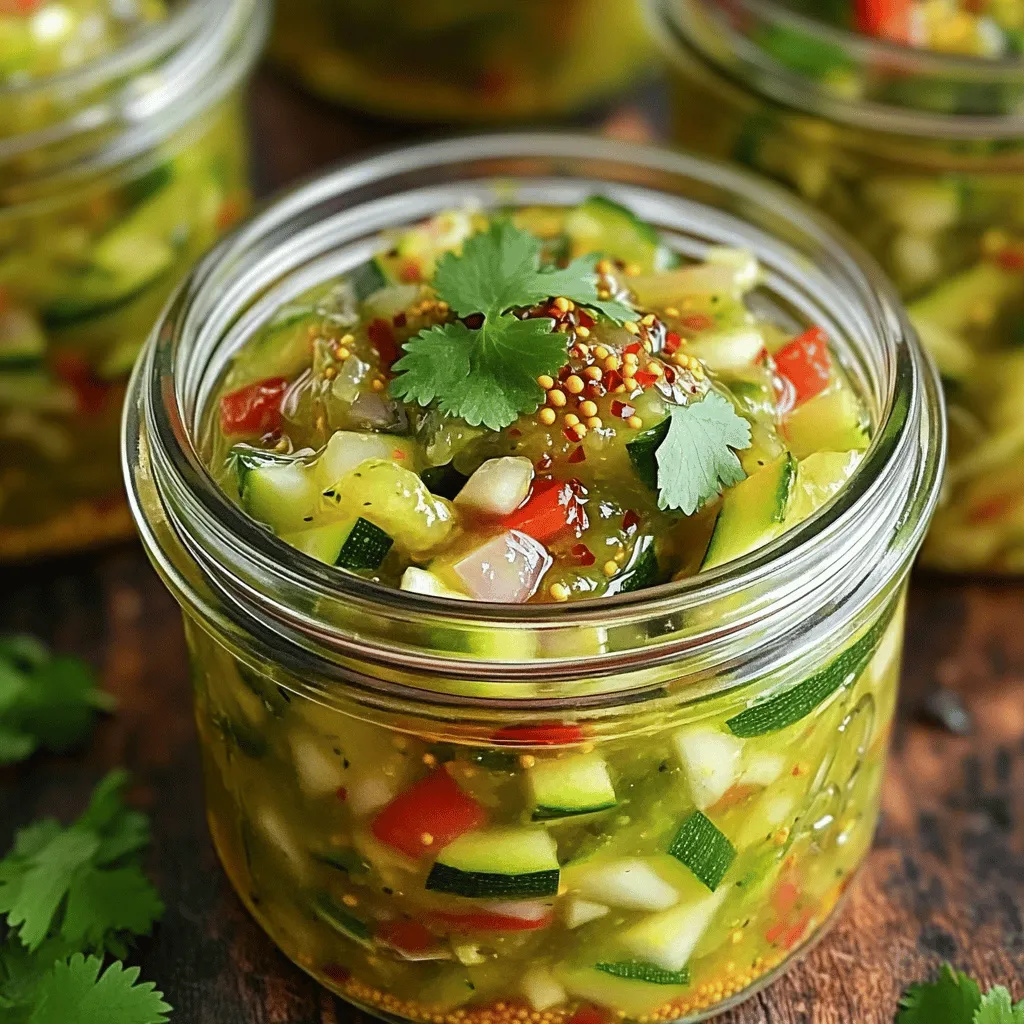
Once the relish thickens to your desired texture, remove it from heat. Stir in the fresh cilantro for a burst of flavor. Allow the relish to cool slightly. Then, transfer it to sterilized jars. Seal the jars tightly. Let them cool completely at room temperature before storing in the refrigerator.
Tips & Tricks
Best Practices for Making Relish
To make the best spicy zucchini relish, chop your veggies finely. This allows the flavors to mix well. When the pieces are small, they soak up the spices. Use a sharp knife for clean cuts. This helps keep your veggies fresh and bright.
Adjusting Spice Levels
If you want to change the heat, adjust the chili flakes. Start with a smaller amount and taste. You can always add more if you like it spicier. For less heat, you can skip the chili flakes or use mild peppers. Remember, it’s all about what you enjoy.
Flavor Enhancements
Want to boost the taste? Try adding fresh herbs like dill or basil. A splash of lime juice can brighten the flavor too. You could even add some cumin for a warm twist. Mix and match to find your favorite flavor combo. Experimenting makes cooking fun!

Variations
Alternative Ingredients
You can swap out the zucchinis for other veggies. Try cucumbers for a crunchier taste. Yellow squash also works well. If you want a twist, use eggplant or bell peppers. Each will add its unique flavor to the relish.
Flavor Profiles
Want to change up the taste? Add spices like cumin or coriander for warmth. Fresh herbs like basil or mint can brighten the relish. A squeeze of lemon or lime juice brings a zesty kick. These flavor additions can make your relish special and unique.
Serving Suggestions
Spicy zucchini relish pairs well with many dishes. Use it as a topping for grilled meats. It also works great on tacos or sandwiches. Mix it into salads for extra crunch. Serve it alongside cheese and crackers for a delightful snack.
Storage Info
How to Properly Store Zucchini Relish
To keep your spicy zucchini relish fresh, store it in clean, airtight jars. Make sure to fill each jar, leaving a small space at the top. This helps maintain flavor and keeps the relish from spoiling. Place the jars in the fridge after they cool down. The cold slows down spoilage and keeps the relish tasty.
Shelf Life
When stored properly, spicy zucchini relish lasts about 2 to 3 weeks in the fridge. Always check for signs of spoilage. If you see mold or an off smell, it’s best to throw it away. Fresh relish has a bright color and a strong scent. If those fade, it may be time to let it go.
Freezing Tips
If you want to keep the relish longer, freezing is a great option. Use freezer-safe jars or bags. Leave space for expansion as the relish freezes. This will prevent jar breakage. The relish can last up to 6 months in the freezer. When you’re ready to use it, thaw it in the fridge overnight. Enjoy your spicy zucchini relish anytime with these simple storage methods!
FAQs
How can I use spicy zucchini relish in recipes?
You can add spicy zucchini relish to many dishes. Try it on hot dogs or burgers for a tasty twist. It works great as a topping for grilled meats or fish. You can also mix it into salads for a kick. Use it as a spread on sandwiches or wraps. It adds flavor to rice or grain bowls too.
Can I make this relish without sugar?
Yes, you can make spicy zucchini relish without sugar. Use honey or agave syrup as a sweetener. You can also try using stevia for a low-calorie option. If you skip the sugar, the relish will be less sweet. This may change the overall taste but can still be delicious.
What can I substitute for apple cider vinegar?
You can use white vinegar or rice vinegar instead of apple cider vinegar. Each type of vinegar has a unique taste. White vinegar gives a sharper flavor, while rice vinegar is milder and sweeter. Choose based on your taste preference and what you have on hand.
We explored how to make spicy zucchini relish with simple ingredients and steps. You learned about preparing, cooking, and storing this delicious dish. Remember to chop your veggies finely for the best taste. Feel free to adjust spice levels to match your preference. This relish adds zing to many meals. With proper storage, it stays fresh for weeks. Enjoy your homemade relish and experiment with flavors to find your favorite twist!


![For a vibrant and tasty treat, use a mix of colorful fruits. Here’s what you need: - 1 cup strawberries, hulled - 1 cup orange segments - 1 cup pineapple chunks - 1 cup green grapes - 1 cup blueberries - 1 cup purple grapes or blackberries These fruits not only look great, but they also pack in vitamins. Each fruit adds its own flavor and texture. You can choose fresh, ripe fruits for the best taste. If you want to add a bit of sweetness, consider these options: - 2 tablespoons honey (optional) Honey brings a natural sweetness to the skewers. Drizzle it on before serving. It works well with all the fruits. Garnishing makes your skewers look even better. Use fresh mint leaves for a pop of color. Arrange the skewers on a platter for a fun display. You can also place them in a glass jar for a playful touch. This way, everyone can grab their own skewer! For the full recipe, check the detailed steps to make these beautiful treats. Start by washing all the fruits well. Rinse strawberries, grapes, blueberries, and oranges under cool water. Hull the strawberries, removing the green tops. Cut large strawberries in half for easier skewering. Peel the oranges and break them into segments. For the pineapple, slice it into bite-sized pieces. Finally, rinse the green and purple grapes. Grab wooden skewers and now it’s time to thread the fruits. Begin with a strawberry, then add an orange segment. Next, add a pineapple chunk and follow with a green grape. Then, add a blueberry and finish with a purple grape or blackberry. Aim for a vibrant pattern with all the colors of the rainbow. Each skewer should look fun and inviting! If you want to add a bit of sweetness, drizzle honey over the skewers. This step is optional, but it can enhance the flavors. For a refreshing treat, chill the skewers in the fridge for about 30 minutes before serving. Arrange them on a lovely platter and add fresh mint leaves for a pop of color. These simple steps make your rainbow fruit skewers look and taste amazing. For more detailed instructions, check the Full Recipe. Choosing ripe fruits is key for tasty skewers. Look for bright colors and firm texture. For strawberries, pick those that are deep red. Oranges should feel heavy and have smooth skin. Pineapples should have a sweet smell and give slightly when pressed. Grapes are ripe when they are plump and not wrinkled. Blueberries should be deep blue, while purple grapes should show no signs of green. When skewering, use sturdy wooden sticks or metal skewers. Start with a strawberry at the bottom. Follow with an orange segment and then a pineapple chunk. Next, add a green grape and a blueberry. Finish with a purple grape or blackberry on top. This order keeps the colors bright and fun. Space the fruits a bit apart to allow for easy eating. For parties, arrange your skewers on a big platter. Display them upright in a tall glass or jar. This makes them easy to grab. You can add a small bowl of honey for dipping. Fresh mint leaves add a nice touch and flavor. Guests will love the colors and the taste! For more ideas, check out the Full Recipe. {{image_2}} You can switch up the fruits in your skewers. Try using kiwi instead of orange for a tangy taste. Swap in mango for a sweeter flavor, or use raspberries for a tart kick. Here are some great options: - Kiwi - Mango - Raspberries - Peaches - Apples These fruits add different colors, flavors, and textures. You can mix and match based on what you like. Get creative with your combinations! Dips can make your fruit skewers even more fun. You can serve them with yogurt or chocolate sauce. Here are some tasty ideas: - Vanilla yogurt - Honey yogurt - Chocolate sauce - Nut butter Dipping adds a new layer of flavor. You can make a small bowl for each dip. This way, everyone can enjoy their favorite! Make your skewers special for holidays or parties. For a birthday, use colorful sprinkles on your yogurt dip. For summer picnics, create a “beach” theme with coconut flakes. You can also arrange the fruits in shapes, like stars or hearts. This adds a fun touch to your dish. For more details on making these colorful treats, check the Full Recipe. To keep your rainbow fruit skewers fresh, store them in the fridge. Place them in an airtight container. This helps prevent the fruits from drying out or absorbing odors. If you plan to serve them later, keep the honey separate until just before serving. This way, the skewers stay crisp and colorful. When prepping your skewers, wash and cut your fruits ahead of time. Keep them in separate containers for easy access. This makes it simple to assemble the skewers when you’re ready. If you want to make them in advance, prepare them a few hours before serving. Just remember to refrigerate them to keep them fresh. Most fruits have a good shelf life when stored correctly. Here’s a quick guide: - Strawberries: 3–5 days - Oranges: 1–2 weeks - Pineapple: 3–5 days - Grapes: 1 week - Blueberries: 1 week - Blackberries: 3–5 days Always check for freshness before using any fruit. By following these tips, your rainbow fruit skewers will stay vibrant, tasty, and ready to enjoy! For the full recipe, check back on the main article. Yes, you can use frozen fruits for skewers. However, they may not hold their shape well. Frozen fruits often lose some water when thawed. This can make them mushy. If you want to use them, let them thaw first. Pat them dry with a towel to reduce excess moisture. This way, they won’t drip and make a mess. To boost the nutrition of your rainbow fruit skewers, consider these tips: - Add a source of protein. Use yogurt, cheese cubes, or nuts. - Include seeds. Sprinkle chia or flaxseed on the fruit. - Use whole fruits instead of fruit juice. Whole fruits have more fiber. - Mix in some veggies. Cherry tomatoes or cucumber slices can add crunch. These small changes can make your skewers even healthier without losing flavor. For a summer picnic, the best fruits are those that are sweet and refreshing. Here are some great choices: - Strawberries: Juicy and easy to eat. - Watermelon: Hydrating and fun to slice. - Pineapple: Sweet and tangy. - Grapes: Bite-sized and portable. - Blueberries: Packed with antioxidants. - Raspberries: Tart and flavorful. These fruits not only taste great but also look beautiful on your skewers. You can find the full recipe for rainbow fruit skewers [here]. Enjoy! Rainbow fruit skewers are fun and easy to make. We covered the best fruits, optional sweeteners, and cool presentation ideas. You learned how to prep the fruit and assemble the skewers step by step. I shared tips on choosing ripe fruit and serving them at gatherings. We also explored variations, like adding dips and themed designs. Finally, I discussed how to store your skewers for freshness. Now, grab your favorites and get creative with your skewers! Enjoy these tasty treats while having fun with friends and family.](https://dailydishly.com/wp-content/uploads/2025/06/1f4123b9-dd53-4d15-af26-e58167d567ef-768x768.webp)


![To make crispy Parmesan ranch potato skins, you need a few simple and tasty items. Here’s what you will need: - 4 medium russet potatoes - 1 tablespoon olive oil - 1 teaspoon garlic powder - 1 teaspoon onion powder - 1 teaspoon dried parsley - ½ teaspoon salt - ¼ teaspoon black pepper - ½ cup grated Parmesan cheese - ½ cup shredded cheddar cheese - ½ cup sour cream - 2 green onions, sliced - Optional: hot sauce for drizzling These ingredients blend well together to create bold flavors. The russet potatoes shine with their fluffy texture. Olive oil helps the skins crisp up nicely. Garlic and onion powders add great depth to every bite. Parmesan cheese gives a sharp, rich taste, while cheddar brings creaminess. If you want to switch things up, you can try different cheeses, like mozzarella or pepper jack. You can also use sweet potatoes for a twist. Adjust the spices based on your taste, too. You can add more garlic powder or even a pinch of cayenne for heat. This recipe is flexible and can be made to suit your preferences. For the full recipe, check the instructions above. Start by preheating your oven to 400°F (200°C). This step is key for crispy potato skins. While the oven heats, wash the potatoes well. Use a fork to pierce each potato several times. This helps steam escape and ensures even cooking. Place the potatoes on a baking sheet. Bake them for 45-60 minutes until they are fork-tender. After baking, remove the potatoes and let them cool for about 10 minutes. Once they are cool enough to handle, cut each potato in half lengthwise. Use a spoon to scoop out some of the insides, leaving about a ¼-inch thick shell. This gives you the perfect base for your toppings. Next, brush the potato skins with olive oil, both inside and out. This step adds flavor and helps achieve that crispy texture. In a small bowl, mix together garlic powder, onion powder, dried parsley, salt, and black pepper. This seasoning blend will bring great taste to your skins. Sprinkle this mix evenly inside each potato skin. Now, it’s time to layer on the cheese. Start with the grated Parmesan cheese, then add the shredded cheddar cheese on top. The cheese will melt beautifully and add a rich flavor to each bite. Place the potato skins back on the baking sheet, cheese-side up. Return them to the oven and bake for another 15-20 minutes. Keep an eye on them until the cheese is melted and the edges are crispy. After baking, remove the skins from the oven and let them cool slightly. Top each one with a dollop of sour cream and garnish with sliced green onions. If you like a kick, drizzle some hot sauce on top. Enjoy this tasty treat with friends or family. For a complete guide, refer to the Full Recipe. To get those potato skins extra crispy, start with the right oil. I use olive oil because it adds flavor and helps the skins crisp up. Brush the oil on both the inside and outside of the potato skins. This step is key! When baking, make sure to keep an eye on the skins. Check them at the 15-minute mark. The cheese should melt, and the edges should turn golden brown. If they look a bit soft, give them a few more minutes. Trust your eyes; crispy is the goal! Want to kick up the flavor? You can add more spices. Try paprika or cayenne for some heat. A sprinkle of smoked paprika can give a nice smoky taste. If you want to modify the ranch flavor, consider adding some herbs. Fresh dill or chives can brighten things up. You can also mix in a little ranch seasoning for extra zing! These small changes can transform your potato skins into an even tastier snack. {{image_2}} You can change the cheeses to mix things up. Try using gouda or mozzarella. These cheeses melt well and add great taste. You can also use feta for a tangy twist. For toppings, consider adding cooked bacon bits or jalapeños for heat. Switching up the seasonings can create unique flavors. Instead of garlic and onion powder, try smoked paprika or chili powder. These spices give a warm, smoky flavor that is hard to resist. You can also add a sprinkle of ranch seasoning for extra zest. If you want to make these potato skins vegan, swap the cheese for a plant-based version. Nutritional yeast can also add a cheesy flavor without dairy. For the sour cream, use a vegan alternative made from cashews or coconut. To make these skins gluten-free, just ensure your seasoning blends are free from gluten. You can also use gluten-free breadcrumbs if you want extra crunch. If you want to cut down on fat, use less cheese and opt for low-fat dairy products. You can also brush the skins with cooking spray instead of oil. This way, you keep the flavor while making them lighter. For the full recipe, check out the [Full Recipe]. To keep your crispy Parmesan ranch potato skins fresh, store them in the fridge. Place them in an airtight container. This helps keep them crisp for a few days. Use wax paper or parchment paper between layers to avoid sogginess. When you want to reheat them, preheat your oven to 375°F (190°C). Place the skins on a baking sheet and heat for about 10-15 minutes. This keeps them nice and crispy, just like when they were fresh. If you want to save some for later, you can freeze potato skins. Start by baking them and letting them cool completely. Once cool, wrap each skin individually in plastic wrap. Then, place them in a freezer bag. This helps prevent freezer burn. To thaw, move them to the fridge overnight. When you’re ready to eat, reheat them in the oven at 375°F (190°C) for about 15 minutes. They will taste almost as good as fresh from the oven! For the full recipe, check out the Crispy Parmesan Ranch Potato Skins details. Yes, you can use different types of potatoes. Each type brings a unique flavor and texture. For example, russet potatoes are fluffy and great for crisping. Yukon golds are creamier and add a buttery taste. Red potatoes hold their shape well but may not get as crispy. Experiment with what you like best. Just remember to keep the skin thick enough for filling. To make these potato skins healthier, you can swap some ingredients. Use low-fat cheese for less fat. Greek yogurt can replace sour cream for a protein boost. You can also skip cheese entirely and pile on veggies, like bell peppers or spinach. This way, you keep the flavor but cut down on calories. Choose olive oil spray instead of pouring oil to control the amount used. Yes, you can prep these potato skins ahead of time. Bake the potatoes and scoop them out. Store the skins in an airtight container in the fridge. You can also mix your seasonings and cheese ahead. When you’re ready to eat, just assemble and bake. This method saves time and makes it easy to enjoy a tasty snack. In this article, we covered making delicious potato skins. You learned the key flavors, portion sizes, and how to prep and bake. We shared tips for maximum crispiness and enhancements for extra taste. You saw variations for different diets and storage methods for leftovers. These potato skins can be fun and easy to make. With some practice, you'll impress everyone with your tasty creations. Enjoy your cooking journey!](https://dailydishly.com/wp-content/uploads/2025/07/9ef0e1bf-f6f5-4930-b94b-6007a553a89c-768x768.webp)