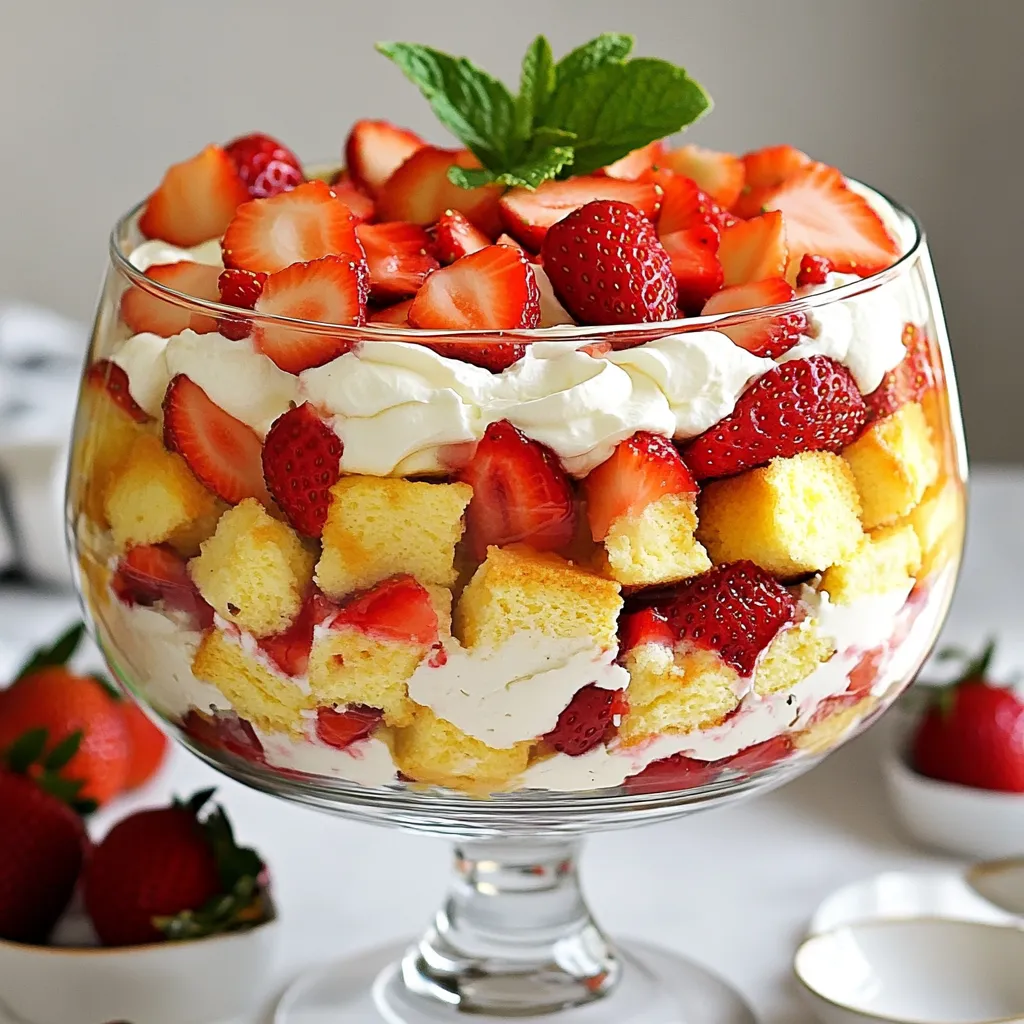
Get ready to enjoy a Strawberry Shortcake Trifle that’s not just a dessert, but a showstopper! This layered treat packs bright strawberries, fluffy sponge cake, and creamy goodness into every bite. I’ll guide you through choosing fresh ingredients and assembling them like a pro. Whether it’s for a party or just a sweet craving, you’ll impress everyone with this delightful recipe. Let’s dive in and make magic happen!
Why I Love This Recipe
- Fresh and Fruity: This trifle is packed with fresh strawberries, making it a light and refreshing dessert perfect for any occasion.
- Layered Perfection: The beautiful layers of cake, strawberries, pudding, and whipped cream create an eye-catching presentation that is sure to impress.
- Easy to Assemble: With simple ingredients and straightforward steps, this recipe is perfect for both beginner and experienced cooks.
- Chill and Serve: The trifle can be made ahead of time, allowing the flavors to meld together for a delicious and hassle-free dessert.
Ingredients
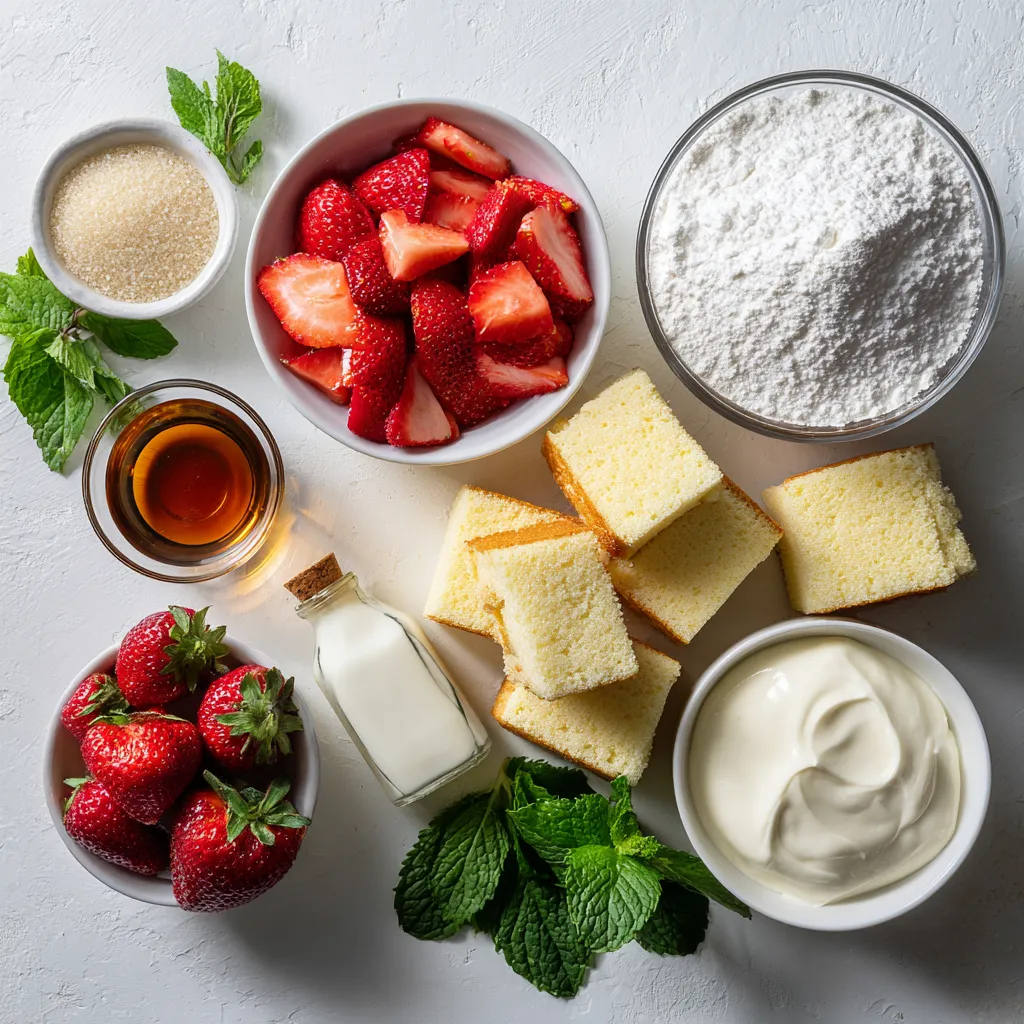
Fresh Ingredients Needed
– 2 cups fresh strawberries, hulled and sliced
– 1 cup heavy whipping cream
– 1 store-bought or homemade sponge cake (about 8-inch round)
Pantry Staples
– 1/4 cup granulated sugar
– 1/4 cup powdered sugar
– 2 teaspoons vanilla extract (1 teaspoon for strawberries, 1 teaspoon for whipped cream)
Optional Garnishes
– Fresh mint leaves
To craft this delightful trifle, you need fresh strawberries. Their sweet taste is the heart of this dish. Heavy cream helps create a rich and fluffy whipped topping. Soft sponge cake adds a light texture that soaks up fruity flavors.
In your pantry, grab granulated sugar to sweeten the strawberries. Powdered sugar gives the whipped cream a perfect touch of sweetness. Vanilla extract adds a warm flavor that ties everything together.
For a final touch, fresh mint leaves make your trifle even more special. Their bright green color and fresh taste give a lovely contrast to the red strawberries and white cream. With these ingredients, you are ready to make a stunning trifle that everyone will love.
Step-by-Step Instructions
Preparing the Strawberries
Maceration Process
First, we need to prepare the strawberries. Take 2 cups of fresh strawberries, hull, and slice them. Place them in a bowl. Add 1/4 cup of granulated sugar and 1 teaspoon of vanilla extract. Stir gently. Let the strawberries sit for about 15 minutes. This process is called maceration. It helps the strawberries release their sweet juices.
Combining with Sugar and Vanilla
The sugar and vanilla will enhance the flavor of the strawberries. You will see the strawberries get juicy and sweet. This mix is the perfect base for our trifle.
Whipping the Cream
Equipment Needed
Next, grab an electric mixer and a large bowl. We will whip the cream to make it fluffy. You’ll need 1 cup of heavy whipping cream, 1/4 cup of powdered sugar, and another teaspoon of vanilla extract.
Achieving the Right Consistency
Pour the heavy cream into the bowl. Add the powdered sugar and vanilla. Start mixing on low speed. Gradually increase the speed until soft peaks form. This means the cream should hold its shape but still be soft and smooth.
Assembling the Trifle
Layering Techniques
Now it’s time to assemble the trifle. Cut your sponge cake into 1-inch cubes. In a large trifle dish or individual glasses, start with a layer of cake cubes. Next, add a layer of the macerated strawberries, making sure to include some juice. After that, add a layer of vanilla pudding, followed by whipped cream. Repeat these layers until your dish is full.
Presentation Tips
Finish with a layer of whipped cream on top. For a beautiful touch, add more sliced strawberries and some fresh mint leaves. Serve the trifle in clear glass bowls. This way, everyone can see the lovely layers inside. Chill it in the fridge for at least 1 hour before serving. This helps the flavors blend together nicely.
Tips & Tricks
Achieving Perfect Layers
To make your trifle look great, layer the ingredients evenly. Start with cake cubes at the bottom. Use a spoon to spread each layer. This helps keep them neat. For even layers, use a light hand when adding each ingredient.
Using clear glassware is best. It lets you see the pretty layers. A trifle dish or small glasses work well. This makes your dessert look fancy and fun.
Flavors and Texture
Chilling the trifle is key. It allows the flavors to mix and taste better. Let it sit in the fridge for at least one hour. This wait makes each bite delicious.
Consider adding extra flavors. You can mix in some lemon zest with the strawberries. This gives a fresh twist. Adding a splash of almond extract to the whipped cream can also enhance the taste.
Swaps and Substitutions
If you need a dairy-free option, try coconut cream for the whipped topping. It’s rich and creamy, just like heavy cream.
You can also swap strawberries for other fruits. Try blueberries, peaches, or raspberries. Each fruit adds a unique taste and color to the trifle.
Pro Tips
- Tip for Perfect Strawberries: Use ripe, sweet strawberries for the best flavor. Look for vibrant red berries with a sweet aroma.
- Tip for Whipped Cream: Chill your mixing bowl and beaters before whipping the cream. This helps achieve a better volume and texture.
- Tip for Layering: Make sure to allow each layer to be slightly cooled (if applicable) before adding the next to prevent melting of the whipped cream.
- Tip for Presentation: Use clear glasses or a trifle dish to display the beautiful layers. Garnish with additional mint leaves for a pop of color.
Variations
Flavor Variations
You can switch up the flavors to keep things fun. Try a chocolate strawberry trifle. Just add chocolate pudding between the layers. The mix of chocolate and strawberries tastes amazing.
A lemon strawberry trifle is another great choice. Use lemon pudding instead of vanilla. The tartness of lemon pairs well with the sweet strawberries. Both variations will give you a new twist on the classic trifle.
Ingredient Variations
If you need a gluten-free option, use a gluten-free sponge cake. Many brands offer tasty gluten-free cakes. You won’t lose any flavor, and everyone can enjoy it.
For a vegan option, swap heavy cream with coconut cream. You can whip it just like regular cream. This way, you get a rich and creamy texture without dairy.
Presentation Variations
Serving individual trifles is an easy way to impress guests. Use small glass cups or jars. This method makes each dessert feel special and fancy.
You can also add celebratory garnishes. Sprigs of fresh mint or extra strawberry slices add color. A little creativity in the presentation makes your trifle stand out.
Storage Info
Refrigeration Guidelines
– How to Store Leftovers
After enjoying your trifle, store any leftovers in the fridge. Place it in an airtight container. If you used a glass dish, cover it tightly with plastic wrap. This keeps it fresh and prevents it from absorbing other smells.
– Best Practices for Layered Desserts
Layered desserts can lose their charm if not stored right. Always keep the trifle chilled. Avoid mixing layers before serving. This helps maintain the distinct flavors and textures. You want that beautiful look when you scoop into it!
Freezing Information
– Can You Freeze Strawberry Shortcake Trifle?
Freezing a trifle is not recommended. The whipped cream and pudding may separate when thawed. This will change the texture. If you want to prep in advance, make and freeze individual elements instead.
– How to Thaw and Serve
If you do freeze parts, thaw them in the fridge overnight before serving. Reassemble the trifle layer by layer for the best experience. This way, you keep that fresh taste!
Shelf Life
– Expected Duration of Freshness
When stored correctly, your trifle lasts about 2-3 days in the fridge. After this time, the layers start to blend and lose their texture. Enjoy it fresh for the best taste!
FAQs
How do I make homemade pudding for this trifle?
To make homemade pudding, you need milk, sugar, cornstarch, and vanilla. Start by mixing 2 cups of milk with 1/2 cup of sugar in a pot. Heat it on medium. In a bowl, whisk 1/4 cup of cornstarch with 1/4 cup of cold milk. Once the milk on the stove is warm, slowly add the cornstarch mix. Stir until it thickens. Remove it from heat and stir in 1 teaspoon of vanilla. Let it cool before using it in the trifle. This pudding adds rich flavor and creaminess.
Can I use frozen strawberries instead of fresh?
Yes, you can use frozen strawberries. Just thaw them first and drain any excess liquid. Frozen strawberries may be softer than fresh ones, but they still taste great. You may want to add a bit more sugar to enhance their sweet flavor. Use them in the same way as fresh strawberries. This swap makes it easy to enjoy this dessert anytime of the year.
Is it possible to prepare this trifle ahead of time?
Absolutely! You can make the trifle a day before serving. Just layer the cake, strawberries, pudding, and cream as usual. Cover it and store it in the fridge. This helps the flavors blend well. However, if you want the layers to stay pretty, add the whipped cream right before serving. This keeps it fresh and fluffy. Planning ahead makes it easier for parties or gatherings.
This blog post covered how to create a delicious strawberry shortcake trifle. We explored fresh ingredients like strawberries, heavy cream, and sponge cake, plus pantry staples such as sugar and vanilla. I shared step-by-step instructions for preparing the strawberries, whipping the cream, and assembling the layers. You learned tips for perfect layers and variations to try. Remember, storing properly keeps your dessert fresh. Now, it’s your turn to make this tasty treat and impress some friends! Enjoy the process and have fun experimenting with different flavor