Sweet Chili Shrimp Bowls Flavorful and Easy Meal

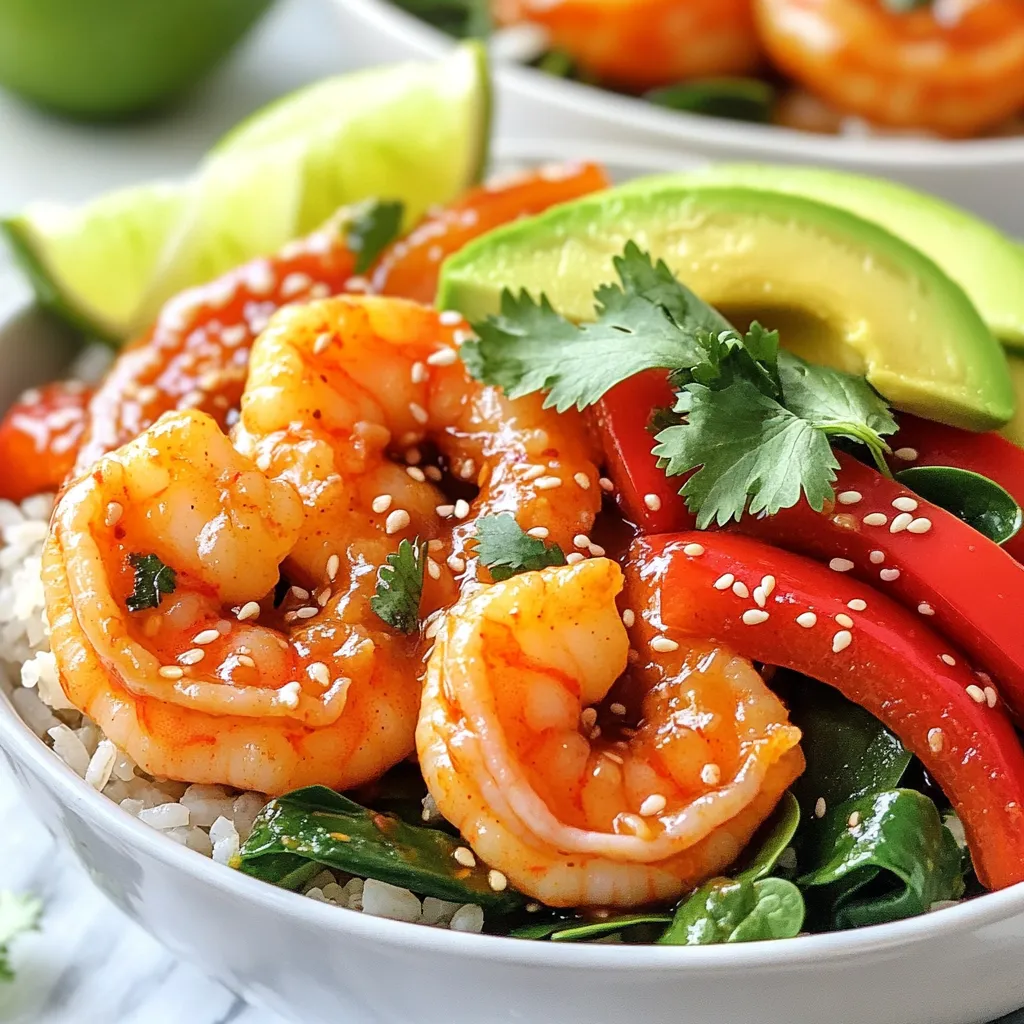
Looking for a quick, tasty dinner? Say hello to Sweet Chili Shrimp Bowls! This meal is packed with flavor and comes together easily in just a few steps. With juicy shrimp, colorful veggies, and a sweet chili sauce that packs a punch, it’s a dish everyone will love. Plus, you can customize it to fit your taste. Let’s dive into how to make this simple yet satisfying meal!
Ingredients
Main Ingredients for Sweet Chili Shrimp Bowls
– 1 lb large shrimp
– 2 tablespoons sweet chili sauce
– 1 tablespoon soy sauce
– 1 tablespoon sesame oil
Additional Ingredients
– 2 cups cooked jasmine rice
– 1 red bell pepper
– 1 cup baby spinach
– 1 avocado
Garnishes and Extras
– Chopped fresh cilantro
– Lime wedges
– Sesame seeds
– Salt and pepper to taste
Sweet Chili Shrimp Bowls are a delight to make. The main ingredients bring bold flavors that come together quickly. Shrimp is the star here, making the dish light and tasty.
I use large shrimp for this dish. They soak up the sweet chili sauce well. This sauce adds a nice sweetness. It pairs perfectly with the soy sauce and sesame oil.
Next, I add cooked jasmine rice as a base. It has a nice texture. The red bell pepper brings a crunch, and baby spinach adds color. I love how it wilts slightly when I mix it in.
Avocado slices add creaminess. They balance the dish and add healthy fats.
For garnishes, I like to sprinkle chopped cilantro. It adds a fresh taste. Lime wedges bring a zesty kick. Sesame seeds give a nice touch as well.
All these ingredients make a colorful and tasty meal. You can easily customize it to your liking!
Step-by-Step Instructions
Marinating the Shrimp
Start by making a simple marinade. In a bowl, mix together:
– 2 tablespoons sweet chili sauce
– 1 tablespoon soy sauce
– 1 tablespoon sesame oil
– Salt and pepper to taste
Add 1 pound of large shrimp to the bowl. Make sure each shrimp is well coated. Let the shrimp marinate for about 15 minutes. This helps the shrimp soak up all the tasty flavors.
Cooking the Shrimp and Vegetables
While the shrimp marinates, heat a large non-stick skillet or wok over medium-high heat. Add a little oil to the skillet. When the oil is hot, add the marinated shrimp. Cook for 2 to 3 minutes on each side. The shrimp should turn pink and opaque when done.
Next, add 1 thinly sliced red bell pepper to the skillet. Cook for another 2 minutes. The bell pepper should be soft but still have some crunch. Finally, remove the skillet from heat. Stir in 1 cup of baby spinach. Let it wilt slightly with the heat from the shrimp and bell pepper.
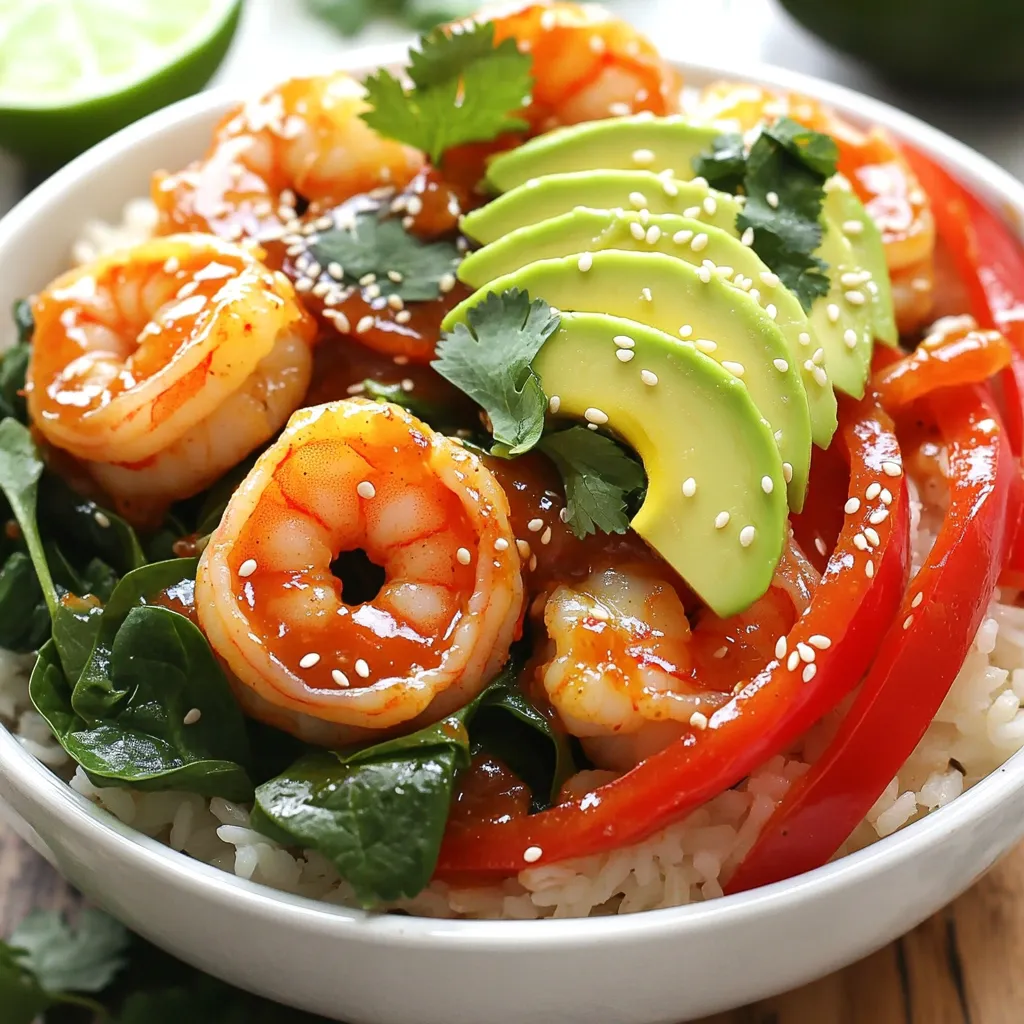
Assembling the Bowls
To build your sweet chili shrimp bowls, start with a base of 2 cups of cooked jasmine rice. Make sure to fill each bowl generously. Next, layer the sautéed shrimp and vegetables on top of the rice.
For a beautiful finishing touch, add slices of 1 avocado on top. Sprinkle with fresh chopped cilantro and sesame seeds for extra flavor. Serve with lime wedges on the side for a zesty kick. Enjoy your colorful and tasty meal!
Tips & Tricks
Cooking Tips for Perfect Shrimp
How can you tell when shrimp is perfectly cooked? Look for a pink color and firm texture. When shrimp turns pink and opaque, it is ready to eat. This usually takes about 2-3 minutes on each side.
To avoid overcooking, keep an eye on the shrimp as it cooks. If you cook shrimp too long, it can become tough and rubbery. Using high heat helps cook shrimp quickly. Remove it from the heat as soon as it is pink and opaque.
Serving Suggestions
What can you serve with sweet chili shrimp bowls? A side of steamed veggies works great. You can also add a fresh salad with a light dressing. For a heartier option, try serving with a side of crispy wontons.
What beverages pair well with shrimp bowls? A chilled white wine, like Sauvignon Blanc, complements the flavors well. If you prefer non-alcoholic drinks, try iced green tea for a refreshing touch.
Presentation Tips
How can you create an attractive bowl arrangement? Start with a base of jasmine rice. Layer the shrimp and vegetables on top in a colorful way. This adds visual appeal and makes the dish more inviting.
Why is garnishing with lime and cilantro important? A lime wedge adds bright acidity, enhancing the dish’s flavor. Fresh cilantro gives a burst of color and freshness. Together, they elevate your sweet chili shrimp bowl to a gourmet level.

Variations
Alternative Proteins
You can swap shrimp for chicken or tofu. If you choose chicken, use boneless, skinless pieces. For tofu, use firm or extra firm. Cooking times change based on your choice.
– Shrimp: 2-3 minutes per side
– Chicken: 5-7 minutes per side or until cooked through
– Tofu: 3-4 minutes per side until golden
This way, everyone can enjoy a tasty bowl.
Flavor Modifications
Add spices or sauces to change the flavor. Try garlic powder for warmth or ginger for a fresh zing. You can also mix in a splash of sriracha for heat.
– Sweetness: Add more sweet chili sauce for a sweeter dish.
– Heat: For more spice, increase sriracha or add red pepper flakes.
These tweaks let you create your own flavor adventure.
Vegetable Swaps
Feel free to use other veggies that match well with sweet chili shrimp. Broccoli, snap peas, or carrots work great. Seasonal veggies like zucchini or asparagus can also shine in your bowl.
– Spring: Use asparagus and peas
– Summer: Try zucchini and bell peppers
– Fall: Butternut squash fits nicely
Experimenting with veggies adds color and nutrition to your meal.
Storage Info
Storing Leftovers
To keep your sweet chili shrimp bowls fresh, store them properly. First, let the bowls cool down to room temperature. Then, place them in airtight containers. This will help prevent any moisture loss. Glass or BPA-free plastic containers work best. Make sure to seal them tightly. Store in the fridge for up to three days for best quality.
Reheating Tips
When you are ready to enjoy your leftovers, reheating is key. Use a microwave or a skillet to warm them up. If using a microwave, heat in short bursts. Stir the bowl in between to heat evenly. This helps maintain the shrimp’s texture and flavor. If using a skillet, add a splash of water to keep it moist. Heat on low until warmed through. Leftovers can last in the fridge for three days. After that, they may lose taste and texture.
Freezing Information
If you want to save your shrimp bowls longer, freezing is a great option. Freeze the shrimp and rice separately from the veggies. This keeps everything fresh and tasty. Use freezer-safe bags or containers. Remove as much air as possible. When you want to eat, thaw the shrimp and rice in the fridge overnight. To reheat, warm them in a skillet until hot, then add the veggies. This way, your meal stays delicious!
FAQs
What can I serve with sweet chili shrimp bowls?
You can pair sweet chili shrimp bowls with many tasty sides. Here are some ideas:
– Steamed broccoli for a crunchy bite.
– Crispy spring rolls for a fun crunch.
– Cucumber salad for a refreshing taste.
– Mango slices to add sweetness.
For drinks, try a light iced tea or a coconut water. Both will cool the spice!
Can I make sweet chili shrimp bowls in advance?
Yes, you can prep ahead! Here are some tips:
– Marinate the shrimp a few hours before cooking. It adds flavor.
– Cook the rice earlier in the day. Store it in the fridge.
– Chop veggies like bell peppers and spinach in advance. Keep them fresh in a sealed container.
Assemble the bowls just before serving for the best taste.
Is there a substitute for sweet chili sauce?
If you need a substitute, try these options:
– Sriracha mixed with honey for sweetness and heat.
– Homemade sauce by mixing soy sauce, sugar, and vinegar.
– Thai chili paste, which gives a similar kick.
These will help you create a yummy flavor!
How can I make sweet chili shrimp bowls spicier?
Want more heat? Here are some ideas:
– Add red pepper flakes to the shrimp while cooking.
– Mix in sliced jalapeños with the bell peppers.
– Drizzle extra sriracha on top before serving.
These tips will turn up the heat and make your meal exciting!
You now have all the tools to make delicious sweet chili shrimp bowls. We covered key ingredients, from shrimp to fresh veggies. You learned how to marinate, cook, and present your dish attractively. With tips on serving and storing, you can enjoy these bowls anytime. Remember, you can switch proteins or add spices for a twist. Try new ideas and make this dish yours. Happy cooking!


![To make these tasty tacos, you need some simple yet bold ingredients. Here’s what you’ll need: - 2 cans black beans, rinsed and drained - 1 medium onion, diced - 3 garlic cloves, minced - 2 tablespoons chipotle in adobo sauce, chopped These ingredients give your tacos a distinct smoky flavor. The black beans provide protein and creaminess. The onions and garlic add depth, while the chipotle brings heat and smokiness. Next, we need some seasonings and garnishes to elevate the dish: - 1 teaspoon smoked paprika - 1 teaspoon cumin - Salt and pepper to taste - Fresh cilantro, for garnish Smoked paprika and cumin enhance the earthy flavor of the beans. A pinch of salt and pepper balances everything out. Fresh cilantro adds brightness and color, making your tacos visually appealing. Lastly, let’s prepare the tortillas and toppings: - 8 small corn tortillas - 1 avocado, sliced - Lime wedges, for serving Corn tortillas are perfect for this dish. They have a lovely flavor and hold up well. Sliced avocado adds creaminess, while lime wedges give a zesty kick. For the full recipe, check out the details for cooking and assembling! First, I heat olive oil in a large skillet over medium heat. I add the diced onion and sauté it until it turns translucent, which takes about five minutes. Next, I stir in the minced garlic and cook it for one minute until it becomes fragrant. Then, I combine the rinsed black beans, chopped chipotle in adobo, smoked paprika, cumin, salt, and pepper. Mixing these ingredients well creates a rich base full of flavor. After combining the filling, I grab a potato masher. I mash some of the black beans to create a creamy texture while leaving others whole for extra bite. This step adds depth to the dish. I then reduce the heat to low, cover the skillet, and let it simmer for about ten minutes. This allows all the flavors to meld beautifully. I stir occasionally to ensure even cooking. While the filling simmers, I warm the small corn tortillas in a separate skillet. I heat them over medium heat for about thirty seconds on each side. This makes the tortillas pliable and ready for filling. Now comes the fun part! I spoon the smoky black bean mixture onto each warm tortilla. Then, I top them with sliced avocado and sprinkle fresh cilantro on top. For an extra burst of flavor, I serve the tacos with lime wedges on the side. This adds a zesty touch that brightens the whole dish. You can find the full recipe for Smoky Chipotle Black Bean Tacos in the previous section. Enjoy! To make your Smoky Chipotle Black Bean Tacos even better, try adding more spices. A dash of cayenne can kick up the heat. You can also mix in a pinch of oregano for a fresh herb taste. If you enjoy a bit of sweetness, drizzle some honey over the top before serving. Toppings can really change the game too! Try adding pickled onions, crumbled feta, or diced tomatoes. Each will give your tacos a unique twist. Don't be afraid to get creative! Presentation matters. When serving, arrange your tacos on a large platter. Add lime wedges and fresh cilantro around them for color. You can even use a small bowl for salsa on the side. This makes your meal look vibrant and inviting. Consider adding colorful accompaniments like sliced radishes or a side of corn salad. These not only look great but also enhance the meal’s flavor. Sautéing and simmering are key for perfect tacos. When you sauté the onion, aim for a golden color. This adds a sweet flavor to the dish. Stir often to avoid burning. To prevent soggy tortillas, warm them before filling. Heat them in a skillet for about 30 seconds on each side. This keeps them soft and easy to fold. If you want extra crispiness, consider lightly frying them in oil. This simple step can elevate your tacos to the next level. For the complete recipe, check out the [Full Recipe]. {{image_2}} Want to add more protein to your tacos? You can easily incorporate chicken or shrimp. Simply cook them in the skillet before adding the beans. For a vegetarian option, try using tofu or tempeh. Cube the tofu and sauté it until golden. For tempeh, steam it first to soften, then sauté for a nice texture. These additions will keep your tacos satisfying and packed with flavor. If you're looking for plant-based protein, consider lentils or chickpeas. They both work well and add a hearty touch. For cheese lovers, look for dairy-free cheese substitutes. Many brands offer tasty options that melt well. This way, you can enjoy creamy toppings without dairy. These alternatives keep your meal both delicious and inclusive for all diets. Tacos don’t have to be served in the traditional way. You can create taco bowls instead. Just layer the black bean mixture over rice or quinoa. Then add your favorite toppings. Another fun option is using lettuce wraps instead of tortillas. This makes for a low-carb alternative while keeping the fresh crunch. Each style offers a unique twist to your smoky chipotle black bean tacos. For the full recipe, check out the Smoky Chipotle Black Bean Tacos section. To store any leftover tacos, place them in an airtight container. Make sure to cool them first. These tacos will stay fresh in the fridge for about three to four days. If you want to freeze the taco filling, let it cool completely. Then, place it in a freezer-safe bag. Squeeze out the air before sealing. The filling can last in the freezer for up to three months. To enjoy, take it out of the freezer and put it in the fridge overnight to thaw. When you reheat the filling, you have two good options: the oven or the microwave. If you use the oven, preheat it to 350°F. Spread the filling in a baking dish and cover it with foil. Heat for about 15 minutes. For the microwave, put the filling in a bowl and cover it. Heat for about 1 to 2 minutes, stirring halfway. Both methods work, but the oven keeps the texture nice. Enjoy your delicious Smoky Chipotle Black Bean Tacos even as leftovers! To make your tacos crispy, you can fry the tortillas. Heat oil in a pan. Add each tortilla and fry for about 30 seconds on each side. This method gives them a nice crunch. You can also use the oven. Preheat it to 400°F (200°C). Brush tortillas with a little oil and place them on a baking sheet. Bake for 5-7 minutes until they are crispy around the edges. Yes, you can use dried beans! However, they need more time. Soak them overnight in water. Then, cook them until soft. This process can take 1-2 hours. Canned beans are quicker and easier, but dried beans can add great flavor and texture. If you don’t have chipotle in adobo, try using smoked paprika or cayenne pepper. Both can add heat and depth. You can also use liquid smoke for that smoky flavor. Adjust the amount to match your heat preference. Start small and taste as you go. In this guide, I covered how to make smoky chipotle black bean tacos. We talked about the key ingredients, cooking steps, and tips for perfect tacos. You can add your favorite proteins or toppings to make it your own. Don’t forget to store leftovers properly to enjoy later. These tacos are flexible and sure to impress. Dive in and enjoy the flavors! You've got this.](https://dailydishly.com/wp-content/uploads/2025/07/3dafe893-e4f9-4e41-b9c9-258fb494a309-768x768.webp)

![- 300g spaghetti - 6 cloves garlic, thinly sliced - 1/2 teaspoon red pepper flakes - 1/4 cup extra-virgin olive oil - Zest and juice of 1 lemon - 1/2 cup fresh parsley, chopped - Salt to taste - Freshly grated Parmesan cheese (optional) - 1 cup cherry tomatoes, halved To make Spaghetti Aglio e Olio, you need simple and fresh ingredients. The garlic is key. It adds depth and flavor. Thinly sliced garlic cooks fast, so watch it closely. Red pepper flakes give the dish a bit of spice. You can add more or less based on your taste. Extra-virgin olive oil is the base for the sauce. It should be high quality for the best flavor. The lemon zest and juice brighten up the dish. Fresh parsley adds color and freshness. Salt enhances all the flavors, so don’t skip it. If you like cheese, sprinkle on some Parmesan at the end. The cherry tomatoes are a fun addition. They bring sweetness and juiciness. You can use them or leave them out. They add a nice twist to the classic recipe. Check out the Full Recipe for more details on how to prepare this dish. - Protein options (shrimp, chicken) - Seasonal vegetables - Other herbs and spices To make the meal heartier, think about adding proteins. Shrimp or chicken cook quickly and add great flavor. Seasonal vegetables like spinach or zucchini can also bring in extra nutrients. Herbs like basil or oregano can enhance the taste too. Feel free to get creative with what you have! To start, boil water in a large pot. Add salt to the water. This step adds flavor to the spaghetti. Once the water reaches a rolling boil, add 300g of spaghetti. Cook according to package instructions until it is al dente. This usually takes around 8 to 10 minutes. After cooking, reserve 1 cup of pasta water. This is key for the sauce. Drain the spaghetti but do not rinse it. In a large skillet, pour in 1/4 cup of extra-virgin olive oil. Heat it over medium heat. Add 6 cloves of sliced garlic. Sauté the garlic until it turns golden, about 2 minutes. Be careful not to burn it. Next, stir in 1/2 teaspoon of red pepper flakes. This adds a nice kick to the dish. Allow the flakes to cook for about 30 seconds. Then, add 1 cup of halved cherry tomatoes. Cook these for 3 to 4 minutes. They should soften and become juicy. Now it’s time to combine! Toss the drained spaghetti into the skillet. Mix it well to coat it with the garlic and oil. Add the zest and juice of 1 lemon. Also, add half of the chopped parsley. If the pasta looks dry, add some reserved pasta water. Keep mixing until you reach your desired creaminess. Finally, season with salt to taste. Remove the skillet from heat. Your delicious Spaghetti Aglio e Olio is ready to enjoy! For the full recipe, check out the detailed guide. To get great flavor, focus on sautéing garlic just right. Use medium heat and watch it closely. Garlic cooks fast and can burn easily. Sauté it for about two minutes until golden, but not brown. This gives a nice, sweet flavor. Next, balance spice and acidity with lemon. The zest adds a fresh burst, while the juice brightens the dish. Add lemon juice right before serving. This keeps the flavor fresh and lively. For al dente pasta, cook spaghetti for 8-10 minutes. Check the package for exact times, as brands vary. You want it to be firm but not hard. Timing is key for adding ingredients. Toss in cherry tomatoes after the garlic. Cook them for 3-4 minutes until they soften. This keeps them fresh and juicy. Don't forget to reserve some pasta water before draining. It helps bind the dish together later. When plating Spaghetti Aglio e Olio, use shallow bowls. This makes the dish look inviting. Add a drizzle of olive oil on top for shine. Garnish with parsley for color. A lemon wedge on the side adds a nice touch. You can also sprinkle freshly grated Parmesan cheese for extra flavor. Enjoy your beautiful, tasty dish! For the full recipe, check out the link provided. {{image_2}} You can easily add proteins like shrimp or chicken to make your dish heartier. This small change can turn a light meal into a filling feast. You can also incorporate seasonal vegetables, like zucchini or asparagus, for a fresh taste. These add color and nutrition to your plate, making your meal even better. To make your dish pop, try infusing extra-virgin olive oil with herbs. You can use rosemary, thyme, or basil. This simple step adds rich flavors without much effort. Another great idea is to use different types of cheese for depth. Pecorino Romano or a tangy goat cheese can bring new taste sensations to your Spaghetti Aglio e Olio. If you want to simplify your cooking, try the one-pot spaghetti method. Cook everything together for a quick meal with less cleanup. Just toss the raw pasta, garlic, and oil into the pot with water and let it cook. You can also make a baked version. This way, your pasta gets crispy edges while remaining soft inside, offering a delightful contrast. For the full recipe, visit [Full Recipe]. To store leftover spaghetti, let it cool first. Place it in an airtight container. Make sure to refrigerate it. Leftovers can last up to three days in the fridge. If you want to keep it longer, you can freeze spaghetti for up to three months. To reheat spaghetti, the stovetop is best. Heat a pan over medium heat. Add a splash of water or olive oil. This helps keep the pasta moist. Stir occasionally until warm. You can also use the microwave. Place the spaghetti in a bowl, cover it, and heat in short bursts. Check often to avoid drying it out. Enjoy your meal! Yes, you can! If you skip the cheese, the dish remains tasty. You might add a splash of cream for a creamy texture. Another option is to use nutritional yeast. It gives a cheesy flavor without dairy. Salads go great with this dish. A simple green salad with lemon dressing works well. Garlic bread is also a fantastic choice. It complements the garlic flavor in the pasta. To serve more people, just multiply the ingredients. For example, double everything for eight servings. Keep the cooking times the same, but check the pasta for doneness. You may need a larger pot for boiling. If you lack olive oil, use avocado oil or sunflower oil. Both have a mild taste that works well. Grapeseed oil is another option, as it has a light flavor too. You can find the full recipe [here](Full Recipe). It has all the steps and tips to make this dish perfect. Spaghetti Aglio e Olio is simple yet delicious. We covered key ingredients, cooking steps, and tips to enhance flavor. You can customize this dish by adding proteins and veggies. Remember to balance the garlic and lemon for taste. If you store leftovers, keep them moist while reheating. Enjoy your cooking adventure and try the variations for a fresh twist. You’ll impress anyone with this dish!](https://dailydishly.com/wp-content/uploads/2025/06/f6e5d00b-504d-4d52-a053-c2bbef60ee08-768x768.webp)
