Teriyaki Mushroom Lettuce Cups Fresh and Flavorful Snack
. To make teriyaki mushroom lettuce cups, you start by cooking the aromatics. First, heat olive oil in a large skillet over medium-high heat. Add minced garlic and ginger. Cook them until they smell great, about one minute. This step builds a strong flavor base. Next, it's time to sauté the mushrooms. Add sliced shiitake and button mushrooms to the skillet. Stir them well so they cook evenly. Sauté until they become soft and browned, which should take about 5 to 7 minutes. This step is key for a delicious texture. After the mushrooms are ready, you add teriyaki sauce. Pour the sauce over the mushroom mix. Stir and cook for another 2 to 3 minutes. You want the sauce to thicken and coat the mushrooms. This will bring all the flavors together. Finally, finish with sesame oil, green onions, and shredded carrots. Stir these in and cook for one more minute. You want the greens to wilt but stay bright. This adds color and crunch to your dish. Once cooked, remove the skillet from heat and let it cool a bit. Now, it's time to assemble your lettuce cups. Take a lettuce leaf and spoon in a good amount of the mushroom mix. Top with sesame seeds for some extra crunch. Fold the lettuce over the filling and enjoy your fresh snack! For the full recipe, check out the details above. - Choosing the right mushrooms I love using shiitake and button mushrooms. Shiitake add a deep, rich flavor. Button mushrooms are mild and soft. Together, they create a great blend. Look for fresh mushrooms that feel firm. Avoid any that are slimy or have dark spots. - Enhancing flavor with additional spices To boost flavor, try adding a pinch of red pepper flakes. It gives a nice kick without being too spicy. You can also add a splash of lime juice. This adds brightness to the dish. Experimenting with spices makes your dish unique. - Cooking tips for the perfect texture For the best texture, don’t overcrowd the pan. Cook mushrooms in batches if needed. This helps them brown nicely. Stir the mushrooms occasionally for even cooking. They should be tender but not mushy. - How to serve for visual appeal Serve the mushroom mixture in the lettuce cups. Arrange them on a colorful plate. This makes them look fresh and inviting. You can also add some shredded carrots on top for extra color and crunch. - Ideal garnishing options Sprinkle sesame seeds on top for a nice finish. Chopped green onions add a pop of color, too. You can also add a few cilantro leaves for freshness. These small touches make your dish look gourmet. {{image_2}} You can swap mushrooms for tofu to make it a fun vegan dish. Tofu absorbs flavors well. Just follow the same steps as the mushrooms. If you want meat, chicken or beef works great too. Use diced chicken or thin beef strips. Cook them until golden brown before adding the sauce. For a vegan twist, ensure your teriyaki sauce has no animal products. Many brands offer vegan options. You can also make your own sauce easily. For a gluten-free version, choose a gluten-free teriyaki sauce. If you're watching carbs, use lettuce wraps instead of rice or bread. This keeps your meal light and fresh. You can find the full recipe for Teriyaki Mushroom Lettuce Cups [here](#). To keep your teriyaki mushroom lettuce cups fresh, store them properly. Use an airtight container to keep moisture out. Place the cooled mushroom mixture in the container, but keep it separate from the lettuce. This helps the lettuce stay crisp. You can store the mixture in the fridge for up to three days. If you want to keep them longer, consider freezing. Place the mushroom mixture in a freezer-safe bag. Remove as much air as possible before sealing. The mushroom filling can last in the freezer for up to three months. Just remember, the lettuce does not freeze well. Reheating your teriyaki mushroom mixture is easy. First, you can use a skillet. Heat it on medium until warm. Stir it often to keep it from burning. You can also microwave it. Use a microwave-safe bowl and cover it with a paper towel. Heat it for about one to two minutes. Check often to avoid overheating. Avoid reheating the lettuce. Instead, use fresh leaves for serving. This keeps the cups crunchy and tasty. Enjoy your flavorful snacks anytime! Can I make the sauce from scratch? Yes, you can make teriyaki sauce at home. Combine soy sauce, sugar, ginger, and garlic in a pot. Heat until the sugar dissolves, and then thicken it with cornstarch mixed with water. This way, you control the flavor and sweetness. What can I substitute for lettuce? If you don't have lettuce, use cabbage leaves or rice paper. Both provide a crunchy wrap. You can also try collard greens for a heartier option. Each adds a unique taste and texture to your dish. How long do these last in the fridge? Teriyaki mushroom lettuce cups stay fresh for about three days in the fridge. Keep the filling and lettuce separate. This keeps the lettuce crisp. Store in airtight containers to maintain freshness. What to serve with Teriyaki Mushroom Lettuce Cups? These cups pair well with rice, quinoa, or a light salad. You can also serve a side of edamame for extra protein. A simple dipping sauce, like soy sauce or spicy mayo, adds flavor. Are there any common mistakes to avoid? One common mistake is overcooking the mushrooms. They should be tender but not mushy. Also, don’t skip the garnish of sesame seeds; it adds crunch and flavor. Finally, make sure to let the filling cool before filling the lettuce, so it doesn't wilt. This article covered making Teriyaki Mushroom Lettuce Cups. You learned about the right ingredients, steps to prepare them, and tips for the best taste. We discussed easy variations, storage methods, and answered common questions. These cups are tasty and simple to make. You can enjoy them fresh or change them to fit your diet. Try these ideas and make your meals fun!](https://dailydishly.com/wp-content/uploads/2025/07/164680a5-e301-481a-8618-b09cde035bc4.webp)
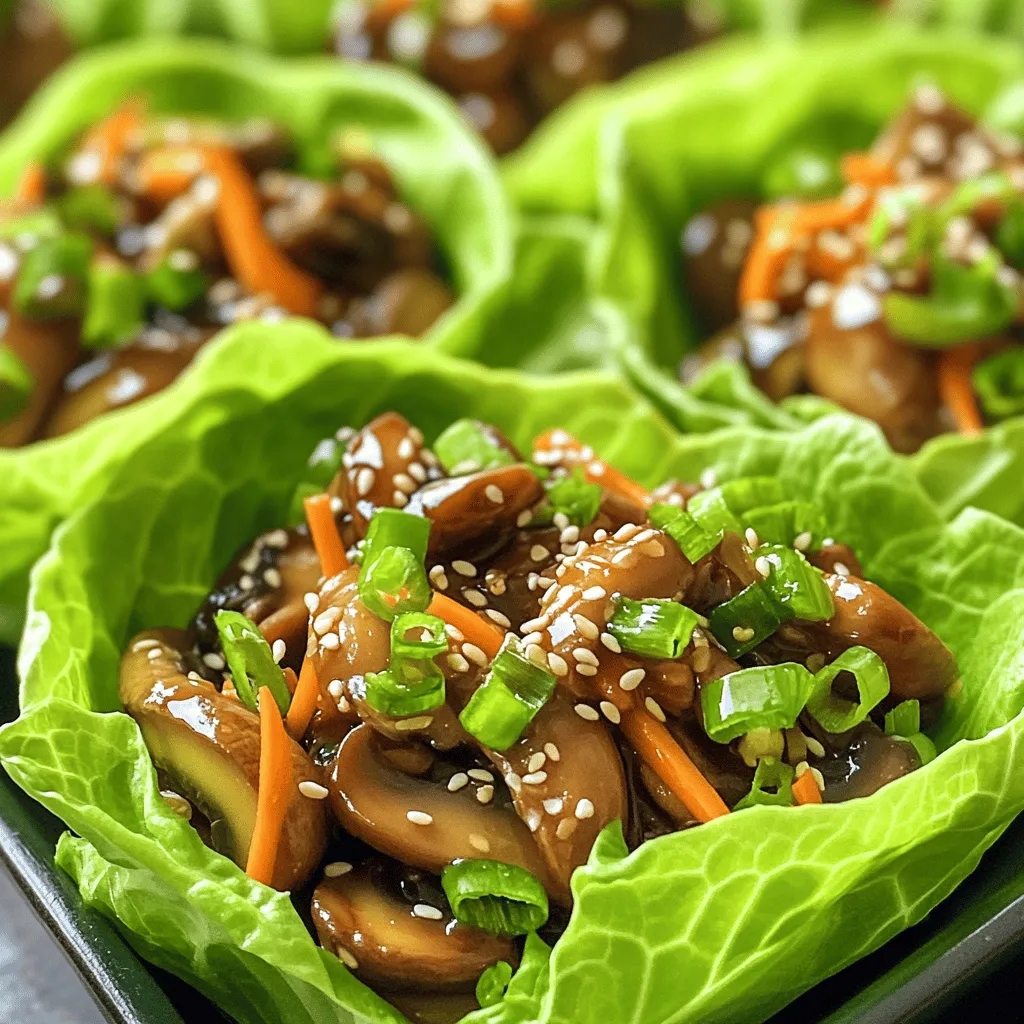
Are you looking for a fresh and tasty snack? Try my Teriyaki Mushroom Lettuce Cups! These cups are packed with flavor and are great for any time of the day. With just a few simple ingredients, you can create a healthy dish that is fun to eat. Let’s dive into the ingredients and get cooking! Your taste buds will thank you.
Ingredients
To make the Teriyaki Mushroom Lettuce Cups, you will need the following ingredients:
– 2 cups shiitake mushrooms, sliced
– 1 cup button mushrooms, sliced
– 1 tablespoon olive oil
– 2 cloves garlic, minced
– 1 tablespoon ginger, minced
– 1/4 cup teriyaki sauce
– 1 teaspoon sesame oil
– 1/4 cup green onions, chopped
– 1/4 cup shredded carrots
– 1 head of butter lettuce, leaves separated
– Sesame seeds for garnish
These ingredients bring fresh flavors and a mix of textures. Shiitake mushrooms add a rich taste. Button mushrooms add a mild, earthy tone. Olive oil helps sauté the aromatics. Garlic and ginger bring warmth to the dish.
Teriyaki sauce gives a sweet and savory kick. The sesame oil adds a nutty flavor that enhances the dish. Green onions and carrots add crunch and color. Butter lettuce wraps everything up nicely, making it easy to eat.
Step-by-Step Instructions
Preparation Steps
To make teriyaki mushroom lettuce cups, you start by cooking the aromatics. First, heat olive oil in a large skillet over medium-high heat. Add minced garlic and ginger. Cook them until they smell great, about one minute. This step builds a strong flavor base.
Next, it’s time to sauté the mushrooms. Add sliced shiitake and button mushrooms to the skillet. Stir them well so they cook evenly. Sauté until they become soft and browned, which should take about 5 to 7 minutes. This step is key for a delicious texture.
After the mushrooms are ready, you add teriyaki sauce. Pour the sauce over the mushroom mix. Stir and cook for another 2 to 3 minutes. You want the sauce to thicken and coat the mushrooms. This will bring all the flavors together.
Finally, finish with sesame oil, green onions, and shredded carrots. Stir these in and cook for one more minute. You want the greens to wilt but stay bright. This adds color and crunch to your dish.
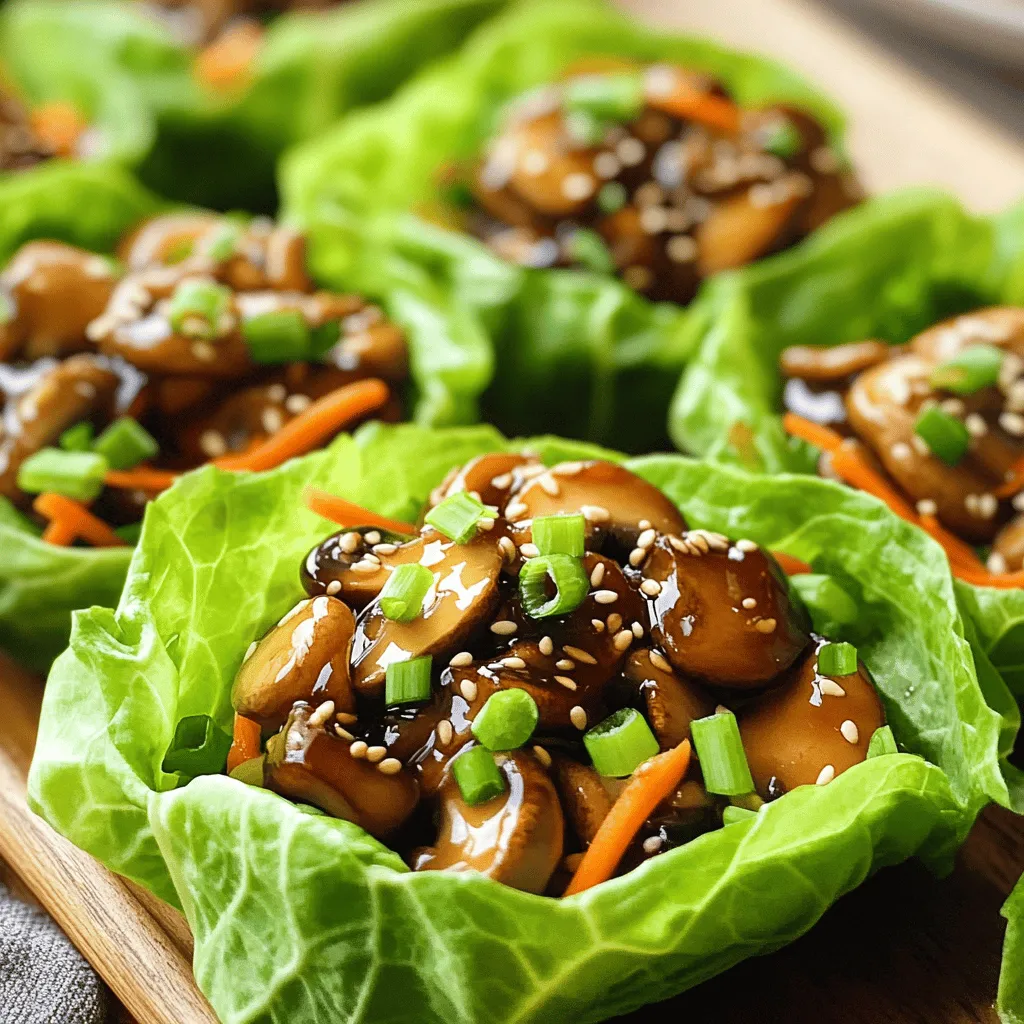
Once cooked, remove the skillet from heat and let it cool a bit. Now, it’s time to assemble your lettuce cups. Take a lettuce leaf and spoon in a good amount of the mushroom mix. Top with sesame seeds for some extra crunch. Fold the lettuce over the filling and enjoy your fresh snack!
Tips & Tricks
Best Practices
– Choosing the right mushrooms
I love using shiitake and button mushrooms. Shiitake add a deep, rich flavor. Button mushrooms are mild and soft. Together, they create a great blend. Look for fresh mushrooms that feel firm. Avoid any that are slimy or have dark spots.
– Enhancing flavor with additional spices
To boost flavor, try adding a pinch of red pepper flakes. It gives a nice kick without being too spicy. You can also add a splash of lime juice. This adds brightness to the dish. Experimenting with spices makes your dish unique.
– Cooking tips for the perfect texture
For the best texture, don’t overcrowd the pan. Cook mushrooms in batches if needed. This helps them brown nicely. Stir the mushrooms occasionally for even cooking. They should be tender but not mushy.
Presentation Tips
– How to serve for visual appeal
Serve the mushroom mixture in the lettuce cups. Arrange them on a colorful plate. This makes them look fresh and inviting. You can also add some shredded carrots on top for extra color and crunch.
– Ideal garnishing options
Sprinkle sesame seeds on top for a nice finish. Chopped green onions add a pop of color, too. You can also add a few cilantro leaves for freshness. These small touches make your dish look gourmet.

Variations
Alternative Proteins
You can swap mushrooms for tofu to make it a fun vegan dish. Tofu absorbs flavors well. Just follow the same steps as the mushrooms. If you want meat, chicken or beef works great too. Use diced chicken or thin beef strips. Cook them until golden brown before adding the sauce.
Dietary Modifications
For a vegan twist, ensure your teriyaki sauce has no animal products. Many brands offer vegan options. You can also make your own sauce easily. For a gluten-free version, choose a gluten-free teriyaki sauce. If you’re watching carbs, use lettuce wraps instead of rice or bread. This keeps your meal light and fresh.
Storage Info
Storing Leftovers
To keep your teriyaki mushroom lettuce cups fresh, store them properly. Use an airtight container to keep moisture out. Place the cooled mushroom mixture in the container, but keep it separate from the lettuce. This helps the lettuce stay crisp. You can store the mixture in the fridge for up to three days.
If you want to keep them longer, consider freezing. Place the mushroom mixture in a freezer-safe bag. Remove as much air as possible before sealing. The mushroom filling can last in the freezer for up to three months. Just remember, the lettuce does not freeze well.
Reheating Instructions
Reheating your teriyaki mushroom mixture is easy. First, you can use a skillet. Heat it on medium until warm. Stir it often to keep it from burning. You can also microwave it. Use a microwave-safe bowl and cover it with a paper towel. Heat it for about one to two minutes. Check often to avoid overheating.
Avoid reheating the lettuce. Instead, use fresh leaves for serving. This keeps the cups crunchy and tasty. Enjoy your flavorful snacks anytime!
FAQs
Common Questions about Teriyaki Mushroom Lettuce Cups
Can I make the sauce from scratch?
Yes, you can make teriyaki sauce at home. Combine soy sauce, sugar, ginger, and garlic in a pot. Heat until the sugar dissolves, and then thicken it with cornstarch mixed with water. This way, you control the flavor and sweetness.
What can I substitute for lettuce?
If you don’t have lettuce, use cabbage leaves or rice paper. Both provide a crunchy wrap. You can also try collard greens for a heartier option. Each adds a unique taste and texture to your dish.
How long do these last in the fridge?
Teriyaki mushroom lettuce cups stay fresh for about three days in the fridge. Keep the filling and lettuce separate. This keeps the lettuce crisp. Store in airtight containers to maintain freshness.
Additional Inquiries
What to serve with Teriyaki Mushroom Lettuce Cups?
These cups pair well with rice, quinoa, or a light salad. You can also serve a side of edamame for extra protein. A simple dipping sauce, like soy sauce or spicy mayo, adds flavor.
Are there any common mistakes to avoid?
One common mistake is overcooking the mushrooms. They should be tender but not mushy. Also, don’t skip the garnish of sesame seeds; it adds crunch and flavor. Finally, make sure to let the filling cool before filling the lettuce, so it doesn’t wilt.
This article covered making Teriyaki Mushroom Lettuce Cups. You learned about the right ingredients, steps to prepare them, and tips for the best taste. We discussed easy variations, storage methods, and answered common questions.
These cups are tasty and simple to make. You can enjoy them fresh or change them to fit your diet. Try these ideas and make your meals fun!
. To make teriyaki mushroom lettuce cups, you start by cooking the aromatics. First, heat olive oil in a large skillet over medium-high heat. Add minced garlic and ginger. Cook them until they smell great, about one minute. This step builds a strong flavor base. Next, it's time to sauté the mushrooms. Add sliced shiitake and button mushrooms to the skillet. Stir them well so they cook evenly. Sauté until they become soft and browned, which should take about 5 to 7 minutes. This step is key for a delicious texture. After the mushrooms are ready, you add teriyaki sauce. Pour the sauce over the mushroom mix. Stir and cook for another 2 to 3 minutes. You want the sauce to thicken and coat the mushrooms. This will bring all the flavors together. Finally, finish with sesame oil, green onions, and shredded carrots. Stir these in and cook for one more minute. You want the greens to wilt but stay bright. This adds color and crunch to your dish. Once cooked, remove the skillet from heat and let it cool a bit. Now, it's time to assemble your lettuce cups. Take a lettuce leaf and spoon in a good amount of the mushroom mix. Top with sesame seeds for some extra crunch. Fold the lettuce over the filling and enjoy your fresh snack! For the full recipe, check out the details above. - Choosing the right mushrooms I love using shiitake and button mushrooms. Shiitake add a deep, rich flavor. Button mushrooms are mild and soft. Together, they create a great blend. Look for fresh mushrooms that feel firm. Avoid any that are slimy or have dark spots. - Enhancing flavor with additional spices To boost flavor, try adding a pinch of red pepper flakes. It gives a nice kick without being too spicy. You can also add a splash of lime juice. This adds brightness to the dish. Experimenting with spices makes your dish unique. - Cooking tips for the perfect texture For the best texture, don’t overcrowd the pan. Cook mushrooms in batches if needed. This helps them brown nicely. Stir the mushrooms occasionally for even cooking. They should be tender but not mushy. - How to serve for visual appeal Serve the mushroom mixture in the lettuce cups. Arrange them on a colorful plate. This makes them look fresh and inviting. You can also add some shredded carrots on top for extra color and crunch. - Ideal garnishing options Sprinkle sesame seeds on top for a nice finish. Chopped green onions add a pop of color, too. You can also add a few cilantro leaves for freshness. These small touches make your dish look gourmet. {{image_2}} You can swap mushrooms for tofu to make it a fun vegan dish. Tofu absorbs flavors well. Just follow the same steps as the mushrooms. If you want meat, chicken or beef works great too. Use diced chicken or thin beef strips. Cook them until golden brown before adding the sauce. For a vegan twist, ensure your teriyaki sauce has no animal products. Many brands offer vegan options. You can also make your own sauce easily. For a gluten-free version, choose a gluten-free teriyaki sauce. If you're watching carbs, use lettuce wraps instead of rice or bread. This keeps your meal light and fresh. You can find the full recipe for Teriyaki Mushroom Lettuce Cups [here](#). To keep your teriyaki mushroom lettuce cups fresh, store them properly. Use an airtight container to keep moisture out. Place the cooled mushroom mixture in the container, but keep it separate from the lettuce. This helps the lettuce stay crisp. You can store the mixture in the fridge for up to three days. If you want to keep them longer, consider freezing. Place the mushroom mixture in a freezer-safe bag. Remove as much air as possible before sealing. The mushroom filling can last in the freezer for up to three months. Just remember, the lettuce does not freeze well. Reheating your teriyaki mushroom mixture is easy. First, you can use a skillet. Heat it on medium until warm. Stir it often to keep it from burning. You can also microwave it. Use a microwave-safe bowl and cover it with a paper towel. Heat it for about one to two minutes. Check often to avoid overheating. Avoid reheating the lettuce. Instead, use fresh leaves for serving. This keeps the cups crunchy and tasty. Enjoy your flavorful snacks anytime! Can I make the sauce from scratch? Yes, you can make teriyaki sauce at home. Combine soy sauce, sugar, ginger, and garlic in a pot. Heat until the sugar dissolves, and then thicken it with cornstarch mixed with water. This way, you control the flavor and sweetness. What can I substitute for lettuce? If you don't have lettuce, use cabbage leaves or rice paper. Both provide a crunchy wrap. You can also try collard greens for a heartier option. Each adds a unique taste and texture to your dish. How long do these last in the fridge? Teriyaki mushroom lettuce cups stay fresh for about three days in the fridge. Keep the filling and lettuce separate. This keeps the lettuce crisp. Store in airtight containers to maintain freshness. What to serve with Teriyaki Mushroom Lettuce Cups? These cups pair well with rice, quinoa, or a light salad. You can also serve a side of edamame for extra protein. A simple dipping sauce, like soy sauce or spicy mayo, adds flavor. Are there any common mistakes to avoid? One common mistake is overcooking the mushrooms. They should be tender but not mushy. Also, don’t skip the garnish of sesame seeds; it adds crunch and flavor. Finally, make sure to let the filling cool before filling the lettuce, so it doesn't wilt. This article covered making Teriyaki Mushroom Lettuce Cups. You learned about the right ingredients, steps to prepare them, and tips for the best taste. We discussed easy variations, storage methods, and answered common questions. These cups are tasty and simple to make. You can enjoy them fresh or change them to fit your diet. Try these ideas and make your meals fun!](https://dailydishly.com/wp-content/uploads/2025/07/164680a5-e301-481a-8618-b09cde035bc4-300x300.webp)


![When making Buffalo chicken meatballs, you need fresh and tasty ingredients. Here’s a detailed list of what you will need: - Ground chicken: 1 pound gives the meatballs their base. - Breadcrumbs and cheese: 1/2 cup breadcrumbs and 1/4 cup grated Parmesan cheese add flavor and texture. - Spices and seasonings: You’ll need garlic powder, onion powder, salt, and black pepper. These make the meatballs tasty. - Optional serving items: Consider celery sticks and ranch dressing. They pair well for dipping. This mix of ingredients makes for a delicious meal. You get protein from the chicken and flavor from the spices. The cheese adds a nice touch too. If you want to spice things up, you can add more hot sauce. For the full recipe, check out the instructions to make these tasty bites! Prepping the baking sheet Start by preheating your oven to 400°F (200°C). Line a baking sheet with parchment paper. This step keeps the meatballs from sticking and makes cleanup easy. Mixing ingredients In a large bowl, add the ground chicken, breadcrumbs, green onions, and Parmesan cheese. Crack in one large egg. Next, pour in the hot sauce, and sprinkle in the garlic powder, onion powder, salt, and black pepper. Mix everything well with your hands. Make sure the spices and sauces blend into the chicken evenly. Shaping the meatballs Once mixed, take a small scoop of the mixture. Form it into a ball about 1 inch wide. Place each meatball on the prepared baking sheet, leaving some space between them. This helps them cook evenly. Baking the meatballs Drizzle a bit of olive oil over the meatballs. This helps them brown nicely. Now, place the baking sheet in the oven. Bake for 20 to 25 minutes. The meatballs should be golden brown and cooked through. Additional tips for flavor enhancement If you want more heat, toss the baked meatballs in extra hot sauce just before serving. This adds a tasty kick. Serve them warm with celery sticks and ranch dressing for dipping. Enjoy your Buffalo chicken meatballs! For the full recipe, check out the earlier section. Mixing is key for great meatballs. Combine your ground chicken and other ingredients gently. If you mix too much, the meatballs get tough. Aim for a light touch. This helps keep them soft and juicy. Oven temperature matters too. Preheat your oven to 400°F (200°C). This hot oven helps brown the meatballs well. If the oven is too cool, the meatballs may dry out. Avoid overmixing your meatball mix. Overmixing makes the meatballs dense. On the flip side, under-mixing can cause them to fall apart. Find a balance to create a perfect texture. Baking time is important. If the meatballs are too big, they need more time. If they’re small, check them early. Use a meat thermometer to ensure they're cooked through. Aim for 165°F (75°C) for safe eating. For more tips and the full recipe, check the article. {{image_2}} You can play with flavors in Buffalo chicken meatballs. Instead of hot sauce, try BBQ sauce for a sweet twist. You can add spices like smoked paprika or cayenne for extra heat. Mixing in fresh herbs, like parsley or cilantro, brightens the flavor. You can also sneak in some finely chopped vegetables. Diced bell peppers or shredded carrots add crunch and nutrition. These small changes let you create a unique taste each time you make them. If you need gluten-free options, use gluten-free breadcrumbs. They work just as well and keep the meatballs tasty. You can also swap out ground chicken for ground turkey or a plant-based option. For low-carb alternatives, skip the breadcrumbs and use almond flour instead. This keeps the meatballs light and healthy. You can also serve them with veggies, instead of bread, for a filling meal. With these variations, you can customize Buffalo chicken meatballs to suit your needs and tastes. Make sure to check the Full Recipe for more tips! To keep your buffalo chicken meatballs fresh, use simple storage methods. First, let the meatballs cool completely. Then, place them in an airtight container. Refrigerate them for up to three days. Make sure they stay sealed to prevent drying out. If you want to save them longer, freezing works well. Arrange the meatballs in a single layer on a baking sheet. Freeze them until solid, about two hours. Once frozen, transfer them to a freezer bag. They can last up to three months in the freezer. Just remember to label the bag with the date. You can reheat buffalo chicken meatballs in two ways: microwave or oven. The microwave is quick. Place a few meatballs on a microwave-safe plate. Cover them with a damp paper towel to keep them moist. Heat for about 30 seconds or until warm. If you prefer the oven, preheat it to 350°F (175°C). Arrange the meatballs on a baking sheet. Cover them with foil to lock in moisture. Heat for 10-15 minutes, or until heated through. This method keeps them crispy and delicious. For the best taste, avoid overcooking. Check the meatballs regularly to ensure they stay juicy. Enjoy your tasty meal again with ease! Don't forget to make some buffalo chicken meatballs from the Full Recipe. How long do they take to cook? The meatballs cook in about 20 to 25 minutes. You want them golden brown and cooked through. Keep an eye on them as they bake to avoid overcooking. Can I make them ahead of time? Yes, you can make these meatballs ahead of time. Prepare them, then store them in the fridge. You can bake them later, or freeze them for up to a month. What to serve with Buffalo chicken meatballs? Serve them with celery sticks and ranch dressing. These crunchy sides balance the heat of the meatballs. You can also pair them with a fresh salad or some crusty bread. Is this recipe gluten-free? No, the recipe is not gluten-free as it uses breadcrumbs. However, you can substitute gluten-free breadcrumbs to make them suitable for a gluten-free diet. This small change keeps the flavor intact while making them friendly for more diets. For the complete recipe, check out the [Full Recipe]. This blog post covered everything you need for buffalo chicken meatballs. I shared ingredients like ground chicken, breadcrumbs, and seasonings. You learned the step-by-step process to mix, shape, and bake these tasty bites. I also shared tips for perfect meatballs and common mistakes to avoid. Don't forget the flavorful variations and how to store or reheat leftovers. Enjoy making your own buffalo chicken meatballs and impress everyone with your skills!](https://dailydishly.com/wp-content/uploads/2025/06/4347ed53-b30a-4529-9040-7c93ba67935a-768x768.webp)

![- 12 mini bell peppers (assorted colors) - 1 cup cooked quinoa - 1 cup black beans, rinsed and drained - 1 cup corn (fresh, frozen, or canned) - 1/2 cup diced tomatoes (fresh or canned) - 1 cup shredded cheese (cheddar or pepper jack) The mini bell peppers are the stars here. Their sweet crunch makes a great bite. They come in many colors, adding fun to your dish. Quinoa adds protein and a nice texture. Black beans bring fiber and heartiness. Corn adds sweetness and color, while diced tomatoes add moisture and flavor. Finally, shredded cheese melts into a gooey topping that ties everything together. - 1 teaspoon cumin - 1 teaspoon smoked paprika - 1 teaspoon garlic powder - 1/2 teaspoon onion powder - Salt and pepper to taste Seasonings bring life to your dish. Cumin adds warmth and earthiness. Smoked paprika gives a touch of smokiness. Garlic powder adds depth, while onion powder enhances flavor. Salt and pepper balance everything out. This blend will make your stuffed mini bell peppers burst with flavor. - Fresh cilantro, chopped (for garnish) - 1 tablespoon olive oil Garnishes make your dish pretty and fresh. Fresh cilantro adds a pop of color and brightness. Olive oil adds richness and ties the flavors together. Together, they make your stuffed mini bell peppers look and taste amazing. You can find the full recipe [here]. 1. Preheat the oven to 375°F (190°C). This step gets your oven ready for baking. 2. Cut the tops off the mini bell peppers. Use a sharp knife for a clean cut. 3. Remove the seeds and any white parts inside the peppers. This helps reduce bitterness. 1. In a large mixing bowl, combine the cooked quinoa, black beans, corn, and diced tomatoes. 2. Add half a cup of shredded cheese to the mix. This adds creaminess and flavor. 3. Stir in the cumin, smoked paprika, garlic powder, onion powder, salt, and pepper. Mix well until everything is combined. 4. Drizzle one tablespoon of olive oil over the filling and stir again. This keeps it moist. 1. Carefully fill each mini bell pepper with the quinoa mixture. Press down gently to pack it in. 2. Arrange the stuffed peppers upright in a baking dish. If they tip over, use crumpled aluminum foil to help them stand. 3. Sprinkle the rest of the cheese on top of the stuffed peppers. This will melt into a tasty layer. 4. Cover the dish with aluminum foil. Bake for 20 minutes, then remove the foil. 5. Bake for an additional 10-15 minutes, until the peppers are tender and the cheese is bubbly and golden. 6. After baking, let them cool for a few minutes before garnishing with fresh cilantro. For the Full Recipe, refer to the ingredients and precise steps above. Enjoy! You can easily change this recipe. Try using ground turkey instead of black beans. It adds a nice flavor. For some heat, add chili powder or cayenne pepper. This can spice things up! If you want vegan options, skip the cheese and use tofu. For gluten-free, ensure you select gluten-free grains and beans. You have options for cooking. Baking is simple and gives a soft texture. You can also use an air fryer. Air frying makes them crispy and quick. If you want a smoky taste, grilling is great. Just watch the peppers so they don’t burn. Dips enhance the meal. Salsa and guacamole pair well with the stuffed peppers. You can serve them as appetizers or as a fun main dish. They are colorful and bright, making your table look good. For a complete meal, add a fresh salad on the side. You can find the full recipe above, so you have all the details you need. {{image_2}} You can make stuffed mini bell peppers in many tasty ways. For a Mexican twist, add taco seasoning to the filling. This adds spice and flavor. You can use ground meat or keep it vegetarian. For a Mediterranean style, mix in feta cheese and olives. This creates a salty and creamy taste. The tangy flavors work great with the sweet peppers. Both options are fun and easy to try. Feel free to play with the main ingredients. You can swap quinoa for rice if you prefer it. Rice adds a nice texture and flavor. If you want a change, use lentils instead of beans. Lentils cook fast and have a great taste. They also boost the protein in your dish. These swaps let you customize the recipe to your liking. Seasonal changes can inspire new stuffed pepper ideas. In summer, use fresh garden veggies like zucchini or corn. These add brightness and flavor. In winter, try heartier vegetables like mushrooms or kale. They give warmth and comfort to your meal. These seasonal changes keep things interesting and delicious. For the full recipe, check out the details above. After you enjoy your stuffed mini bell peppers, store the leftovers in the fridge. Place them in an airtight container. This keeps them fresh and tasty. If you have a lot, you can stack them, but make sure they are not too crowded. The best containers are glass or BPA-free plastic. They seal well and help keep the flavor. To freeze stuffed peppers, let them cool first. Then, wrap each pepper tightly in plastic wrap. After that, put them in a freezer-safe bag or container. This helps prevent freezer burn. When you want to eat them, take them out. Thaw them in the fridge overnight. You can reheat them in the oven or microwave. If using the oven, bake at 350°F (175°C) until warmed through. Stuffed mini bell peppers last about 3 to 5 days in the fridge. If frozen, they can last up to 3 months. For the best taste, eat them sooner rather than later. Always check for any signs of spoilage before eating. Keeping track of freshness helps you enjoy your meal at its best. Stuffed mini bell peppers are small, colorful peppers filled with a tasty mix. They are often stuffed with ingredients like quinoa, beans, corn, and cheese. After baking, they become soft and flavorful. The peppers add a nice crunch and sweetness. This dish is perfect as an appetizer or a main course. You can enjoy them warm or at room temperature. Yes, you can make stuffed mini bell peppers in advance. Prepare the filling and stuff the peppers. Then, cover and refrigerate them for up to a day. When ready to bake, take them out and let them sit for 15 minutes. This helps them cook evenly. You can also freeze them before baking. To do this, wrap them tightly and store them for up to three months. Thaw in the fridge overnight before baking. Stuffed mini bell peppers pair well with many sides. Here are a few tasty options: - A fresh green salad with vinaigrette - Guacamole and tortilla chips - Rice or quinoa pilaf - A light soup, like tomato or corn chowder - Sparkling water or a light white wine These sides complement the flavors of the stuffed peppers and make the meal more complete. You can tell stuffed mini bell peppers are done by checking a few signs. First, look for the peppers to be tender and slightly wrinkled. The cheese on top should be golden and bubbly. If you poke a pepper with a fork, it should feel soft but not mushy. Cooking time is usually 30 to 35 minutes at 375°F (190°C). If unsure, a food thermometer should read 165°F (74°C) inside the filling. Stuffed mini bell peppers are fun, tasty, and easy to make. We explored their main ingredients, seasonings, and garnishes. You learned how to prep, mix, and bake them perfectly. Plus, I shared great tips for customizing and serving your dish. Don’t forget about storing leftovers for later! Experiment with flavors and try different options. There’s so much you can do with this dish. Enjoy making stuffed peppers that please everyone at your table!](https://dailydishly.com/wp-content/uploads/2025/07/7be91d44-d02b-4978-8cdb-a2e2cd47e9c1-768x768.webp)