Thai Peanut Crunch Salad Cups Fresh and Healthy Delight

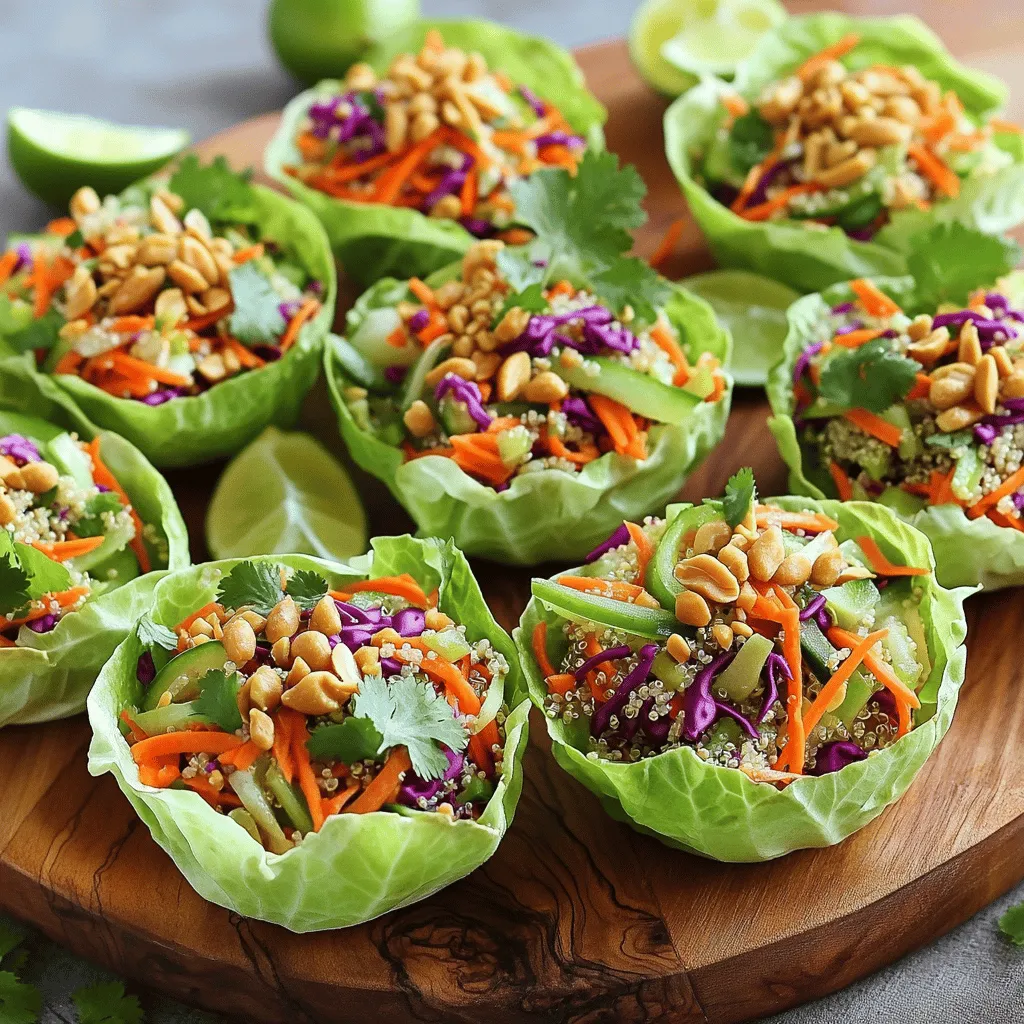
Are you craving a fresh and healthy dish that’s bursting with flavor? Look no further! These Thai Peanut Crunch Salad Cups are not only easy to make, but they’re also fun to eat. Packed with vibrant veggies, protein options, and a creamy peanut dressing, this recipe is perfect for a quick lunch or a light dinner. Join me as we dive into this delightful recipe that satisfies both your taste buds and your health goals!
Ingredients
Vegetable Ingredients
– 1 cup shredded carrots
– 1 cup red cabbage, finely shredded
– 1 bell pepper (red or yellow), julienned
– 1 cucumber, peeled and diced
Protein and Grain Options
– 1 cup cooked quinoa
– Rice noodles (alternative)
Dressing Ingredients
– 1 lime, juiced
– 2 tablespoons peanut butter
– 1 tablespoon soy sauce
– 1 tablespoon maple syrup (or honey)
– 1 tablespoon sesame oil
– Salt and pepper to taste
Garnishing Elements
– 1/4 cup fresh cilantro, chopped
– 1/4 cup roasted peanuts, crushed
– 8 small lettuce leaves (butter lettuce or romaine)
When I create Thai Peanut Crunch Salad Cups, I focus on fresh, vibrant ingredients. The main veggies are shredded carrots, red cabbage, bell peppers, and cucumbers. Each adds color and crunch.
For protein and grains, I use cooked quinoa. It gives a nice base. If you want a twist, try rice noodles instead. They add great texture.
The dressing is key. I mix fresh lime juice, peanut butter, soy sauce, maple syrup, and sesame oil. This blend is creamy and zesty. I add salt and pepper to taste.
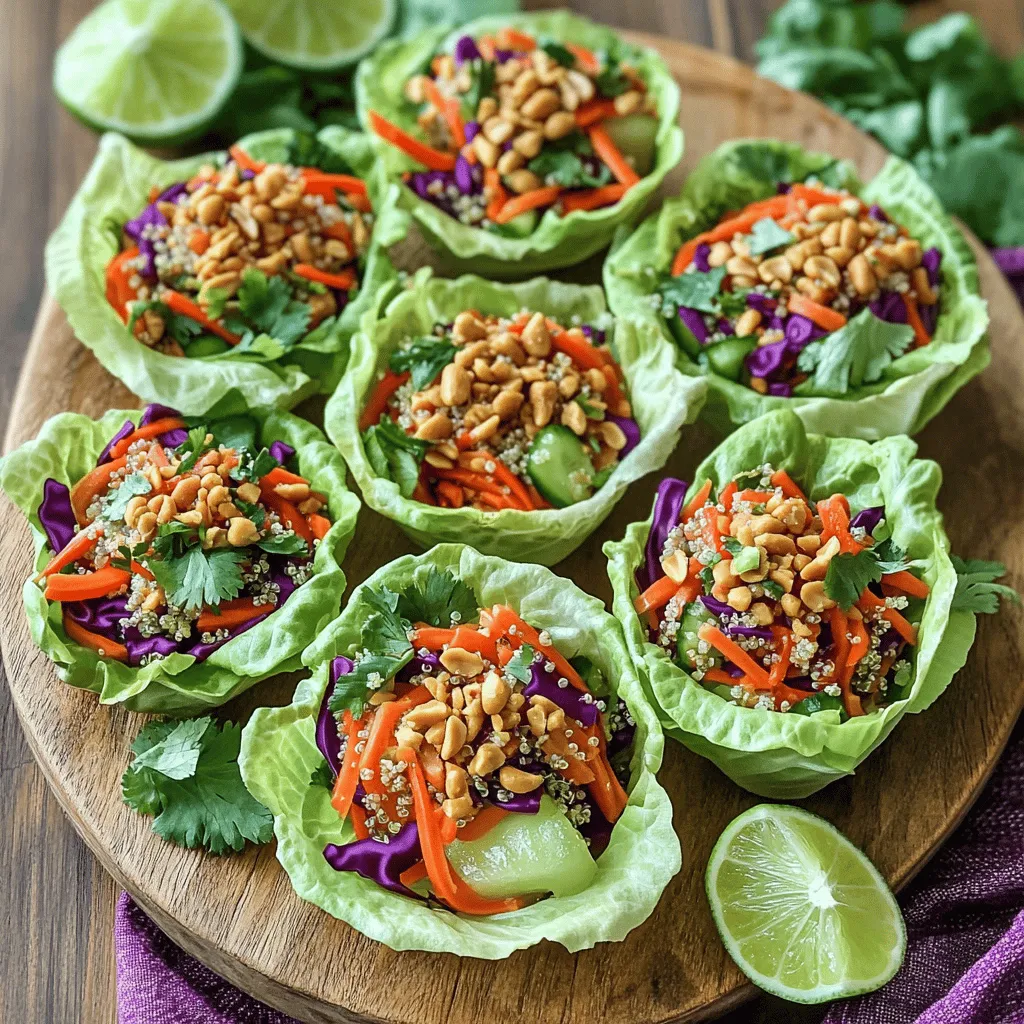
Finally, I love garnishing my salad cups. Fresh cilantro and crushed peanuts provide extra flavor and crunch. I use small lettuce leaves as cups, perfect for holding the salad.
Step-by-Step Instructions
Preparation of Vegetables
To make the salad cups, start with the carrots and cabbage. Use a box grater to shred the carrots quickly. For the cabbage, cut it in half. Remove the core and shred it with a knife. This gives a nice crunch.
Next, for the bell pepper, slice it in half. Remove the seeds and stem. Then, cut the pepper into thin strips, known as julienning. For the cucumber, peel it first. Then, slice it in half and remove the seeds. Dice it into small pieces.
Making the Dressing
Grab a small bowl to make the dressing. Add lime juice, peanut butter, soy sauce, maple syrup, and sesame oil. Use a whisk to mix them well together. This helps combine the flavors evenly. If the dressing is thick, add a little water. This will help it pour easily over the salad.
Assembling the Salad Cups
In a large bowl, combine the shredded carrots, cabbage, bell pepper, diced cucumber, cooked quinoa, and chopped cilantro. Mix them well with a spoon until everything is evenly distributed.
Now, take a lettuce leaf. Spoon a generous amount of salad mixture into the center. Be careful not to overfill. This makes it easy to fold and hold.
Serving Suggestions
For a great presentation, arrange the filled salad cups on a platter. You can sprinkle crushed peanuts and cilantro on top for a nice touch. Serve with lime wedges on the side. This adds extra flavor and freshness when eating.
Tips & Tricks
Enhancing Flavor
To make your salad shine, adjust the seasoning with salt and pepper. Start with a small pinch of salt. Taste and add more if needed. Use fresh ground pepper for a bright flavor. This simple trick can change the taste.
Balancing the dressing flavors is key too. Mix lime juice, peanut butter, soy sauce, and maple syrup. If it tastes too sour, add more maple syrup. If it’s too sweet, add a touch of soy sauce. Always taste as you go!
Prep and Assembly Tips
Prepare your ingredients ahead of time. Shred the carrots and cabbage the night before. This saves time and keeps your salad fresh. Store each vegetable in a sealed container. You can also cook the quinoa in advance. Just let it cool before using.
To keep salad cups fresh until serving, leave the dressing off until you are ready to eat. If you mix everything too early, the lettuce will get soggy. Assemble your cups right before serving for the best crunch!
Equipment Recommendations
Use a large mixing bowl for the salad. A glass or stainless-steel bowl works best. They are easy to clean and won’t hold onto odors. A whisk is great for mixing the dressing. A simple balloon whisk will do just fine.
For cutting vegetables, use a sharp chef’s knife. Make sure it is well-maintained for safety and ease. For julienning the bell pepper, slice it into strips first, then cut those into smaller pieces. This makes the task quick and easy!

Variations
Ingredient Substitutions
If you want to change up the crunch, you can use different veggies. Try adding snap peas or radishes for a fresh twist. You can even use shredded zucchini! These options add great texture.
For protein, chicken or tofu work well. Cooked chicken adds heartiness. Tofu is great if you want a plant-based option. Just make sure to season it well!
Dressing Variations
Want a kick? Try adding sriracha to your peanut dressing. This will give it a spicy twist. If you prefer a milder flavor, use less peanut butter and more lime juice.
For a vegan option, you can swap the honey for agave syrup. This keeps it sweet without any animal products. You can also use sunflower seed butter if you have a nut allergy.
Serving Suggestions
Serve salad cups in fun ways. Try using small jars or bowls for a unique look. You can stack the cups on a platter for a colorful display.
Pair these cups with grilled chicken or shrimp for a full meal. A side of jasmine rice makes it even better. You can also serve a light soup to round out your dinner.
Storage Info
Refrigeration Tips
To store your Thai Peanut Crunch Salad Cups, use airtight containers. Make sure you keep the salad mixture separate from the lettuce cups. This keeps the lettuce crisp and fresh. If stored correctly, the salad cups can last for up to three days in the fridge. Always check for freshness before eating.
Freezing Guidelines
Freezing the salad mixture can be tricky. The crunchy veggies may lose their texture. If you choose to freeze, do it without the dressing. Use freezer-safe containers or bags. Label them with the date. This way, you can keep track of how long they’ve been in the freezer. Aim to use them within a month for the best taste.
Freshness Maintenance
To keep the ingredients crisp, store them in the fridge wrapped tightly. You can also add a damp paper towel to the container. This helps keep moisture in. If the salad loses some crunch, try refreshing it. Just toss it gently with a splash of lime juice. This can help revive the flavors and crispness before serving.
FAQs
How long do Thai Peanut Crunch Salad Cups last?
Thai Peanut Crunch Salad Cups last for about 2 to 3 days in the fridge. Store them in an airtight container. The veggies stay fresh, but the lettuce may wilt. For best taste, eat them sooner rather than later.
Can I make these salad cups ahead of time?
Yes, you can prepare the salad cups in advance! Chop all the veggies and make the dressing ahead. Keep the salad mix and dressing in separate containers. When you are ready to eat, just combine them and fill the lettuce cups. This keeps everything fresh and crisp.
Are these salad cups gluten-free?
Yes, these salad cups can be gluten-free! Just ensure you use gluten-free soy sauce. Most of the other ingredients are naturally gluten-free. This makes it a great dish for those with gluten sensitivity.
What can I substitute for peanut butter?
If you have allergies, you can use sun butter or almond butter instead of peanut butter. These options give a similar creamy texture. You can also try tahini or a soy-based dressing for a nut-free alternative. Adjust the taste as needed to match your preference.
In this blog post, we explored making Thai Peanut Crunch Salad Cups. We covered each ingredient, from fresh veggies to proteins and dressing. I shared tips for prep and assembly, plus fun variations and storage information. These salad cups are not only tasty but also flexible. You can customize them to fit your taste and needs. Enjoy creating your version of these salad cups for a delicious meal any time!


![To make a refreshing Lemon Basil Chickpea Salad, you need the following: - 1 can (15 oz) chickpeas, drained and rinsed - 1 cup cherry tomatoes, halved - 1 cucumber, diced - 1 bell pepper (any color), diced - 1/4 red onion, finely chopped - 1/4 cup fresh basil leaves, chopped - Juice of 1 lemon - 3 tablespoons extra-virgin olive oil - Salt and pepper to taste - 1/4 teaspoon garlic powder - 1/4 teaspoon red pepper flakes (optional) When picking your produce, choose firm tomatoes and bright, crisp cucumbers. Look for bell peppers that feel heavy for their size. Fresh basil should smell sweet and look vibrant. These tips help ensure your salad shines with flavor. You can add extra flavor and texture to your salad with these options: - Avocado, diced for creaminess - Feta cheese, crumbled for a salty kick - Olives, sliced for a briny touch - Grilled corn for sweetness Feel free to swap ingredients based on what’s in season. For example, use zucchini in summer or roasted butternut squash in fall. This flexibility makes the salad fun and fresh all year long. For the complete recipe, check out the [Full Recipe]. To make the Lemon Basil Chickpea Salad, start with a large bowl. Combine the following ingredients: - 1 can (15 oz) chickpeas, drained and rinsed - 1 cup cherry tomatoes, halved - 1 cucumber, diced - 1 bell pepper (any color), diced - 1/4 red onion, finely chopped - 1/4 cup fresh basil leaves, chopped Mix these well. The chickpeas add protein and texture. The tomatoes and cucumber bring freshness and crunch. The bell pepper adds color, while the onion gives a mild zing. Once mixed, let’s prepare the dressing. You can serve the salad right away, but I suggest letting it sit for at least 10 minutes. This time helps the flavors blend nicely. For the dressing, grab a small bowl. Whisk together these ingredients: - Juice of 1 lemon - 3 tablespoons extra-virgin olive oil - Salt and pepper to taste - 1/4 teaspoon garlic powder - 1/4 teaspoon red pepper flakes (optional) The lemon juice gives a bright, tangy taste. Olive oil adds richness. Adjust the salt and pepper to your liking. If you want a kick, add the red pepper flakes. Aim for a smooth blend in your dressing. Drizzle it over your salad and toss gently. Taste the salad and adjust seasoning if needed. Enjoy this vibrant dish fresh, or chill it for a refreshing bite. For the full recipe, check out the detailed instructions. You can pair Lemon Basil Chickpea Salad with many dishes. It goes well with grilled chicken or fish. You can also serve it with warm pita bread for a filling meal. For a light lunch, try it with a scoop of quinoa. When presenting the salad, use a large, bright bowl. This makes the colors pop and draws attention. Garnish with extra basil leaves or lemon slices for a fresh look. Adjusting the seasonings can make this salad perfect for your taste. If you like more zest, add extra lemon juice. For added heat, sprinkle in more red pepper flakes. You can also mix in more garlic powder for a stronger flavor. If you have leftovers, store them in an airtight container. To enhance the flavors, let the salad rest for a bit before eating. Reheating is not usually needed, but you can warm it slightly if you prefer. Just be careful not to heat it too much, as the fresh veggies taste best cold. {{image_2}} You can easily switch up the vegetables in your Lemon Basil Chickpea Salad. Here are some ideas: - Zucchini: Grate or dice it for a fresh crunch. - Carrots: Shred them for a sweet touch. - Corn: Add sweet corn for extra flavor and texture. You can also swap out chickpeas for other legumes: - Black beans: They add a rich, earthy taste. - Lentils: These will make your salad even heartier. For herbs, feel free to get creative: - Mint: It gives a refreshing twist. - Cilantro: Perfect if you love its bold flavor. When it comes to dressings, you can personalize it: - Balsamic vinaigrette: Adds a tangy sweetness. - Greek yogurt dressing: For a creamy element. This salad is versatile for different diets. To make it vegan, simply ensure the dressing is plant-based. You can replace any non-vegan ingredients with plant-friendly options: - Use nutritional yeast instead of cheese for a cheesy flavor without dairy. For gluten-free needs, this salad is already safe! Just make sure any added ingredients are gluten-free. To lower calories, skip the oil or use less. You can also add more veggies to bulk it up without extra calories. If you want to boost protein, consider these options: - Feta cheese: Crumble it on top for creamy richness. - Grilled chicken: Adds heartiness and flavor. With these variations, your Lemon Basil Chickpea Salad can fit any taste or diet. Check out the Full Recipe for all the details! To keep your Lemon Basil Chickpea Salad fresh, store it in an airtight container. Glass containers work well, but plastic ones are fine too. Make sure the lid closes tightly. Place the salad in the fridge right away. This helps lock in flavors and keeps everything crisp. If you have extra dressing, store it separately. This way, your salad won’t get soggy. When you’re ready to eat, simply drizzle the dressing over the salad and toss it again. Your salad will stay fresh in the fridge for about three days. After that, the veggies may lose their crunch. Look for signs of spoilage. If the salad smells off or looks slimy, it’s time to toss it. Make sure to check the basil too. If the leaves turn brown or wilt, it’s best to discard them. Enjoy your salad while it’s fresh for the best taste. For the full recipe, check [Full Recipe]. What can I add to make this salad heartier? You can add cooked quinoa or farro for more fiber. Chopped avocado adds creaminess. Grilled chicken or shrimp boosts protein. Can I make this salad ahead of time? Yes, you can make this salad ahead. It tastes even better after sitting for a while. Just store it in the fridge. Is there a substitute for chickpeas in this recipe? If you don't have chickpeas, try black beans or cannellini beans. Both offer protein and a nice texture. This salad is not just tasty; it’s healthy too. One serving has about 250 calories. It has 10 grams of fat and 12 grams of protein. - Chickpeas provide protein and fiber. - Tomatoes add vitamins and antioxidants. - Cucumbers keep the salad light and refreshing. - Basil offers flavor and has anti-inflammatory properties. How to make the salad more flavorful? To enhance the taste, add more lemon juice or fresh herbs. A pinch of cumin can also add depth. Recommendation for preparing for meal prepping When meal prepping, keep the dressing separate. This keeps the salad fresh and crisp. Store it in airtight containers for best results. This blog post walked you through making a fresh and tasty Lemon Basil Chickpea Salad. We covered the main ingredients and tips for choosing the best produce. You learned how to make a flavorful dressing and plenty of serving ideas. In conclusion, this salad is easy to customize for any diet and season. With proper storage, it stays fresh and tasty for days. Enjoy making this salad and share it with friends and family for a healthy treat!](https://dailydishly.com/wp-content/uploads/2025/07/d3747d36-0043-45e0-9a82-fe789303a34f-768x768.webp)
![For these grilled veggie skewers, you will need: - 1 large zucchini, sliced into thick rounds - 1 red bell pepper, cut into squares - 1 yellow bell pepper, cut into squares - 1 red onion, cut into chunks - 8 cherry tomatoes - 1 cup mushrooms, halved These vegetables bring color and flavor to your skewers. You can mix and match based on your taste. Try using eggplant or asparagus for a twist. The marinade adds zest and depth to the veggies. You will need: - 3 tablespoons olive oil - 2 teaspoons dried oregano - 1 teaspoon garlic powder - Salt and pepper to taste This simple mix enhances the natural flavors of the vegetables. Adjust the salt and pepper to fit your liking. Garnishes can make your skewers pop! Consider using: - Fresh parsley, chopped Adding parsley gives a fresh touch. It also adds a nice green color to the dish. You can also sprinkle feta cheese for a creamy bite. For the full recipe, check the Grilled Mediterranean Veggie Skewers. Start by gathering your veggies. Use a large bowl to combine: - 1 large zucchini, sliced into thick rounds - 1 red bell pepper, cut into squares - 1 yellow bell pepper, cut into squares - 1 red onion, cut into chunks - 8 cherry tomatoes - 1 cup mushrooms, halved Make sure to wash all your vegetables well. This keeps them fresh and clean. Cut them into even pieces. This helps them cook evenly on the grill. Next, we make the marinade. In a small bowl, whisk together: - 3 tablespoons olive oil - 2 teaspoons dried oregano - 1 teaspoon garlic powder - Salt and pepper to taste Mix until well combined. Pour this mixture over your veggies in the large bowl. Toss gently. Make sure every piece is coated. This will add great flavor to your skewers. Now it’s time to grill! First, preheat your grill to medium-high heat. While it heats, thread the marinated vegetables onto the skewers. Alternate between different types for a colorful look. Once the grill is hot, place the skewers on it. Grill for about 10-12 minutes. Turn the skewers occasionally. You want nice grill marks and tender veggies. When they are done, remove them from the grill. Let them cool slightly before serving. You can garnish with fresh parsley for an extra burst of flavor. For the full recipe, check out [Full Recipe]. Enjoy your grilled Mediterranean veggie skewers! To grill veggie skewers well, start with a clean grill. This helps prevent sticking. Preheat your grill to medium-high heat. This temperature cooks veggies evenly and keeps them crisp. Soak wooden skewers in water for at least 30 minutes. This step helps them not burn on the grill. When placing skewers on the grill, leave space between them. This promotes even heat flow. Keep a close eye on them. Turn the skewers every few minutes. This way, every side gets that nice grill mark. To get that perfect char, use high heat for a short time. Grill your skewers for about 10-12 minutes. Turn them often to avoid burning. The goal is tender veggies with those lovely grill lines. You want a bit of caramelization for extra flavor. Don’t forget to watch for the color change, too. When the veggies are brightly colored and tender, they are done. If you want a deeper char, leave them on a bit longer. Just be careful not to overcook them. Serve your grilled Mediterranean veggie skewers warm. They shine on their own, but pair nicely with dips. Try hummus or a yogurt sauce for added flavor. You can also serve them on a bed of fresh greens. This adds a nice crunch and vibrancy. For a fun twist, chop up leftovers and add them to salads. You can also use them in wraps or sandwiches. They keep well, making them a great meal prep option. For the full recipe, check out the details above. Enjoy your grilling! {{image_2}} You can swap in many other veggies for your skewers. Try using eggplant, asparagus, or even cauliflower. Each brings a unique taste and texture. For a sweeter note, add butternut squash or carrots. These flavors will shine when grilled. Don't be afraid to mix and match. The more colorful, the better! For a heartier meal, add protein to your skewers. Chicken or shrimp work well here. Cut them into bite-sized pieces for even cooking. You can marinate them just like the veggies. For a vegan option, try tofu or tempeh. They soak up flavors beautifully. Adding protein makes your skewers more filling and nutritious. While the olive oil and oregano mix is great, you can get creative. Try adding lemon juice or balsamic vinegar for extra zing. A bit of honey can bring a sweet touch. Experiment with spices like smoked paprika or cumin for warmth. Each marinade will change the flavor profile. Feel free to explore and find your favorite! Check out the Full Recipe for more details on creating the perfect skewers. After enjoying your Grilled Mediterranean Veggie Skewers, store leftovers in an airtight container. This keeps the flavors fresh. You can keep them in the fridge for three to four days. Make sure they cool down before sealing. Layer them with paper towels to absorb extra moisture. To reheat your skewers, use a skillet or grill. This helps maintain the charred flavor. Heat them on medium for about five minutes. Turn them gently to warm all sides. You can also use a microwave, but it may make them soft. If you choose the microwave, heat in short bursts to avoid overcooking. Freezing grilled skewers is a great option for meal prep. Let them cool completely first. Then, wrap each skewer in plastic wrap. Place the wrapped skewers in a freezer bag, removing as much air as possible. They can stay fresh for up to three months. To enjoy, thaw in the fridge overnight before reheating. Yes, you can use many types of vegetables. Try eggplant, asparagus, or even corn. Mixing colors and shapes makes your dish fun and tasty. Each vegetable adds its unique flavor. Experiment to find your favorites! Soak wooden skewers for at least 30 minutes. This helps prevent them from burning on the grill. If you forget to soak them, use metal skewers instead. They work great and need no soaking at all. Many sauces taste great with these skewers. Tzatziki sauce adds a cool, creamy bite. A balsamic glaze gives a sweet twist. You can also try a spicy harissa sauce for heat. Each sauce adds its own special touch to the dish. For the full recipe, check it out! Grilled Mediterranean Veggie Skewers are fun and easy to make. We looked at the best veggies, how to prepare them, and tasty marinades. I shared tips for grilling and great serving ideas. You can try different veggies and proteins to mix things up. Remember to store leftovers well so you can enjoy them later. With these guidelines, your grilling efforts will be a hit. Enjoy every bite and happy grilling!](https://dailydishly.com/wp-content/uploads/2025/07/4b70700e-9f85-4317-b9e4-a855a04e592b-768x768.webp)

![To make crispy Parmesan ranch potato skins, you need a few simple and tasty items. Here’s what you will need: - 4 medium russet potatoes - 1 tablespoon olive oil - 1 teaspoon garlic powder - 1 teaspoon onion powder - 1 teaspoon dried parsley - ½ teaspoon salt - ¼ teaspoon black pepper - ½ cup grated Parmesan cheese - ½ cup shredded cheddar cheese - ½ cup sour cream - 2 green onions, sliced - Optional: hot sauce for drizzling These ingredients blend well together to create bold flavors. The russet potatoes shine with their fluffy texture. Olive oil helps the skins crisp up nicely. Garlic and onion powders add great depth to every bite. Parmesan cheese gives a sharp, rich taste, while cheddar brings creaminess. If you want to switch things up, you can try different cheeses, like mozzarella or pepper jack. You can also use sweet potatoes for a twist. Adjust the spices based on your taste, too. You can add more garlic powder or even a pinch of cayenne for heat. This recipe is flexible and can be made to suit your preferences. For the full recipe, check the instructions above. Start by preheating your oven to 400°F (200°C). This step is key for crispy potato skins. While the oven heats, wash the potatoes well. Use a fork to pierce each potato several times. This helps steam escape and ensures even cooking. Place the potatoes on a baking sheet. Bake them for 45-60 minutes until they are fork-tender. After baking, remove the potatoes and let them cool for about 10 minutes. Once they are cool enough to handle, cut each potato in half lengthwise. Use a spoon to scoop out some of the insides, leaving about a ¼-inch thick shell. This gives you the perfect base for your toppings. Next, brush the potato skins with olive oil, both inside and out. This step adds flavor and helps achieve that crispy texture. In a small bowl, mix together garlic powder, onion powder, dried parsley, salt, and black pepper. This seasoning blend will bring great taste to your skins. Sprinkle this mix evenly inside each potato skin. Now, it’s time to layer on the cheese. Start with the grated Parmesan cheese, then add the shredded cheddar cheese on top. The cheese will melt beautifully and add a rich flavor to each bite. Place the potato skins back on the baking sheet, cheese-side up. Return them to the oven and bake for another 15-20 minutes. Keep an eye on them until the cheese is melted and the edges are crispy. After baking, remove the skins from the oven and let them cool slightly. Top each one with a dollop of sour cream and garnish with sliced green onions. If you like a kick, drizzle some hot sauce on top. Enjoy this tasty treat with friends or family. For a complete guide, refer to the Full Recipe. To get those potato skins extra crispy, start with the right oil. I use olive oil because it adds flavor and helps the skins crisp up. Brush the oil on both the inside and outside of the potato skins. This step is key! When baking, make sure to keep an eye on the skins. Check them at the 15-minute mark. The cheese should melt, and the edges should turn golden brown. If they look a bit soft, give them a few more minutes. Trust your eyes; crispy is the goal! Want to kick up the flavor? You can add more spices. Try paprika or cayenne for some heat. A sprinkle of smoked paprika can give a nice smoky taste. If you want to modify the ranch flavor, consider adding some herbs. Fresh dill or chives can brighten things up. You can also mix in a little ranch seasoning for extra zing! These small changes can transform your potato skins into an even tastier snack. {{image_2}} You can change the cheeses to mix things up. Try using gouda or mozzarella. These cheeses melt well and add great taste. You can also use feta for a tangy twist. For toppings, consider adding cooked bacon bits or jalapeños for heat. Switching up the seasonings can create unique flavors. Instead of garlic and onion powder, try smoked paprika or chili powder. These spices give a warm, smoky flavor that is hard to resist. You can also add a sprinkle of ranch seasoning for extra zest. If you want to make these potato skins vegan, swap the cheese for a plant-based version. Nutritional yeast can also add a cheesy flavor without dairy. For the sour cream, use a vegan alternative made from cashews or coconut. To make these skins gluten-free, just ensure your seasoning blends are free from gluten. You can also use gluten-free breadcrumbs if you want extra crunch. If you want to cut down on fat, use less cheese and opt for low-fat dairy products. You can also brush the skins with cooking spray instead of oil. This way, you keep the flavor while making them lighter. For the full recipe, check out the [Full Recipe]. To keep your crispy Parmesan ranch potato skins fresh, store them in the fridge. Place them in an airtight container. This helps keep them crisp for a few days. Use wax paper or parchment paper between layers to avoid sogginess. When you want to reheat them, preheat your oven to 375°F (190°C). Place the skins on a baking sheet and heat for about 10-15 minutes. This keeps them nice and crispy, just like when they were fresh. If you want to save some for later, you can freeze potato skins. Start by baking them and letting them cool completely. Once cool, wrap each skin individually in plastic wrap. Then, place them in a freezer bag. This helps prevent freezer burn. To thaw, move them to the fridge overnight. When you’re ready to eat, reheat them in the oven at 375°F (190°C) for about 15 minutes. They will taste almost as good as fresh from the oven! For the full recipe, check out the Crispy Parmesan Ranch Potato Skins details. Yes, you can use different types of potatoes. Each type brings a unique flavor and texture. For example, russet potatoes are fluffy and great for crisping. Yukon golds are creamier and add a buttery taste. Red potatoes hold their shape well but may not get as crispy. Experiment with what you like best. Just remember to keep the skin thick enough for filling. To make these potato skins healthier, you can swap some ingredients. Use low-fat cheese for less fat. Greek yogurt can replace sour cream for a protein boost. You can also skip cheese entirely and pile on veggies, like bell peppers or spinach. This way, you keep the flavor but cut down on calories. Choose olive oil spray instead of pouring oil to control the amount used. Yes, you can prep these potato skins ahead of time. Bake the potatoes and scoop them out. Store the skins in an airtight container in the fridge. You can also mix your seasonings and cheese ahead. When you’re ready to eat, just assemble and bake. This method saves time and makes it easy to enjoy a tasty snack. In this article, we covered making delicious potato skins. You learned the key flavors, portion sizes, and how to prep and bake. We shared tips for maximum crispiness and enhancements for extra taste. You saw variations for different diets and storage methods for leftovers. These potato skins can be fun and easy to make. With some practice, you'll impress everyone with your tasty creations. Enjoy your cooking journey!](https://dailydishly.com/wp-content/uploads/2025/07/9ef0e1bf-f6f5-4930-b94b-6007a553a89c-768x768.webp)

