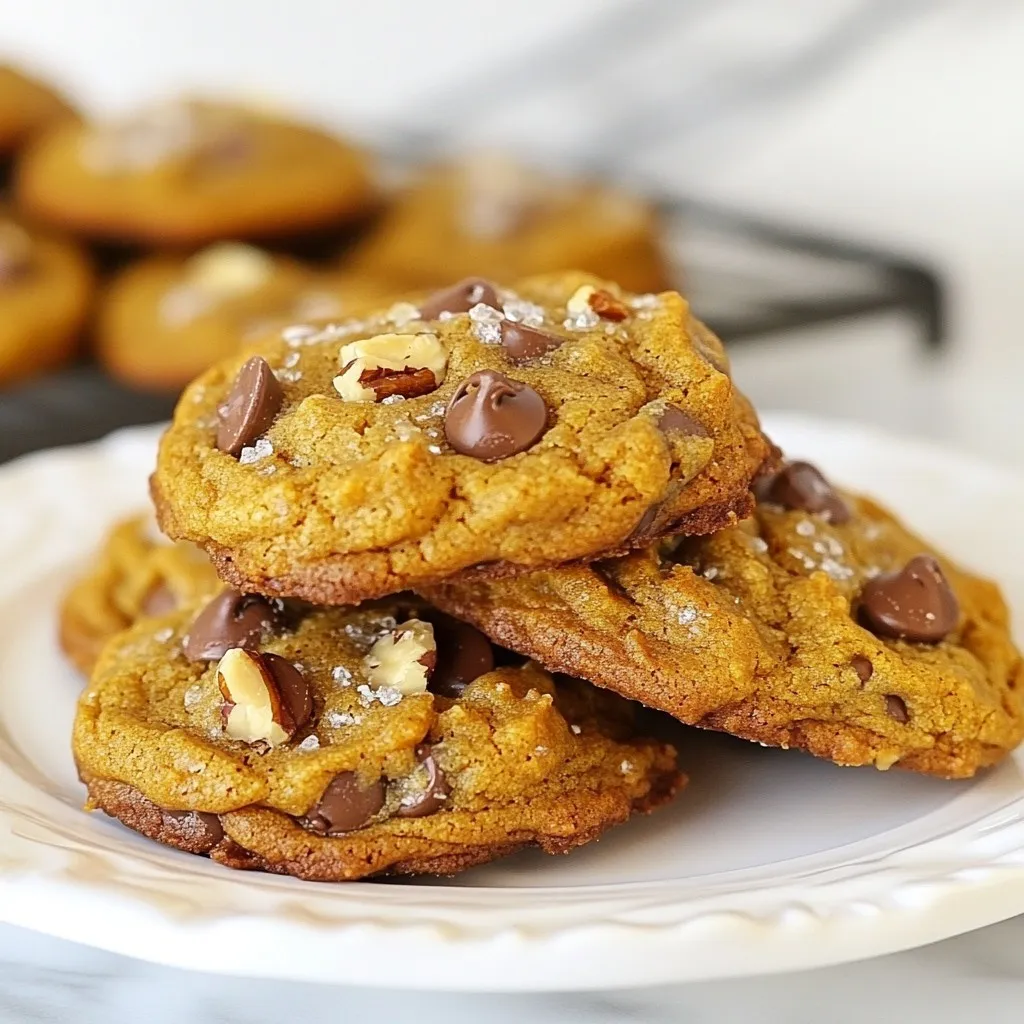
Ready to indulge in a tasty treat? These Vegan Chocolate Chip Pumpkin Cookies are a soft delight perfect for any occasion! With just a few simple ingredients, I’ll guide you through easy steps to create cookies that are both delicious and healthy. Whether you want to impress friends or enjoy a cozy snack, these cookies will hit the spot. Let’s dive into this fun baking adventure!
Why I Love This Recipe
- Deliciously Unique Flavor: The combination of pumpkin and chocolate creates a delightful contrast that is both comforting and indulgent.
- Perfect for Any Occasion: These cookies are a fantastic treat for fall gatherings, holidays, or just a cozy night in.
- Easy to Make: With simple ingredients and straightforward instructions, these cookies come together quickly, making them a great choice for any baker.
- Vegan and Healthier: Using pumpkin puree and coconut sugar, these cookies offer a healthier alternative to traditional chocolate chip cookies without sacrificing taste.
Ingredients
Main Ingredients for Vegan Chocolate Chip Pumpkin Cookies
To create these tasty cookies, gather the following ingredients:
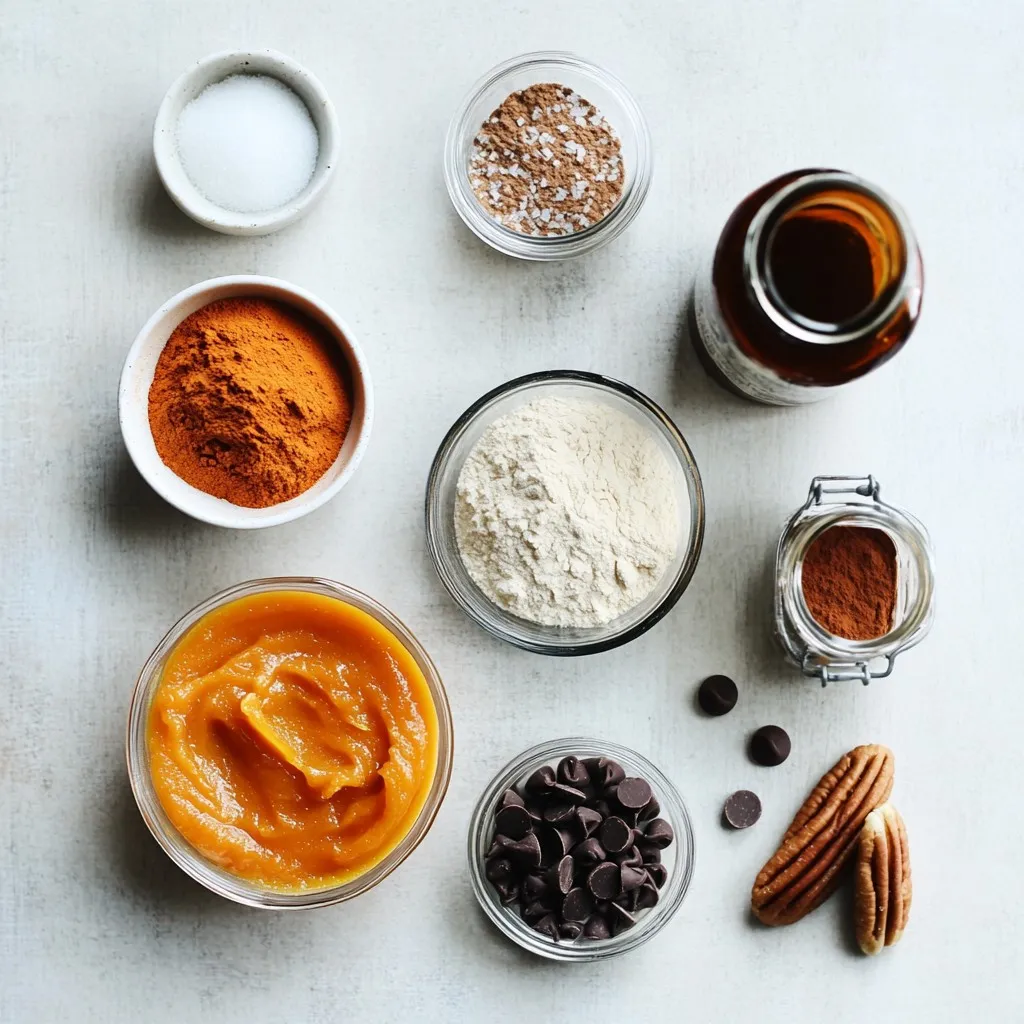
– 1 cup pumpkin puree
– 1/2 cup coconut sugar
– 1/4 cup maple syrup
– 1/2 cup coconut oil, melted
– 1 teaspoon vanilla extract
– 1 1/2 cups all-purpose flour
– 1 teaspoon baking soda
– 1/2 teaspoon baking powder
– 1/2 teaspoon salt
– 1 teaspoon pumpkin pie spice
– 1/2 cup dairy-free chocolate chips
Each ingredient plays a key role. The pumpkin puree adds moisture and flavor. Coconut sugar gives a rich taste and keeps it vegan. Maple syrup adds sweetness and depth.
Optional Add-ins
You can make these cookies even better with some optional ingredients:
– 1/4 cup chopped pecans
These pecans add crunch and a nutty flavor. You can also try other nuts, like walnuts, or even seeds for a twist.
Substitutions for Common Ingredients
If you need to swap any items, here are some easy options:
– Pumpkin puree: Use fresh pumpkin if you prefer.
– Coconut sugar: Brown sugar works well as a substitute.
– Coconut oil: You can replace it with vegetable oil or applesauce for a lighter version.
– All-purpose flour: A gluten-free blend can work, too.
These substitutions keep the cookie’s taste and texture while meeting your needs.
Step-by-Step Instructions
Preparation Steps
To start, gather your ingredients. You’ll need:
– 1 cup pumpkin puree
– 1/2 cup coconut sugar
– 1/4 cup maple syrup
– 1/2 cup coconut oil, melted
– 1 teaspoon vanilla extract
– 1 1/2 cups all-purpose flour
– 1 teaspoon baking soda
– 1/2 teaspoon baking powder
– 1/2 teaspoon salt
– 1 teaspoon pumpkin pie spice
– 1/2 cup dairy-free chocolate chips
– 1/4 cup chopped pecans (optional)
First, preheat your oven to 350°F (175°C). Line a baking sheet with parchment paper. This helps the cookies not stick. In a large bowl, mix pumpkin puree, coconut sugar, maple syrup, melted coconut oil, and vanilla extract. Stir until everything blends well.
In another bowl, sift together the all-purpose flour, baking soda, baking powder, salt, and pumpkin pie spice. This makes the dry mix light and fluffy. Slowly add the dry mix to the wet mix. Stir gently until just combined. Don’t over-mix; it can make the cookies tough. Finally, fold in the dairy-free chocolate chips and pecans if you want a nutty crunch.
Baking Instructions
Now, use a tablespoon or cookie scoop to drop dollops of the dough onto the lined baking sheet. Space them about 2 inches apart. This is key to give them room to spread. Bake in your preheated oven for 10 to 12 minutes. Look for golden edges, but make sure the centers stay soft. This is what gives them that chewy texture.
Cooling and Serving Tips
Once baked, remove your cookies from the oven. Let them cool on the baking sheet for about 5 minutes. This helps them set. After that, transfer them to a wire rack to cool completely. Enjoy these cookies fresh or store them for later. Pair them with a warm drink for a cozy treat!
Tips & Tricks
How to Achieve Perfectly Soft Cookies
To make your cookies soft, use pumpkin puree. It adds moisture and flavor. Mix wet and dry ingredients gently. Over-mixing can make cookies tough. Bake them until the edges are golden but the center is still soft. This gives you that perfect chewy bite. Let them cool on the sheet for a few minutes. This helps them set up without getting hard.
Storage and Reheating Advice
Store your cookies in an airtight container. This keeps them fresh and soft. You can keep them at room temperature for up to five days. For longer storage, place them in the fridge. Reheat them in the microwave for about 10 seconds. This brings back the warmth and soft texture.
Common Mistakes to Avoid
A few mistakes can ruin your cookies. First, don’t skip the pumpkin pie spice. It adds warmth and depth. Avoid using too much flour. Measure it properly by spooning it into the cup. Also, don’t skip resting the dough. If you hurry, cookies may spread too much during baking. Lastly, always watch the baking time closely. Each oven can bake differently.
Pro Tips
- Use Fresh Pumpkin Puree: For a deeper flavor, consider roasting your own pumpkin and pureeing it instead of using canned pumpkin.
- Chill the Dough: If the dough is too sticky, chill it in the refrigerator for 30 minutes to make it easier to scoop and shape.
- Check for Doneness: Keep an eye on the cookies as they bake; overbaking can lead to dry cookies. They should be golden around the edges but soft in the center.
- Storage Tips: Store the cookies in an airtight container at room temperature for up to a week, or freeze them for longer storage.
Variations
Flavor Variations
You can change the flavor of your cookies with easy swaps. Try adding spices like cinnamon or nutmeg for warmth. You can also add more pumpkin pie spice for a stronger taste. If you like crunch, mix in some chopped walnuts or pecans. They give a nice texture.
Diet-Specific Variations
If you have dietary needs, you can adapt this recipe. To make it gluten-free, use almond flour or a gluten-free blend. For a nut-free version, skip the pecans completely. You can also use sunflower seed butter instead of coconut oil for a nut-free fat option.
Creative Add-ins
Want to get creative? You can add dried fruits like cranberries or raisins for a fruity twist. Chia seeds or flaxseeds can boost nutrition and add fun texture. Feel free to experiment with what you have on hand to make your cookies unique. Each variation brings a new taste to enjoy!
Storage Info
Best Practices for Storing Cookies
To keep your vegan chocolate chip pumpkin cookies fresh, store them in an airtight container. Make sure they cool completely before you put them away. This helps to avoid any sogginess. Place parchment paper between layers if stacking them. It keeps them from sticking together. Keep them in a cool, dry place. They will stay soft and tasty this way.
Freezing Instructions for Vegan Cookies
Freezing your cookies is easy and a great way to save them for later. After baking, let the cookies cool completely. Then, place them in a single layer on a baking sheet. Freeze them for about an hour. This helps them keep their shape. Once frozen, transfer them to a freezer bag. Remove as much air as possible before sealing. These cookies can last up to three months in the freezer. When you want a cookie, just thaw them at room temperature.
How Long Do They Last?
Vegan chocolate chip pumpkin cookies can last about one week at room temperature. If you keep them in the fridge, they may last up to two weeks. Always check for any signs of spoilage. If they look or smell off, it’s best to toss them. The key to enjoying these cookies longer is proper storage.
FAQs
Can I use fresh pumpkin instead of canned puree?
Yes, you can use fresh pumpkin. Start by roasting a pumpkin until soft. Scrape out the flesh and blend it until smooth. This gives you a fresh taste. Just make sure it is well-drained. Too much water can make your cookies soggy.
How can I make these cookies nut-free?
To make these cookies nut-free, simply skip the pecans. You can also swap dairy-free chocolate chips with carob chips. This keeps the cookies safe for those with nut allergies. You can still enjoy great flavor without nuts.
What can I substitute for coconut sugar?
You can use brown sugar as a substitute for coconut sugar. It has a similar taste and texture. If you want a lighter option, try using regular white sugar. Just remember, it will change the flavor a bit.
In this blog post, we explored how to make vegan chocolate chip pumpkin cookies. We covered essential ingredients, baking steps, and tips for perfect cookies. You learned about tasty add-ins and how to store them properly. Remember, using fresh pumpkin is fine, and there are simple swaps for allergens. Don’t forget to experiment with flavors! These cookies are easy to make and fun to share. Enjoy baking and sharing these delicious treats with your friends and famil