Watermelon Feta Mint Salad Refreshing Summer Delight

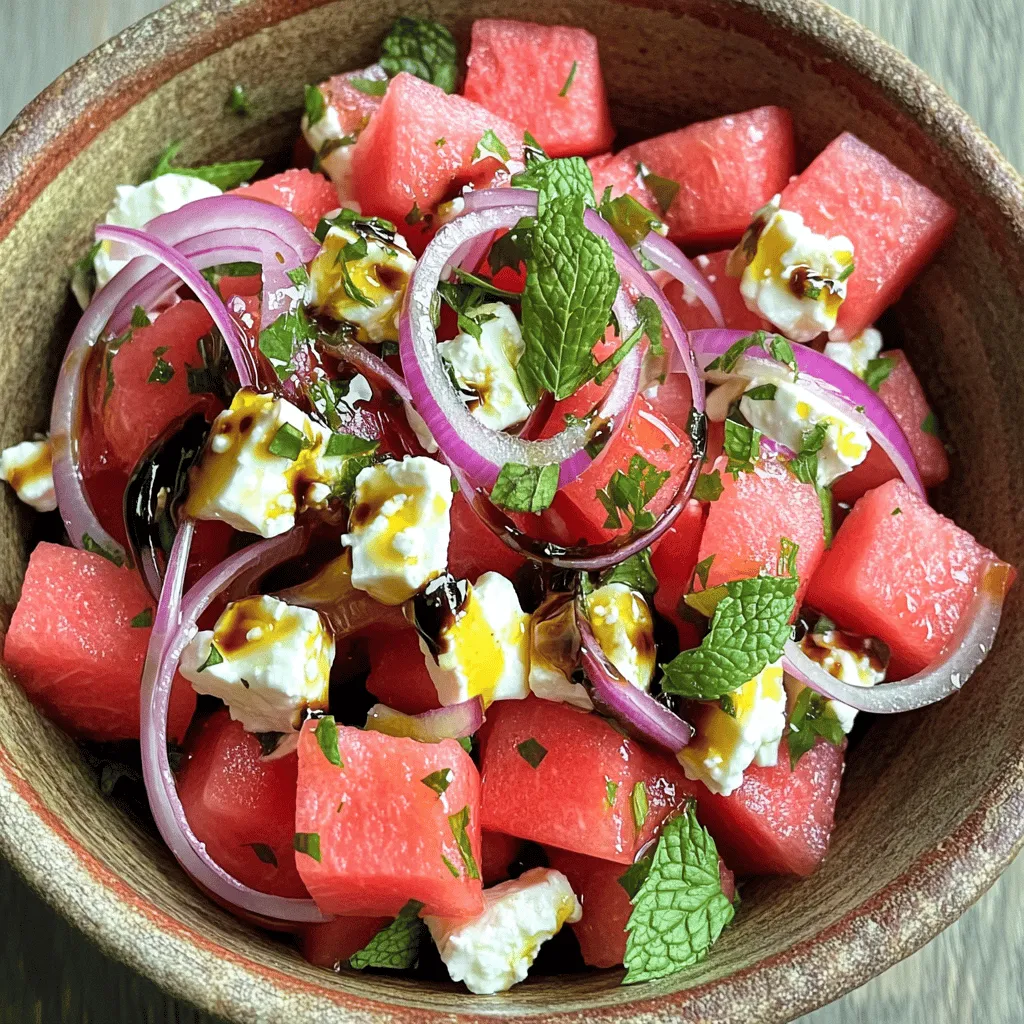
Looking for a bright, refreshing dish this summer? Dive into my Watermelon Feta Mint Salad! This simple recipe combines juicy watermelon, creamy feta, and fresh mint for a taste explosion. It’s not just delicious; it’s packed with health benefits, too. In just 20 minutes, you can create a perfect side dish or light meal. Ready to impress your friends and family? Let’s get started!
Ingredients
List of Ingredients
– 4 cups watermelon, cubed
– 1 cup feta cheese, crumbled
– 1/2 cup fresh mint leaves, chopped
– 1/4 cup red onion, thinly sliced
– 2 tablespoons balsamic glaze
– 1 tablespoon olive oil
– Salt and pepper to taste
Watermelon is full of water. It helps you stay hydrated in summer heat. This sweet fruit is low in calories, making it a smart choice for snacks. One cup of watermelon gives you vitamins A and C, plus some potassium.
Feta cheese adds a salty taste. It has protein and calcium, which are good for bones. Feta also contains probiotics, which can help your gut health.
Fresh mint brings a cool flavor. It can help with digestion and has antioxidants. Mint can also freshen breath, making it nice in salads.
Using these ingredients together creates a vibrant, tasty salad.Enjoy making your Watermelon Feta Mint Salad!
Step-by-Step Instructions
Preparation Steps
– Step 1: Combine watermelon and feta.
Start by taking a large bowl. Add 4 cups of cubed watermelon. Then, add 1 cup of crumbled feta cheese. This mix gives a sweet and salty base.
– Step 2: Add fresh mint and onion.
Next, chop 1/2 cup of fresh mint leaves. Toss them in with the watermelon and feta. Then, slice 1/4 cup of red onion thinly. Add this to the bowl for a nice crunch.
– Step 3: Drizzle with balsamic glaze and olive oil.
Now, take 2 tablespoons of balsamic glaze and drizzle it over the salad. Then, add 1 tablespoon of olive oil. These will add depth and richness to the taste.
– Step 4: Toss salad gently.
Use a spatula to toss everything together. Be gentle to keep the watermelon cubes intact. You want a nice mix without smashing the fruit.
– Step 5: Season with salt and pepper.
Sprinkle some salt and pepper to taste. This step is crucial to enhance the flavors. Adjust the seasoning based on your preference.
– Step 6: Let flavors meld.
Allow the salad to sit for about 10 minutes. This time lets the flavors blend well. It enhances the overall taste of the dish.Enjoy this refreshing dish!
Tips & Tricks
Best Practices for Preparation
Cutting watermelon can be tricky. Here are my tips for cutting watermelon efficiently:
– Choose a ripe watermelon. Look for a yellow spot on the skin.
– Use a sharp knife. This will help you cut through the thick rind easily.
– Cut the watermelon in half. Stand it on one end, and slice downwards.
– Slice into chunks. Make cuts lengthwise and crosswise for even cubes.
Next, crumbling feta cheese can create a mess. Here’s how to do it without fuss:
– Use a fork to break it apart gently. This method works best.
– Keep feta chilled until you’re ready to use it. It crumbles better this way.
– Work over a bowl or plate. This helps catch any small pieces.
When mixing your salad, be gentle. Here are my recommendations to avoid breaking watermelon:
– Use a large spoon or spatula. This will help you toss without squishing.
– Mix in batches. Combine small amounts at a time to maintain shape.
– Toss lightly. The goal is to mix, not mash.
Enhancing Flavor
Now, let’s talk about flavor. Using fresh mint is key to this salad. Here’s why:
– Fresh mint has a bright, lively taste that dried mint lacks.
– Chop mint leaves finely for a more even flavor spread.
– Avoid dried mint unless you’re in a pinch. It’s not the same!
For the balsamic glaze, consider these adjustments:
– Add a touch of honey if you want more sweetness.
– Use a flavored glaze, like fig or raspberry, for a twist.
– Drizzle just before serving. This keeps the salad fresh and crisp.
Pairing suggestions can make your meal complete:
– Serve with grilled chicken for protein and a hearty dish.
– Add crusty bread to soak up the flavors.
– Try it with a light white wine. This salad pairs well with crisp, fruity wines.

Variations
Substitutions
You can easily change this recipe to fit your needs. If you want a vegan option, try using vegan feta cheese. It has a similar taste and texture, making it a great choice. Other herbs like basil or cilantro can also add fun flavors.
When it comes to melons, watermelon is not your only option. Try cantaloupe or honeydew for a new twist. These fruits can bring a sweeter taste that pairs well with feta.
Adding Extras
If you want to make your salad heartier, adding nuts or seeds is a great idea. Chopped walnuts or sunflower seeds add crunch and healthy fats.
For more protein, consider grilled chicken or chickpeas. Both options will make your salad more filling and satisfying.
Flavored balsamic glazes can also enhance the taste of your salad. Look for varieties with honey or fig for a sweet touch.
Storage Info
How to Store Leftovers
To keep your Watermelon Feta Mint Salad fresh, use an airtight container. Glass containers work well and do not hold smells. You can also use plastic containers, just make sure they seal tightly. Store the salad in the fridge. It will stay good for about 1 to 2 days. After this time, the watermelon may get mushy.
Reusing Leftovers
Leftover salad is not just for eating as is. You can mix it into yogurt for a refreshing snack. Try adding it to a wrap with grilled chicken for a tasty lunch. You can also toss it into a grain bowl with quinoa or rice. Other dishes that can use similar ingredients include smoothies or salsas. The flavors blend well and keep meals interesting!
FAQs
Can I make Watermelon Feta Mint Salad ahead of time?
Yes, you can make this salad ahead. However, I suggest serving it fresh. If you make it early, the watermelon may lose its crunch. To keep it fresh, mix the salad just before serving.
What’s the best type of feta cheese to use?
I prefer using creamy feta cheese. It adds a nice texture and flavor. Look for blocks of feta, as crumbled feta can be too dry. You can also try goat feta for a different taste.
Can I use canned or frozen watermelon?
Canned or frozen watermelon isn’t ideal for this salad. They lose their crispness and juicy bite. Fresh watermelon gives the best flavor and texture. Always choose ripe, juicy watermelon for this recipe.
How do I adjust this recipe for larger servings?
To make more servings, simply double or triple the recipe. Keep the same ratios for the ingredients. For example, use 8 cups of watermelon and 2 cups of feta. Adjust the seasoning to taste.
What dressing alternatives work well for this salad?
You can use lemon juice or lime juice instead of balsamic glaze. A splash of olive oil mixed with vinegar works great, too. Experiment with your favorite dressings to find what you love!
This blog post shared a simple and tasty Watermelon Feta Mint Salad recipe. You learned about the fresh ingredients and their health benefits. I provided easy steps for preparation, tips for the best results, and ways to make this dish your own. Don’t forget that this salad can easily be stored and adapted with extra ingredients. Enjoy making it for you and your loved ones. Fresh flavors make everything better. Happy cooking!


![- 12 mini bell peppers (assorted colors) - 1 cup cooked quinoa - 1 cup black beans, rinsed and drained - 1 cup corn (fresh, frozen, or canned) - 1/2 cup diced tomatoes (fresh or canned) - 1 cup shredded cheese (cheddar or pepper jack) The mini bell peppers are the stars here. Their sweet crunch makes a great bite. They come in many colors, adding fun to your dish. Quinoa adds protein and a nice texture. Black beans bring fiber and heartiness. Corn adds sweetness and color, while diced tomatoes add moisture and flavor. Finally, shredded cheese melts into a gooey topping that ties everything together. - 1 teaspoon cumin - 1 teaspoon smoked paprika - 1 teaspoon garlic powder - 1/2 teaspoon onion powder - Salt and pepper to taste Seasonings bring life to your dish. Cumin adds warmth and earthiness. Smoked paprika gives a touch of smokiness. Garlic powder adds depth, while onion powder enhances flavor. Salt and pepper balance everything out. This blend will make your stuffed mini bell peppers burst with flavor. - Fresh cilantro, chopped (for garnish) - 1 tablespoon olive oil Garnishes make your dish pretty and fresh. Fresh cilantro adds a pop of color and brightness. Olive oil adds richness and ties the flavors together. Together, they make your stuffed mini bell peppers look and taste amazing. You can find the full recipe [here]. 1. Preheat the oven to 375°F (190°C). This step gets your oven ready for baking. 2. Cut the tops off the mini bell peppers. Use a sharp knife for a clean cut. 3. Remove the seeds and any white parts inside the peppers. This helps reduce bitterness. 1. In a large mixing bowl, combine the cooked quinoa, black beans, corn, and diced tomatoes. 2. Add half a cup of shredded cheese to the mix. This adds creaminess and flavor. 3. Stir in the cumin, smoked paprika, garlic powder, onion powder, salt, and pepper. Mix well until everything is combined. 4. Drizzle one tablespoon of olive oil over the filling and stir again. This keeps it moist. 1. Carefully fill each mini bell pepper with the quinoa mixture. Press down gently to pack it in. 2. Arrange the stuffed peppers upright in a baking dish. If they tip over, use crumpled aluminum foil to help them stand. 3. Sprinkle the rest of the cheese on top of the stuffed peppers. This will melt into a tasty layer. 4. Cover the dish with aluminum foil. Bake for 20 minutes, then remove the foil. 5. Bake for an additional 10-15 minutes, until the peppers are tender and the cheese is bubbly and golden. 6. After baking, let them cool for a few minutes before garnishing with fresh cilantro. For the Full Recipe, refer to the ingredients and precise steps above. Enjoy! You can easily change this recipe. Try using ground turkey instead of black beans. It adds a nice flavor. For some heat, add chili powder or cayenne pepper. This can spice things up! If you want vegan options, skip the cheese and use tofu. For gluten-free, ensure you select gluten-free grains and beans. You have options for cooking. Baking is simple and gives a soft texture. You can also use an air fryer. Air frying makes them crispy and quick. If you want a smoky taste, grilling is great. Just watch the peppers so they don’t burn. Dips enhance the meal. Salsa and guacamole pair well with the stuffed peppers. You can serve them as appetizers or as a fun main dish. They are colorful and bright, making your table look good. For a complete meal, add a fresh salad on the side. You can find the full recipe above, so you have all the details you need. {{image_2}} You can make stuffed mini bell peppers in many tasty ways. For a Mexican twist, add taco seasoning to the filling. This adds spice and flavor. You can use ground meat or keep it vegetarian. For a Mediterranean style, mix in feta cheese and olives. This creates a salty and creamy taste. The tangy flavors work great with the sweet peppers. Both options are fun and easy to try. Feel free to play with the main ingredients. You can swap quinoa for rice if you prefer it. Rice adds a nice texture and flavor. If you want a change, use lentils instead of beans. Lentils cook fast and have a great taste. They also boost the protein in your dish. These swaps let you customize the recipe to your liking. Seasonal changes can inspire new stuffed pepper ideas. In summer, use fresh garden veggies like zucchini or corn. These add brightness and flavor. In winter, try heartier vegetables like mushrooms or kale. They give warmth and comfort to your meal. These seasonal changes keep things interesting and delicious. For the full recipe, check out the details above. After you enjoy your stuffed mini bell peppers, store the leftovers in the fridge. Place them in an airtight container. This keeps them fresh and tasty. If you have a lot, you can stack them, but make sure they are not too crowded. The best containers are glass or BPA-free plastic. They seal well and help keep the flavor. To freeze stuffed peppers, let them cool first. Then, wrap each pepper tightly in plastic wrap. After that, put them in a freezer-safe bag or container. This helps prevent freezer burn. When you want to eat them, take them out. Thaw them in the fridge overnight. You can reheat them in the oven or microwave. If using the oven, bake at 350°F (175°C) until warmed through. Stuffed mini bell peppers last about 3 to 5 days in the fridge. If frozen, they can last up to 3 months. For the best taste, eat them sooner rather than later. Always check for any signs of spoilage before eating. Keeping track of freshness helps you enjoy your meal at its best. Stuffed mini bell peppers are small, colorful peppers filled with a tasty mix. They are often stuffed with ingredients like quinoa, beans, corn, and cheese. After baking, they become soft and flavorful. The peppers add a nice crunch and sweetness. This dish is perfect as an appetizer or a main course. You can enjoy them warm or at room temperature. Yes, you can make stuffed mini bell peppers in advance. Prepare the filling and stuff the peppers. Then, cover and refrigerate them for up to a day. When ready to bake, take them out and let them sit for 15 minutes. This helps them cook evenly. You can also freeze them before baking. To do this, wrap them tightly and store them for up to three months. Thaw in the fridge overnight before baking. Stuffed mini bell peppers pair well with many sides. Here are a few tasty options: - A fresh green salad with vinaigrette - Guacamole and tortilla chips - Rice or quinoa pilaf - A light soup, like tomato or corn chowder - Sparkling water or a light white wine These sides complement the flavors of the stuffed peppers and make the meal more complete. You can tell stuffed mini bell peppers are done by checking a few signs. First, look for the peppers to be tender and slightly wrinkled. The cheese on top should be golden and bubbly. If you poke a pepper with a fork, it should feel soft but not mushy. Cooking time is usually 30 to 35 minutes at 375°F (190°C). If unsure, a food thermometer should read 165°F (74°C) inside the filling. Stuffed mini bell peppers are fun, tasty, and easy to make. We explored their main ingredients, seasonings, and garnishes. You learned how to prep, mix, and bake them perfectly. Plus, I shared great tips for customizing and serving your dish. Don’t forget about storing leftovers for later! Experiment with flavors and try different options. There’s so much you can do with this dish. Enjoy making stuffed peppers that please everyone at your table!](https://dailydishly.com/wp-content/uploads/2025/07/7be91d44-d02b-4978-8cdb-a2e2cd47e9c1-768x768.webp)