Wild Rice Salad with Apples and Pecans Delight

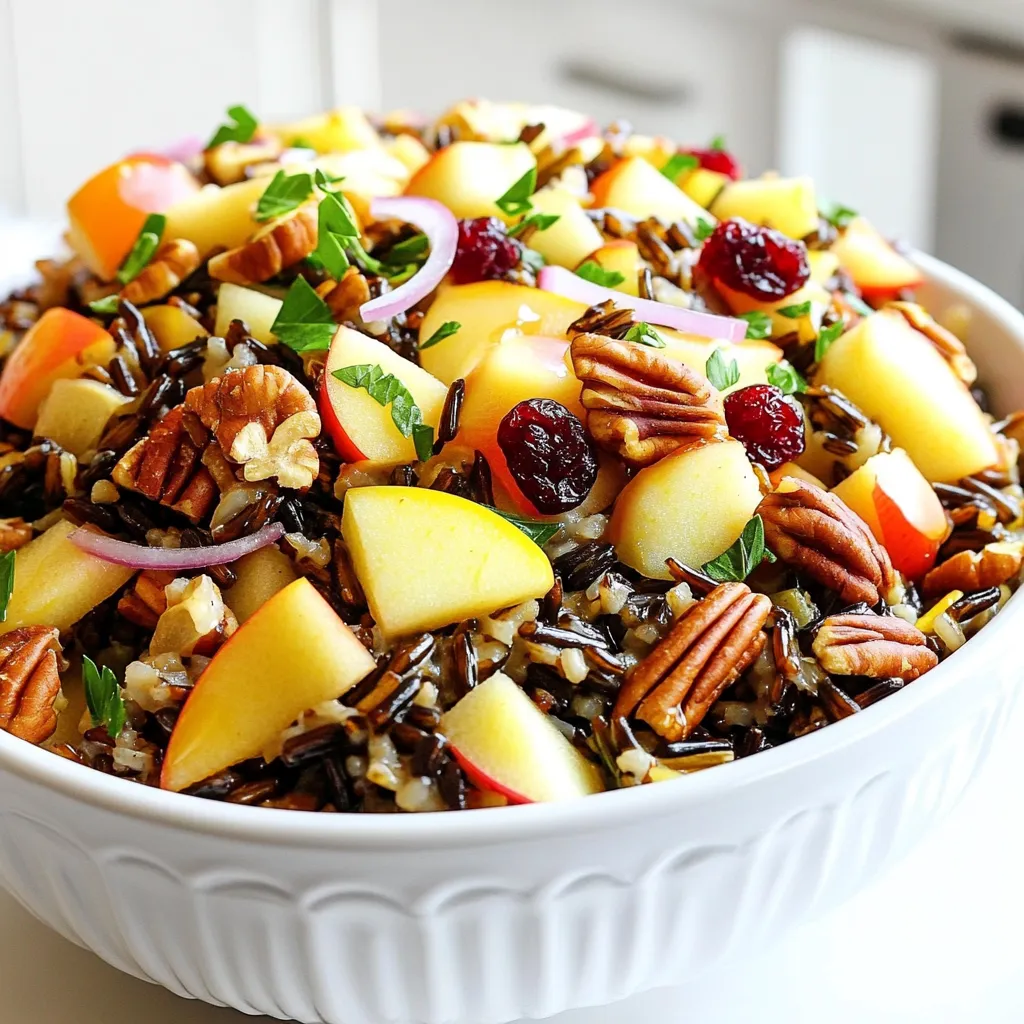
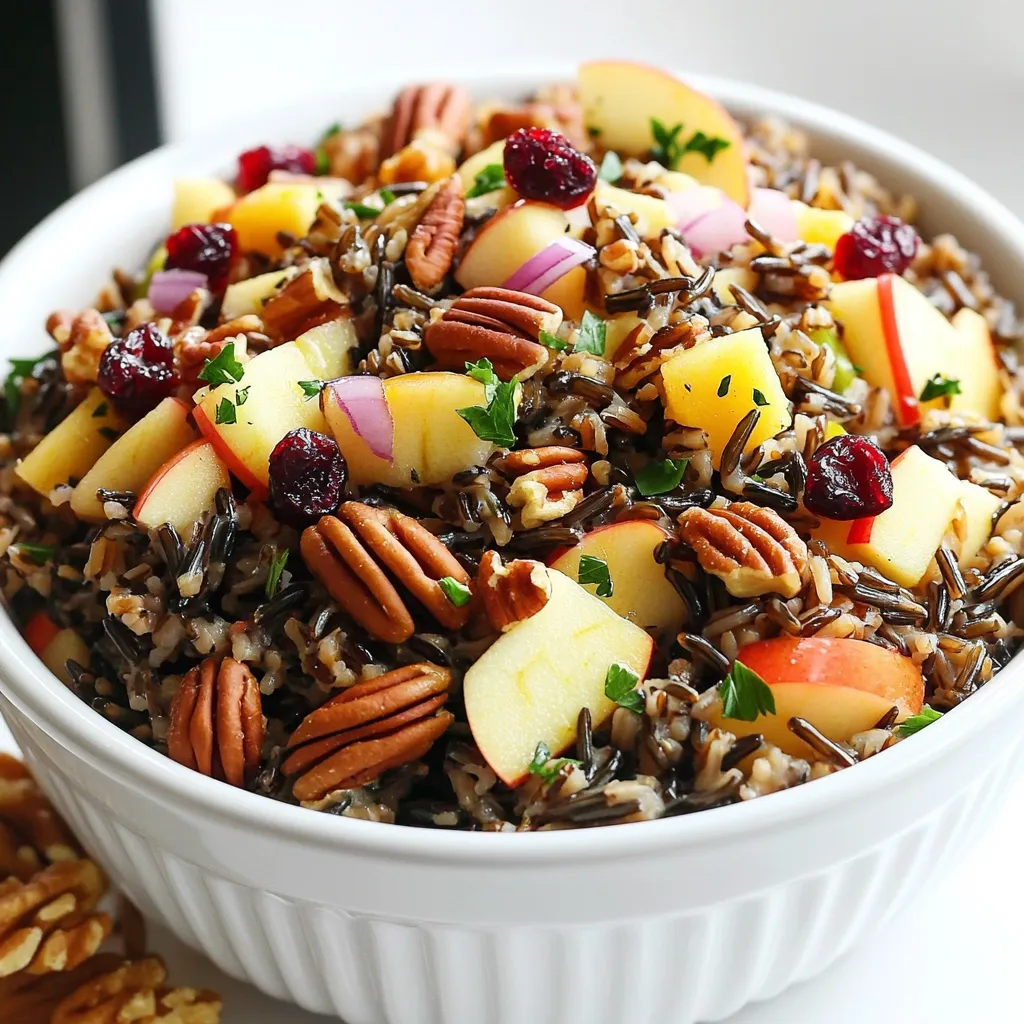
If you want a fresh and tasty salad that’s perfect for any meal, you’re in luck! This Wild Rice Salad with Apples and Pecans is packed with flavor and crunch. You get the nutty taste of wild rice and the sweetness of apples, plus the crunch of pecans. Whether it’s for a picnic or a dinner side, this salad is easy to make and super satisfying. Let’s dive into this delightful dish!
Ingredients
To make a delicious wild rice salad with apples and pecans, you need these simple ingredients:
– 1 cup wild rice
– 2 cups water or vegetable broth
– 1 large apple, diced (preferably a tart variety like Granny Smith)
– ½ cup pecans, toasted and roughly chopped
– ½ cup dried cranberries
– ¼ cup red onion, finely diced
– ¼ cup fresh parsley, chopped
– 2 tablespoons olive oil
– 2 tablespoons apple cider vinegar
– 1 tablespoon maple syrup
– Salt and pepper to taste
Each ingredient brings its own flavor. Wild rice gives a nutty taste and chewy texture. Apples add crispness and sweetness. Pecans give crunch and richness. Dried cranberries provide a burst of tartness. The red onion adds a sharp note, while parsley brightens the dish. Olive oil, apple cider vinegar, and maple syrup create a tasty dressing. Salt and pepper round out the flavors.
Feel free to mix and match these ingredients based on your taste. Enjoy experimenting!
Step-by-Step Instructions
Cooking the Wild Rice
First, grab a medium saucepan. Pour in 2 cups of water or vegetable broth. Turn the heat to high and bring it to a boil. This is key for cooking the wild rice. Once it’s boiling, add 1 cup of wild rice. Lower the heat to low and cover the pan. Let it simmer for about 40-45 minutes. You’ll know it’s done when the rice is tender and splits open. After cooking, drain any extra liquid. Set the rice aside to cool.
Preparing the Dressing
You will need a small bowl for this part. Gather the following items:
– 2 tablespoons olive oil
– 2 tablespoons apple cider vinegar
– 1 tablespoon maple syrup
– Salt and pepper to taste
Now, add these ingredients to your bowl. Use a whisk to mix them well. This helps blend the flavors and makes a tasty dressing.
Combining the Ingredients
In a large bowl, add the cooled wild rice first. Next, toss in the diced apple, toasted pecans, dried cranberries, diced red onion, and chopped parsley. This order helps to mix everything evenly. Once all ingredients are in the bowl, gently toss them together. Make sure everything gets coated with that delicious dressing.
Chilling and Serving
Now it’s time to chill the salad. Cover the bowl and place it in the fridge for at least 30 minutes. This lets the flavors mix well. When you’re ready to serve, you can enjoy it cold or at room temperature. This salad tastes great as a side dish or a light meal.
Tips & Tricks
Choosing the Right Apple
When picking apples, choose a tart variety like Granny Smith. Tart apples add a nice zing. Sweet apples can be too soft and lose their crunch. A mix of both can be fun, but stick to tart for the best flavor balance.
Toasting Pecans
Toasting pecans brings out their rich flavor. Preheat your oven to 350°F (175°C). Spread the pecans on a baking sheet. Toast them for 8 to 10 minutes. Keep an eye on them so they don’t burn. You can also toast them in a skillet over medium heat. Stir often for about 5 minutes.
Making Ahead and Flavor Tips
Let the salad chill in the fridge for at least 30 minutes. This helps the flavors mix well. If you can, chill it for a few hours or overnight. For extra flavor, add a splash more vinegar or maple syrup just before serving. This simple trick brings the salad to life!

Variations
Adding Other Fruits
You can mix in other fruits to change the flavor. Try using pears, grapes, or oranges. These fruits add sweetness and freshness. Keep the same amount as the apple for balance. You can also use dried fruits like apricots or figs. They will give a nice chewiness and flavor.
Nut Alternatives
If you’re allergic to nuts, don’t worry! You can use seeds instead. Sunflower seeds or pumpkin seeds work well in this salad. They add crunch and healthy fats. You can also skip the nuts entirely for a lighter dish. This keeps the salad safe for everyone.
Dressing Alternatives
If you don’t have apple cider vinegar, try balsamic vinegar or lemon juice. Both will give a nice tang to the salad. For oils, you can substitute with avocado oil or even sesame oil. Each will change the flavor a bit but still taste great!
Storage Info
Best Storage Practices
To keep your wild rice salad fresh, store it in an air-tight container. This helps prevent any odors from your fridge from seeping in. Glass containers work great, as they do not stain and are easy to clean. Always let the salad cool before sealing it up. This keeps moisture from building up inside.
Refrigeration and Freezing
You should refrigerate leftovers within two hours of serving. Place them in the air-tight container and cover it well. The salad stays tasty for up to four days in the fridge. If you want to freeze it, I suggest not freezing the apples. They may turn mushy when thawed. Instead, freeze the rice and pecan mix. To thaw, move it to the fridge for a few hours before serving.
Shelf Life
For the best quality, eat the salad within four days. After that, the flavors may fade, and the texture may change. If you see any unusual smells or colors, it’s best to toss it out. Fresh ingredients make this salad shine, so always aim to enjoy it soon after making!
FAQs
Can I use brown rice instead of wild rice?
You can use brown rice, but it will change the taste and texture. Brown rice cooks softer than wild rice. Wild rice is firmer and has a nutty flavor. Adjust the cooking time if you switch to brown rice.
How do I make this salad vegan?
This salad is already mostly vegan. To keep it vegan, use maple syrup for sweetness and ensure the broth is vegetable-based. All other ingredients are plant-based.
What other ingredients can I add to enhance this salad?
You can add many ingredients! Here are some ideas:
– Fresh spinach for more greens
– Goat cheese for creaminess
– Chopped celery for extra crunch
– Sunflower seeds for added texture
Can I serve the salad warm?
Yes, you can serve it warm! Just prepare the salad right after cooking the rice. The flavors will be different but still tasty.
Is this recipe gluten-free?
Yes, this recipe is gluten-free. Wild rice is naturally gluten-free. Ensure all other ingredients, like the broth, are gluten-free too.
This blog post covered a delightful wild rice salad. We explored key ingredients, cooking steps, and tips for the best flavor. I shared how to choose apples, toast pecans, and enhance flavors. We also looked at variations and storage tips.
Remember, this salad is not just a side dish; it’s a tasty and healthy choice. You can make it your own with different fruits or nuts. Enjoy creating and sharing this simple yet satisfying recipe!


![- 4 cups fresh broccoli florets - 1 medium onion, chopped - 2 cloves garlic, minced Fresh broccoli florets are key to this soup. They bring a bright color and a nice crunch. Chopped onion adds a sweet base flavor. Minced garlic gives a touch of warmth and depth. Together, these ingredients form a great start for our cozy soup. - 4 cups vegetable broth - 2 cups shredded sharp cheddar cheese - 1 cup heavy cream Vegetable broth gives our soup a rich, savory taste. Shredded sharp cheddar cheese is the star. It melts beautifully, creating that creamy texture we love. Heavy cream adds smoothness and richness. These dairy ingredients make the soup feel indulgent and satisfying. - 1 tablespoon olive oil - Salt and pepper to taste - 1 teaspoon paprika (for a hint of spice) - 1 tablespoon cornstarch (optional, for thickening) Olive oil is perfect for sautéing the onion and garlic. Salt and pepper enhance all the flavors in the soup. Paprika gives a slight kick that pairs well with cheddar. If you like a thicker soup, cornstarch is your friend. Just mix it with a little water before adding it in. For the full recipe, check out Cozy Broccoli Cheddar Bliss! 1. Sautéing the onion and garlic Start by heating the olive oil in a large pot over medium heat. Add the chopped onion and sauté it until it turns translucent, which should take about 5 minutes. This step builds a great base flavor. Next, stir in the minced garlic and cook for one more minute. The garlic will become fragrant, adding depth to your soup. 2. Cooking the broccoli and broth mixture Add the fresh broccoli florets and the vegetable broth to the pot. Bring the mixture to a boil. Once boiling, reduce the heat and let it simmer for about 15 minutes. You want the broccoli to be tender during this time. This step lets the flavors meld together beautifully. 1. Blending the soup to the desired consistency If you like a smooth soup, grab an immersion blender. Blend the soup until it reaches your preferred texture. If you prefer chunks, blend it less or leave it as is. This step lets you customize the soup to your liking. 2. Stirring in cream, cheese, and seasonings Now, stir in the heavy cream and shredded sharp cheddar cheese. Add salt, pepper, and paprika to taste. Keep cooking on low heat until the cheese melts completely. This step creates that creamy goodness we all crave in broccoli cheddar soup. 1. Thickening the soup (if desired) If you want a thicker soup, mix the cornstarch with a little cold water first. Then, stir this mixture into the soup. Let it cook for another 2-3 minutes. This step gives your soup that perfect, hearty texture. 2. Tasting and adjusting flavors Finally, taste your soup. Add more salt, pepper, or paprika as needed. This step ensures your soup is just right for your palate. Enjoy your cozy bowl of broccoli cheddar bliss! For the complete method, check out the Full Recipe. - Fresh Ingredients: Always choose fresh broccoli florets. They give the best flavor and color. Look for bright green florets with no yellow spots. Fresh onions and garlic also boost taste. - Blending Methods: Use an immersion blender for easy blending. You can blend until smooth or leave some chunks. If you don't have one, carefully transfer the soup to a blender in batches. - Additional Spices: Try adding a pinch of nutmeg or cayenne pepper for warmth. A sprinkle of paprika adds color and flavor. You can also mix in some fresh herbs like thyme or parsley. - Pairing Suggestions: Serve with a crusty bread or a side salad. These pair well and add comfort. A simple green salad with a tangy vinaigrette works great. - Too-Thin Soup: If your soup is too thin, mix a tablespoon of cornstarch with cold water. Stir this into the soup and cook for a few minutes until thickened. - Seasoning Balance: If the soup tastes bland, add more salt and pepper. Taste as you go, and adjust to your preference. A splash of lemon juice can brighten the flavors too. {{image_2}} You can make this soup lighter by using low-fat dairy options. Swap heavy cream for low-fat milk or a plant-based milk. This change still keeps the soup creamy. You can also add more vegetables. Carrots and spinach fit well in this soup. They boost nutrition and add color. Mixing in different cheese varieties can change the taste. Try gouda or pepper jack for a twist. You can also add herbs like thyme or basil for extra flavor. Crispy bacon gives a rich taste and crunch. It adds depth to the creamy soup. If you need a gluten-free version, use cornstarch as a thickener. Make sure your vegetable broth is gluten-free too. For vegan options, swap cheese and cream for plant-based alternatives. Nutritional yeast gives a cheesy flavor without dairy. You can still enjoy this soup without animal products. Feel free to explore these variations to make this easy broccoli cheddar soup your own. For a full recipe, check the [Full Recipe]. Store your broccoli cheddar soup in a tight container. Let it cool first. The best practice is to use glass or BPA-free plastic. This soup lasts about 3 to 4 days in the fridge. When you want a bowl, just take it out and reheat. To freeze soup, let it cool completely. Pour it into freezer-safe containers, leaving some space at the top. This helps with expansion. Use containers made for freezing to avoid cracks. It can stay fresh for up to 3 months in the freezer. When you're ready, move it to the fridge to thaw overnight. You have two great options to reheat your soup. You can use the stovetop or microwave. On the stovetop, heat it gently over medium-low heat. Stir often to prevent sticking. If you use the microwave, heat in short bursts. Stir in between to ensure even heating. When reheating, you might notice the soup has thickened. To restore creaminess, add a splash of cream or broth. This keeps your soup smooth and delicious! Enjoy your cozy bowl of soup anytime. Broccoli cheddar soup lasts about 3 to 4 days in the fridge. To keep it fresh, store it in an airtight container. Make sure to cool it down before putting it in the fridge. This way, you can enjoy those cheesy flavors for a few days. Yes, you can make this soup ahead of time. It’s great for meal prep! I often make a big batch and store it. Just let it cool, then store it in the fridge. Reheat it on the stove or in the microwave when you're ready to eat. This soup tastes even better the next day as the flavors blend more. You can serve this soup with many sides. A slice of crusty bread is perfect for dipping. A simple salad adds freshness and crunch. You could also enjoy it with a grilled cheese sandwich for extra comfort. These pairings make your meal even more delightful! Yes, this broccoli cheddar soup can be gluten-free. Just use gluten-free vegetable broth and cornstarch. Always check labels to ensure the ingredients are safe. This way, everyone can enjoy this creamy delight without worry. This blog post covered everything you need to make delicious broccoli cheddar soup. We explored key ingredients like fresh broccoli, sharp cheddar, and heavy cream. You learned step-by-step instructions for preparation, blending, and adjusting flavors. We also shared tips for enhancing your soup, plus healthy variations to try. Lastly, I provided storage and reheating advice. Enjoy making your soup, knowing it’s simple and adaptable. Dive in, savor every bite, and share it with loved ones. Happy cooking!](https://dailydishly.com/wp-content/uploads/2025/06/80916b53-9b02-4ceb-883a-5c917337c047-768x768.webp)