Zesty Black Bean Salad Flavorful and Healthy Delight

Are you ready to add a burst of flavor to your meals? This Zesty Black Bean Salad is not just healthy; it’s a delightful mix of taste and nutrition. In this article, I’ll guide you through every step — from picking the best ingredients to tasty variations. You’ll learn how to maximize flavor, avoid common mistakes, and store your salad for lasting freshness. Let’s dive in and spice up your cooking!
Ingredients
List of Ingredients
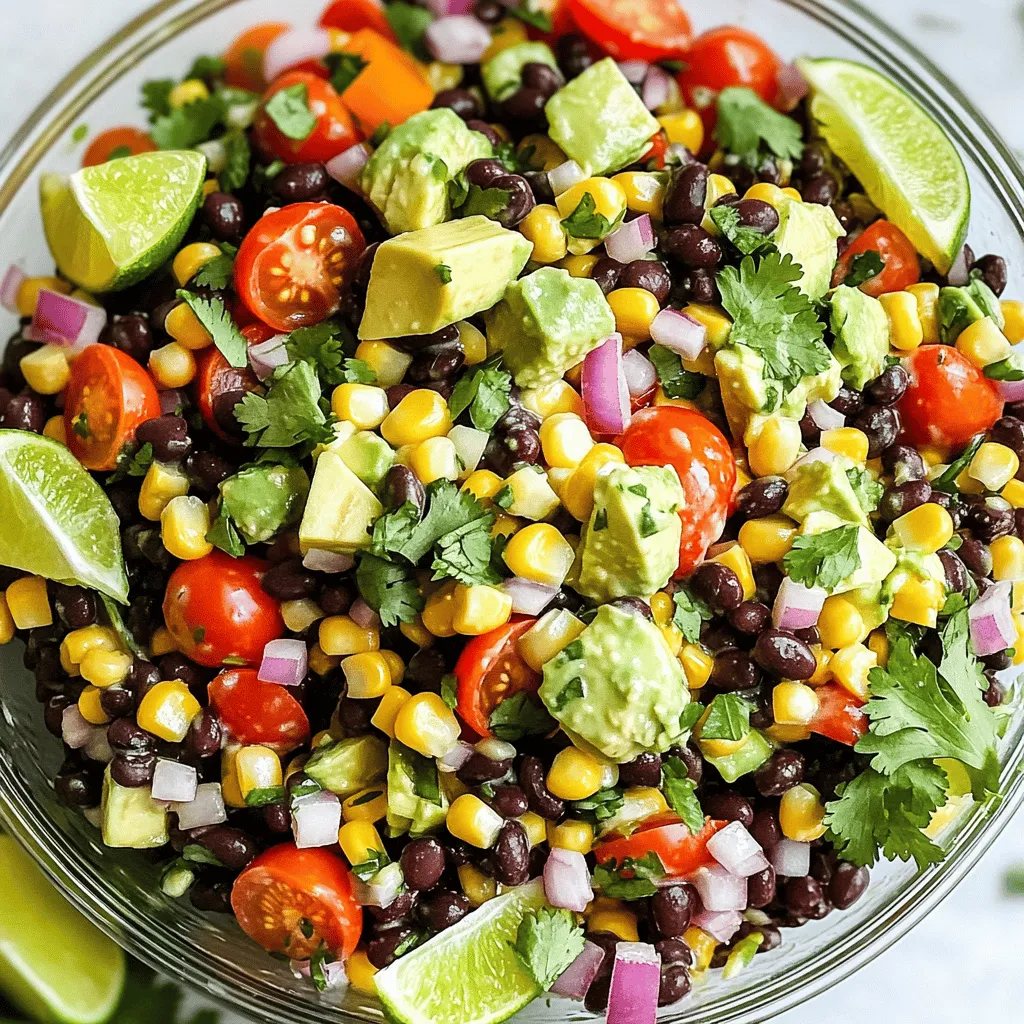
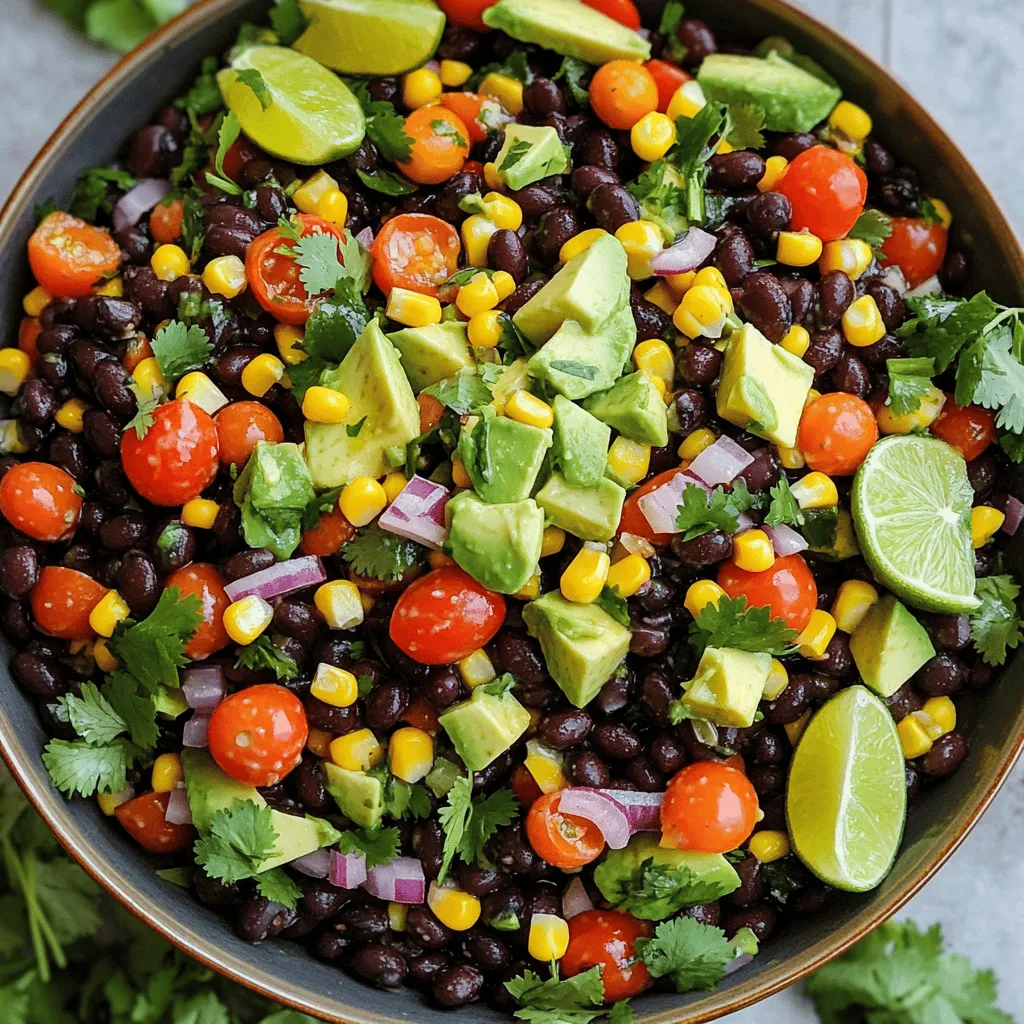
To make Zesty Black Bean Salad, gather these fresh ingredients:
– 1 can (15 oz) black beans, rinsed and drained
– 1 cup corn (fresh, frozen, or canned)
– 1 red bell pepper, diced
– 1 avocado, diced
– 1/2 red onion, finely chopped
– 1 cup cherry tomatoes, halved
– 1/4 cup fresh cilantro, chopped
– 2 tablespoons lime juice
– 1 tablespoon olive oil
– 1 teaspoon ground cumin
– 1 teaspoon garlic powder
– Salt and pepper to taste
Nutritional Benefits of Key Ingredients
Black beans are a great source of protein and fiber. They help you feel full and satisfied. Corn adds sweetness and crunch while providing vitamins A and C. Red bell peppers are loaded with antioxidants and vitamin C, which is great for your skin. Avocado brings healthy fats to the mix, which help keep your heart strong. Cherry tomatoes add color and taste, plus they contain lycopene, which is good for your health. Cilantro adds a fresh flavor and may help with digestion.
Recommended Brands or Types of Ingredients
When choosing your ingredients, look for brands that use non-GMO products. For black beans, I recommend brands like Eden or Goya. They have a great flavor and texture. For corn, frozen corn from Green Giant is a solid choice. It has a sweet taste and cooks well. For fresh produce, visit your local farmer’s market. You will find ripe avocados and colorful peppers. For olive oil, I suggest a high-quality brand like California Olive Ranch. This oil enhances the salad’s flavor. Fresh lime juice is best, but bottled juice is okay if you’re in a hurry.
Step-by-Step Instructions
Preparation Steps
To make this zesty black bean salad, start by gathering your ingredients. You will need black beans, corn, red bell pepper, avocado, red onion, cherry tomatoes, cilantro, lime juice, olive oil, ground cumin, garlic powder, salt, and pepper. Rinse and drain the black beans first. Then, chop the red bell pepper, avocado, and red onion. Halve the cherry tomatoes and chop the cilantro.
Tips for Maximizing Flavor
To really boost the flavor, always use fresh ingredients. Fresh lime juice makes a big difference compared to bottled juice. Also, let the salad sit for 10-15 minutes after mixing. This helps the flavors blend. Taste it before serving and adjust the salt and lime juice if needed. A pinch more salt can bring out the flavors even more.
Cooking and Mixing Techniques
Use a large bowl for mixing. Start by adding the black beans, corn, and all the chopped veggies. In a small bowl, whisk the lime juice, olive oil, cumin, and garlic powder together. Pour this dressing over the salad mix. Gently toss everything together. Make sure all ingredients are coated in the dressing. This step ensures every bite is full of flavor.
Tips & Tricks
Common Mistakes to Avoid
When making Zesty Black Bean Salad, avoid overcooking the beans. Canned beans are ready to use. Rinsing them helps remove excess salt. Don’t skip this step. Also, using too much lime juice can overwhelm the flavors. Start with less, then add more if needed. Lastly, be careful with the salt. You can always add more, but you can’t take it out.
How to Cut Ingredients for Best Results
Cut your avocado, bell pepper, and onion into similar sizes. This helps with even bites. To dice the red onion, first cut it in half. Then slice thinly from the top down. For the bell pepper, slice off the top and bottom. Remove the seeds, then cut into strips before dicing. For cherry tomatoes, slice them in half for a nice look.
Timing for Best Flavor Development
Letting the salad sit for 10-15 minutes allows the flavors to blend. This short wait makes a big difference. The lime juice and spices soak into the beans and veggies. If you can, prepare it a bit ahead of time. This extra time makes each bite more flavorful. If you want it even better, chill it in the fridge for a while before serving.

Variations
Alternative Ingredients for Customization
You can change up the Zesty Black Bean Salad to suit your taste. Here are some fun swaps:
– Beans: Use pinto or kidney beans if you prefer.
– Veggies: Try adding diced cucumber or grated carrots.
– Herbs: Swap cilantro for parsley or basil for a new taste.
– Dressing: Experiment with apple cider vinegar for a tangy kick.
These simple changes keep the salad fresh and exciting.
Adding Proteins for a Heartier Salad
Want to make your salad more filling? Add proteins! Here are a few great options:
– Grilled Chicken: Dice it up and mix it in for extra flavor.
– Shrimp: Cooked shrimp adds a nice touch and pairs well.
– Tofu: For a vegetarian option, toss in some firm tofu.
These proteins turn a light salad into a full meal without losing its zesty nature.
Spicy Twist: Incorporating Jalapeños
If you love heat, jalapeños are perfect for your salad. Here’s how to use them:
– Fresh Jalapeños: Dice them finely and mix into the salad.
– Pickled Jalapeños: They add a tangy flavor and a nice crunch.
– Adjust Heat: Start with a small amount and taste as you go.
This spicy twist gives your Zesty Black Bean Salad an exciting kick!
Storage Info
Best Practices for Refrigeration
To keep your zesty black bean salad fresh, store it in an airtight container. Make sure to seal it tightly. This helps keep the flavors intact. Place it in the fridge right after you make it. Avoid adding avocado until you are ready to serve. This keeps it from turning brown too quickly.
How Long Does Zesty Black Bean Salad Last?
Zesty black bean salad stays good for about 3 to 4 days in the fridge. After this time, the flavors may fade. The freshness of the ingredients matters, too. If you made it with fresh produce, it may last longer. Always check for any off smells or changes in texture before eating.
How to Revive Leftovers
To make your leftovers taste fresh again, add a splash of lime juice. This brightens the flavors and adds zing. You can also toss in a bit of fresh cilantro or diced tomatoes. If the salad seems dry, mix in a little olive oil. These small tweaks can make your leftovers feel brand new!
FAQs
Can I make Zesty Black Bean Salad ahead of time?
Yes, you can make Zesty Black Bean Salad ahead of time. It tastes even better after resting. The flavors blend well when it sits. Just store it in the fridge. This salad stays fresh for up to three days. If you want to keep the avocado from browning, add it just before serving.
What can I serve Zesty Black Bean Salad with?
You can serve Zesty Black Bean Salad with many dishes. It pairs well with grilled chicken or fish. You can also enjoy it with tacos or burritos. It makes a great side for barbecues. For a light meal, serve it with tortilla chips. You can even use it as a topping for nachos.
How do I make Zesty Black Bean Salad Vegan?
Making Zesty Black Bean Salad vegan is easy! The recipe is already plant-based. Just ensure the ingredients you use are vegan-friendly. All the main ingredients, like beans and veggies, are vegan. The dressing with lime juice and olive oil is also vegan. You can enjoy this dish guilt-free!
This blog post covered key ingredients, steps, and tips for making Zesty Black Bean Salad. You learned about the health perks of each ingredient and found best brands to use. I shared ways to prepare, cook, and mix for great flavor. Avoiding common mistakes lets you succeed every time. You can customize your salad with fun variations too!
In the end, making this dish is easy, delicious, and rewarding. Enjoy your cooking adventure!


![For this dish, you need 1 pound of fresh asparagus. Look for bright green color and firm stems. Trim the tough ends before cooking. This helps ensure that each bite is tender and tasty. Garlic and lemon are the stars here. You’ll need 4 cloves of garlic, minced finely. This adds a nice punch of flavor. You also need the zest and juice of 1 lemon. The zest gives a bright taste, while the juice adds a fresh tang. You can enhance the dish with extra ingredients. I suggest adding 1 teaspoon of red pepper flakes for a little heat. Fresh parsley, chopped, makes a nice garnish. It adds color and a fresh taste. A pinch of salt and pepper rounds out the flavors, making the dish pop. For the full recipe, check the details above. Start by gathering all your ingredients. You will need: - 1 pound fresh asparagus, trimmed - 4 cloves garlic, minced - 2 tablespoons olive oil - Zest of 1 lemon - Juice of 1 lemon - 1 teaspoon red pepper flakes (optional) - Salt and pepper to taste - Fresh parsley, chopped (for garnish) Wash the asparagus well and trim the ends. This helps remove any tough parts. Next, mince the garlic finely. Zest the lemon carefully to avoid the bitter white pith. Finally, squeeze the juice from the lemon, making sure to catch any seeds. Preheat your oven to 400°F (200°C). This ensures even cooking. In a large bowl, combine the asparagus, minced garlic, olive oil, lemon zest, and red pepper flakes, if you want some heat. Add the lemon juice and season with salt and pepper. Toss everything together well. You want the asparagus to be nicely coated. Now, spread the asparagus on a baking sheet in a single layer. This helps them cook evenly. Roast them in the oven for 15-20 minutes. Toss halfway through to promote even browning. You’ll know they’re done when they are tender and slightly crispy. Once cooked, remove the asparagus from the oven. Transfer it to a serving platter. For a pop of color and freshness, garnish with chopped parsley. This dish pairs well with many meals, making it a versatile side. If you want, you can check out the Full Recipe for more tips and variations! To get your asparagus just right, start with fresh spears. Look for bright green color and firm texture. Trim the tough ends, about one inch from the bottom. This helps avoid bitterness. Spread the asparagus in a single layer on the baking sheet. This ensures even roasting. Toss halfway through cooking for a nice crisp. Roast until tender, about 15-20 minutes. You can add more flavor to your dish. Try a sprinkle of Parmesan cheese before roasting for a savory kick. Fresh herbs like thyme or dill work well too. Add a splash of balsamic vinegar for a tangy twist. Red pepper flakes add heat, but use them sparingly. Lemon zest gives a bright taste that contrasts nicely with garlic. Need to feed more guests? Simply double the ingredients. You can also cut the recipe in half for smaller meals. Adjust the cooking time if you change the amount. Use a larger baking sheet for more asparagus. This keeps them from steaming and ensures a crispy finish. Always check for doneness by tasting a piece. {{image_2}} You can cook garlic lemon asparagus in many ways. Grilling gives it a smoky flavor. Just toss the asparagus with the garlic lemon mix and grill for 5-7 minutes. Sautéing is quick and easy too. Heat a pan, add olive oil, and toss the asparagus for about 5 minutes. Both methods keep the asparagus crisp and full of taste. Want to change up the flavor? Adding cheese is a great option. Feta or Parmesan adds creaminess. Fresh herbs like thyme or basil also work well. Just mix them in before you roast. If you like heat, try adding more red pepper flakes. Each twist brings a new taste to this dish. Seasonal ingredients can brighten this recipe. In spring, add some fresh peas or radishes. In summer, toss in cherry tomatoes for sweetness. Fall calls for butternut squash cubes. Winter may inspire you to add roasted nuts for crunch. Using what's fresh makes this dish more fun and tasty. After you enjoy your garlic lemon asparagus, store leftovers in an airtight container. This helps keep the flavors fresh. Place the container in the fridge. Leftovers last about three to four days. If you notice any off smells or changes in color, it's best to toss them. To reheat your asparagus, use the oven or a skillet. Preheat the oven to 350°F (175°C). Spread the asparagus on a baking sheet and warm for about 10 minutes. This keeps them crispy. If using a skillet, add a splash of olive oil and heat on medium for five minutes. Stir gently to avoid burning. Yes, you can freeze garlic lemon asparagus, but it may change texture. Blanch the asparagus first. Boil for two minutes, then place in ice water. Drain and dry before placing in freezer bags. They can last up to three months in the freezer. When ready to eat, cook straight from frozen. Enjoy the fresh taste by using the [Full Recipe]. Garlic lemon asparagus lasts about 3 to 5 days in the fridge. To store it, put it in an airtight container. This keeps it fresh and tasty. I recommend eating it within this time for the best flavor and texture. If you notice any changes, like a mushy texture, it’s best to throw it out. You can use frozen asparagus, but it will change the dish’s texture. Frozen asparagus tends to be softer when cooked. To use it, thaw the asparagus first. After that, pat it dry to remove excess moisture. This helps achieve a better roast. You might also need to adjust the cooking time. Garlic lemon asparagus pairs well with many dishes. Here are some great options: - Grilled chicken or fish - Pasta with olive oil and herbs - Quinoa or rice dishes - Steak or pork chops - A fresh green salad These ideas help you create a balanced meal. The bright lemon flavor complements rich proteins nicely. For even more inspiration, check out the Full Recipe for Garlic Lemon Asparagus. This article covered how to make delicious Garlic Lemon Asparagus. We talked about key ingredients like fresh asparagus and garlic. I shared clear steps to prepare, cook, and serve it. You learned tips for roasting it perfectly and some fun variations. Also, I gave storage tips to keep it fresh. When you try this dish, enjoy its bright flavors. Feel free to get creative with your own twists. Happy cooking!](https://dailydishly.com/wp-content/uploads/2025/06/b7aeafc4-6d88-42f1-94a5-d1a2b58bd123-768x768.webp)
![- 12 mini bell peppers (assorted colors) - 1 cup cooked quinoa - 1 cup black beans, rinsed and drained - 1 cup corn (fresh, frozen, or canned) - 1/2 cup diced tomatoes (fresh or canned) - 1 cup shredded cheese (cheddar or pepper jack) The mini bell peppers are the stars here. Their sweet crunch makes a great bite. They come in many colors, adding fun to your dish. Quinoa adds protein and a nice texture. Black beans bring fiber and heartiness. Corn adds sweetness and color, while diced tomatoes add moisture and flavor. Finally, shredded cheese melts into a gooey topping that ties everything together. - 1 teaspoon cumin - 1 teaspoon smoked paprika - 1 teaspoon garlic powder - 1/2 teaspoon onion powder - Salt and pepper to taste Seasonings bring life to your dish. Cumin adds warmth and earthiness. Smoked paprika gives a touch of smokiness. Garlic powder adds depth, while onion powder enhances flavor. Salt and pepper balance everything out. This blend will make your stuffed mini bell peppers burst with flavor. - Fresh cilantro, chopped (for garnish) - 1 tablespoon olive oil Garnishes make your dish pretty and fresh. Fresh cilantro adds a pop of color and brightness. Olive oil adds richness and ties the flavors together. Together, they make your stuffed mini bell peppers look and taste amazing. You can find the full recipe [here]. 1. Preheat the oven to 375°F (190°C). This step gets your oven ready for baking. 2. Cut the tops off the mini bell peppers. Use a sharp knife for a clean cut. 3. Remove the seeds and any white parts inside the peppers. This helps reduce bitterness. 1. In a large mixing bowl, combine the cooked quinoa, black beans, corn, and diced tomatoes. 2. Add half a cup of shredded cheese to the mix. This adds creaminess and flavor. 3. Stir in the cumin, smoked paprika, garlic powder, onion powder, salt, and pepper. Mix well until everything is combined. 4. Drizzle one tablespoon of olive oil over the filling and stir again. This keeps it moist. 1. Carefully fill each mini bell pepper with the quinoa mixture. Press down gently to pack it in. 2. Arrange the stuffed peppers upright in a baking dish. If they tip over, use crumpled aluminum foil to help them stand. 3. Sprinkle the rest of the cheese on top of the stuffed peppers. This will melt into a tasty layer. 4. Cover the dish with aluminum foil. Bake for 20 minutes, then remove the foil. 5. Bake for an additional 10-15 minutes, until the peppers are tender and the cheese is bubbly and golden. 6. After baking, let them cool for a few minutes before garnishing with fresh cilantro. For the Full Recipe, refer to the ingredients and precise steps above. Enjoy! You can easily change this recipe. Try using ground turkey instead of black beans. It adds a nice flavor. For some heat, add chili powder or cayenne pepper. This can spice things up! If you want vegan options, skip the cheese and use tofu. For gluten-free, ensure you select gluten-free grains and beans. You have options for cooking. Baking is simple and gives a soft texture. You can also use an air fryer. Air frying makes them crispy and quick. If you want a smoky taste, grilling is great. Just watch the peppers so they don’t burn. Dips enhance the meal. Salsa and guacamole pair well with the stuffed peppers. You can serve them as appetizers or as a fun main dish. They are colorful and bright, making your table look good. For a complete meal, add a fresh salad on the side. You can find the full recipe above, so you have all the details you need. {{image_2}} You can make stuffed mini bell peppers in many tasty ways. For a Mexican twist, add taco seasoning to the filling. This adds spice and flavor. You can use ground meat or keep it vegetarian. For a Mediterranean style, mix in feta cheese and olives. This creates a salty and creamy taste. The tangy flavors work great with the sweet peppers. Both options are fun and easy to try. Feel free to play with the main ingredients. You can swap quinoa for rice if you prefer it. Rice adds a nice texture and flavor. If you want a change, use lentils instead of beans. Lentils cook fast and have a great taste. They also boost the protein in your dish. These swaps let you customize the recipe to your liking. Seasonal changes can inspire new stuffed pepper ideas. In summer, use fresh garden veggies like zucchini or corn. These add brightness and flavor. In winter, try heartier vegetables like mushrooms or kale. They give warmth and comfort to your meal. These seasonal changes keep things interesting and delicious. For the full recipe, check out the details above. After you enjoy your stuffed mini bell peppers, store the leftovers in the fridge. Place them in an airtight container. This keeps them fresh and tasty. If you have a lot, you can stack them, but make sure they are not too crowded. The best containers are glass or BPA-free plastic. They seal well and help keep the flavor. To freeze stuffed peppers, let them cool first. Then, wrap each pepper tightly in plastic wrap. After that, put them in a freezer-safe bag or container. This helps prevent freezer burn. When you want to eat them, take them out. Thaw them in the fridge overnight. You can reheat them in the oven or microwave. If using the oven, bake at 350°F (175°C) until warmed through. Stuffed mini bell peppers last about 3 to 5 days in the fridge. If frozen, they can last up to 3 months. For the best taste, eat them sooner rather than later. Always check for any signs of spoilage before eating. Keeping track of freshness helps you enjoy your meal at its best. Stuffed mini bell peppers are small, colorful peppers filled with a tasty mix. They are often stuffed with ingredients like quinoa, beans, corn, and cheese. After baking, they become soft and flavorful. The peppers add a nice crunch and sweetness. This dish is perfect as an appetizer or a main course. You can enjoy them warm or at room temperature. Yes, you can make stuffed mini bell peppers in advance. Prepare the filling and stuff the peppers. Then, cover and refrigerate them for up to a day. When ready to bake, take them out and let them sit for 15 minutes. This helps them cook evenly. You can also freeze them before baking. To do this, wrap them tightly and store them for up to three months. Thaw in the fridge overnight before baking. Stuffed mini bell peppers pair well with many sides. Here are a few tasty options: - A fresh green salad with vinaigrette - Guacamole and tortilla chips - Rice or quinoa pilaf - A light soup, like tomato or corn chowder - Sparkling water or a light white wine These sides complement the flavors of the stuffed peppers and make the meal more complete. You can tell stuffed mini bell peppers are done by checking a few signs. First, look for the peppers to be tender and slightly wrinkled. The cheese on top should be golden and bubbly. If you poke a pepper with a fork, it should feel soft but not mushy. Cooking time is usually 30 to 35 minutes at 375°F (190°C). If unsure, a food thermometer should read 165°F (74°C) inside the filling. Stuffed mini bell peppers are fun, tasty, and easy to make. We explored their main ingredients, seasonings, and garnishes. You learned how to prep, mix, and bake them perfectly. Plus, I shared great tips for customizing and serving your dish. Don’t forget about storing leftovers for later! Experiment with flavors and try different options. There’s so much you can do with this dish. Enjoy making stuffed peppers that please everyone at your table!](https://dailydishly.com/wp-content/uploads/2025/07/7be91d44-d02b-4978-8cdb-a2e2cd47e9c1-768x768.webp)
. To start, fill a large pot with water. Add a good pinch of salt. Bring the water to a boil. Once boiling, add 8 oz of rotini or fusilli pasta. Cook it for the time on the package until it is al dente. This usually takes about 8 to 10 minutes. After cooking, drain the pasta in a colander. Rinse it under cold water to stop the cooking. Set the pasta aside while you prepare the rest. While the pasta cooks, it’s time to chop the veggies. Take 1 cup of cherry tomatoes and cut them in half. Next, dice 1 cucumber and finely chop 1/2 of a red onion. Then, chop 1 bell pepper, either red or yellow will do. Finally, chop 1/4 cup of fresh parsley. Toss all these chopped veggies in a large mixing bowl. They add color and crunch to your salad. Now, it’s time to mix things up. Add the drained pasta to the bowl with the veggies. Toss in 1 cup of pitted and halved Kalamata olives. These olives give a nice briny flavor. Mix everything well so that the pasta and veggies are evenly combined. For the dressing, grab a small bowl. Whisk together 1/4 cup of olive oil, 3 tablespoons of red wine vinegar, and 1 teaspoon of dried oregano. Add salt and pepper to taste. This dressing brings all the flavors together. Taste it and adjust the seasoning if needed. Drizzle the dressing over the pasta and veggies. Next, add 1 cup of crumbled feta cheese for that creamy touch. Gently toss everything together until all the ingredients are coated in the dressing. This step is key for flavor. Let the salad chill in the fridge for about 30 minutes. This allows the flavors to meld nicely. When ready to serve, you can enjoy it cold or at room temperature. For a pretty presentation, serve it in a large bowl or on individual plates. For the full recipe, check out the detailed instructions above! To make your Greek pasta salad pop, consider adjusting the seasoning. You might want to add more salt or pepper based on your taste. Fresh herbs can also boost the flavor. Basil or mint can make a big difference. Chilling the salad is important too. Let it sit in the fridge for at least 30 minutes. This time helps all the flavors blend beautifully. Garnishing makes your salad look great. Try adding extra feta cheese on top. Fresh parsley adds a bright touch too. Use colorful serving bowls for more visual appeal. When serving at gatherings, individual plates can impress your guests. Layer the salad in a clear bowl for a beautiful view of all the colors. Want to add protein? Grilled chicken or shrimp work well in this salad. They complement the flavors nicely. For dietary needs, you can swap out regular pasta for gluten-free pasta. This way, everyone can enjoy the dish. Feel free to mix in your favorite veggies or nuts for extra crunch. You can find the full recipe [here](#). {{image_2}} You can make your Greek pasta salad even better by adding artichokes or sun-dried tomatoes. These ingredients bring a burst of flavor. They add a nice touch of tanginess that pairs well with feta. You can also mix in fresh herbs like basil or mint. These herbs give the salad a bright and fresh taste. Try adding a handful of chopped mint for a refreshing twist. Seasonal veggies can change the way your salad tastes. In spring or summer, add sweet peas or bell peppers for crunch. You can also throw in some zucchini or asparagus for a fun texture. Change your ingredients based on what is fresh and in season. This keeps your salad exciting and flavorful. If you're looking for new flavors, try different dressings. A simple lemon vinaigrette can brighten up the dish. Just mix lemon juice, olive oil, salt, and pepper for a zesty kick. For a creamy option, consider using Greek yogurt or tahini. This adds a rich taste and pairs well with the pasta. For the full recipe, you can check out the details above. To keep your Greek pasta salad fresh, store it in an airtight container. This helps to keep out air and moisture. You can store it in the fridge for up to 3 days. After that, the flavors may fade, and the veggies might get soggy. Always check for any signs of spoilage before eating leftovers. You can freeze Greek pasta salad, but it may change texture. The veggies can become mushy when thawed. If you still want to freeze it, follow these tips: - Use a freezer-safe container. Make sure it seals well to avoid freezer burn. - Freeze without dressing. Add the dressing after you thaw the salad. This keeps the pasta and veggies fresh. - Thaw in the fridge. Let it sit overnight before serving. This gives it time to defrost slowly. If you can't use feta cheese, try these options: - Goat cheese: It has a similar tangy taste. - Ricotta cheese: This gives a softer texture. - Vegan feta: Made from nuts or tofu for dairy-free needs. - Cottage cheese: A lighter option, though a bit different in flavor. - Nutritional yeast: For a vegan cheese-like flavor without dairy. These swaps work well in Greek pasta salad. Choose based on your taste or dietary needs. Greek pasta salad can sit out for about two hours. - Hot weather: Reduce this time to one hour. - Cooler conditions: It can last longer. After the safe time, it’s best to store leftovers in the fridge. Always keep food safety in mind. Yes, you can make Greek pasta salad ahead of time. - Prep time: You can prepare it up to 24 hours in advance. - Storage: Keep it in an airtight container in the fridge. This allows the flavors to blend better. Just toss in the feta cheese right before serving for the best taste. The original recipe is not vegan due to feta cheese. To make it vegan, use these tips: - Substitute feta: Use vegan feta or omit cheese. - Check pasta: Ensure it’s made without egg. This way, you still enjoy a tasty Greek pasta salad that fits your diet. This blog post covered a tasty Greek pasta salad, including its fresh ingredients, step-by-step instructions, and useful tips. You learned how to combine pasta, veggies, and feta for a burst of flavor. Remember, chilling the salad enhances the taste, and there are many ways to customize it. With proper storage, you can enjoy leftovers without losing quality. Whether you're hosting a gathering or enjoying a simple meal, this salad fits perfectly. Try it out and impress yourself and your guests with this easy, delicious dish.](https://dailydishly.com/wp-content/uploads/2025/06/42921458-26d8-4100-967d-b17bfbbdb796-768x768.webp)
![To make a tasty Roasted Red Pepper Quinoa Salad, gather these ingredients: - 1 cup quinoa, rinsed - 2 large red bell peppers - 1/2 cup cherry tomatoes, halved - 1/4 cup red onion, finely chopped - 1/2 cup cucumber, diced - 1/4 cup feta cheese, crumbled (optional) - 3 tablespoons olive oil - 2 tablespoons balsamic vinegar - 1 teaspoon garlic powder - Salt and pepper to taste - Fresh parsley, chopped for garnish This salad is not just delicious; it’s healthy too. Here’s why each ingredient matters: - Quinoa: A great source of protein and fiber. It helps keep you full and satisfied. - Red bell peppers: High in vitamins A and C, these add color and crunch. They also support your immune system. - Cherry tomatoes: Packed with antioxidants, they boost heart health and add sweetness. - Red onion: Contains quercetin, which may help lower blood pressure and cholesterol. - Cucumber: Hydrating and low in calories, cucumbers make your salad light and fresh. - Feta cheese: Adds creaminess and flavor; it’s a source of calcium. - Olive oil: A source of healthy fats, it’s good for your heart. - Balsamic vinegar: Adds tanginess and may help regulate blood sugar levels. - Garlic powder: Great for flavor, it also has health benefits like boosting your immune system. - Fresh parsley: Rich in vitamins K and C, it also freshens your breath. Fresh veggies make the salad shine. Here are some tips: - Red bell peppers: Look for bright colors and firm skin. Avoid soft spots. - Cherry tomatoes: Choose shiny, plump tomatoes. They should smell sweet. - Cucumber: Pick cucumbers that feel firm and are dark green. - Red onion: Look for heavy onions with smooth skin. Avoid any that feel soft or have dark spots. - Fresh parsley: Choose parsley that is bright green and crisp. Avoid yellow or wilting leaves. When you use fresh ingredients, your Roasted Red Pepper Quinoa Salad will taste amazing. Don't forget to check the [Full Recipe] for all the steps! To make the quinoa, start by rinsing one cup under cold water. This helps remove any bitter taste. In a medium saucepan, mix the rinsed quinoa with two cups of water. Bring it to a boil over high heat. Once it boils, lower the heat to a simmer. Cover the pot and let it cook for about 15 minutes. The water should absorb fully. After that, fluff the quinoa with a fork and let it cool. This fluffy base gives the salad its nice texture. Next, we need to roast the red peppers. Preheat your oven to 425°F (220°C). Cut the peppers in half and remove the seeds. Place them skin-side up on a baking sheet. Roast them for about 25 minutes. You want the skins to be blistered and slightly charred. Once roasted, take them out and let them cool. After cooling, peel off the skin and chop the peppers into bite-sized pieces. This smoky flavor adds depth to our salad. Now it’s time to bring everything together. In a large mixing bowl, combine the cooled quinoa, chopped roasted peppers, halved cherry tomatoes, diced cucumber, and finely chopped red onion. To make the dressing, whisk together three tablespoons of olive oil, two tablespoons of balsamic vinegar, one teaspoon of garlic powder, and salt and pepper to taste in a small bowl. Pour this dressing over the salad mixture. Toss gently to combine everything well. If you like, add some crumbled feta cheese for extra creaminess. Finally, garnish with fresh parsley before serving. You can find the full recipe here. To get the best texture for your quinoa, rinse it well. This step removes any bitterness. Use a fine mesh strainer and run cold water over the quinoa for about a minute. After rinsing, cook it with a 2:1 water-to-quinoa ratio. Bring it to a boil, then lower the heat and cover it. Let it simmer for 15 minutes. When done, fluff it with a fork. This keeps the grains separate and light. Use fresh herbs to boost the flavor of your salad. Fresh parsley adds brightness. You can also try basil or cilantro for a twist. For extra flavor, add spices like cumin or smoked paprika. These spices will give depth and warmth to your dish. Just a pinch can make a big difference. Mix them into your dressing or sprinkle them on top before serving. A beautiful presentation makes your salad more inviting. Use a large, shallow bowl to showcase the colors. Arrange the ingredients in sections for a vibrant look. You can also serve it in individual bowls for a personal touch. Garnish with extra parsley or a sprinkle of feta on top. Drizzle a little olive oil or balsamic vinegar just before serving to add shine. Check out the Full Recipe for more serving ideas! {{image_2}} To make this salad vegan, skip the feta cheese. You can add nuts or seeds for creaminess. Toasted sunflower seeds or sliced almonds work well. They add crunch and flavor without dairy. You can also swap balsamic vinegar for a splash of lemon juice. This keeps the salad bright and fresh. Good news! Quinoa is naturally gluten-free. This salad is a great choice for those with gluten issues. Just ensure that all your other ingredients are also gluten-free. Check labels on dressings and canned items. You can enjoy this dish without worry. Want to boost the protein? You have options! Chickpeas are a great choice. They add fiber and taste. Just rinse and toss them in. Grilled chicken is another option. Cook it simply with salt and pepper, then slice it up. This makes the salad filling and tasty. Feel free to mix and match proteins based on your needs. For the full recipe, check out the details above. To keep your roasted red pepper quinoa salad fresh, store it in an airtight container. This will help lock in flavor and moisture. If you have extra dressing, store it separately. This way, the salad won’t get soggy. Place the container in the fridge right away. You can eat this salad cold, but if you prefer it warm, reheat it gently. Use the microwave for quick warming. Heat for 30 seconds, then stir. Check if it’s warm enough. You can also use a skillet. Heat on low for a few minutes, stirring often. This salad stays fresh in the fridge for about three days. After that, the veggies may lose their crunch, and the flavors might fade. Always check for any strange smells or changes in color before eating. If you see any signs of spoilage, it’s best to toss it out. Enjoy your meal while it's fresh! For the complete recipe, see the [Full Recipe]. Yes, you can make this salad ahead of time. I often prepare it in the morning for lunch later. The flavors blend well after sitting for a few hours. Just keep it in the fridge. If you want, hold off on adding the dressing until you're ready to eat. This keeps everything fresh and crisp. If you need a substitute for quinoa, try brown rice or farro. Both add great texture. You can also use couscous or bulgur for a quick cook time. Each option gives a unique taste and feel. Just make sure to adjust the cooking time based on what you choose. To adjust spice levels, use less garlic powder or add more veggies. If you like heat, try adding red pepper flakes or diced jalapeños. For a milder taste, skip the feta cheese. Taste as you go, so you get it just right for you. This blog post covered how to create a tasty salad. We discussed each ingredient, their benefits, and how to choose fresh veggies. You learned clear steps to prepare quinoa, roast peppers, and mix your salad well. We shared tips for perfect texture, flavor boosts, and neat serving ideas. You can also explore vegan or gluten-free options and add proteins. Lastly, proper storage keeps your leftovers fresh. Use this guide to enjoy healthy salads any time!](https://dailydishly.com/wp-content/uploads/2025/06/1f28db07-8093-4cb7-8796-796da85cb13a-768x768.webp)