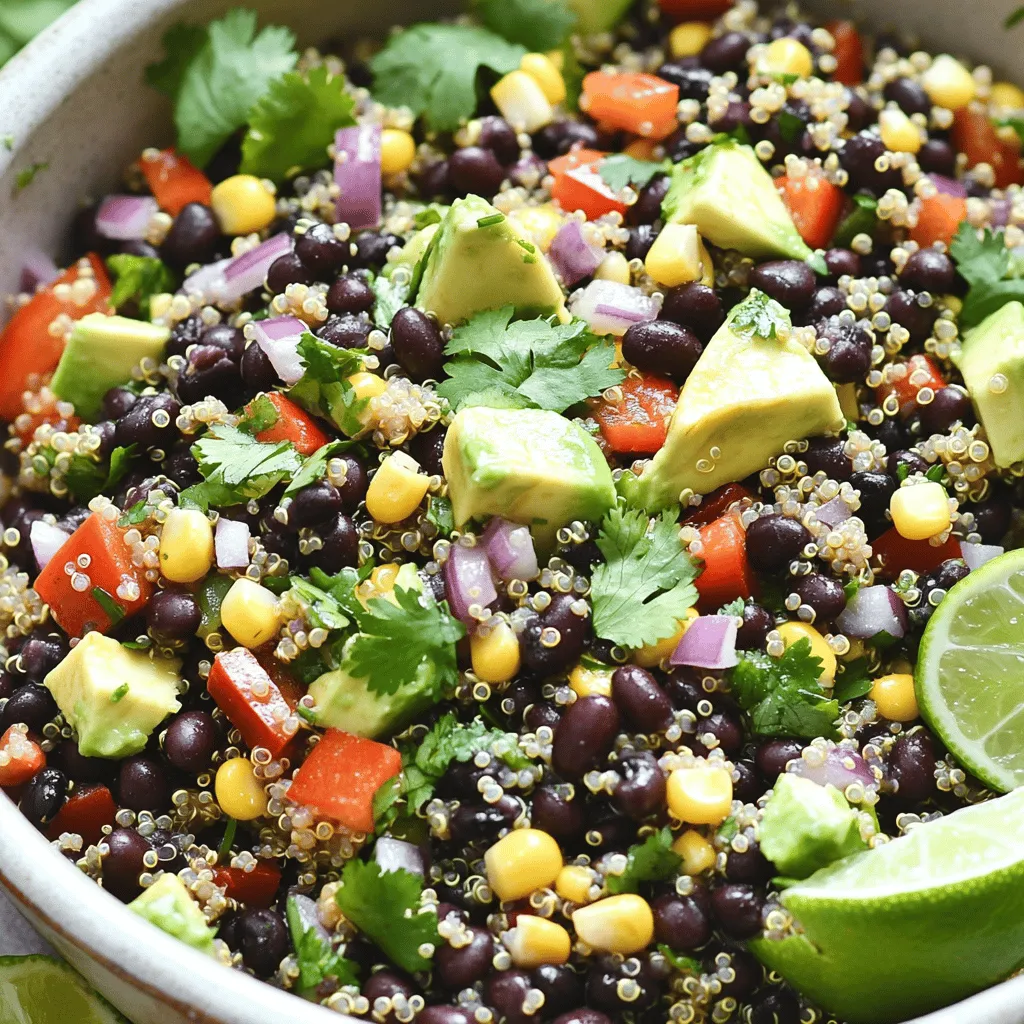
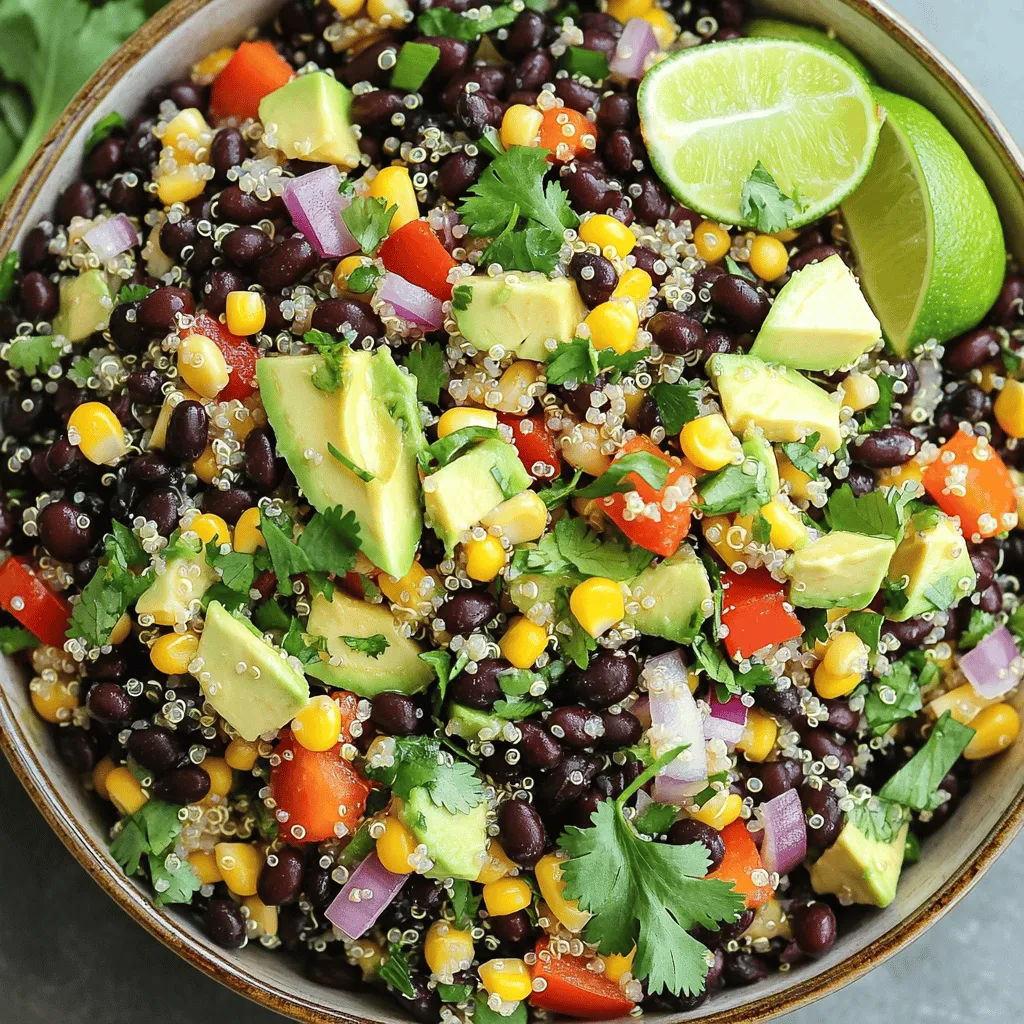
Looking for a fresh and flavorful dish that’s easy to whip up? My Zesty Quinoa Black Bean Salad is just what you need. Packed with protein and vibrant veggies, it’s perfect as a main dish or a side. I’ll share simple steps and tips to ensure your salad bursts with taste. Get ready to impress your family and friends with this delightful recipe that’s both healthy and satisfying!
Ingredients
Main Ingredients
– 1 cup quinoa, rinsed
– 2 cups vegetable broth
– 1 can (15 oz) black beans, drained and rinsed
– 1 cup corn kernels (fresh, frozen, or canned)
– 1 red bell pepper, diced
– 1 small red onion, finely chopped
– 1 avocado, diced
– 1/4 cup fresh cilantro, chopped
The base of this salad is quinoa and black beans. Quinoa is a superfood, full of protein. It cooks quickly and adds a nice texture. Black beans bring fiber and a rich taste. For the veggies, corn, bell pepper, onion, and avocado add color and crunch. Each ingredient plays a role in making this dish vibrant and fresh.
Seasonings and Dressing
– 1 lime, juiced
– 3 tablespoons olive oil
– 1 teaspoon cumin
– 1/2 teaspoon chili powder
– Salt and pepper to taste
For flavor, I use lime juice and olive oil. They brighten the dish and add healthy fats. Cumin and chili powder give warmth. Salt and pepper enhance all the flavors. This dressing ties everything together and makes each bite zesty.
Optional Garnishes
– Fresh cilantro
– Lime wedges
Garnishes can elevate your salad. Fresh cilantro adds a pop of green and freshness. Lime wedges offer a squeeze of extra zest right before eating. These small touches make the salad look and taste even better.
Step-by-Step Instructions
Cooking the Quinoa
To start, take a medium saucepan and bring 2 cups of vegetable broth to a boil. Once it is boiling, add 1 cup of rinsed quinoa. This step is key to getting tender quinoa. Reduce the heat to low, cover the pan, and let it simmer for about 15 minutes. After the time is up, remove it from heat and let it cool. Fluff the quinoa with a fork to separate the grains. This adds a nice texture to the salad.
Preparing the Salad Base
In a large mixing bowl, combine the salad base. First, add 1 can of drained and rinsed black beans. Next, toss in 1 cup of corn kernels, whether fresh, frozen, or canned. Then, add 1 diced red bell pepper and 1 small finely chopped red onion. For a creamy touch, include 1 diced avocado. Finally, sprinkle in 1/4 cup of chopped fresh cilantro. This mix brings a vibrant color and fresh taste to your dish.
Making the Dressing
For the dressing, take a small bowl and whisk together the juice of 1 lime, 3 tablespoons of olive oil, 1 teaspoon of cumin, and 1/2 teaspoon of chili powder. Add salt and pepper to taste. This dressing brightens the salad and ties all the flavors together. After mixing, taste it and adjust the seasoning as needed. You may want to add more lime juice or spices, depending on your preference.
Once everything is ready, combine the cooled quinoa with the vegetable mix. Pour the dressing over the salad and gently toss everything together. Let the salad rest in the fridge for at least 30 minutes to allow the flavors to blend.
Tips & Tricks
Perfect Quinoa Cooking
Rinsing quinoa is key. It removes bitter saponins. This step ensures a better texture. Use a fine mesh strainer for rinsing.
The water ratio matters, too. For every cup of quinoa, use two cups of vegetable broth. This gives the quinoa a rich flavor.
Flavor Enhancements
To boost flavor, try adding spices. Smoked paprika or garlic powder works well. You can also add cayenne for heat.
Fresh herbs bring life to the salad. Try using basil or parsley to enhance freshness. Cilantro is a great choice too.
Serving Suggestions
For serving, I like using a large bowl. It allows everyone to help themselves. A colorful platter can make it more inviting.
Pair this salad with grilled chicken or fish. It makes a full meal that is both healthy and tasty. You can also serve it with warm pita bread for a nice touch.
Variations
Protein Additions
You can boost your Zesty Quinoa Black Bean Salad with protein. Adding grilled chicken or shrimp makes it heartier. Simply grill the meat and cut it into bite-sized pieces. Mix it into the salad for a tasty twist.
For a vegetarian option, try adding chickpeas or tofu. Both choices pack a protein punch. You can roast the tofu with spices for extra flavor.
Different Dressings
The salad dressing can change up the whole dish. You can use different dressings to keep things fresh. A balsamic vinaigrette or a creamy avocado dressing are great options.
You can make your own dressing at home. Mix lime juice, olive oil, garlic, and herbs. This homemade version can taste better than store-bought dressings.
Seasonal Ingredients
Using seasonal ingredients can enhance the salad. In summer, add fresh tomatoes or cucumbers for crunch. In winter, consider roasted sweet potatoes or butternut squash.
You can also swap out the bell pepper for other colorful veggies. Seasonal swaps can make your salad feel new. Enjoy this dish year-round by adjusting the ingredients!
Storage Info
Best Storage Practices
To keep your Zesty Quinoa Black Bean Salad fresh, use airtight containers. This helps lock in moisture and flavor. When storing, layer the salad to keep ingredients crisp. Place the quinoa at the bottom, followed by beans and vegetables. This way, the dressings won’t make everything soggy.
Shelf Life
When stored in the fridge, this salad lasts about three to five days. Check for signs of spoilage, like a sour smell or slimy texture. If you notice either, it’s best to toss it out. Freshness is key to enjoying this dish fully.
Reheating Suggestions
You can eat this salad cold right from the fridge. It tastes great that way! If you prefer it warm, gently reheat it. Use a microwave or a pan on low heat. Heat just until warm, not hot, to keep the flavors bright. Enjoy experimenting with how you like it best!
FAQs
How to make quinoa less bitter?
To reduce quinoa’s bitterness, rinse it well before cooking. Place the quinoa in a fine-mesh strainer. Rinse it under cold water for about 2 minutes. This removes the natural coating called saponin, which can taste bitter. After rinsing, cook it in vegetable broth for extra flavor.
Can I make this salad ahead of time?
Yes, you can make this salad ahead of time. I suggest preparing it at least 30 minutes before serving. This allows the flavors to mix well. You can also store it in the fridge for up to 2 days. Just remember to keep the avocado separate until ready to serve to avoid browning.
What can I substitute for black beans?
If you don’t have black beans, you can use other beans. Chickpeas, kidney beans, or pinto beans work well. You can also try lentils for a twist. Each option will change the taste slightly, but they all add protein and fiber.
This blog post covers a tasty quinoa salad with black beans and fresh veggies. You learned how to cook quinoa, prepare the salad, and whip up a zesty dressing. I shared tips for enhancing flavor and serving ideas. Variations let you customize this meal to your taste. Remember, storing properly keeps your salad fresh longer. With these steps, you can enjoy a healthy dish that’s easy to make. Try it out and make it your own!


