Zucchini Corn Pizza Delicious and Healthy Delight

Are you ready for a pizza that’s both tasty and good for you? My Zucchini Corn Pizza is a delightful twist on the classic favorite. Packed with fresh flavors and simple ingredients, this recipe is a fun way to enjoy healthy eating. Whether you’re feeding a family or craving a solo slice, you’ll love how easy it is to make. Let’s dive into the world of delicious and healthy pizza!
Ingredients
Essential Ingredients for Zucchini Corn Pizza
For a tasty zucchini corn pizza, you need these key ingredients:
– 1 pre-made pizza crust (or homemade if preferred)
– 1 medium zucchini, thinly sliced
– 1 cup sweet corn kernels (fresh or frozen)
– 1 cup shredded mozzarella cheese
– 1/2 cup ricotta cheese
– 1/2 teaspoon garlic powder
– 1 teaspoon Italian seasoning
– 1 tablespoon olive oil
– Salt and pepper to taste
– Fresh basil leaves for garnish
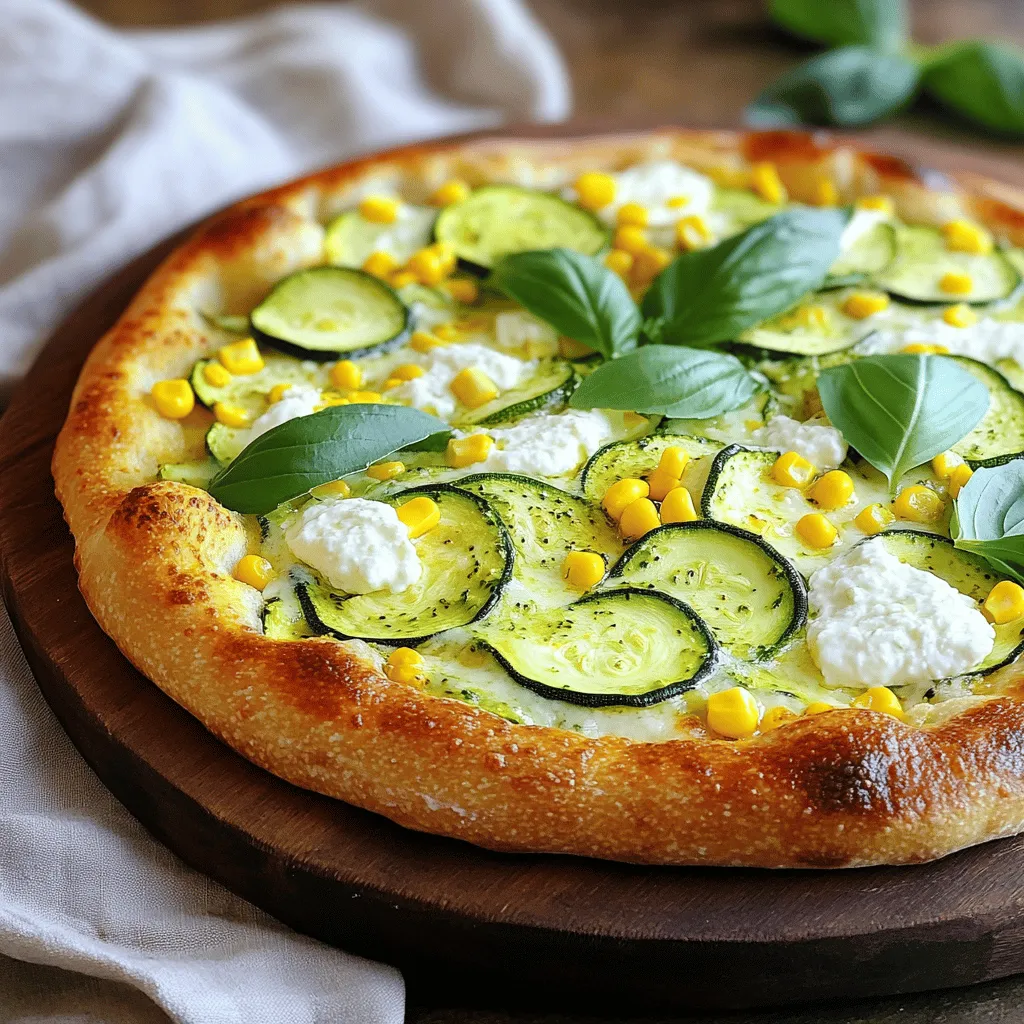
These ingredients create a balance of flavors and textures. The zucchini offers a nice crunch. The sweet corn adds a bit of sweetness, and the cheeses provide creaminess.
Optional Add-ins and Toppings
You can customize your pizza with extra ingredients. Here are some ideas:
– Cherry tomatoes for a burst of freshness
– Spinach or kale for added greens
– Red onion for a sharper taste
– Bell peppers for some color and crunch
– Crumbled feta or goat cheese for a tangy twist
Feel free to mix and match. These add-ins let you create a pizza that suits your taste.
Nutrition Information
Zucchini corn pizza is not just yummy; it is also healthy. Here’s a quick look at the nutrition:
– Each slice has about 220 calories.
– It packs in protein from the cheese.
– Zucchini and corn provide fiber and vitamins.
– Using a whole grain crust boosts the health benefits further.
This pizza is a great choice for a quick meal. It is both nutritious and delicious, making it perfect for family dinners or casual gatherings.
Step-by-Step Instructions
Preparing the Pizza Crust
Start by preheating your oven. Follow the instructions on your pizza crust. If you use a pre-made crust, roll it out on a baking sheet or pizza stone. If you make a homemade crust, prepare it as stated in your recipe.
Sautéing the Zucchini
In a skillet, heat one tablespoon of olive oil over medium heat. Add your thinly sliced zucchini. Sauté the zucchini for about 3 to 4 minutes. You want it to be tender but still crisp. Season with garlic powder, salt, and pepper to taste. Once it’s done, remove it from the heat and set it aside.
Assembling the Pizza
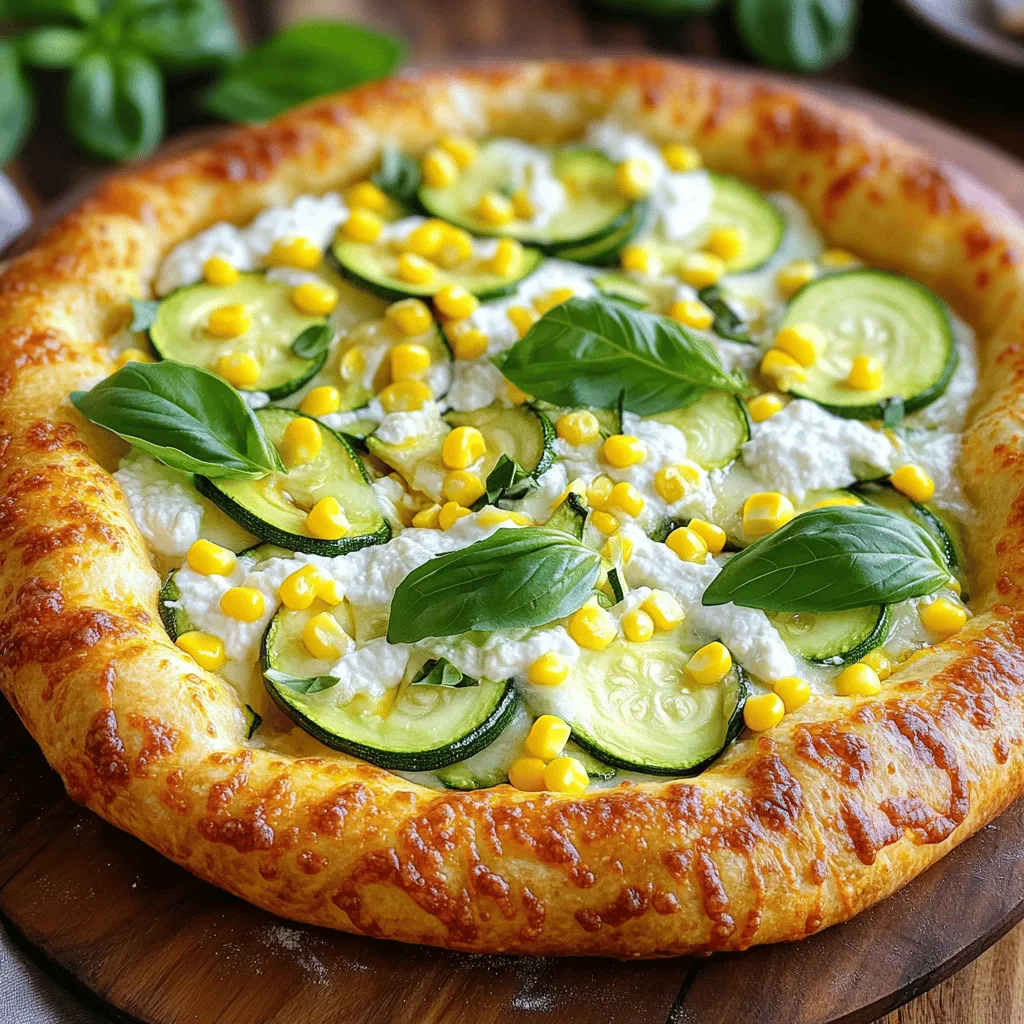
Spread 1/2 cup of ricotta cheese evenly over your crust. Leave a small border at the edge. Next, add the sautéed zucchini and 1 cup of sweet corn kernels on top of the cheese. Now, sprinkle 1 cup of shredded mozzarella cheese over everything. Finally, add 1 teaspoon of Italian seasoning for extra flavor. Bake your pizza in the preheated oven for 12 to 15 minutes. Look for a golden crust and bubbly cheese. After baking, let the pizza cool for a minute. Garnish with fresh basil leaves before slicing. Enjoy your delicious zucchini corn pizza!
Tips & Tricks
Best Practices for Cooking Zucchini
To cook zucchini well, start with fresh ones. Look for firm, shiny skin. Wash them and slice them thin. Thin slices cook faster and taste better. Sauté them for about 3-4 minutes. This keeps them tender but not mushy. Add salt and pepper to bring out their flavor. You can also grill or roast zucchini for a smoky taste.
Cheese Recommendations
For this pizza, use mozzarella for its melt and stretch. It makes each bite gooey and fun. Adding ricotta gives a creamy texture. You can mix cheeses for a flavor boost. Try a bit of feta for tang or a bit of cheddar for sharpness. Just keep the cheese balanced so it does not overpower the other ingredients.
How to Achieve a Perfectly Crispy Crust
A crispy crust makes the pizza great. Start by preheating your oven well. A hot oven helps the crust rise and crisp. If using a pre-made crust, follow the package instructions. For homemade crust, make sure it’s rolled out thin. Bake it until it’s golden. You can also use a pizza stone for even better results. Just place it in the oven before you preheat. This way, it gets very hot.

Variations
Gluten-Free Pizza Options
You can easily make this pizza gluten-free. Use a gluten-free pizza crust instead of regular. Many stores offer tasty gluten-free options. You can also make your own crust with almond flour or cauliflower. Both options work well with the zucchini and corn toppings. Just follow the same cooking steps.
Vegan Adaptations
For a vegan version, swap out the cheese. Use vegan mozzarella or nutritional yeast for a cheesy flavor. Instead of ricotta, try hummus or a cashew cream. These swaps keep the pizza creamy and delicious. You will not miss the dairy at all.
Flavor Pairing Ideas
Zucchini and corn pair well with many flavors. Add sliced bell peppers or red onions for extra crunch. Try fresh herbs like oregano or thyme for a burst of flavor. A sprinkle of red pepper flakes will add a kick. Drizzle balsamic glaze on top after baking for a sweet finish. Get creative and mix flavors to your liking!
Storage Info
How to Store Leftover Pizza
Storing leftover Zucchini Corn Pizza is easy. First, let the pizza cool down. Then, slice it into pieces. Place the slices in an airtight container. You can also wrap them in plastic wrap. This keeps them fresh for up to three days in the fridge.
Reheating Tips for Optimal Flavor
To reheat your pizza, use an oven for best results. Set the oven to 375°F (190°C). Place the pizza slices on a baking sheet. Heat for about 10 minutes. This makes the crust crispy again. You can also use a skillet. Heat it on medium-low and cover it. This method keeps the cheese melty.
Freezing Instructions
Freezing Zucchini Corn Pizza is a great idea for meal prep. First, let the pizza cool completely. Wrap each slice in plastic wrap. Then, place the slices in a freezer-safe bag. Remove as much air as possible. You can freeze the pizza for up to two months. When ready to eat, thaw it in the fridge overnight before reheating.
FAQs
Can I use a different type of cheese?
Yes, you can try different cheeses. Cheddar, gouda, or feta work well. Each cheese adds a unique taste. Mix and match to find your favorite. Experimenting makes cooking fun and tasty!
How do I make a homemade pizza crust?
To make pizza crust, mix flour, yeast, water, and salt. Knead the dough until smooth. Let it rise for about an hour. Roll it out and shape it to fit your pan. Homemade crust is simple and delicious!
What other vegetables can I add to zucchini corn pizza?
You can add bell peppers, mushrooms, or spinach. Broccoli and onions also taste great. Feel free to explore your fridge. Use any veggies you love for extra flavor and nutrients.
How do I make this pizza spicy?
To add spice, sprinkle crushed red pepper flakes on top. You can also use spicy cheese or add jalapeños. Mixing in a spicy sauce with the ricotta works well too. Make it as fiery as you like!
Zucchini corn pizza is fun and tasty. We covered essential ingredients, step-by-step instructions, and useful tips. You learned about variations, storage methods, and common questions. Cooking this dish can be simple and rewarding. You can tailor it to your taste. Now, enjoy a slice of your unique pizza creation. Have fun experimenting with flavors!


![To make crispy chickpea tacos, you need the following main ingredients: - 1 can (15 oz) chickpeas, drained and rinsed - 1 tablespoon olive oil - 1 teaspoon paprika - 1 teaspoon cumin - ½ teaspoon garlic powder - ½ teaspoon chili powder - Salt and pepper to taste - 6 small corn tortillas - 1 cup shredded cabbage - ½ cup diced tomatoes - ¼ cup diced red onion - ½ avocado, sliced - Fresh cilantro for garnish - Lime wedges for serving Chickpeas are the star of this dish. They provide protein and fiber. The spices add depth and flavor. The tortillas hold all the goodness together. Fresh toppings bring crunch and color. You will need a few simple tools for this recipe: - Baking sheet - Mixing bowl - Dry skillet Using these tools makes the cooking process smooth. A baking sheet helps the chickpeas get crispy. A mixing bowl lets you combine ingredients easily. A dry skillet warms the tortillas just right. Here’s a quick look at the nutritional facts for one serving of these tacos: - Calories: About 200 - Protein: 8g - Carbohydrates: 30g - Fat: 7g These tacos are filling yet light. They are great for lunch or dinner. You get a good balance of protein, carbs, and healthy fats. For the full recipe, check out the other sections. 1. Preheating the oven Start by preheating your oven to 400°F (200°C). This will help the chickpeas get nice and crispy. 2. Tossing chickpeas with seasoning In a mixing bowl, add the drained and rinsed chickpeas. Pour in olive oil, then sprinkle paprika, cumin, garlic powder, chili powder, salt, and pepper. Toss everything well until the chickpeas are coated with the spices. This step is key for great flavor. 1. Spreading chickpeas on a baking sheet Take a baking sheet and spread the seasoned chickpeas in a single layer. Make sure they are not piled on top of each other. This helps them crisp up nicely. 2. Baking time and techniques for crispiness Bake the chickpeas in the oven for about 20 to 25 minutes. Halfway through, shake the pan to ensure even cooking. You'll know they are done when they are golden brown and crispy. 1. Heating tortillas While the chickpeas bake, heat your corn tortillas in a dry skillet over medium heat. Cook them for about 30 seconds on each side until they are warm and flexible. 2. Layering ingredients for optimal flavor Once your chickpeas are crispy, it’s time to assemble the tacos. Place a generous scoop of chickpeas in each tortilla. Add shredded cabbage, diced tomatoes, red onion, and avocado slices on top. For the final touch, sprinkle fresh cilantro and squeeze some lime juice over everything. This adds a fresh burst of flavor! For the full recipe, you can refer to the detailed instructions included earlier. Enjoy these tasty tacos! To get the best crunch from your chickpeas, rinse and dry them well. This step removes extra starch and moisture. Use a clean kitchen towel to pat them dry. This helps them crisp up nicely in the oven. When baking, spread the chickpeas out on the sheet. Give them space to breathe and cook evenly. Bake at 400°F (200°C) for 20-25 minutes. Shake the pan halfway through to ensure they get crispy all around. You can make your chickpeas even tastier! Try adding smoked paprika or cayenne pepper for a kick. Adjust the seasonings based on your taste. For toppings, think beyond the usual. Add fresh corn, diced jalapeños, or pickled radishes for a zesty touch. These will boost flavor and add crunch to your tacos. These tacos pair well with fresh sides. Try serving them with a simple avocado salad or black bean salsa. These sides add color and more flavor. For presentation, use a bright platter. Arrange the tacos neatly and add lime wedges on the side. This makes the meal more inviting. You can drizzle a bit of light ranch or yogurt dressing over the tacos for creamy goodness. For the full recipe, check out the earlier section. Enjoy your crispy chickpea tacos! {{image_2}} You can easily make these tacos fit your diet. For gluten-free options, use corn tortillas. They are tasty and safe for those who avoid gluten. You can also try lettuce wraps for a fresh twist. If you're vegan, this recipe is already perfect for you! The chickpeas provide protein and flavor without any animal products. Just make sure to check any additional toppings you use. Get creative with spices! Try adding curry powder or smoked paprika for a different taste. You can mix in some cayenne pepper for a spicy kick. Adjust the amounts to fit your spice level. Toppings are where you can really shine. Add jalapeños for heat or mango salsa for sweetness. Pickled onions can add a tangy crunch. You can even sprinkle some feta cheese on top for a creamy finish. Use seasonal vegetables for a fresh touch. In summer, add sweet corn or diced bell peppers. In fall, roasted butternut squash or pumpkin can add warmth. You can switch up the veggies based on what you find at the market. Don’t forget about dressings! In warmer months, a light lime vinaigrette works wonders. In cooler months, you might enjoy a creamy avocado dressing. Adjust based on what you have on hand or what’s in season. For the full recipe, check out the Crispy Chickpea Tacos section! To keep leftover chickpeas fresh, store them in an airtight container. Place them in the fridge. They will stay good for about three to four days. If you want to recook them, heat the chickpeas in a skillet. Add a splash of olive oil and your favorite spices. This helps restore their crispy texture. If you want to assemble your tacos in advance, do so carefully. Keep the ingredients separate until you are ready to eat. Store the chickpeas in one container and the toppings in another. For tortillas, wrap them in foil or wax paper. This keeps them soft. When you are ready to serve, warm the tortillas in a skillet for the best taste. Yes, you can freeze cooked chickpeas! Place them in a freezer-safe bag. Remove as much air as possible before sealing. They will stay fresh for up to three months. As for assembled tacos, I do not recommend freezing them. The tortillas become soggy when thawed. However, you can freeze the chickpeas and toppings separately. Just thaw and reheat when you’re ready to enjoy. For the full recipe, refer back to the beginning of this article. To make crispy chickpea tacos, start by preheating your oven to 400°F (200°C). Rinse one can of chickpeas and drain them well. In a bowl, toss the chickpeas with one tablespoon of olive oil and a mix of spices: one teaspoon of paprika, one teaspoon of cumin, half a teaspoon of garlic powder, and half a teaspoon of chili powder. Add salt and pepper to taste. Spread the seasoned chickpeas on a baking sheet in a single layer. Bake them for 20 to 25 minutes. Shake the pan halfway through. This gives them a nice crunch. While they bake, heat six small corn tortillas in a dry skillet over medium heat for about 30 seconds on each side. Once the chickpeas are crispy and golden, fill each tortilla with them. Add fresh toppings like shredded cabbage, diced tomatoes, diced red onion, and avocado slices. Finish with fresh cilantro and a squeeze of lime juice for a bright taste. For the full recipe, check out the [Full Recipe]. Chickpea tacos benefit from fresh and crunchy toppings. Here are some great options: - Shredded cabbage - Diced tomatoes - Diced red onion - Sliced avocado - Fresh cilantro - Lime wedges These toppings add color and flavor. You can also try pickled jalapeños for some heat or crumbled feta for a creamy touch. Mix and match to find your favorite combination! This recipe is already vegan-friendly! To keep it that way, ensure you use corn tortillas and skip any dairy toppings. For added creaminess, try using avocado or a vegan yogurt. You can also add a splash of hot sauce for extra flavor without any animal products. Crispy chickpea tacos pair well with various sides. Here are a few suggestions: - Mexican rice or quinoa - Black beans or refried beans - A simple green salad with lime vinaigrette - Chips and salsa or guacamole These sides not only complement the tacos but also make your meal more filling and satisfying. Enjoy! Crispy chickpea tacos are easy to make and pack great flavor. We covered the main ingredients, tools, and nutritional info to help you. You learned the step-by-step process, plus tips for crispiness and flavor. Don’t forget the variations and storage tips to keep your meals fresh. Experiment with different spices and toppings to find what you love. Enjoy creating your tacos and make them your own for delicious meals!](https://dailydishly.com/wp-content/uploads/2025/06/47f89152-e87e-483c-b85b-8fc38f5c57d2-768x768.webp)


