
Creamy Roasted Red Pepper Soup Simple and Delicious
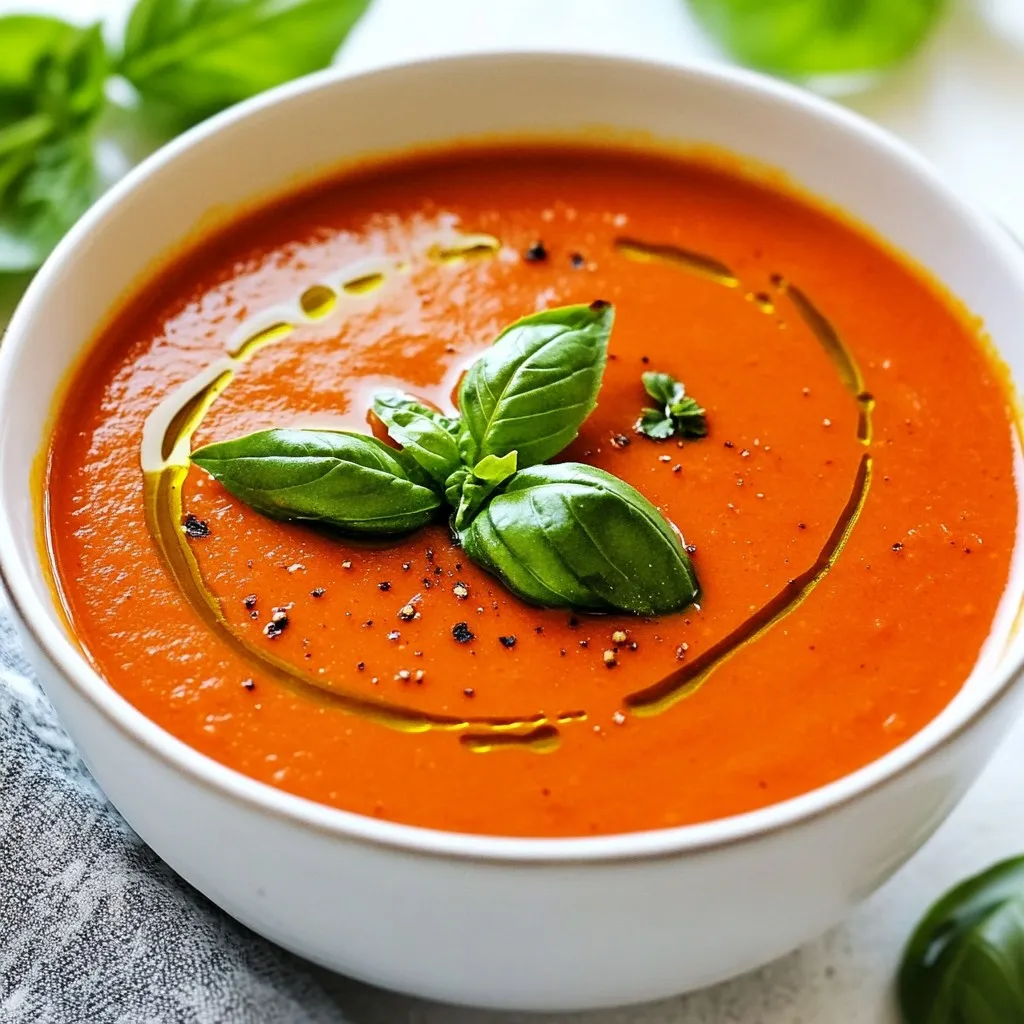

Are you ready to dive into a bowl of pure comfort? My Creamy Roasted Red Pepper Soup is a simple delight you can whip up today. With bright red bell peppers, savory garlic, and a touch of cream, this recipe is bursting with flavor. Plus, it’s easy to make! Follow along for tips and tricks to ensure yours comes out perfectly every time. Let’s get cooking!
Why I Love This Recipe
- Rich Flavor: This soup is bursting with the smoky sweetness of roasted red peppers, making each spoonful comforting and delicious.
- Creamy Texture: The addition of heavy cream gives the soup a velvety smoothness that enhances its overall appeal.
- Easy to Make: With simple ingredients and straightforward steps, this recipe is perfect for both novice and experienced cooks.
- Versatile: You can easily modify this recipe to be dairy-free or spice it up with additional herbs and spices for a personalized touch.
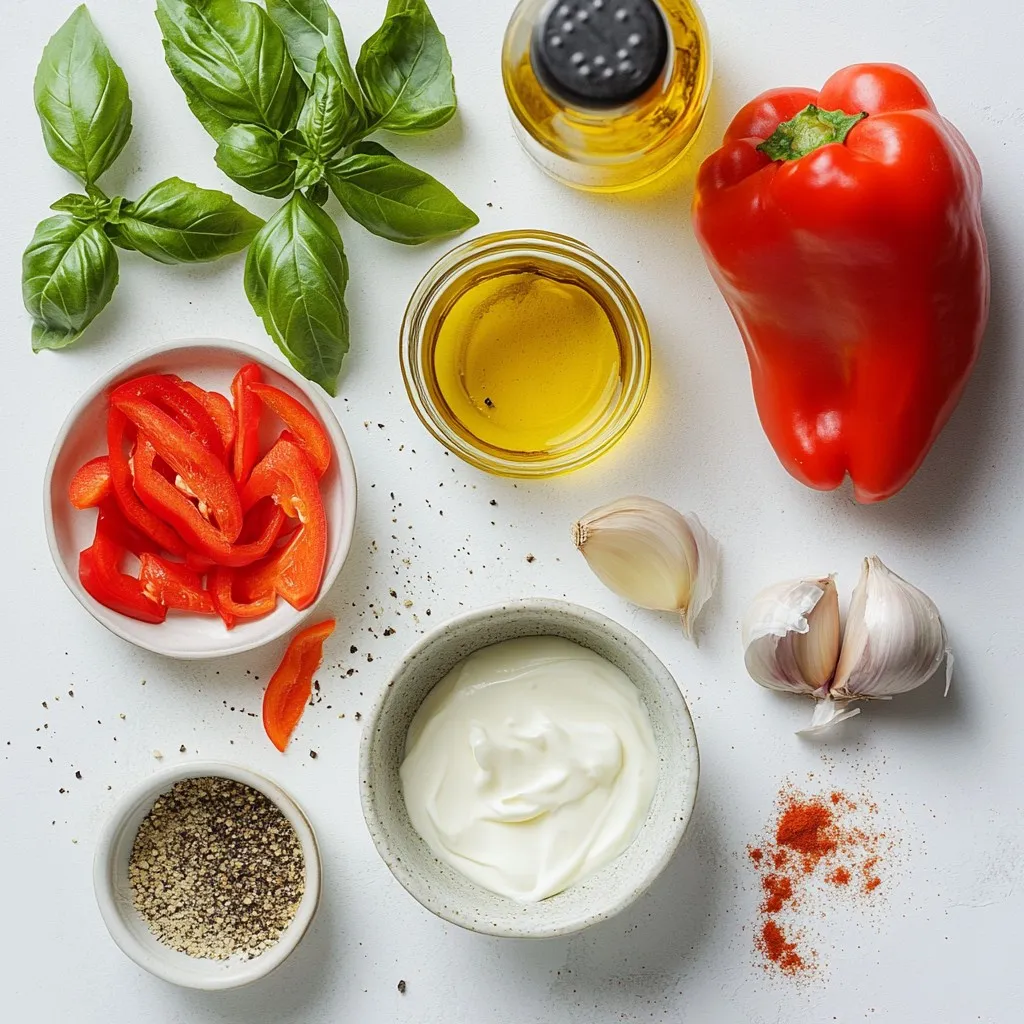
Ingredients
List of Required Ingredients
– 4 large red bell peppers, roasted and peeled
– 1 medium onion, chopped
– 3 cloves garlic, minced
– 2 cups vegetable broth
– 1 cup heavy cream or coconut cream
– 1 tablespoon olive oil
– 1 teaspoon smoked paprika
– Salt and black pepper to taste
– Fresh basil leaves for garnish
These ingredients are key to making creamy roasted red pepper soup. The red bell peppers bring sweetness and color. When you roast them, they turn smoky and rich. The onion adds depth, while garlic gives a nice kick. Vegetable broth serves as the soup’s base, making it hearty.
For creaminess, you can use heavy cream or coconut cream. Olive oil helps sauté the onion and garlic to bring out their flavors. Smoked paprika adds a subtle warmth that pairs well with peppers. Finally, salt and black pepper will enhance all the flavors. Don’t forget the fresh basil—it adds a bright touch when you serve the soup!
With these ingredients ready, you’ll create a comforting dish that warms the soul.
Step-by-Step Instructions
Preparing the Roasted Red Peppers
First, preheat your oven to 400°F (200°C). This heat brings out the sweet flavors in the peppers. Next, take the large red bell peppers and cut them in half. Remove the seeds and stems. Place them cut-side down on a baking sheet lined with parchment paper. Roast the peppers for about 25-30 minutes. You want the skins to blister and blacken.
Once they are roasted, take them out and cover them with aluminum foil for about 10 minutes. This step steams the peppers, making the skin easy to peel off. After steaming, carefully remove the skins and chop the peppers into smaller pieces.
Cooking the Soup Base
In a large pot, heat one tablespoon of olive oil over medium heat. Add one chopped onion to the pot. Sauté the onion for about 5 minutes until it becomes soft and translucent. This adds a nice flavor base for your soup.
Next, stir in three minced garlic cloves and one teaspoon of smoked paprika. Sauté these for another minute. You will love the aroma that fills your kitchen!
Blending and Finalizing the Soup
Now, add the chopped roasted red peppers to the pot. Pour in two cups of vegetable broth. Bring everything to a boil, then reduce the heat and let it simmer for about 10 minutes. This step allows the flavors to blend well.
Using an immersion blender, blend the soup until it is smooth and creamy. If you don’t have one, you can use a countertop blender but do this in batches. After blending, stir in one cup of heavy cream. Season with salt and black pepper to taste. Heat the soup on low for another 5 minutes, making sure it doesn’t boil.
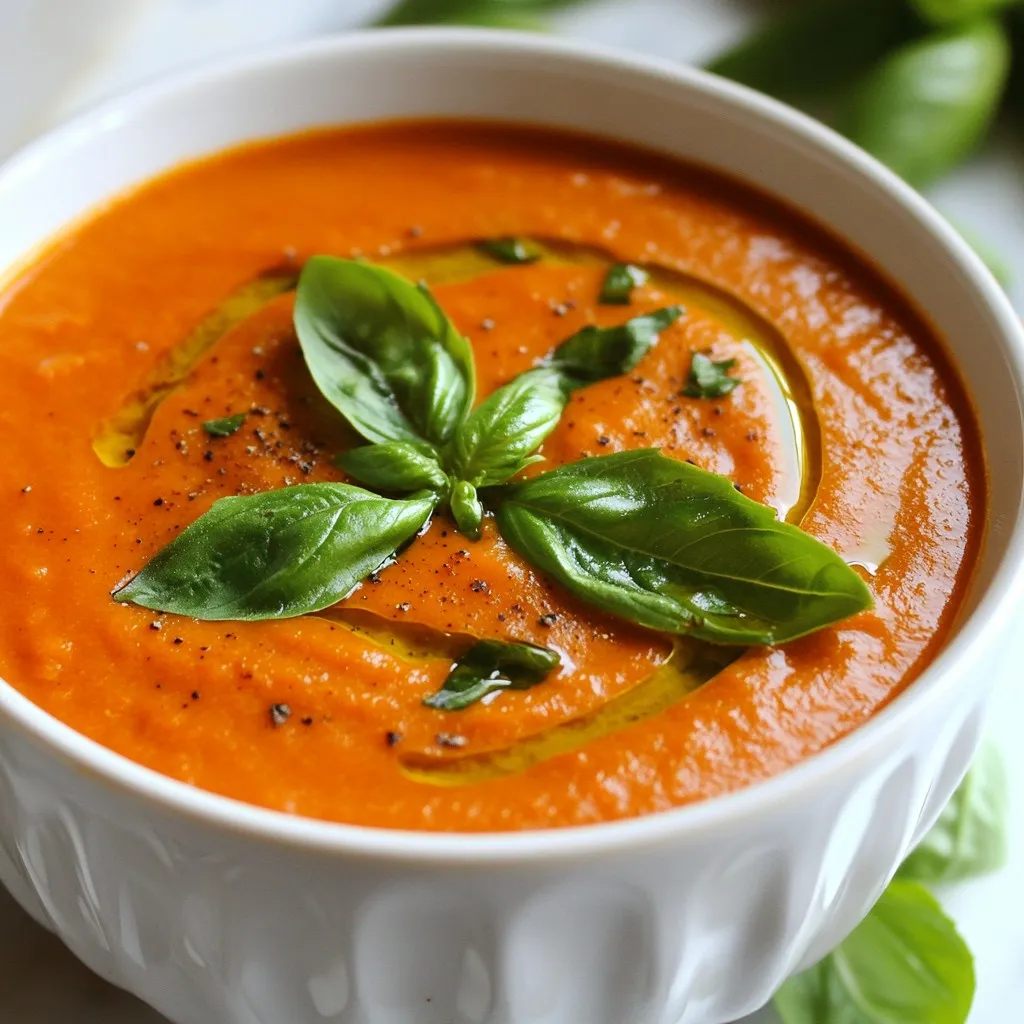
Now you are ready to enjoy a bowl of creamy roasted red pepper soup!
Tips & Tricks
Perfecting the Roasting Process
Roasting the red peppers well is key for great flavor. Set your oven to 400°F (200°C). Cut the peppers in half and place them cut-side down on a baking sheet. Roast them for 25-30 minutes until the skins blister and blacken. This will give the soup a deep, rich taste.
To make peeling easier, cover the roasted peppers with aluminum foil for 10 minutes. This steaming step helps the skin come off smoothly. When you peel them, be gentle. You want all that sweet, roasted flesh intact for your soup.
Blending Techniques
You can use either an immersion blender or a countertop blender. An immersion blender is great for blending right in the pot. It saves time and cuts down on cleanup. Just blend until smooth and creamy.
If you use a countertop blender, let the soup cool slightly first. Blend in batches if needed. Always hold the lid down tightly. Hot soup can splatter, so be careful.
Flavor Enhancements
To make your soup even tastier, think about adding spices and herbs. Smoked paprika gives a nice, warm taste. You might also try a pinch of cumin for some earthiness.
Fresh herbs like basil or parsley can brighten the flavor. Just stir them in right before serving. This adds a fresh twist and makes your soup look beautiful.
Pro Tips
- Choosing Peppers: Opt for ripe, vibrant red bell peppers for the best flavor and sweetness in your soup.
- Peeling Peppers: Steaming the roasted peppers in foil helps the skin come off easily. Make sure to let them steam for at least 10 minutes.
- Blending Options: For an ultra-smooth texture, use a high-speed blender. If using an immersion blender, make sure to blend thoroughly to avoid chunks.
- Seasoning to Taste: Adjust the seasoning at the end of cooking. Start with a little salt and pepper, and add more if needed for the perfect balance.
Variations
Dairy-Free Options
You can make a creamy roasted red pepper soup without dairy. Just swap the heavy cream with coconut cream. This gives the soup a rich texture and a slight sweetness. Coconut cream blends well with the smoky flavor of the roasted peppers. Plus, it keeps your soup creamy and delicious while making it friendly for those who avoid dairy.
Adding Proteins
If you want to make your soup even heartier, consider adding proteins. You can stir in some cooked beans, like cannellini or chickpeas. They add a nice texture and boost the nutrition. If you prefer meat, shredded chicken works great too. Just add it to the pot when you mix in the roasted peppers. This way, you have a filling meal that keeps you satisfied.
Flavor Twists
To change up the taste, try adding spices or herbs. A hint of cumin gives a warm, earthy flavor. You can also mix in fresh herbs like thyme or oregano for a burst of freshness. This can make your soup feel new with every batch. Feel free to experiment with flavors and find your perfect twist!
Storage Info
Refrigeration Guidelines
After you make this creamy roasted red pepper soup, let it cool. Pour it into airtight containers. This keeps the soup fresh and tasty. Store it in your fridge for up to five days. Make sure to seal the containers tightly. This way, the soup does not absorb other smells from the fridge.
Freezing the Soup
If you want to keep the soup longer, freezing is a great choice. First, let the soup cool completely. Then, pour it into freezer-safe containers. Leave some space at the top because the soup may expand when frozen. You can also use freezer bags for easy storage. To reheat, thaw the soup overnight in the fridge. Heat it gently on the stove. Stir often to keep it smooth and creamy.
Shelf Life
In the fridge, the creamy roasted red pepper soup lasts about five days. If you freeze it, you can enjoy it for up to three months. Just remember, the sooner you eat it, the better it tastes!
FAQs
Can I use canned roasted red peppers?
Yes, you can use canned roasted red peppers. They save time and effort. Look for high-quality brands for the best taste. Drain and rinse them before using. This option works well if you want to skip the roasting step. Just remember, the flavor may be less intense than fresh roasted peppers.
How can I thicken the soup if it’s too thin?
If your soup is too thin, there are a few ways to thicken it. You can add more heavy cream or use a cornstarch slurry. Simply mix one tablespoon of cornstarch with two tablespoons of cold water. Stir this into the soup and heat until it thickens. Another option is to blend in some cooked potatoes or white beans for added creaminess.
What can I serve with creamy roasted red pepper soup?
This soup pairs well with many sides. Consider serving it with crusty bread for dipping. A simple green salad also complements the flavors nicely. Grilled cheese sandwiches are a classic choice, too. For a fun twist, serve it with a dollop of pesto or a sprinkle of feta cheese.
Is this soup suitable for meal prep?
Yes, this soup is great for meal prep. You can make it ahead of time and store it in the fridge. It stays fresh for about four days. For longer storage, freeze the soup in airtight containers. When ready to eat, simply reheat it on the stove or in the microwave. Enjoy it throughout the week!
You learned how to make a creamy roasted red pepper soup with simple steps and tasty flavors. We discussed the key ingredients, cooking methods, and helpful tips to enhance your soup. Remember, you can customize it with different spices or proteins for variety. Store leftovers properly to enjoy this dish later. With this knowledge, you can create a delicious bowl of soup anytime you want. Enjoy your cooking and the warm comfort of this dis
Creamy Roasted Red Pepper Soup
Ingredients
- 4 large red bell peppers, roasted and peeled
- 1 medium onion, chopped
- 3 cloves garlic, minced
- 2 cups vegetable broth
- 1 cup heavy cream (or coconut cream for a dairy-free option)
- 1 tablespoon olive oil
- 1 teaspoon smoked paprika
- to taste Salt and black pepper
- for garnish Fresh basil leaves
Instructions
- Begin by preheating your oven to 400°F (200°C). Cut the red bell peppers in half, remove the seeds and stems, and place them cut-side down on a baking sheet lined with parchment paper. Roast the peppers in the oven for about 25-30 minutes, or until the skins are blistered and blackened.
- Once roasted, remove the peppers from the oven and cover them with aluminum foil for about 10 minutes. This steams the peppers, making it easier to peel off the skin. After steaming, carefully remove the skins, and chop the peppers.
- In a large pot, heat the olive oil over medium heat. Add the chopped onion and sauté for about 5 minutes until the onion becomes soft and translucent.
- Stir in the minced garlic and smoked paprika, sautéing for another minute until fragrant.
- Add the chopped roasted red peppers to the pot, followed by the vegetable broth. Bring the mixture to a boil, then reduce the heat and let it simmer for about 10 minutes.
- Using an immersion blender (or a countertop blender, in batches), blend the soup until smooth and creamy.
- Stir in the heavy cream and season with salt and black pepper to taste. Heat the soup for another 5 minutes on low heat, ensuring it doesn't boil.
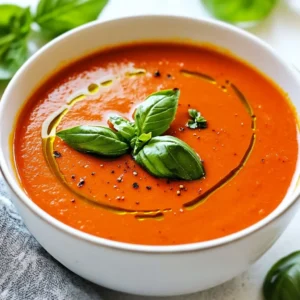
- Serve the soup hot, garnished with fresh basil leaves for a pop of color and flavor.


. To start, grab a large mixing bowl. Open the can of black beans, rinse, and drain them. Use a fork or potato masher to mash the beans. Aim for a mostly smooth texture but leave some chunks for bite. Next, add the cooked quinoa, breadcrumbs, and chopped red onion. Toss in the finely chopped bell pepper, minced garlic, and spices: chili powder, cumin, smoked paprika, salt, and pepper. Finally, squeeze in the lime juice. Mix everything until it feels well combined. If the mixture is too wet, sprinkle in more breadcrumbs until it can hold its shape. Once your mixture is ready, divide it into four equal parts. Shape each part into a patty that is about one inch thick. Heat olive oil in a non-stick skillet over medium heat. When the oil is hot, carefully place the patties in the skillet. Cook each side for about 4-5 minutes. Look for a golden brown color and ensure they are heated through. This step gives the burgers a nice crispy edge. Now it's time to serve your spicy black bean burgers! Place each patty on a hamburger bun. Top with your favorite ingredients, like avocado slices, lettuce, tomato, and spicy mayo. For a beautiful plate, pair the burgers with sweet potato fries or a mixed greens salad. The colors will look great together and make your meal even more appetizing. For the full recipe, check the details above. To get the best texture, mash your black beans well. Leave some chunks for that hearty bite. Add cooked quinoa to bind everything together. Use breadcrumbs or oat flour for a firmer patty. If the mix feels too wet, just add more breadcrumbs. This helps the burgers hold their shape. Want more heat? Try adding chopped jalapeños or a dash of cayenne pepper. You can also mix in some hot sauce or sriracha for an extra kick. Don’t forget to taste as you go! Adjust the spices until you get the flavor you want. Fresh herbs like cilantro can brighten up the taste too. Store cooked burgers in an airtight container. They will stay fresh for about three days in the fridge. To reheat, use the skillet on medium heat. Cook for about three minutes on each side. You can also microwave them for a quicker option; just cover them to keep moisture. If you want longer storage, freeze the uncooked patties. They’ll last up to three months in the freezer. Enjoy them anytime with the full recipe! {{image_2}} You can swap black beans for other beans. Chickpeas or kidney beans work well. Each bean brings a unique flavor and texture. For example, chickpeas add a nutty taste. Kidney beans give a softer bite. Just mash them like you do with black beans. Follow the same recipe steps for great results. Want more nutrition? Add grains or veggies to your burger mix. Cooked brown rice or farro can boost fiber. You can also mix in grated carrots or zucchini. These add moisture and flavor. Just remember to squeeze out excess water from veggies. This keeps your burger from getting too wet. Experimenting with spices can change your burger game. Try adding smoked chipotle for heat. Or mix in fresh herbs like cilantro or parsley. For a Mediterranean twist, add oregano and feta cheese. These spices and herbs change the flavor and make it exciting. Don't be afraid to get creative with what you have! For the full recipe, check out the detailed steps above. To keep your cooked spicy black bean burgers fresh, let them cool first. Place them in an airtight container. Store them in the fridge for up to three days. This helps maintain their flavor and texture. Freezing your burgers is a great option for meal prep. After they cool, wrap each burger in plastic wrap. Then, place them in a freezer-safe bag. They can last up to three months in the freezer. When you’re ready to eat, just thaw them in the fridge overnight. Use glass or BPA-free plastic containers for best results. These containers seal tightly and prevent air from entering. This keeps your burgers from drying out. If you’re freezing, look for heavy-duty freezer bags. They help protect against freezer burn. To make your Spicy Black Bean Burgers stick, you need the right balance. Start by mashing the black beans well. Leave some chunks for texture. Mix in breadcrumbs or oat flour. This helps hold the burgers together. If the mix feels too wet, add more breadcrumbs. You want a moldable consistency. This simple trick ensures your burgers stay intact while cooking. You can serve many tasty sides with Spicy Black Bean Burgers. Here are some great options: - Sweet potato fries - Mixed greens salad - Coleslaw - Grilled vegetables - Corn on the cob These sides add color and flavor to your meal. They also complement the burgers well. Feel free to mix and match to find what you like best! Yes, you can bake black bean burgers! Baking is a healthier option. Preheat your oven to 375°F (190°C). Line a baking sheet with parchment paper. Place the shaped patties on it. Bake for about 20-25 minutes. Flip them halfway for even cooking. You’ll still get a nice texture without frying. This method works well and keeps the burgers light! To sum up, we explored how to make tasty spicy black bean burgers. We looked at key ingredients, cooking steps, and tips for the perfect texture. You can try fun variations and learn how to store leftovers. These burgers are easy to tweak for your tastes. They are delicious and healthy. Enjoy making them your own, and share with friends!](https://dailydishly.com/wp-content/uploads/2025/06/bb742c5e-0c76-419c-af3f-f1da08f0abd3-768x768.webp)