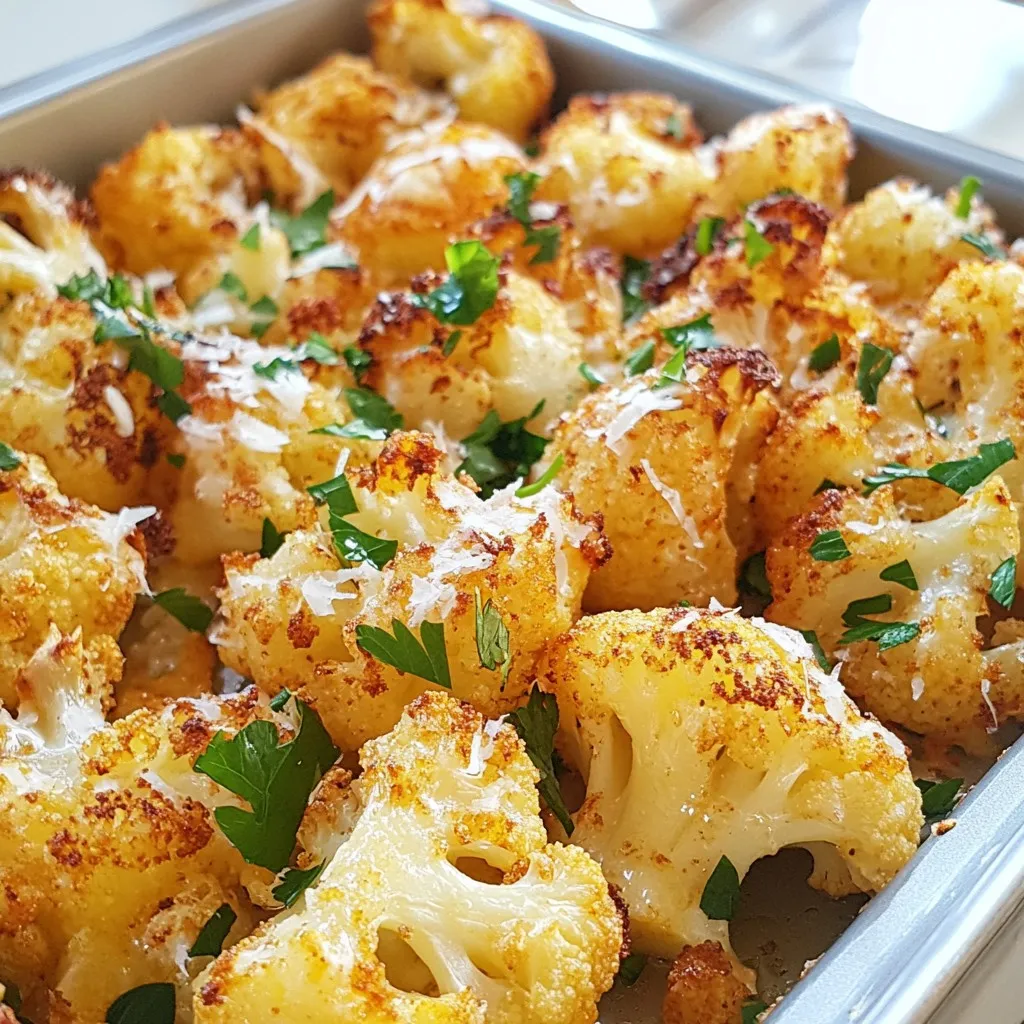
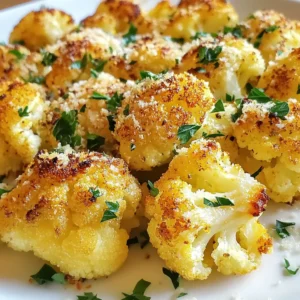
Roast Garlic Parmesan Cauliflower Simple Flavor Boost

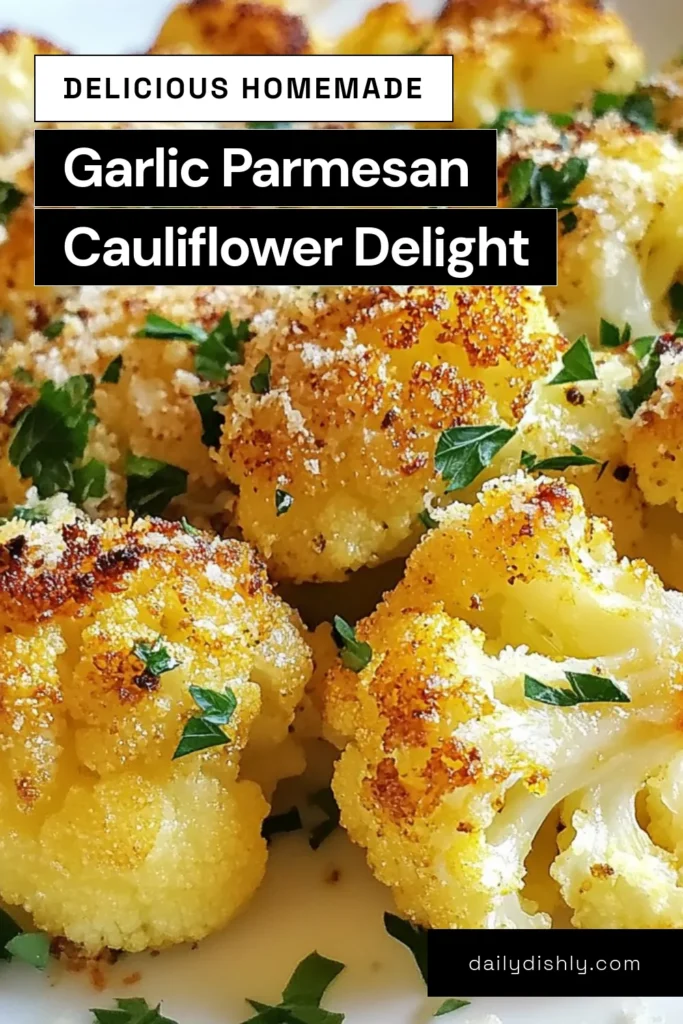
If you’re ready to elevate your vegetable game, let’s dive into Roast Garlic Parmesan Cauliflower! This simple dish packs a punch of flavor and is super easy to make. I’ll share the key ingredients, step-by-step instructions, and tips to get the perfect roast. Whether you’re a veggie lover or just looking to spice up your meals, this recipe is sure to impress. Get excited to discover a new favorite side dish!
Why I Love This Recipe
- Delicious Flavor Combination: The roasted garlic and Parmesan create a rich, savory taste that elevates the humble cauliflower to a gourmet level.
- Simple Preparation: With just a few ingredients and minimal prep time, this dish is easy to make, perfect for busy weeknights.
- Healthy and Nutritious: Cauliflower is a low-calorie vegetable packed with vitamins and minerals, making this dish a guilt-free indulgence.
- Versatile Side Dish: This roasted cauliflower pairs well with a variety of main courses, from grilled meats to vegetarian dishes.
Ingredients
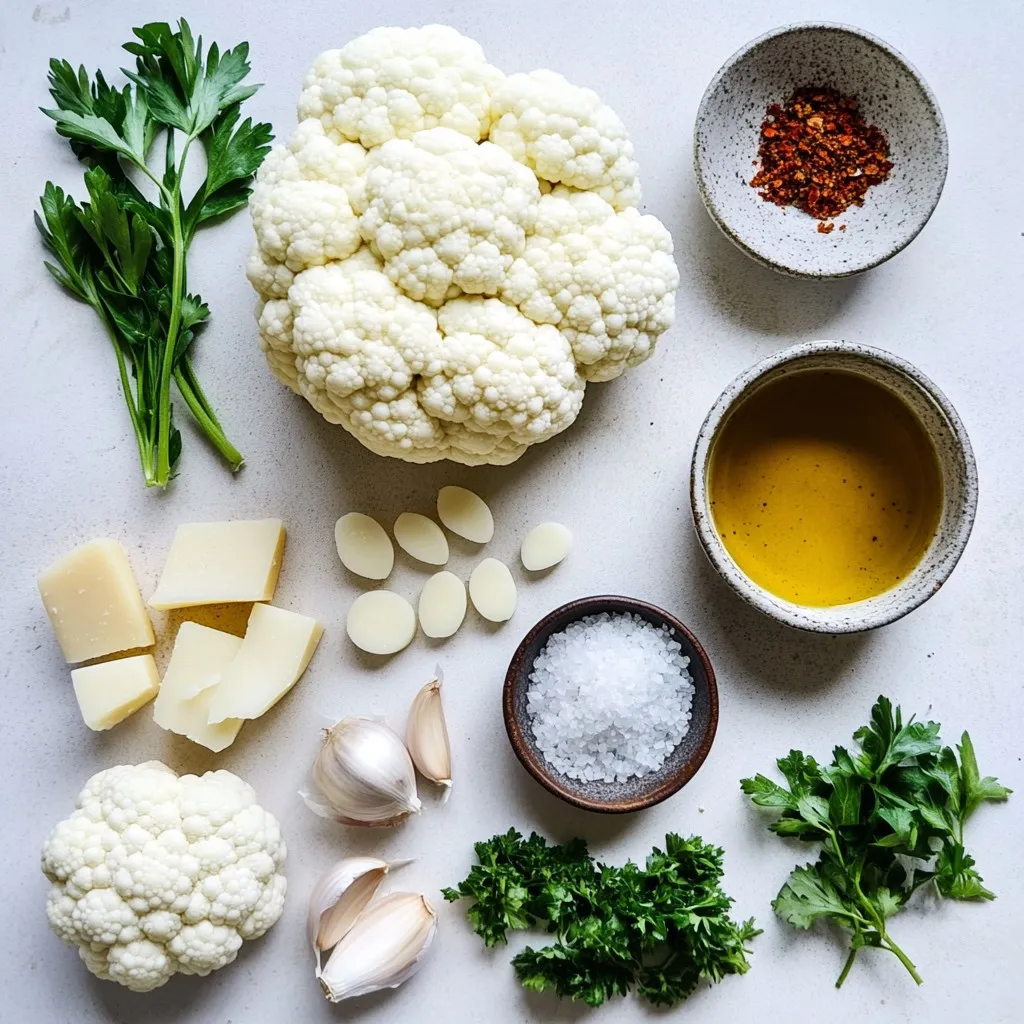
List of Ingredients
– 1 large head of cauliflower, cut into florets
– 4 cloves garlic, minced
– 1/4 cup olive oil
– 1/2 cup grated Parmesan cheese
– 1 teaspoon onion powder
– 1 teaspoon smoked paprika
– Salt and black pepper to taste
– Fresh parsley, chopped (for garnish)
Measurement Tips
When measuring ingredients, use measuring cups for liquids and dry ingredients. For solids like cheese or garlic, a scale gives more accuracy. If you want a stronger garlic taste, add an extra clove or two. Use a light hand with salt and pepper. You can always add more later.
Ingredient Substitutions
If you don’t have Parmesan, try Pecorino Romano or nutritional yeast for a vegan twist. You can swap olive oil for avocado oil or melted butter. For a kick, you might add cayenne pepper instead of smoked paprika. If you are short on fresh garlic, use garlic powder, but fresh has more flavor.
Step-by-Step Instructions
Preheat Oven and Prepare Baking Sheet
First, preheat your oven to 425°F (220°C). This step helps cook the cauliflower evenly. While the oven heats, line a baking sheet with parchment paper. This makes cleanup easy and helps prevent sticking.
Make the Marinade
In a large mixing bowl, combine four minced garlic cloves, a quarter cup of olive oil, one teaspoon of onion powder, and one teaspoon of smoked paprika. Add salt and black pepper to taste. Stir it all well to form a smooth marinade. This mix gives the cauliflower a rich flavor.
Coat the Cauliflower Florets
Next, take your large head of cauliflower and cut it into florets. Add these florets to the bowl with the marinade. Toss them well until each piece is coated. This ensures every bite is full of flavor.
Roast the Cauliflower
Now, spread the coated cauliflower florets in a single layer on your prepared baking sheet. Roast them in the oven for about 25 minutes. Remember to stir halfway through. This helps them cook evenly and turn golden brown.
Add Parmesan and Finish Roasting
After 25 minutes, take the baking sheet out of the oven. Sprinkle half a cup of grated Parmesan cheese over the hot cauliflower. Return it to the oven for another five minutes. This melts the cheese and adds a tasty, bubbly finish. Finally, garnish with freshly chopped parsley for a bright touch before serving.
Tips & Tricks
Achieving Perfect Roast Texture
To get that perfect roast, start with fresh cauliflower. Look for a large head with tight florets. Cut the florets into even pieces. This helps them cook evenly. Spread them out on the sheet. Don’t crowd the pan. Air needs to flow around the florets. Stir them halfway through roasting. This ensures they brown nicely.
Best Practices for Flavor Enhancement
Use fresh garlic for a bold taste. Mince it finely to release its oils. The olive oil helps the garlic spread its flavor. Don’t skip the onion powder and smoked paprika. They add depth and warmth. Feel free to adjust the salt and pepper to your liking. A touch of lemon juice can brighten the dish even more.
Serving Suggestions
Serve this dish as a side or a main meal. It pairs well with grilled chicken or fish. You can also toss it with pasta for a hearty dish. Adding a sprinkle of fresh parsley not only looks nice but adds freshness. Enjoy it warm for the best flavor.
Pro Tips
- Use Fresh Garlic: Fresh garlic will provide a more robust flavor compared to pre-minced garlic. Consider using whole cloves if you want a milder taste.
- Experiment with Cheese: For a different flavor profile, try substituting the Parmesan with Pecorino Romano or a dairy-free cheese alternative.
- Adjust Cooking Time: Depending on your oven and the size of the florets, you may need to adjust the cooking time to achieve your desired level of crispiness.
- Make it a Meal: Add cooked quinoa or chickpeas to the roasted cauliflower for a hearty side dish or main course.
Variations
Alternative Cheeses to Use
You can switch up the cheese in this dish. Try using sharp cheddar for a bold taste. Feta adds a nice tang, while mozzarella gives a creamy texture. For a dairy-free option, use nutritional yeast. It brings a cheesy flavor without the dairy.
Adding Vegetables or Proteins
Feel free to mix in other veggies. Broccoli or Brussels sprouts work well with cauliflower. You can toss in sliced bell peppers for color. If you want protein, consider adding chickpeas or diced chicken. This makes the dish more filling and fun.
Spicy Version Ideas
If you like heat, add some red pepper flakes to the marinade. You can also mix in diced jalapeños for a kick. For a smoky flavor, try chipotle powder. This will elevate the taste and give it a nice zing.
Storage Info
Refrigeration Guidelines
Store leftover Roast Garlic Parmesan Cauliflower in an airtight container. Keep it in the fridge. It stays fresh for up to four days. When you want to eat it, just take it out and enjoy. You can also sprinkle a bit of fresh parsley on top for extra flavor.
Freezing Roasted Cauliflower
If you want to save some for later, freezing is a great option. Let the cauliflower cool completely before packing it. Use a freezer-safe bag or container. It can last for about three months in the freezer. When you’re ready to eat it, thaw it in the fridge overnight before reheating.
Reheating Tips
To warm up your cauliflower, you have a few options. You can use the oven, microwave, or skillet. For the oven, preheat it to 350°F. Place the cauliflower on a baking sheet for about 10-15 minutes. If using a microwave, heat it in short bursts. Stir between each burst to avoid overcooking. In a skillet, just add a splash of olive oil and heat over medium. This keeps the flavors fresh and tasty.
FAQs
Can I use frozen cauliflower for this recipe?
Yes, you can use frozen cauliflower. It works well in this dish. Just thaw it first. Pat it dry to remove extra moisture. This helps the cauliflower roast better. You may need to adjust the cooking time. Check for tenderness and browning.
How can I make this recipe vegan?
To make this recipe vegan, simply skip the cheese. You can use nutritional yeast instead. It adds a cheesy flavor without dairy. Another option is to use a vegan cheese substitute. Adjust the cooking time to ensure all ingredients blend well.
What else can I use roasted cauliflower for?
Roasted cauliflower is very versatile. You can add it to salads for extra crunch. It also works well in wraps or tacos. Try mixing it into pasta dishes for added flavor. You can even use it as a pizza topping.
Roasting cauliflower is simple and fun with just a few key steps. We explored the ingredients needed, from marinades to alternatives. The step-by-step guide helps you achieve the best roast. Tips ensure great texture and flavor, while variations let you get creative. Storing leftover cauliflower is easy too! With these insights, you can enjoy delicious roasted cauliflower any time, whether you’re cooking for yourself or guests. Embrace the joy of cooking and make it your ow
Roast Garlic Parmesan Cauliflower
Ingredients
- 1 large head cauliflower, cut into florets
- 4 cloves garlic, minced
- 1 cup olive oil
- 1 2 grated Parmesan cheese
- 1 teaspoon onion powder
- 1 teaspoon smoked paprika
- to taste Salt and black pepper
- for garnish Fresh parsley, chopped
Instructions
- Preheat your oven to 425°F (220°C) and line a baking sheet with parchment paper.
- In a large mixing bowl, combine the minced garlic, olive oil, onion powder, smoked paprika, salt, and black pepper. Stir well to form a marinade.
- Add the cauliflower florets to the bowl and toss them in the marinade until evenly coated.
- Spread the cauliflower in a single layer on the prepared baking sheet.
- Roast in the oven for about 25 minutes, stirring halfway through, until the cauliflower is tender and golden brown.
- Remove the baking sheet from the oven and sprinkle the grated Parmesan cheese evenly over the hot cauliflower.
- Return to the oven for an additional 5 minutes, until the cheese is melted and bubbly.
- Once done, garnish with freshly chopped parsley for a pop of color and flavor before serving.
![- 2 pounds chicken wings - 1/2 cup honey - 1/4 cup low-sodium soy sauce - 3 tablespoons minced garlic - 1 tablespoon fresh ginger, grated - 1 tablespoon rice vinegar - 1 teaspoon sesame oil - 1/2 teaspoon black pepper - 1 tablespoon cornstarch (optional for thickening) - 2 tablespoons green onions (for garnish) - Sesame seeds (for garnish) Let's dive into why these ingredients make Honey Garlic Chicken Wings so special. First, the chicken wings give a great base. They are juicy and perfect for absorbing flavors. Next, honey adds sweetness and a sticky texture. It caramelizes beautifully when cooked. The low-sodium soy sauce brings a savory taste that balances the honey. This mix creates a flavor that will make your taste buds dance. Now, let's talk about the flavor enhancers. Minced garlic gives a strong, aromatic kick. Fresh ginger adds warmth and depth. Rice vinegar brightens the sauce, cutting through the sweetness. Together, they create a rich, well-rounded flavor profile. For the additional ingredients, sesame oil adds a nutty note. Black pepper gives a subtle heat. If you want a thicker sauce, cornstarch can help. Finally, the green onions and sesame seeds make a lovely garnish. They add color and a fresh crunch. You can find the full recipe here, and you'll see how easy it is to make these tasty wings. - Preheat the oven to 400°F (200°C). - Rinse and dry the chicken wings thoroughly. This helps them get crispy. - In a bowl, whisk together: - 1/2 cup honey - 1/4 cup soy sauce - 3 tablespoons minced garlic - 1 tablespoon fresh ginger, grated - 1 tablespoon rice vinegar - 1 teaspoon sesame oil - 1/2 teaspoon black pepper - Optionally, add 1 tablespoon of cornstarch for thickening. - Place the wings in a bowl, then pour the marinade over them. - Make sure each wing is fully coated. Cover and refrigerate for 30 minutes to 2 hours. - Arrange wings on a wire rack over a baking sheet. Bake for 25-30 minutes, flipping halfway. - In the last 5 minutes, pour remaining marinade into a saucepan. Heat it until boiling, then simmer for 3-5 minutes until thickened. - Brush the baked wings with the glaze for extra flavor. - Garnish with chopped green onions and sesame seeds before serving. Enjoy your sticky honey garlic chicken wings! For the full recipe, see above. - Choose the right type of chicken wings: Look for fresh or frozen wings that are meaty and plump. Split wings or whole wings work well. Both have their charm. - Importance of drying wings for crispness: After rinsing, pat the wings dry with paper towels. This helps them get crispy when cooked. Moisture is the enemy of crispiness. - Marination time tips for optimal taste: Marinate your wings for at least 30 minutes. For the best flavor, aim for 2 hours. This allows the honey garlic mix to soak in well. - How to balance sweetness and savoriness in the sauce: Use the right amount of soy sauce and honey. A half-cup of honey balances with a quarter-cup of soy sauce. This mix gives you both sweet and salty. - Alternative cooking methods: You can grill or fry the wings. Grilling gives a nice smokey flavor. Frying makes them extra crispy. Both options are tasty. - Tips for monitoring doneness and crispiness: Use a meat thermometer for doneness. The wings should reach 165°F. Keep an eye on the color. They should be golden brown and crispy. For the full recipe, check out the [Full Recipe]. {{image_2}} You can easily change up the taste of your honey garlic chicken wings. One option is to add chili flakes for a spicy kick. This addition pairs well with the sweet honey. If you want an Asian twist, add some sesame oil and chopped green onions. These flavors make the wings even more special and delicious. You can cook wings in different ways. Oven-baking is a popular method. It gives the wings a nice crispness. You can also use an air fryer. This method cooks wings faster while keeping them juicy. For an easier prep, try slow cooking. Just set it and forget it while the flavors blend together. When serving these wings, think about side dishes. Coleslaw adds a crunchy texture. Potato wedges are another great choice for a hearty meal. For dipping, offer a variety of sauces. Ranch or blue cheese can balance the sweetness of the wings. You can find the full recipe for these tasty wings [Full Recipe]. After you enjoy your honey garlic chicken wings, store any leftovers. First, let them cool to room temperature. This helps keep them fresh. Use an airtight container for storage. These containers keep air out and prevent the wings from drying. You can refrigerate cooked wings for up to three days. If you want them to last longer, freezing is a great option. To reheat your wings, you want them crispy again. The oven is the best method for this. Preheat your oven to 375°F (190°C). Place the wings on a baking sheet lined with foil. Heat them for about 10-15 minutes, flipping halfway through. This helps them crisp up nicely. If you are in a hurry, you can use the microwave. But be careful; it may make them a bit soggy. Heat them in a microwave-safe dish for 1-2 minutes. Check them often to avoid overcooking. You can freeze both raw and cooked chicken wings. If freezing raw wings, keep them in their original packaging. Wrap them well in plastic wrap or foil. This helps prevent freezer burn. You can store them this way for up to six months. For cooked wings, let them cool first. Place them in an airtight container or freezer bag. You can freeze cooked wings for up to three months. When you are ready to eat, just thaw them in the fridge overnight before reheating. For the full recipe, check out the Sticky Honey Garlic Chicken Wings. Honey garlic chicken wings are not spicy. They have a sweet and savory flavor. However, you can add heat if you like spice. Just stir in some red pepper flakes or a dash of hot sauce into the marinade. Start with a small amount. You can always add more heat later. Yes, you can use frozen chicken wings. Make sure to thaw them before cooking. To thaw, place the wings in the fridge overnight. If you're short on time, you can use the cold water method. Seal the wings in a bag and submerge them in cold water for about an hour. Once thawed, follow the recipe as normal. Check the internal temperature of the wings. They should reach 165°F (74°C). You can use a meat thermometer for this. Look for a nice golden brown color on the outside. The juices should run clear when you cut into them. If they're still pink, they need more time. These wings pair well with several side dishes. Consider serving coleslaw for crunch and freshness. Potato wedges also work great. You can try a simple salad for balance. If you want something fun, serve with crispy onion rings. Each of these sides adds a tasty touch to your meal. Yes, you can bake the wings in advance. Cook them, then let them cool completely. Store them in an airtight container in the fridge. To reheat, place them on a baking sheet. Bake at 350°F (175°C) for about 10-15 minutes. This keeps them crispy and tasty. For the best flavor, brush them with extra glaze before serving. For the full recipe, check out the sticky honey garlic chicken wings section. This blog post detailed how to make Honey Garlic Chicken Wings from start to finish. You learned about the key ingredients and steps needed to create the perfect marinade. I also shared tips to enhance flavor and achieve that ideal crispiness. Remember, you can easily alter recipes to suit your taste. Serve these wings with your favorite sides for a complete meal. Enjoy the process and have fun experimenting with different flavors!](https://dailydishly.com/wp-content/uploads/2025/06/2feb3bb2-4133-459b-bb32-a04192496237-768x768.webp)