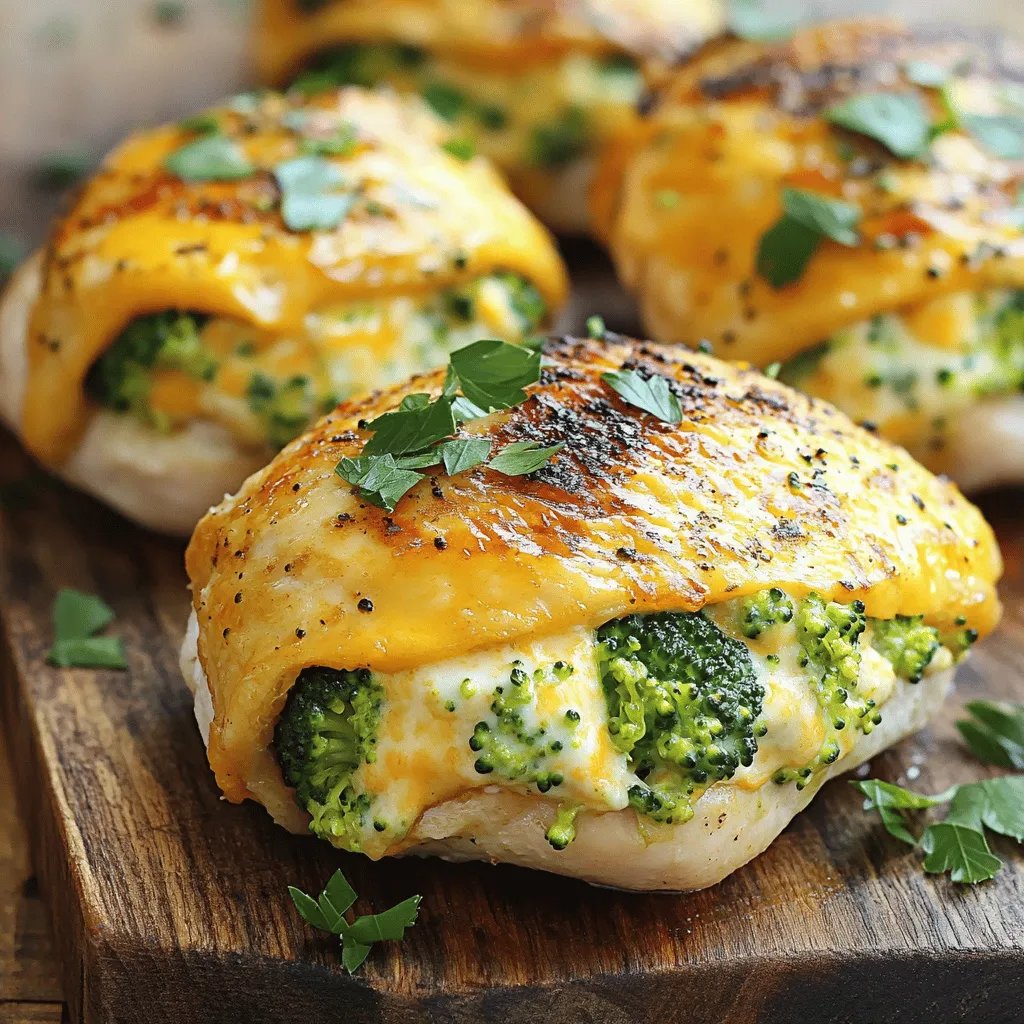
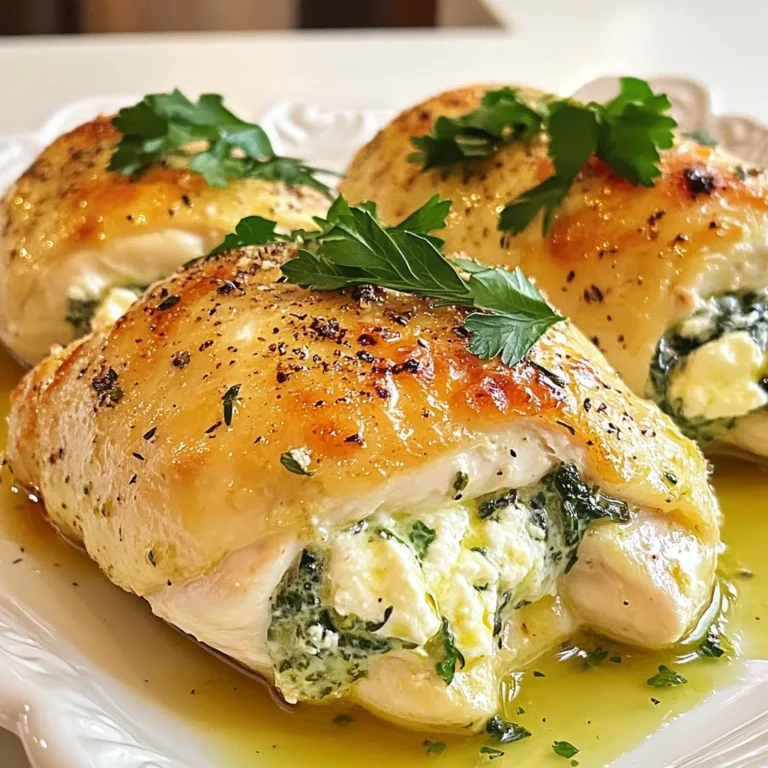
Broccoli Cheddar Stuffed Chicken Flavorful Dinner Recipe

If you’re looking for a tasty dinner that’s easy to make, try my Broccoli Cheddar Stuffed Chicken. This dish combines juicy chicken breasts with creamy broccoli and sharp cheddar cheese. It’s perfect for impressing your family or guests. I’ll guide you through every step and even share tips to make your meal shine. Get ready to enjoy a flavorful dinner that’s both comforting and nutritious!
Ingredients
Main ingredients for Broccoli Cheddar Stuffed Chicken
To make this tasty dish, you need a few key ingredients:
– 4 boneless, skinless chicken breasts
– 1 cup broccoli florets, steamed and chopped
– 1 cup sharp cheddar cheese, shredded
– 1/2 cup cream cheese, softened
– 1/4 teaspoon garlic powder
– 1/4 teaspoon onion powder
– Salt and pepper to taste
– 1/2 cup breadcrumbs
– 2 tablespoons olive oil
– Fresh parsley for garnish (optional)
These simple ingredients come together to create a rich and cheesy filling. The broccoli adds a nice crunch and color.
Optional ingredients for added flavor
You can enhance the dish with a few optional ingredients:
– 1 teaspoon Dijon mustard for a tangy taste
– 1/4 teaspoon smoked paprika for a smokier flavor
– 1/4 cup grated Parmesan cheese for extra creaminess
These ingredients can help you customize the dish to your liking. Feel free to play around with these options!
Notes on ingredient substitutions
If you don’t have all the ingredients, here are some smart swaps:
– Use frozen broccoli instead of fresh. Just thaw and chop it.
– Swap cream cheese for Greek yogurt for a lighter option.
– Replace sharp cheddar with any cheese you enjoy, like mozzarella or gouda.
These substitutions can help you make this dish even if you’re low on certain ingredients. Enjoy experimenting!
Step-by-Step Instructions
Preparation of chicken breasts
First, you need to prep the chicken breasts. Start by rinsing them under cool water. Pat them dry with a paper towel. Next, carefully slice a pocket into each breast. You want to cut deep, but not all the way through. This pocket will hold the yummy filling.
How to create the stuffing mixture
Now, let’s make the stuffing. In a mixing bowl, combine the steamed broccoli, sharp cheddar cheese, cream cheese, garlic powder, onion powder, salt, and pepper. Use a fork or spatula to mix everything well. You want a creamy and cheesy filling. Make sure the broccoli is chopped small so it fits nicely in the chicken.
Baking and serving tips
You’re almost ready to bake! Preheat your oven to 375°F (190°C). Take the stuffed chicken and dip it in olive oil. Then coat it with breadcrumbs. This gives it a nice crunch. Place the chicken in a baking dish and drizzle any leftover olive oil on top. Bake for about 25-30 minutes. The chicken should be cooked through and reach 165°F (75°C). After baking, let it rest for 5 minutes before slicing. Garnish with fresh parsley if you like. Serve warm and enjoy your meal!
Tips & Tricks
Best practices for cooking chicken
To cook chicken well, start with good quality meat. Look for fresh, boneless, skinless chicken breasts. Always make sure your chicken is at room temperature before cooking. This helps it cook evenly. Season both sides with salt and pepper for better flavor. Use a meat thermometer to check for doneness. Aim for an internal temperature of 165°F (75°C) for safety.
How to achieve the perfect stuffing texture
For a great stuffing texture, blend your ingredients well. Mix steamed broccoli, sharp cheddar, and cream cheese until smooth. This gives you a creamy filling that holds together. If it feels too thick, add a splash of milk to loosen it. When you stuff the chicken, press gently. This helps the filling stay inside during cooking.
Common mistakes to avoid
One common mistake is overcooking the chicken. Keep an eye on the time and use a thermometer. Another mistake is not sealing the pocket well. If you don’t seal it, the filling will leak out. Lastly, don’t skip resting the chicken after baking. Letting it rest for five minutes helps keep it juicy.
Variations
Alternative cheeses for different flavors
You can switch up the cheese for fun. Try using mozzarella for a milder taste. Gouda adds a rich flavor, while pepper jack brings a nice kick. Each cheese changes the dish’s profile. Experiment and find your favorite.
Vegetarian options using tofu or mushrooms
If you want a meat-free meal, use tofu or mushrooms. Press and cube firm tofu, then mix it with the broccoli and cheese. For mushrooms, chop them finely and sauté before adding. Both options keep the dish tasty and filling.
Different seasonings and spices to enhance taste
Seasoning can make a big difference. Add paprika for a smoky flavor. Italian herbs like oregano or basil can also give it a fresh twist. For a spicy note, try red pepper flakes. These small changes can elevate your meal.
Storage Info
How to store leftovers properly
Store your leftover Broccoli Cheddar Stuffed Chicken in an airtight container. Place it in the fridge for up to three days. Make sure the chicken has cooled down before sealing the container. This keeps the chicken moist and fresh.
Reheating instructions for best results
To reheat, preheat your oven to 350°F (175°C). Place the chicken in an oven-safe dish. Cover it with foil to keep it from drying out. Heat for about 15-20 minutes, or until it’s warm throughout. You can also use a microwave. Heat in short bursts of 1-2 minutes, checking often.
Freezing tips and guidelines
You can freeze Broccoli Cheddar Stuffed Chicken for up to three months. Wrap each piece tightly in plastic wrap and then in foil. This helps prevent freezer burn. When you are ready to eat, thaw in the fridge overnight. Reheat as mentioned above to enjoy your tasty meal again.
FAQs
How long to cook Broccoli Cheddar Stuffed Chicken?
You should cook Broccoli Cheddar Stuffed Chicken for about 25 to 30 minutes. I recommend checking the chicken’s internal temperature. It should reach 165°F (75°C) to be safe. The cooking time can vary based on your oven and the size of the chicken breasts. Always use a meat thermometer for the best results.
Can I make this dish ahead of time?
Yes, you can make this dish ahead of time. You can prepare the stuffed chicken and store it in the fridge before baking. Cover it tightly with plastic wrap or foil. When you’re ready to bake, just add a few extra minutes to the cook time. This way, you can enjoy a tasty meal on a busy night without extra work.
What sides pair well with Broccoli Cheddar Stuffed Chicken?
There are many great sides to serve with this dish. Here are a few ideas:
– Garlic mashed potatoes
– Steamed green beans
– Roasted carrots
– A simple garden salad
– Quinoa or rice for a healthy touch
These sides balance the rich flavors of the chicken and add color to your plate. Enjoy your meal with a fresh side!
Broccoli Cheddar Stuffed Chicken is a delight. We covered its main and optional ingredients, plus substitutions. You learned step-by-step instructions for prep, stuffing, and baking. I shared tips for perfect chicken cooking and common mistakes to avoid. We explored tasty variations and important storage info for leftovers.
Now you can enjoy this dish any time. With practice, you’ll master it. Remember, a little creativity goes a long way in your kitchen. Happy cooking!

![- 1.5 lbs Brussels sprouts, trimmed and halved - 3 tablespoons maple syrup - 2 tablespoons olive oil - 1 teaspoon garlic powder - 1 teaspoon salt - ½ teaspoon black pepper - ½ cup pecans, roughly chopped (optional) - 1 tablespoon balsamic vinegar (optional) When I make maple roasted Brussels sprouts, I love using fresh, vibrant Brussels sprouts. They have a sweet, nutty taste that pairs perfectly with maple syrup. The maple syrup adds a lovely sweetness that balances the slight bitterness of the sprouts. Olive oil is essential here. It helps in roasting and gives a nice, rich flavor. Garlic powder adds depth, while salt and pepper enhance the natural taste. If you want some crunch, add pecans. They bring a great texture and flavor. I sometimes drizzle balsamic vinegar at the end for a tangy twist. - Baking sheet - Large mixing bowl - Measuring spoons - Knife and cutting board For this recipe, you need a few simple tools. A baking sheet helps with even roasting. A large mixing bowl makes it easy to combine everything. Measuring spoons ensure you get the right amounts. Finally, a knife and cutting board are needed to trim the Brussels sprouts. With these ingredients and tools, you're all set to create a delicious dish. You can check out the [Full Recipe] for step-by-step instructions. Enjoy your cooking adventure! - Preheat your oven to 400°F (200°C). - Trim and halve the Brussels sprouts. This helps them cook evenly and taste great. - In a large mixing bowl, mix Brussels sprouts with olive oil, maple syrup, garlic powder, salt, and pepper. Make sure every sprout gets a nice coat. This mixture adds sweetness and flavor. - Spread the sprouts in a single layer on a baking sheet. This step is key for good roasting. - Roast for 20-25 minutes, shaking the pan halfway. This helps them brown evenly. You want them golden and crispy on the edges. For extra crunch, sprinkle chopped pecans during the last five minutes. You can find the full recipe [here](#). To get crispy Brussels sprouts, spread them out on the baking sheet. Make sure they are in a single layer. This helps them roast evenly. Shake the pan halfway through cooking. This allows hot air to reach all sides. You can add balsamic vinegar for a bit of tang. It gives a nice balance to the sweetness of the maple. Garlic adds depth, too. You can also try spices like paprika or cayenne for extra heat. This way, you can customize the flavors to your taste. These Brussels sprouts go well with proteins like chicken or fish. They make a great side dish. You can also serve them as a healthy snack or appetizer. They are delicious warm or at room temperature. For more ideas, check out the Full Recipe. {{image_2}} You can easily make this dish nut-free. Just omit the pecans. The Brussels sprouts will still taste great with the maple syrup and spices. You won't miss the nuts at all! If you want a vegan version, you can keep it simple. Use maple syrup as your only sweetener. This recipe already has olive oil, so it’s vegan-friendly. Just make sure to check your balsamic vinegar for any added ingredients that aren’t vegan. Want to make your Brussels sprouts special for the season? Add some seasonal spices! A sprinkle of cinnamon or nutmeg gives a warm, festive touch. This twist makes your dish stand out and adds a new flavor layer. Try it next time for a fun change! For the full recipe, check out the [Full Recipe]. Store leftovers in an airtight container in the fridge. Make sure the sprouts cool down first. This keeps them fresh and tasty for your next meal. Reheat in the oven for best texture. Set the oven to 350°F (175°C) and warm for about 10 minutes. If you're in a hurry, you can use the microwave. Heat them for 1-2 minutes, checking often to avoid overcooking. These delicious Brussels sprouts last for up to 3 days in the fridge. If you freeze them, the texture can change, making them mushy. For the best quality, enjoy them fresh or stored in the fridge. Yes, but fresh is recommended for better texture. Frozen Brussels sprouts often lose their crunch. They may also release more water, making them less crispy. If you use frozen ones, be sure to thaw and drain them first. All ingredients are naturally gluten-free; ensure seasonings are free of gluten. Check labels on packaged items. Some sauces or spices may contain hidden gluten. Using fresh ingredients helps keep this dish safe for gluten-free diets. Honey or agave can be used as a replacement, though it will alter flavor. Maple syrup provides a unique taste that is hard to match. If you choose honey, use a little less, as it is sweeter. Agave has a milder flavor and can work well, too. This recipe shows you how to make tasty roasted Brussels sprouts. You need simple ingredients and basic tools. Preheat your oven, mix the sprouts, and roast them for a perfect dish. Remember to try different flavors and store any leftovers properly. These sprouts pair well with any meal or stand alone as a snack. Enjoy trying this recipe and make it your own! Happy cooking!](https://dailydishly.com/wp-content/uploads/2025/07/86ea6ed0-8750-4297-97a9-678adfd456c4-768x768.webp)