Crispy Sesame Chicken Irresistible Flavor Recipe
![- 1 lb boneless, skinless chicken thighs - 1/2 cup cornstarch - 1/4 teaspoon black pepper - 1 cup panko breadcrumbs - 1/4 cup sesame seeds - 1/4 cup soy sauce - 1/4 cup honey - 1 tablespoon apple cider vinegar - 1 teaspoon ginger paste - 1 garlic clove, minced - Green onions, finely sliced - Toasted sesame seeds To make crispy sesame chicken, gather all your ingredients first. This helps you stay organized and enjoy the cooking process. The chicken thighs offer a tender bite while the cornstarch provides that essential crunch. Panko breadcrumbs and sesame seeds create a delightful texture and nutty flavor. For the sauce, soy sauce and honey blend perfectly. Apple cider vinegar adds a hint of tang, while ginger and garlic bring warmth and depth. These simple ingredients make a sauce that truly elevates your dish. Don’t forget your garnishes! Finely sliced green onions and toasted sesame seeds add a pop of color and flavor. When you plate your dish, it not only looks great but also tastes amazing. This is the key to making crispy sesame chicken irresistible. For the detailed steps on how to combine these ingredients, check out the Full Recipe. To start, mix the dry ingredients. In a bowl, combine 1/2 cup cornstarch, 1/2 teaspoon salt, and 1/4 teaspoon black pepper. This mix will help the chicken get crispy. Next, bread the chicken. Take 1 lb of cut chicken thighs. Dip each piece into the cornstarch mix, then into a beaten large egg. Finally, coat each piece with a mix of 1 cup panko breadcrumbs and 1/4 cup sesame seeds. Make sure the coating is even. This step is key for that crunchy texture. Now, heat oil for frying. In a deep skillet, add enough vegetable oil to cover the chicken pieces. Heat it over medium-high heat. Once the oil is hot, fry the chicken in batches. Cook for about 5-7 minutes until each piece is golden brown and crispy. Drain the fried chicken on paper towels. This keeps it from getting soggy. For the sauce, grab a separate saucepan. Combine 1/4 cup soy sauce, 1/4 cup honey, 1 tablespoon apple cider vinegar, 1 teaspoon ginger paste, and a minced garlic clove. Heat the mixture over medium heat. Stir and bring it to a simmer for 3-4 minutes. This thickens your sauce and blends the flavors nicely. Once the chicken is fried, drizzle or toss the sauce over it. Make sure each piece is well-coated. Enjoy your crispy sesame chicken! For more details, check out the Full Recipe. To make your chicken crispy, use cornstarch and panko breadcrumbs. Cornstarch helps absorb moisture, while panko adds crunch. - Use 1/2 cup of cornstarch. - Mix it with 1/2 teaspoon salt and 1/4 teaspoon black pepper. - Coat each chicken piece well before frying. Frying temperature matters too. Heat your vegetable oil to medium-high. The right heat cooks the chicken fast and keeps it crispy. - Fry in small batches. - Cook each batch for about 5-7 minutes. - Drain on paper towels to remove excess oil. To boost flavor, adjust the sauce. This sauce is a mix of sweet and savory, but you can change it to your taste. - Add more honey for sweetness or soy sauce for saltiness. - Try using fresh garlic and ginger. Fresh ingredients add a lively taste and aroma. Use 1 teaspoon of ginger paste and 1 minced garlic clove in your sauce. This makes it more vibrant and tasty. How you serve your chicken makes a big difference. For an attractive plate, use a large platter. - Drizzle extra sauce over the chicken. - Garnish with sliced green onions and toasted sesame seeds for color and texture. This makes your Crispy Sesame Chicken look as good as it tastes! For more tips and the full recipe, check the [Full Recipe]. {{image_2}} You can make Crispy Sesame Chicken lighter. Instead of frying, try baking. Bake the chicken at 400°F for 20-25 minutes. This method keeps the crunch without extra oil. If you want low-sodium soy sauce, use tamari or coconut aminos. Both give a similar flavor but with less salt. You can add spices to the coating for extra flavor. Try paprika or cayenne for a little heat. A pinch of garlic powder adds a nice touch too. To mix things up, use different sauces. Sweet chili sauce or teriyaki sauce can give a fun twist. You can also try a spicy mustard sauce for a zing. Pair your Crispy Sesame Chicken with tasty sides. Steamed broccoli or stir-fried vegetables work well. They add color and nutrition. You can also serve it with rice. Jasmine or brown rice both complement the dish. For a fresh touch, add a side salad with sesame dressing. Enjoy your meal with a mix of flavors and textures! To keep your Crispy Sesame Chicken fresh, refrigerate it right away. Place the chicken in a shallow container. This helps it cool down faster. Cover the container tightly with a lid or plastic wrap. This keeps the chicken from drying out. Use it within three days for the best taste. Use airtight containers for storing leftovers. Glass containers work great since they do not stain. You can also use BPA-free plastic containers. Make sure they are safe for food use. Label your containers with the date. This helps you track how long they have been stored. To enjoy your Crispy Sesame Chicken again, you need to reheat it carefully. The oven is the best choice. Preheat your oven to 350°F (175°C). Place the chicken on a baking sheet. Heat for about 10-15 minutes. This keeps the chicken crispy. The microwave is faster but can make the chicken soggy. If you must use it, heat in short bursts. Check after every 30 seconds to avoid overcooking. Yes, you can freeze Crispy Sesame Chicken! First, let it cool completely. Then, wrap each piece tightly in plastic wrap. Place the wrapped pieces in a freezer bag. Squeeze out the air and seal it. This prevents freezer burn. To thaw, move the chicken to the fridge overnight. This keeps it safe. You can also use the microwave for a quick thaw. Use the defrost setting, checking often. Once thawed, reheat in the oven for the best results. Enjoy your delicious meal again! For the complete recipe, check out the Full Recipe section. You can use chicken breasts as a substitute for chicken thighs. They are leaner but still work well. You may also try chicken tenders, which are tender and cook quickly. For vegetarian options, consider using tofu or tempeh. They absorb flavors well and provide a nice texture when cooked. Look for a golden brown color on the chicken. The coating should be crispy and firm. You can use a meat thermometer to check the temperature. Chicken should reach 165°F (75°C) to be safe to eat. If you do not have a thermometer, cut into a piece. The meat should be white with no pink inside. Yes, you can make the sauce in advance. Just mix all the sauce ingredients in a saucepan. Cook it over medium heat until it thickens slightly. Allow it to cool, then store it in an airtight container. When ready to use, reheat it gently on the stove. You can also microwave it for a quick option. This blog post recaps the steps to make Crispy Sesame Chicken. We covered the ingredients, cooking methods, and tips for perfect results. Whether you fry or bake, the key is achieving crispiness. I shared flavorful sauce ideas and garnishing tips to enhance your dish. Remember to store and reheat leftovers properly for best taste. With simple variations, you can easily adapt this recipe. Enjoy your cooking adventure with these helpful insights, and impress everyone with your delicious meal!](https://dailydishly.com/wp-content/uploads/2025/07/12f93f23-c091-4c02-8196-bfe71a37e11f.webp)
Are you ready to take your dinner game to the next level? Crispy Sesame Chicken is packed with flavor and has a delightful crunch. In this blog post, I’ll guide you through the simple steps to make this mouthwatering dish. From the perfect breading technique to a rich, homemade sauce, you’ll impress your family and friends with ease. Let’s get started on this tasty adventure!
Ingredients
Main Ingredients List
– 1 lb boneless, skinless chicken thighs
– 1/2 cup cornstarch
– 1/4 teaspoon black pepper
– 1 cup panko breadcrumbs
– 1/4 cup sesame seeds
Sauce Ingredients
– 1/4 cup soy sauce
– 1/4 cup honey
– 1 tablespoon apple cider vinegar
– 1 teaspoon ginger paste
– 1 garlic clove, minced
Garnishes
– Green onions, finely sliced
– Toasted sesame seeds
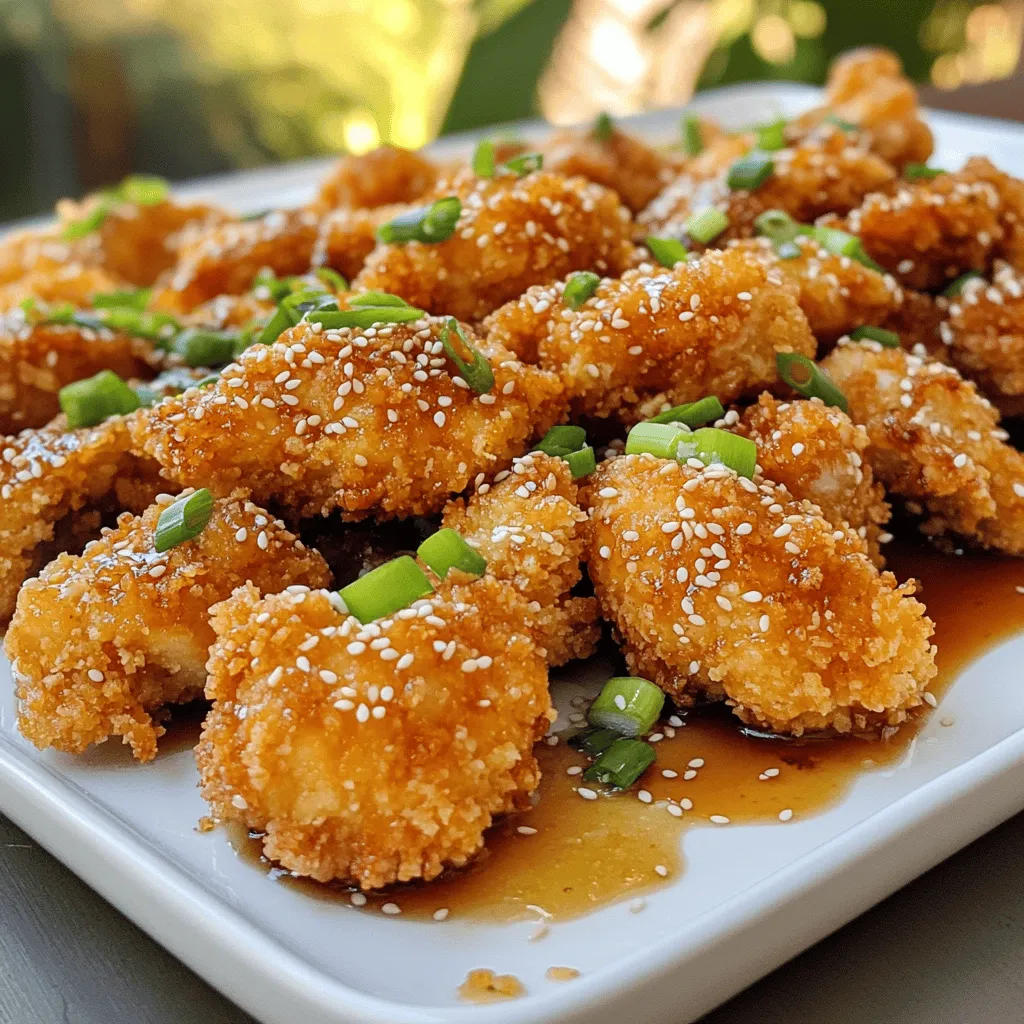
To make crispy sesame chicken, gather all your ingredients first. This helps you stay organized and enjoy the cooking process. The chicken thighs offer a tender bite while the cornstarch provides that essential crunch. Panko breadcrumbs and sesame seeds create a delightful texture and nutty flavor.
For the sauce, soy sauce and honey blend perfectly. Apple cider vinegar adds a hint of tang, while ginger and garlic bring warmth and depth. These simple ingredients make a sauce that truly elevates your dish.
Don’t forget your garnishes! Finely sliced green onions and toasted sesame seeds add a pop of color and flavor. When you plate your dish, it not only looks great but also tastes amazing. This is the key to making crispy sesame chicken irresistible.
Step-by-Step Instructions
Preparation Steps
To start, mix the dry ingredients. In a bowl, combine 1/2 cup cornstarch, 1/2 teaspoon salt, and 1/4 teaspoon black pepper. This mix will help the chicken get crispy.
Next, bread the chicken. Take 1 lb of cut chicken thighs. Dip each piece into the cornstarch mix, then into a beaten large egg. Finally, coat each piece with a mix of 1 cup panko breadcrumbs and 1/4 cup sesame seeds. Make sure the coating is even. This step is key for that crunchy texture.
Cooking Instructions
Now, heat oil for frying. In a deep skillet, add enough vegetable oil to cover the chicken pieces. Heat it over medium-high heat.
Once the oil is hot, fry the chicken in batches. Cook for about 5-7 minutes until each piece is golden brown and crispy. Drain the fried chicken on paper towels. This keeps it from getting soggy.
Sauce Preparation
For the sauce, grab a separate saucepan. Combine 1/4 cup soy sauce, 1/4 cup honey, 1 tablespoon apple cider vinegar, 1 teaspoon ginger paste, and a minced garlic clove.
Heat the mixture over medium heat. Stir and bring it to a simmer for 3-4 minutes. This thickens your sauce and blends the flavors nicely.
Once the chicken is fried, drizzle or toss the sauce over it. Make sure each piece is well-coated. Enjoy your crispy sesame chicken!
Tips & Tricks
Achieving the Perfect Crispiness
To make your chicken crispy, use cornstarch and panko breadcrumbs. Cornstarch helps absorb moisture, while panko adds crunch.
– Use 1/2 cup of cornstarch.
– Mix it with 1/2 teaspoon salt and 1/4 teaspoon black pepper.
– Coat each chicken piece well before frying.
Frying temperature matters too. Heat your vegetable oil to medium-high. The right heat cooks the chicken fast and keeps it crispy.
– Fry in small batches.
– Cook each batch for about 5-7 minutes.
– Drain on paper towels to remove excess oil.
Flavor Enhancements
To boost flavor, adjust the sauce. This sauce is a mix of sweet and savory, but you can change it to your taste.
– Add more honey for sweetness or soy sauce for saltiness.
– Try using fresh garlic and ginger. Fresh ingredients add a lively taste and aroma.
Use 1 teaspoon of ginger paste and 1 minced garlic clove in your sauce. This makes it more vibrant and tasty.
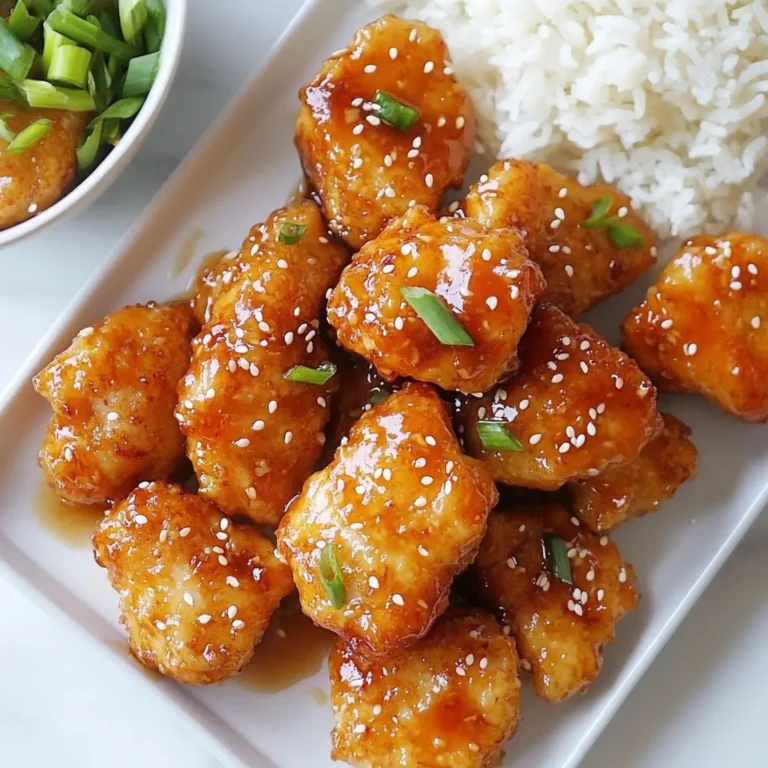
Presentation Suggestions
How you serve your chicken makes a big difference. For an attractive plate, use a large platter.
– Drizzle extra sauce over the chicken.
– Garnish with sliced green onions and toasted sesame seeds for color and texture.
This makes your Crispy Sesame Chicken look as good as it tastes!
Variations
Healthier Alternatives
You can make Crispy Sesame Chicken lighter. Instead of frying, try baking. Bake the chicken at 400°F for 20-25 minutes. This method keeps the crunch without extra oil.
If you want low-sodium soy sauce, use tamari or coconut aminos. Both give a similar flavor but with less salt.
Flavor Variants
You can add spices to the coating for extra flavor. Try paprika or cayenne for a little heat. A pinch of garlic powder adds a nice touch too.
To mix things up, use different sauces. Sweet chili sauce or teriyaki sauce can give a fun twist. You can also try a spicy mustard sauce for a zing.
Side Dish Pairings
Pair your Crispy Sesame Chicken with tasty sides. Steamed broccoli or stir-fried vegetables work well. They add color and nutrition.
You can also serve it with rice. Jasmine or brown rice both complement the dish. For a fresh touch, add a side salad with sesame dressing. Enjoy your meal with a mix of flavors and textures!
Storage Info
Storing Leftover Chicken
To keep your Crispy Sesame Chicken fresh, refrigerate it right away. Place the chicken in a shallow container. This helps it cool down faster. Cover the container tightly with a lid or plastic wrap. This keeps the chicken from drying out. Use it within three days for the best taste.
Recommended Containers for Storage
Use airtight containers for storing leftovers. Glass containers work great since they do not stain. You can also use BPA-free plastic containers. Make sure they are safe for food use. Label your containers with the date. This helps you track how long they have been stored.
Reheating Instructions
To enjoy your Crispy Sesame Chicken again, you need to reheat it carefully. The oven is the best choice. Preheat your oven to 350°F (175°C). Place the chicken on a baking sheet. Heat for about 10-15 minutes. This keeps the chicken crispy.
The microwave is faster but can make the chicken soggy. If you must use it, heat in short bursts. Check after every 30 seconds to avoid overcooking.
Freezing Tips
Yes, you can freeze Crispy Sesame Chicken! First, let it cool completely. Then, wrap each piece tightly in plastic wrap. Place the wrapped pieces in a freezer bag. Squeeze out the air and seal it. This prevents freezer burn.
Instructions on How to Freeze and Thaw Properly
To thaw, move the chicken to the fridge overnight. This keeps it safe. You can also use the microwave for a quick thaw. Use the defrost setting, checking often. Once thawed, reheat in the oven for the best results. Enjoy your delicious meal again!
FAQs
What can I substitute for chicken thighs?
You can use chicken breasts as a substitute for chicken thighs. They are leaner but still work well. You may also try chicken tenders, which are tender and cook quickly. For vegetarian options, consider using tofu or tempeh. They absorb flavors well and provide a nice texture when cooked.
How do I know when the chicken is done frying?
Look for a golden brown color on the chicken. The coating should be crispy and firm. You can use a meat thermometer to check the temperature. Chicken should reach 165°F (75°C) to be safe to eat. If you do not have a thermometer, cut into a piece. The meat should be white with no pink inside.
Can I make the sauce ahead of time?
Yes, you can make the sauce in advance. Just mix all the sauce ingredients in a saucepan. Cook it over medium heat until it thickens slightly. Allow it to cool, then store it in an airtight container. When ready to use, reheat it gently on the stove. You can also microwave it for a quick option.
This blog post recaps the steps to make Crispy Sesame Chicken. We covered the ingredients, cooking methods, and tips for perfect results. Whether you fry or bake, the key is achieving crispiness. I shared flavorful sauce ideas and garnishing tips to enhance your dish. Remember to store and reheat leftovers properly for best taste. With simple variations, you can easily adapt this recipe. Enjoy your cooking adventure with these helpful insights, and impress everyone with your delicious meal!
![- 1 lb boneless, skinless chicken thighs - 1/2 cup cornstarch - 1/4 teaspoon black pepper - 1 cup panko breadcrumbs - 1/4 cup sesame seeds - 1/4 cup soy sauce - 1/4 cup honey - 1 tablespoon apple cider vinegar - 1 teaspoon ginger paste - 1 garlic clove, minced - Green onions, finely sliced - Toasted sesame seeds To make crispy sesame chicken, gather all your ingredients first. This helps you stay organized and enjoy the cooking process. The chicken thighs offer a tender bite while the cornstarch provides that essential crunch. Panko breadcrumbs and sesame seeds create a delightful texture and nutty flavor. For the sauce, soy sauce and honey blend perfectly. Apple cider vinegar adds a hint of tang, while ginger and garlic bring warmth and depth. These simple ingredients make a sauce that truly elevates your dish. Don’t forget your garnishes! Finely sliced green onions and toasted sesame seeds add a pop of color and flavor. When you plate your dish, it not only looks great but also tastes amazing. This is the key to making crispy sesame chicken irresistible. For the detailed steps on how to combine these ingredients, check out the Full Recipe. To start, mix the dry ingredients. In a bowl, combine 1/2 cup cornstarch, 1/2 teaspoon salt, and 1/4 teaspoon black pepper. This mix will help the chicken get crispy. Next, bread the chicken. Take 1 lb of cut chicken thighs. Dip each piece into the cornstarch mix, then into a beaten large egg. Finally, coat each piece with a mix of 1 cup panko breadcrumbs and 1/4 cup sesame seeds. Make sure the coating is even. This step is key for that crunchy texture. Now, heat oil for frying. In a deep skillet, add enough vegetable oil to cover the chicken pieces. Heat it over medium-high heat. Once the oil is hot, fry the chicken in batches. Cook for about 5-7 minutes until each piece is golden brown and crispy. Drain the fried chicken on paper towels. This keeps it from getting soggy. For the sauce, grab a separate saucepan. Combine 1/4 cup soy sauce, 1/4 cup honey, 1 tablespoon apple cider vinegar, 1 teaspoon ginger paste, and a minced garlic clove. Heat the mixture over medium heat. Stir and bring it to a simmer for 3-4 minutes. This thickens your sauce and blends the flavors nicely. Once the chicken is fried, drizzle or toss the sauce over it. Make sure each piece is well-coated. Enjoy your crispy sesame chicken! For more details, check out the Full Recipe. To make your chicken crispy, use cornstarch and panko breadcrumbs. Cornstarch helps absorb moisture, while panko adds crunch. - Use 1/2 cup of cornstarch. - Mix it with 1/2 teaspoon salt and 1/4 teaspoon black pepper. - Coat each chicken piece well before frying. Frying temperature matters too. Heat your vegetable oil to medium-high. The right heat cooks the chicken fast and keeps it crispy. - Fry in small batches. - Cook each batch for about 5-7 minutes. - Drain on paper towels to remove excess oil. To boost flavor, adjust the sauce. This sauce is a mix of sweet and savory, but you can change it to your taste. - Add more honey for sweetness or soy sauce for saltiness. - Try using fresh garlic and ginger. Fresh ingredients add a lively taste and aroma. Use 1 teaspoon of ginger paste and 1 minced garlic clove in your sauce. This makes it more vibrant and tasty. How you serve your chicken makes a big difference. For an attractive plate, use a large platter. - Drizzle extra sauce over the chicken. - Garnish with sliced green onions and toasted sesame seeds for color and texture. This makes your Crispy Sesame Chicken look as good as it tastes! For more tips and the full recipe, check the [Full Recipe]. {{image_2}} You can make Crispy Sesame Chicken lighter. Instead of frying, try baking. Bake the chicken at 400°F for 20-25 minutes. This method keeps the crunch without extra oil. If you want low-sodium soy sauce, use tamari or coconut aminos. Both give a similar flavor but with less salt. You can add spices to the coating for extra flavor. Try paprika or cayenne for a little heat. A pinch of garlic powder adds a nice touch too. To mix things up, use different sauces. Sweet chili sauce or teriyaki sauce can give a fun twist. You can also try a spicy mustard sauce for a zing. Pair your Crispy Sesame Chicken with tasty sides. Steamed broccoli or stir-fried vegetables work well. They add color and nutrition. You can also serve it with rice. Jasmine or brown rice both complement the dish. For a fresh touch, add a side salad with sesame dressing. Enjoy your meal with a mix of flavors and textures! To keep your Crispy Sesame Chicken fresh, refrigerate it right away. Place the chicken in a shallow container. This helps it cool down faster. Cover the container tightly with a lid or plastic wrap. This keeps the chicken from drying out. Use it within three days for the best taste. Use airtight containers for storing leftovers. Glass containers work great since they do not stain. You can also use BPA-free plastic containers. Make sure they are safe for food use. Label your containers with the date. This helps you track how long they have been stored. To enjoy your Crispy Sesame Chicken again, you need to reheat it carefully. The oven is the best choice. Preheat your oven to 350°F (175°C). Place the chicken on a baking sheet. Heat for about 10-15 minutes. This keeps the chicken crispy. The microwave is faster but can make the chicken soggy. If you must use it, heat in short bursts. Check after every 30 seconds to avoid overcooking. Yes, you can freeze Crispy Sesame Chicken! First, let it cool completely. Then, wrap each piece tightly in plastic wrap. Place the wrapped pieces in a freezer bag. Squeeze out the air and seal it. This prevents freezer burn. To thaw, move the chicken to the fridge overnight. This keeps it safe. You can also use the microwave for a quick thaw. Use the defrost setting, checking often. Once thawed, reheat in the oven for the best results. Enjoy your delicious meal again! For the complete recipe, check out the Full Recipe section. You can use chicken breasts as a substitute for chicken thighs. They are leaner but still work well. You may also try chicken tenders, which are tender and cook quickly. For vegetarian options, consider using tofu or tempeh. They absorb flavors well and provide a nice texture when cooked. Look for a golden brown color on the chicken. The coating should be crispy and firm. You can use a meat thermometer to check the temperature. Chicken should reach 165°F (75°C) to be safe to eat. If you do not have a thermometer, cut into a piece. The meat should be white with no pink inside. Yes, you can make the sauce in advance. Just mix all the sauce ingredients in a saucepan. Cook it over medium heat until it thickens slightly. Allow it to cool, then store it in an airtight container. When ready to use, reheat it gently on the stove. You can also microwave it for a quick option. This blog post recaps the steps to make Crispy Sesame Chicken. We covered the ingredients, cooking methods, and tips for perfect results. Whether you fry or bake, the key is achieving crispiness. I shared flavorful sauce ideas and garnishing tips to enhance your dish. Remember to store and reheat leftovers properly for best taste. With simple variations, you can easily adapt this recipe. Enjoy your cooking adventure with these helpful insights, and impress everyone with your delicious meal!](https://dailydishly.com/wp-content/uploads/2025/07/12f93f23-c091-4c02-8196-bfe71a37e11f-300x300.webp)

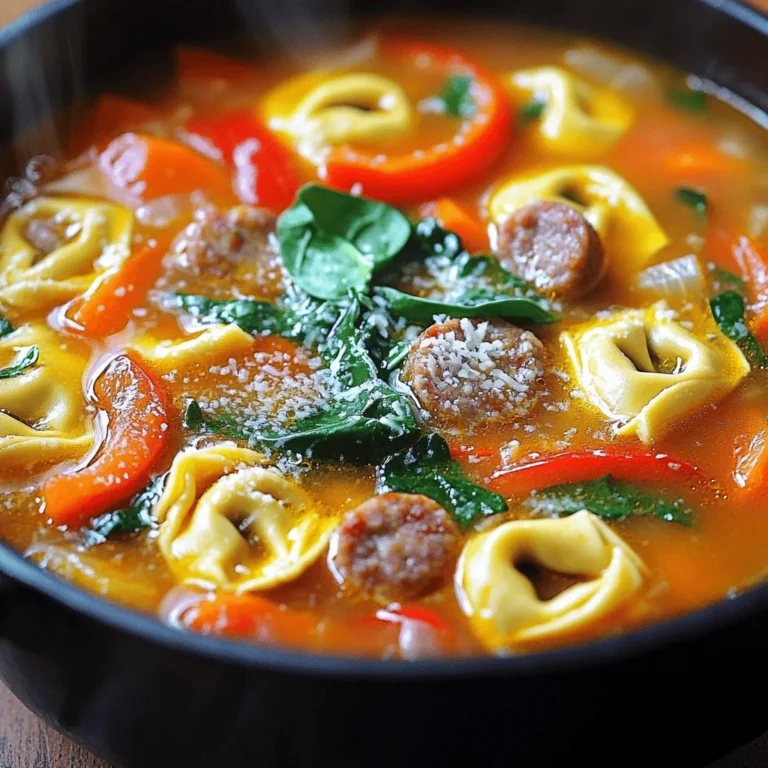
![- 4 cups fresh broccoli florets - 1 medium onion, chopped - 2 cloves garlic, minced Fresh broccoli florets are key to this soup. They bring a bright color and a nice crunch. Chopped onion adds a sweet base flavor. Minced garlic gives a touch of warmth and depth. Together, these ingredients form a great start for our cozy soup. - 4 cups vegetable broth - 2 cups shredded sharp cheddar cheese - 1 cup heavy cream Vegetable broth gives our soup a rich, savory taste. Shredded sharp cheddar cheese is the star. It melts beautifully, creating that creamy texture we love. Heavy cream adds smoothness and richness. These dairy ingredients make the soup feel indulgent and satisfying. - 1 tablespoon olive oil - Salt and pepper to taste - 1 teaspoon paprika (for a hint of spice) - 1 tablespoon cornstarch (optional, for thickening) Olive oil is perfect for sautéing the onion and garlic. Salt and pepper enhance all the flavors in the soup. Paprika gives a slight kick that pairs well with cheddar. If you like a thicker soup, cornstarch is your friend. Just mix it with a little water before adding it in. For the full recipe, check out Cozy Broccoli Cheddar Bliss! 1. Sautéing the onion and garlic Start by heating the olive oil in a large pot over medium heat. Add the chopped onion and sauté it until it turns translucent, which should take about 5 minutes. This step builds a great base flavor. Next, stir in the minced garlic and cook for one more minute. The garlic will become fragrant, adding depth to your soup. 2. Cooking the broccoli and broth mixture Add the fresh broccoli florets and the vegetable broth to the pot. Bring the mixture to a boil. Once boiling, reduce the heat and let it simmer for about 15 minutes. You want the broccoli to be tender during this time. This step lets the flavors meld together beautifully. 1. Blending the soup to the desired consistency If you like a smooth soup, grab an immersion blender. Blend the soup until it reaches your preferred texture. If you prefer chunks, blend it less or leave it as is. This step lets you customize the soup to your liking. 2. Stirring in cream, cheese, and seasonings Now, stir in the heavy cream and shredded sharp cheddar cheese. Add salt, pepper, and paprika to taste. Keep cooking on low heat until the cheese melts completely. This step creates that creamy goodness we all crave in broccoli cheddar soup. 1. Thickening the soup (if desired) If you want a thicker soup, mix the cornstarch with a little cold water first. Then, stir this mixture into the soup. Let it cook for another 2-3 minutes. This step gives your soup that perfect, hearty texture. 2. Tasting and adjusting flavors Finally, taste your soup. Add more salt, pepper, or paprika as needed. This step ensures your soup is just right for your palate. Enjoy your cozy bowl of broccoli cheddar bliss! For the complete method, check out the Full Recipe. - Fresh Ingredients: Always choose fresh broccoli florets. They give the best flavor and color. Look for bright green florets with no yellow spots. Fresh onions and garlic also boost taste. - Blending Methods: Use an immersion blender for easy blending. You can blend until smooth or leave some chunks. If you don't have one, carefully transfer the soup to a blender in batches. - Additional Spices: Try adding a pinch of nutmeg or cayenne pepper for warmth. A sprinkle of paprika adds color and flavor. You can also mix in some fresh herbs like thyme or parsley. - Pairing Suggestions: Serve with a crusty bread or a side salad. These pair well and add comfort. A simple green salad with a tangy vinaigrette works great. - Too-Thin Soup: If your soup is too thin, mix a tablespoon of cornstarch with cold water. Stir this into the soup and cook for a few minutes until thickened. - Seasoning Balance: If the soup tastes bland, add more salt and pepper. Taste as you go, and adjust to your preference. A splash of lemon juice can brighten the flavors too. {{image_2}} You can make this soup lighter by using low-fat dairy options. Swap heavy cream for low-fat milk or a plant-based milk. This change still keeps the soup creamy. You can also add more vegetables. Carrots and spinach fit well in this soup. They boost nutrition and add color. Mixing in different cheese varieties can change the taste. Try gouda or pepper jack for a twist. You can also add herbs like thyme or basil for extra flavor. Crispy bacon gives a rich taste and crunch. It adds depth to the creamy soup. If you need a gluten-free version, use cornstarch as a thickener. Make sure your vegetable broth is gluten-free too. For vegan options, swap cheese and cream for plant-based alternatives. Nutritional yeast gives a cheesy flavor without dairy. You can still enjoy this soup without animal products. Feel free to explore these variations to make this easy broccoli cheddar soup your own. For a full recipe, check the [Full Recipe]. Store your broccoli cheddar soup in a tight container. Let it cool first. The best practice is to use glass or BPA-free plastic. This soup lasts about 3 to 4 days in the fridge. When you want a bowl, just take it out and reheat. To freeze soup, let it cool completely. Pour it into freezer-safe containers, leaving some space at the top. This helps with expansion. Use containers made for freezing to avoid cracks. It can stay fresh for up to 3 months in the freezer. When you're ready, move it to the fridge to thaw overnight. You have two great options to reheat your soup. You can use the stovetop or microwave. On the stovetop, heat it gently over medium-low heat. Stir often to prevent sticking. If you use the microwave, heat in short bursts. Stir in between to ensure even heating. When reheating, you might notice the soup has thickened. To restore creaminess, add a splash of cream or broth. This keeps your soup smooth and delicious! Enjoy your cozy bowl of soup anytime. Broccoli cheddar soup lasts about 3 to 4 days in the fridge. To keep it fresh, store it in an airtight container. Make sure to cool it down before putting it in the fridge. This way, you can enjoy those cheesy flavors for a few days. Yes, you can make this soup ahead of time. It’s great for meal prep! I often make a big batch and store it. Just let it cool, then store it in the fridge. Reheat it on the stove or in the microwave when you're ready to eat. This soup tastes even better the next day as the flavors blend more. You can serve this soup with many sides. A slice of crusty bread is perfect for dipping. A simple salad adds freshness and crunch. You could also enjoy it with a grilled cheese sandwich for extra comfort. These pairings make your meal even more delightful! Yes, this broccoli cheddar soup can be gluten-free. Just use gluten-free vegetable broth and cornstarch. Always check labels to ensure the ingredients are safe. This way, everyone can enjoy this creamy delight without worry. This blog post covered everything you need to make delicious broccoli cheddar soup. We explored key ingredients like fresh broccoli, sharp cheddar, and heavy cream. You learned step-by-step instructions for preparation, blending, and adjusting flavors. We also shared tips for enhancing your soup, plus healthy variations to try. Lastly, I provided storage and reheating advice. Enjoy making your soup, knowing it’s simple and adaptable. Dive in, savor every bite, and share it with loved ones. Happy cooking!](https://dailydishly.com/wp-content/uploads/2025/06/80916b53-9b02-4ceb-883a-5c917337c047-768x768.webp)