
Caramel Apple Puff Pastry Tart Heavenly Dessert Delight
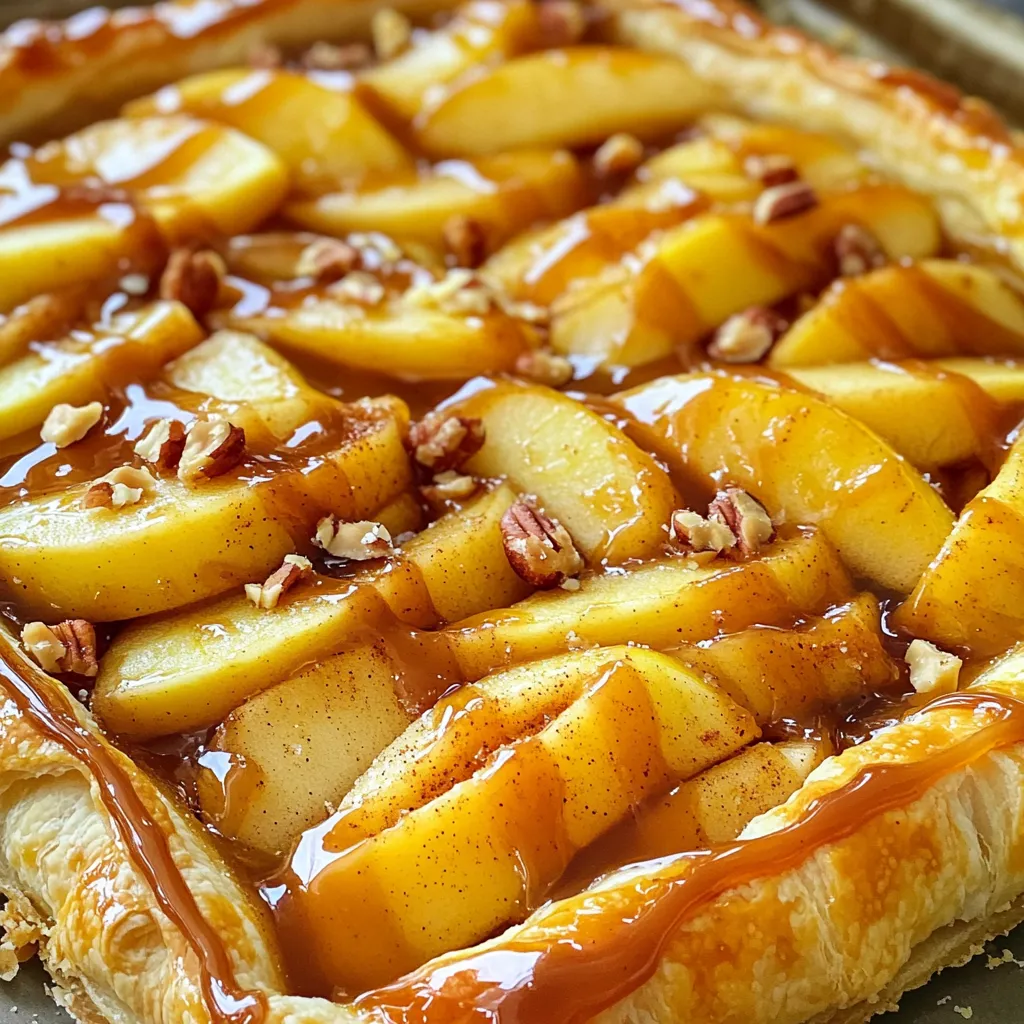
If you’re craving a dessert that’s both easy and delicious, you’ve come to the right place! I’ll guide you through making a Caramel Apple Puff Pastry Tart that’s sure to impress everyone. With layers of flaky pastry, sweet apples, and rich caramel, this treat is pure bliss. Ready to make your kitchen smell heavenly? Let’s dive into this delightful recipe that combines simplicity with scrumptious flavors!
Ingredients
List of Ingredients
– Puff pastry details: Use 1 sheet of thawed puff pastry. This is the base of your tart. It should be rolled out to fit a 12-inch tart pan. The pastry makes the tart light and flaky.
– Apple varieties to use: Choose 3 large apples. Good options include Granny Smith for tartness or Honeycrisp for sweetness. Peeling and slicing them helps them cook evenly.
– Optional toppings and variations: You can sprinkle chopped nuts, like pecans or walnuts, on top for crunch. Sea salt adds a nice touch. You can also add nutmeg for extra flavor if you like.
Step-by-Step Instructions
Preparation
– Thawing and rolling out puff pastry
Start by thawing your sheet of puff pastry. Place it in the fridge for a few hours or at room temperature for about 30 minutes. Once it’s soft, roll it out on a lightly floured surface. Aim for a 12-inch circle. This will fit nicely in your tart pan. Place the rolled pastry in the pan and trim any extra edges.
– Preparing the apple mixture
Grab three large apples like Granny Smith or Honeycrisp. Peel, core, and slice them thinly. In a big bowl, mix the apple slices with 1 tablespoon of lemon juice, ½ cup of granulated sugar, 1 teaspoon of cinnamon, and ¼ teaspoon of nutmeg if you like. Let it sit for about 10 minutes. This draws out the apple juices, adding flavor.
Cooking process
– Cooking apples and making caramel
In a medium pan, melt ¼ cup of unsalted butter over medium heat. Add your apple mixture to the pan. Cook for about 5-7 minutes. You want the apples to be soft but not mushy. After that, remove the pan from heat. In the same pan, clean it first, melt the remaining sugar over medium heat. Don’t stir it. Wait until it turns golden brown. Carefully add ¼ cup of heavy cream. It will bubble, so be careful! Stir until smooth.
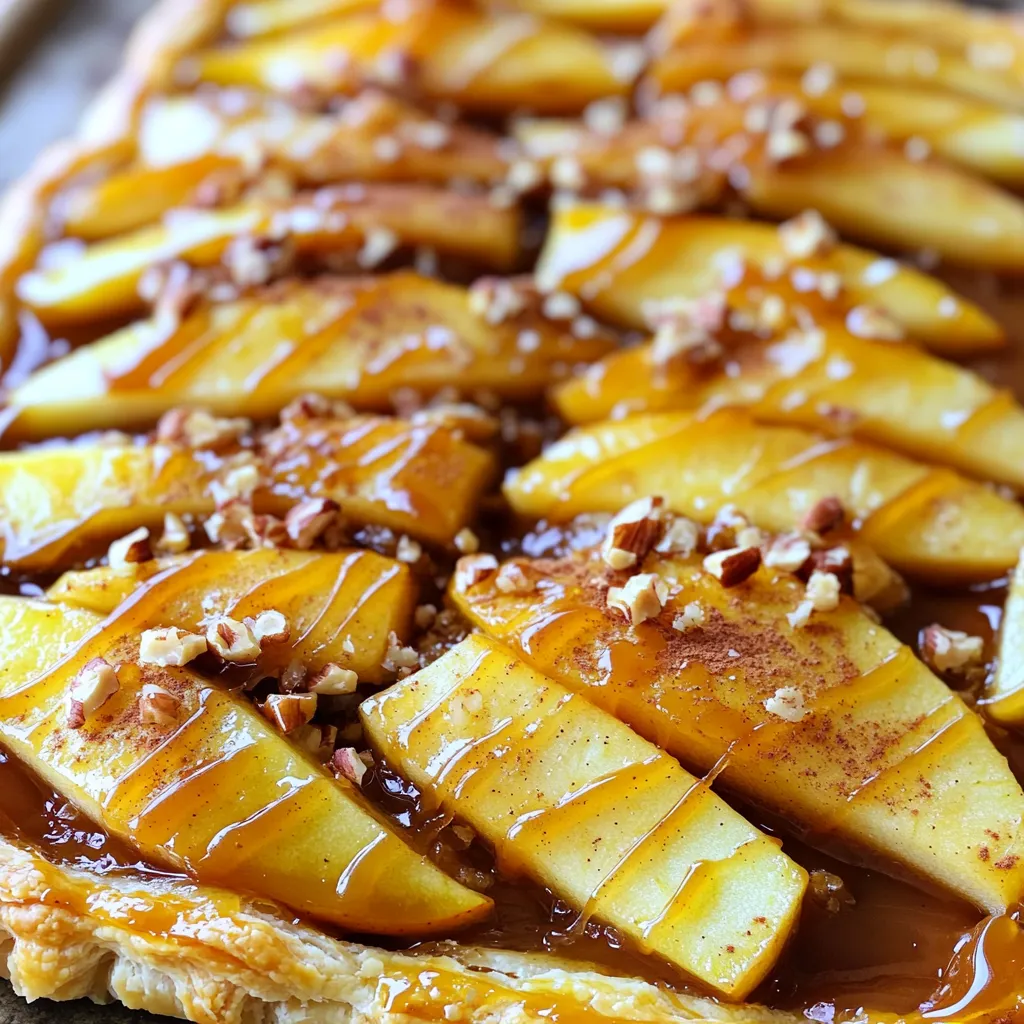
– Arranging and baking the tart
Spread the cooked apples evenly over the puff pastry. Drizzle half of the caramel over the apples. Brush the edges of the pastry with a beaten egg for a nice, golden look. Bake in a preheated oven at 400°F (200°C) for 20-25 minutes. The pastry should puff up and turn golden brown.
Finishing touches
– Adding final caramel and toppings
Once baked, drizzle the remaining caramel over the tart. If you want extra flavor, sprinkle some chopped nuts like pecans or walnuts on top. A pinch of sea salt adds a nice touch, too!
– Serving suggestions
Let the tart cool for about 10 minutes. Slice it up and serve warm. For an extra treat, add a scoop of vanilla ice cream on the side. Drizzle more caramel on top for a beautiful finish. Enjoy your heavenly dessert delight!
Tips & Tricks
Perfecting the Tart
To get a golden, flaky crust, roll out the puff pastry evenly. Use a lightly floured surface. This helps avoid tears. Bake the tart at the right temperature. Set your oven to 400°F (200°C).
For smooth caramel, melt the sugar slowly. Do not stir while it melts. Watch it closely to avoid burning. Once it turns golden brown, add heavy cream slowly. Stir until it is smooth and combined.
Customization Options
You can add different spices to change the flavor. Try nutmeg or ginger for a warm twist. A pinch of allspice can also add depth.
For toppings, consider using chopped nuts. Pecans or walnuts give a nice crunch. You can also sprinkle crushed graham crackers or toffee bits for added texture.
Variations
Fruit Variations
You can change the fruit in this tart for fun. Try pears or peaches if you want. Both fruits add a sweet and juicy twist. In fall, use ripe figs or cranberries for a seasonal treat. They bring tartness and a pop of color to your dish. You can also mix fruits. Combine apples with berries for a new flavor. The tart will still be delicious and look pretty!
Dietary Adjustments
If you need a gluten-free option, use gluten-free puff pastry. Many brands offer this now, so check your local store. It tastes great and works well in this recipe. For vegan choices, swap the butter for coconut oil or vegan butter. Use plant-based cream for the caramel sauce. You can also skip the egg wash for a golden finish. This way, everyone can enjoy this tasty tart!
Storage Info
Storing Leftovers
To keep your tart fresh, wrap it tightly in plastic wrap. Store it in the fridge for up to three days. This keeps the puff pastry from getting too soggy. If you want a quick snack, just cut a slice.
When you reheat it, use an oven instead of a microwave. Preheat the oven to 350°F (175°C). Place the slice on a baking sheet. Heat for about 10 minutes. This helps restore the crispiness of the pastry.
Freezing the Tart
You can freeze the tart for later. First, let it cool completely. Wrap it well in plastic wrap, then in aluminum foil. It can stay in the freezer for up to two months.
When you’re ready to enjoy it, take the tart out of the freezer. Place it in the fridge overnight to thaw. Then, reheat in the oven at 350°F (175°C) for about 15-20 minutes. This makes it taste almost fresh-baked!
FAQs
What type of apples are best for baking?
For baking, I recommend using Granny Smith or Honeycrisp apples. These apples hold their shape well and have a nice blend of sweet and tart flavors. This balance makes them ideal for tarts. Other good choices include Braeburn and Fuji apples. You can mix different apples for more depth in taste.
Can I make this recipe ahead of time?
Yes, you can prepare parts of this tart ahead of time. You can slice the apples and mix them with lemon juice and spices. Store this mixture in the fridge for a day. You can also make the caramel ahead and keep it in a jar. Just warm it up before using. However, I suggest baking it fresh for the best taste and texture.
How do I fix a burnt caramel?
If your caramel burns, you can try to save it. Remove it from heat at the first sign of a burnt smell. If it looks dark, you may need to start over. For a less burnt taste, you can add a bit of cream to help smooth it out. Keep stirring until it blends. If it’s too dark, the flavor might still be off, so fresh caramel is best.
This blog post covered making a delicious apple tart with puff pastry. We explored the best apple varieties, optional toppings, and how to create a golden crust. I shared tips to enhance flavors and ways to store or freeze leftovers for later enjoyment. Remember, minor tweaks can lead to a unique dessert each time. Enjoy experimenting with different fruits and flavors. Your apple tart will impress family and friends alike. Now, get baking and savor every bite!

![Here is the detailed list of ingredients for Cherry Almond Protein Muffins: - 1 cup almond flour - 1/2 cup rolled oats - 1/2 cup protein powder (vanilla or unflavored) - 1/4 cup honey or maple syrup - 1/2 cup Greek yogurt - 2 large eggs - 1/2 cup unsweetened almond milk - 1 tsp baking powder - 1/2 tsp baking soda - 1/2 tsp salt - 1 cup fresh or frozen cherries, pitted and halved - 1/4 cup sliced almonds (for topping) - 1 tsp almond extract These ingredients make a tasty and healthy treat. Almond flour gives a nice texture and flavor. Rolled oats add fiber and keep you full. Protein powder packs a protein punch. Honey or maple syrup sweetens the muffins just right. Greek yogurt keeps them moist and adds protein. Eggs help bind everything together. Almond milk keeps them dairy-free, but regular milk works too. Baking powder and baking soda help the muffins rise. Salt boosts all the flavors. Cherries add sweetness and a pop of color. Sliced almonds on top add crunch and beauty. You can find the complete recipe with instructions in the Full Recipe section. This mix of ingredients makes every bite a delight. Enjoy baking these muffins! Start by preheating your oven to 350°F (175°C). This heat level ensures even baking. Next, line your muffin tin with paper liners. If you prefer not to use liners, lightly grease each cup with oil or butter. This step helps the muffins release easily after baking. In a large bowl, combine the almond flour, rolled oats, protein powder, baking powder, baking soda, and salt. Whisk them together until the mix is smooth and free of lumps. This blend gives the muffins a great base and texture. In another bowl, whisk together the honey or maple syrup, Greek yogurt, eggs, almond milk, and almond extract. Mixing these wet ingredients is key. They add moisture and flavor, making your muffins tasty and soft. Gradually pour the wet mix into the dry mix. Use a spatula to stir gently. It is important to mix just until combined. Overmixing can make the muffins tough. You want a light and airy texture. Divide the batter into your prepared muffin tin, filling each cup about 2/3 full. Top each muffin with sliced almonds for crunch. Bake in your preheated oven for 18-20 minutes. The muffins are ready when they turn golden and a toothpick comes out clean. Once done, cool them in the pan for about 5 minutes. Then, transfer the muffins to a wire rack to cool completely. Enjoy the delicious aroma filling your kitchen! You can find the full recipe above for more details. The texture of your muffins comes from each ingredient. Almond flour gives a nice, moist base. Rolled oats add heartiness and chew. Protein powder boosts nutrition without making them dry. Greek yogurt keeps them soft and fluffy. Eggs bind everything together and add structure. Baking powder and baking soda help them rise, creating that perfect muffin dome. If you have allergies or dietary needs, you can swap some ingredients. For gluten-free muffins, use certified gluten-free oats. If you're vegan, replace eggs with flax eggs or applesauce. Use maple syrup instead of honey for a vegan sweetener. If you’re nut-free, try oat flour instead of almond flour. To make these muffins even tastier, consider adding extra flavors. A dash of cinnamon can warm up the taste. You might also add dark chocolate chips for a sweet twist. Consider mixing in some shredded coconut for texture. Or, how about a splash of vanilla extract to enhance the almond flavor? Enjoy experimenting to find your perfect blend! For the full recipe, check out the Cherry Almond Protein Muffins. {{image_2}} You can swap cherries for many other fruits. Blueberries, raspberries, or diced apples work well. Each fruit adds its unique flavor. For instance, blueberries bring a burst of sweetness. Apples add moisture and a slight crunch. Experiment with seasonal fruits to keep it fresh. There are many types of protein powder you can use. Whey protein is popular and blends easily. Plant-based powders like pea or brown rice are great for vegans. Each type can change the muffin's texture and taste. For example, whey creates a softer muffin, while plant-based options may make them denser. To make these muffins vegan-friendly, replace eggs with flax eggs. Mix one tablespoon of ground flaxseed with three tablespoons of water. Let it sit until it thickens. You can also use almond yogurt instead of Greek yogurt. Maple syrup can replace honey for sweetness. These swaps keep the muffins tasty and plant-based. For the complete recipe, refer to the [Full Recipe]. To keep your Cherry Almond Protein Muffins fresh, store them in an airtight container. This helps keep moisture in and prevents them from drying out. You can keep them at room temperature for up to three days. For longer storage, place them in the fridge. They will stay fresh for about a week if stored properly. If you want to enjoy these muffins later, freezing is a great option. Make sure the muffins are fully cooled. Wrap each muffin in plastic wrap or foil. Then, place them in a freezer-friendly bag or container. This way, they won’t stick together. You can freeze them for up to three months and still enjoy their great taste! When you’re ready to eat a muffin, reheating is easy. You can use a microwave for about 15 to 30 seconds. This warms the muffin without drying it out. If you prefer a crispier texture, heat them in an oven at 350°F (175°C) for about 5 to 10 minutes. This makes the muffins warm and tasty again! Yes, you can use frozen cherries. They work well in this recipe. Just make sure to thaw them first. Pat them dry with a paper towel to remove excess moisture. This helps prevent a soggy muffin. If you use frozen cherries, the muffins may be a bit softer, but they will still taste great. You can add Greek yogurt or cottage cheese to boost protein. Both add creaminess to the muffins. You can also use nut butter like almond or peanut butter. These options mix well and enhance the flavor. Chia seeds or flaxseeds are good too. They add protein and healthy fats. If you need a substitute for almond flour, try oat flour or coconut flour. Both give a nice texture to the muffins. You can also use all-purpose flour, but it will change the taste. If using coconut flour, use less. It absorbs more liquid than almond flour. These muffins can last for about 3 to 5 days at room temperature. Store them in an airtight container to keep them fresh. You can also freeze them for up to 3 months. To check freshness, look for any signs of mold or off smells. In this post, we explored a delicious muffin recipe packed with healthy ingredients. We detailed the key components like almond flour, fruit, and protein powder. You learned step-by-step instructions for mixing and baking with helpful tips along the way. Remember, you can customize this recipe to suit your taste. Try different fruits or even make it vegan! Keep your muffins fresh with proper storage and freeze extras for later. Enjoy your baking journey and the tasty rewards that follow!](https://dailydishly.com/wp-content/uploads/2025/07/36a729b1-00f1-4288-a77b-47884a3c4d33-768x768.webp)


