
Crispy Honey Garlic Salmon Quick and Tasty Dish

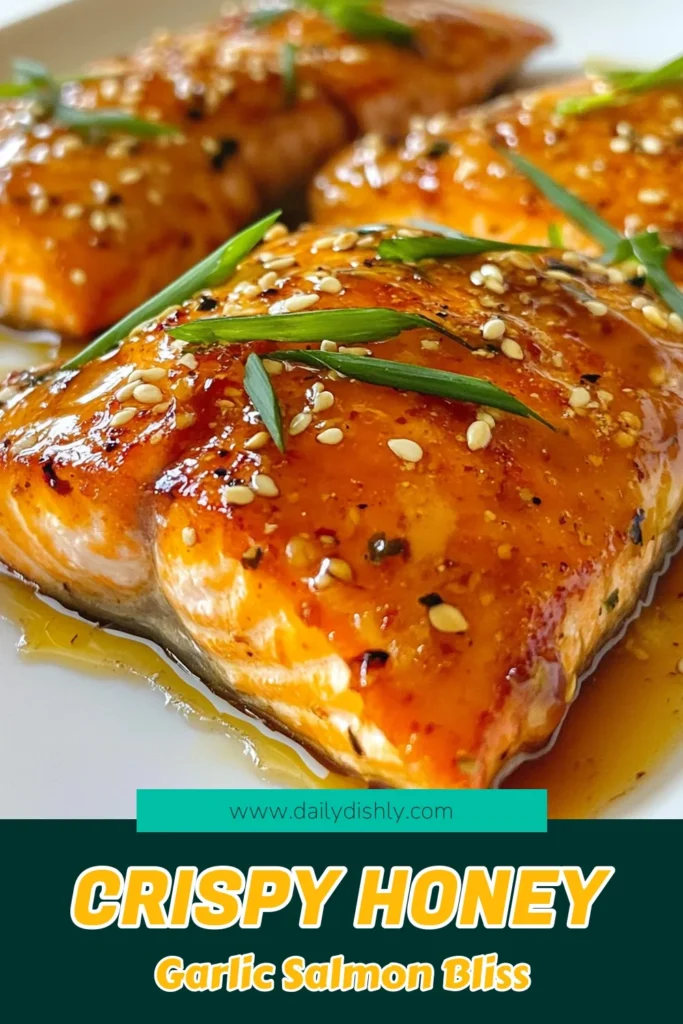
If you’re craving a quick and tasty dish, have I got the recipe for you! Crispy Honey Garlic Salmon is the perfect blend of sweet and savory. In just a few simple steps, you’ll have a meal that delights both your taste buds and your family. Join me as we dive into the ingredients, preparation, and tips to ensure your salmon turns out juicy and crispy every time. Let’s get cooking!
Why I Love This Recipe
- Easy to Prepare: This recipe requires minimal preparation and cooking time, making it perfect for busy weeknights.
- Flavor Explosion: The combination of honey, garlic, and ginger creates a rich and savory flavor profile that’s irresistible.
- Crispy Texture: Baking the salmon skin-side down ensures a crispy texture that complements the tender fish perfectly.
- Healthy Choice: Salmon is packed with omega-3 fatty acids, making this dish not only delicious but also nutritious.
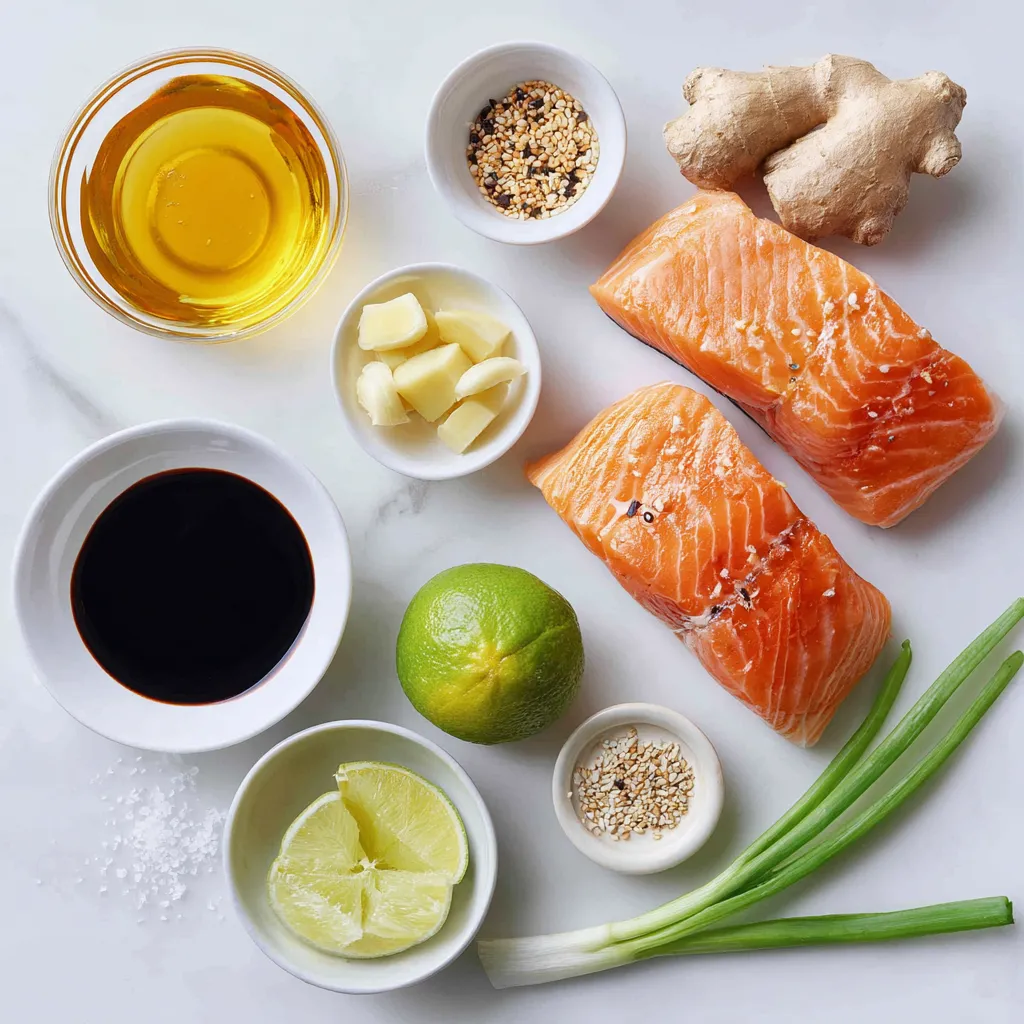
Ingredients
Main Ingredients for Crispy Honey Garlic Salmon
– 4 salmon fillets (skin-on for extra crispiness)
– 1/4 cup honey
– 3 tablespoons soy sauce (low sodium)
– 4 cloves garlic, minced
– 1 tablespoon fresh ginger, grated
– 1 tablespoon olive oil
– 1 tablespoon lime juice
– Salt and pepper to taste
I love using skin-on salmon fillets. The skin gets crispy and adds flavor. Honey and soy sauce mix well. They give the salmon a sweet and salty taste. Garlic and ginger add a nice kick. Olive oil helps with cooking and keeps the salmon moist. Lime juice brightens the dish.
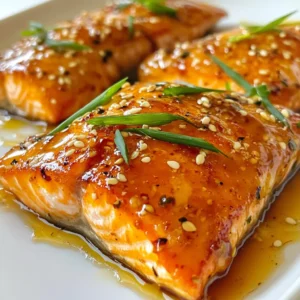
Optional Garnishes
– 1 tablespoon sesame seeds (optional, for garnish)
– 2 green onions, chopped (for garnish)
Garnishes make your dish look great and add flavor. Sesame seeds add a nutty crunch. Chopped green onions give a fresh taste and nice color. You can skip them, but they are worth it!
Step-by-Step Instructions
Preparing the Marinade
To make the marinade, gather a small bowl. In this bowl, add 1/4 cup of honey, 3 tablespoons of low-sodium soy sauce, 4 minced garlic cloves, and 1 tablespoon of fresh grated ginger. Also, include 1 tablespoon of olive oil and 1 tablespoon of lime juice. Whisk all these ingredients until they mix well. This sweet and savory blend will make your salmon shine.
Marinating the Salmon
Next, take your 4 salmon fillets. Season them with salt and pepper on both sides. Place the fillets in a shallow dish or a resealable bag. Pour half of the marinade over the salmon. Let them sit in the fridge for at least 30 minutes. This step lets the flavors soak in and makes the fish taste great.
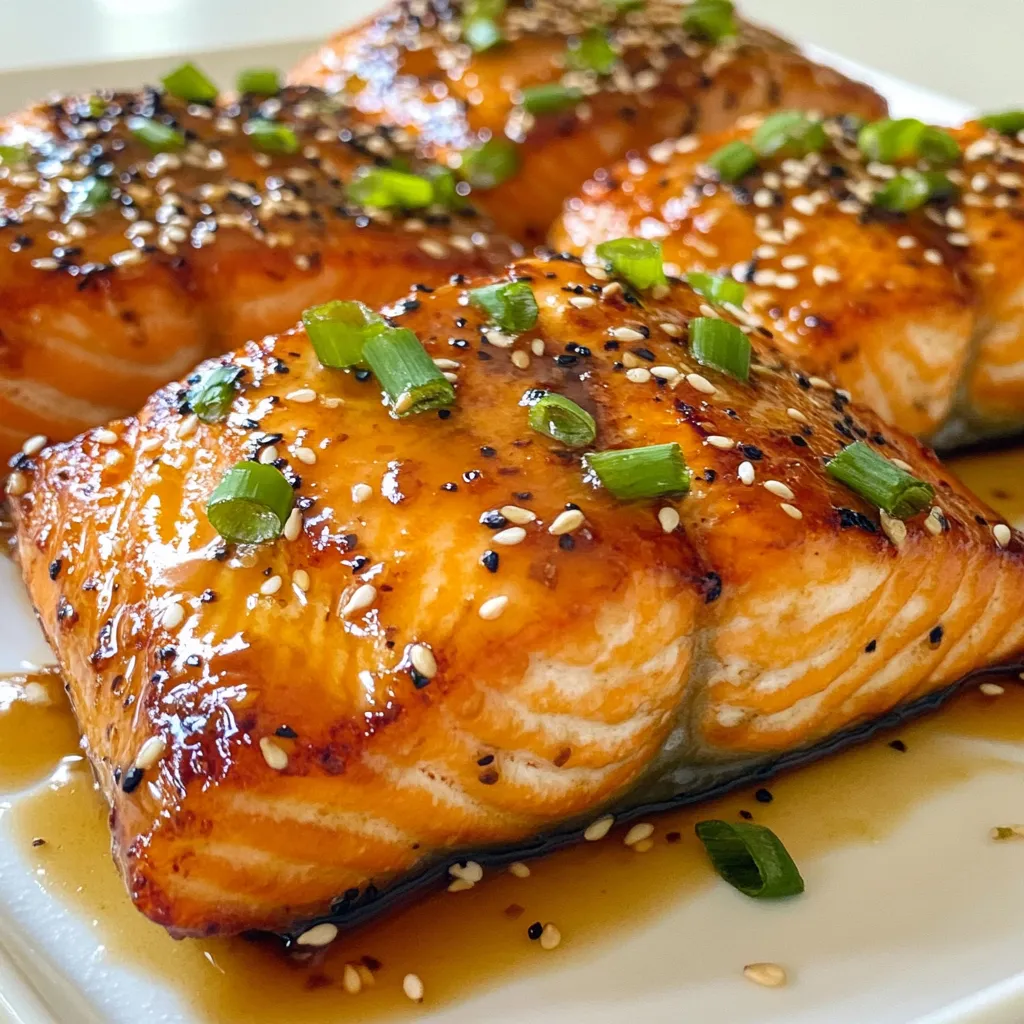
Baking the Salmon
Preheat your oven to 400°F (200°C). Line a baking sheet with parchment paper or grease it lightly. After marinating, remove the salmon from the dish. Discard the marinade used for marinating. Place the fillets skin-side down on the baking sheet. Drizzle the rest of the marinade over the top. Bake for about 12-15 minutes, or until the salmon flakes with a fork. For a crispy finish, broil the salmon for the last 2-3 minutes. Once done, let it cool for a few minutes. Before serving, sprinkle sesame seeds and chopped green onions on top. Enjoy the crispy honey garlic salmon!
Tips & Tricks
Achieving Perfect Crispiness
To get that perfect crispy skin on your salmon, start with skin-on fillets. The skin adds texture and keeps the fish moist. Always preheat your oven to 400°F (200°C) before baking. This helps the salmon cook evenly. When placing the salmon on the baking sheet, make sure to lay them skin-side down. For extra crispiness, broil the salmon for the last few minutes. This will give you a nice golden finish.
Flavor Enhancements
For more flavor, don’t skip the marinade. Mixing honey, soy sauce, garlic, and ginger creates a tasty sauce. You can also add a pinch of red pepper flakes for some heat. If you like citrus, try adding more lime juice or even some orange zest. This will brighten up the dish. Finally, sprinkle sesame seeds and chopped green onions on top before serving. They add a nice crunch and color.
Common Mistakes to Avoid
One common mistake is not seasoning the salmon enough. Always season both sides with salt and pepper. Another mistake is overcooking the salmon. Keep an eye on it while it bakes. Salmon should flake easily but still be moist. Lastly, avoid reusing the marinade that touched the raw fish. Always discard it to stay safe.
Pro Tips
- Use Skin-On Salmon: The skin helps to keep the salmon moist and adds extra crispiness when baked.
- Marinate Longer for Flavor: If you have time, marinate the salmon for an hour or more to enhance the flavors even more.
- Watch the Cooking Time: Salmon cooks quickly; keep an eye on it to prevent overcooking and ensure it remains flaky and tender.
- Broil for Extra Crispiness: For a golden finish, use the broiler for the last 2-3 minutes of cooking, but watch it closely to avoid burning.
Variations
Alternative Sweeteners for Honey
If you want to switch up the sweetener, you have options. Maple syrup works well. It adds a nice flavor that pairs nicely with salmon. You can also use agave nectar for a lighter taste. Both options keep the dish sweet and tasty.
Different Types of Salmon
Not all salmon is the same. You can use sockeye, coho, or even king salmon. Sockeye has a rich flavor. Coho is milder and perfect for those new to salmon. King salmon is buttery and has a higher fat content, which makes it very flavorful. Choose the type you like best.
Substituting Ingredients
You can swap out some ingredients if needed. For a gluten-free option, use tamari instead of soy sauce. If you are out of lime juice, lemon juice works too. You can even use orange juice for a fruity twist. Feel free to mix and match based on what you have. This recipe is flexible and fun to make!
Storage Info
How to Store Leftover Salmon
To store leftover salmon, let it cool first. Wrap each fillet in plastic wrap or foil. Place the wrapped salmon in an airtight container. Store it in the fridge for up to three days. This keeps it fresh and tasty. Remember, the sooner you eat it, the better it will taste!
Reheating Instructions
When you’re ready to eat your leftover salmon, preheat your oven to 350°F (175°C). Place the salmon on a baking sheet lined with parchment paper. Cover it loosely with foil to keep it moist. Heat for about 10 minutes or until warm. You can also reheat it in the microwave. Use low power for 1-2 minutes. Make sure it heats evenly.
Freezing Tips
If you want to freeze the salmon, wrap each fillet tightly in plastic wrap. Then, place it in a freezer-safe bag. Remove as much air as possible. Label the bag with the date. You can freeze it for up to three months. To thaw, place the salmon in the fridge overnight before reheating. This keeps the texture nice and tender.
FAQs
How long to bake salmon for the best results?
For the best results, you should bake salmon for 12 to 15 minutes at 400°F (200°C). The salmon will be ready when it flakes easily with a fork. If you want an extra crispy texture, broil it for the last 2-3 minutes. Keep an eye on it to avoid burning!
Can I use skinless salmon fillets?
Yes, you can use skinless salmon fillets if you prefer. However, skin-on fillets give a crispier texture. Skin helps hold moisture too, making the fish juicier. If you go with skinless, just watch the cooking time, as they may cook faster.
What can I serve with Crispy Honey Garlic Salmon?
You can serve Crispy Honey Garlic Salmon with many sides. Here are some tasty options:
– Steamed broccoli
– Garlic mashed potatoes
– Quinoa salad
– Jasmine rice
– Roasted asparagus
These sides complement the sweet and savory flavors of the salmon. Enjoy experimenting!
In this post, we explored how to make crispy honey garlic salmon. We covered essential ingredients, step-by-step instructions, and tips for perfect results. You also learned about variations and how to store leftovers properly. Remember, small changes can make a big difference in flavor and texture. By following these steps, you can enjoy a tasty, crispy dish every time. This recipe is easy and fun, perfect for any meal. Now, it’s your turn to try it and impress your friends and famil
Crispy Honey Garlic Salmon
Ingredients
- 4 fillets salmon (skin-on for extra crispiness)
- 0.25 cup honey
- 3 tablespoons soy sauce (low sodium)
- 4 cloves garlic, minced
- 1 tablespoon fresh ginger, grated
- 1 tablespoon olive oil
- 1 tablespoon lime juice
- to taste salt and pepper
- 1 tablespoon sesame seeds (optional, for garnish)
- 2 green onions, chopped (for garnish)
Instructions
- In a small bowl, whisk together the honey, soy sauce, minced garlic, grated ginger, olive oil, and lime juice until well combined. This will be your marinade and sauce mixture.
- Season the salmon fillets with salt and pepper on both sides.
- Place the salmon fillets in a shallow dish or resealable plastic bag and pour half of the marinade over them. Let them marinate for at least 30 minutes in the refrigerator.
- Preheat your oven to 400°F (200°C).
- Line a baking sheet with parchment paper or lightly grease it to prevent sticking.
- Remove the salmon from the marinade (discard the marinade used for marinating) and place the fillets skin-side down on the prepared baking sheet.
- Drizzle the remaining marinade over the top of the salmon fillets.
- Bake in the preheated oven for about 12-15 minutes, or until the salmon is cooked through and flakes easily with a fork. For extra crispiness, you can broil the salmon in the last 2-3 minutes of cooking.
- Once done, remove the salmon from the oven and let it rest for a few minutes.
- Sprinkle with sesame seeds and chopped green onions before serving.
![To make zucchini noodles with pesto, gather these main ingredients: - 3 medium zucchinis, spiralized into noodles - 1 cup fresh basil leaves - 1/4 cup pine nuts (toasted) - 1/4 cup grated Parmesan cheese (or nutritional yeast for a vegan option) - 2 garlic cloves, minced - 1/3 cup extra-virgin olive oil - Salt and pepper to taste These ingredients create a fresh and bright dish that is full of flavor. The zucchini noodles serve as a light base, while the pesto adds richness. You can enhance the dish with these optional ingredients: - 1/2 cup sun-dried tomatoes, chopped (in oil for extra flavor) - 1/4 teaspoon crushed red pepper flakes (optional) Adding sun-dried tomatoes gives a nice tang and sweetness. The red pepper flakes can add a bit of heat if you like spice. This dish is not just tasty; it also packs a healthy punch. Here’s a quick look at the nutritional benefits: - Zucchini: Low in calories, high in fiber, and rich in vitamins A and C. - Basil: Contains antioxidants and supports heart health. - Pine Nuts: Offer healthy fats and protein. - Parmesan Cheese: Adds calcium and flavor. - Olive Oil: A good source of healthy fats and antioxidants. Each serving is light yet filling, making it a great choice for lunch or dinner. You can find the full recipe [here]. To make fresh pesto, gather your ingredients. You will need basil leaves, toasted pine nuts, Parmesan cheese, minced garlic, and olive oil. Place these in a food processor. First, pulse the basil, pine nuts, cheese, and garlic together. Add a pinch of salt and pepper. While the processor runs, slowly pour in the olive oil. This helps achieve a smooth and creamy texture. After blending, taste your pesto. Adjust the seasoning to your liking. Set it aside for now. Next, grab your zucchinis. Spiralize them into noodle shapes. In a large skillet, heat a tablespoon of olive oil over medium heat. Add the zucchini noodles once the oil is hot. Sauté for about 2-3 minutes. Keep them slightly crunchy, or al dente. This step is key, as overcooking can make them mushy. Once cooked, remove the skillet from heat. Now, it’s time to mix everything together. Add the pesto to the skillet with the zucchini noodles. Stir well to coat the noodles evenly. This is where the magic happens! Next, add chopped sun-dried tomatoes for extra flavor. If you like spice, sprinkle in crushed red pepper flakes. Toss all the ingredients together until well mixed. Serve your dish right away. Presentation matters, so use a large bowl. Create a nest of zucchini noodles and drizzle extra pesto on top. Garnish with toasted pine nuts for a beautiful finish. Enjoy your flavorful and fresh Zucchini Noodles with Pesto! For the full recipe, check [Full Recipe]. When picking zucchini, look for firm ones that are bright in color. Avoid any with soft spots or wrinkles. Smaller zucchinis taste better and are less watery. Aim for ones about six to eight inches long. This ensures a nice, crisp bite in your dish. You can also check the stem; it should be fresh and green. To make your pesto extra creamy, use a good blender or food processor. Start by blending the basil, pine nuts, and garlic first. Then, slowly add the olive oil while blending. This helps to emulsify the oil, making it smooth. You can add a bit more cheese or even a splash of lemon juice. This brightens the flavor and keeps it fresh. One common mistake is cooking zucchini for too long. Zucchini cooks quickly, so aim for just 2-3 minutes. This keeps it al dente and tasty. Also, avoid adding too much salt at the start. Salt pulls out moisture, making your noodles soggy. Instead, season them lightly before adding your pesto. Finally, don’t overcrowd the pan; cook in batches if needed. For the full recipe, check out the [Full Recipe]. {{image_2}} You can easily make this dish vegan. Instead of Parmesan cheese, use nutritional yeast. This swap gives a cheesy flavor without dairy. You still get a creamy pesto. Blend the rest of the ingredients as usual. This keeps the dish rich and tasty. If you have other dietary needs, don't worry. You can switch out ingredients. For gluten-free options, use gluten-free pasta or spiralized veggies. If you need a nut-free recipe, skip the pine nuts. Use sunflower seeds instead. These simple swaps keep the dish enjoyable for everyone. Zucchini is great, but you can change things up. Try adding fresh herbs like parsley or mint. They give a new twist to the flavor. You can also mix in seasonal veggies. In summer, add cherry tomatoes for sweetness. In fall, try roasted butternut squash for warmth. Each season brings fresh options. Enjoy the tasty variety! Store any leftover zucchini noodles with pesto in an airtight container. You want to keep them fresh and tasty. Place the container in the fridge. They will stay good for about two days. Add a few drops of olive oil to prevent sticking. This keeps the noodles from clumping together. If you used sun-dried tomatoes, they can add extra moisture. So, check for sogginess before storing. To reheat your zucchini noodles, use a skillet. Heat it on low to medium heat. Add a little olive oil to the pan, then toss in the noodles. Stir for about two to three minutes. This warms them up without making them mushy. You can also use a microwave. Put the noodles in a bowl and cover it. Heat on medium for about a minute or two. Check and stir halfway through to ensure even heating. Freezing zucchini noodles is not ideal. They can become watery when thawed. However, you can freeze pesto easily. Put it in ice cube trays for easy use later. Once frozen, pop the cubes into a bag. You can use frozen pesto straight from the freezer. Just add it to hot noodles, and it will melt right in. This way, you can enjoy homemade flavor anytime! For the full recipe, check out the details above. Yes, you can use other veggies. Carrots, bell peppers, or squash work well. Spiralize them just like zucchini. They add nice colors and flavors too. Each will give a new twist to your dish. Just remember to cook them until tender, but not mushy. To make nut-free pesto, skip the pine nuts. Use sunflower seeds instead. They blend nicely and add a good texture. You can also use hemp seeds for a different taste. The rest of the pesto stays the same. Use fresh basil and garlic for that classic flavor. Zucchini noodles with pesto pair well with many sides. A fresh salad adds crunch and brightness. Garlic bread is a great choice for dipping. You could also serve grilled chicken or shrimp on top for protein. Enjoy this dish with a light white wine for a special touch. For more ideas, check the Full Recipe for inspiration. Zucchini noodles with pesto offer a tasty and healthy meal. We covered the key ingredients and how to make them. I shared steps for cooking, tips for selecting fresh zucchini, and variations to suit diets. Proper storage and reheating tips will keep leftovers tasty. Remember, experimenting with flavors makes cooking fun. Enjoy your meal, and don’t hesitate to try new things in the kitchen.](https://dailydishly.com/wp-content/uploads/2025/06/e06d07df-0eee-433f-a13f-76c167ac26ec-768x768.webp)
![To make roasted garlic and tomato pasta, you need these simple items: - 1 pound spaghetti or your favorite pasta - 8 cloves garlic, unpeeled - 4 cups cherry tomatoes, halved - 1/4 cup extra-virgin olive oil - 1 teaspoon dried oregano - 1 teaspoon red pepper flakes (adjust for spice preference) - Salt and pepper to taste - 1/4 cup fresh basil, chopped - 1/2 cup freshly grated Parmesan cheese (optional) Fresh ingredients make a big difference in taste. When cooking, I always use ripe cherry tomatoes. They burst with flavor. Fresh garlic gives a sweet, nutty taste after roasting. Fresh basil adds a bright note to the dish. Using these ingredients helps create a dish that feels special. You can adjust this pasta to fit your needs. If you're gluten-free, choose gluten-free pasta. For a vegan option, skip the Parmesan cheese or use a plant-based alternative. You can even swap cherry tomatoes for canned diced tomatoes if fresh ones aren't available. This way, anyone can enjoy this tasty dish. For a heartier meal, add cooked chicken or shrimp. Feel free to mix in veggies like spinach or zucchini for added nutrition. For the full recipe, check out the details above. Start by gathering your ingredients. For this dish, you need: - 1 pound spaghetti or your favorite pasta - 8 cloves garlic, unpeeled - 4 cups cherry tomatoes, halved - 1/4 cup extra-virgin olive oil - 1 teaspoon dried oregano - 1 teaspoon red pepper flakes (adjust for spice preference) - Salt and pepper to taste - 1/4 cup fresh basil, chopped - 1/2 cup freshly grated Parmesan cheese (optional) Preheat your oven to 400°F (200°C). This helps the garlic and tomatoes roast perfectly. On a baking sheet, place the unpeeled garlic cloves and halved cherry tomatoes. Drizzle with half of the olive oil. Sprinkle with oregano, red pepper flakes, salt, and pepper. Toss gently to coat. Roast in the oven for 20-25 minutes. Look for blistered tomatoes and soft garlic. The smell will guide you! Meanwhile, cook your pasta. Use a large pot of salted boiling water and follow the package instructions. Cook until it’s al dente. Don’t forget to save 1 cup of pasta water before draining. Once the tomatoes and garlic are done, let them cool a bit. Squeeze the roasted garlic out of its skin into a bowl. Mash it with a fork to create a creamy base. Mix the mashed garlic with the roasted tomatoes. Add the remaining olive oil and a splash of the reserved pasta water. Stir well to make a sauce. Now, add the drained pasta to the sauce. Toss it all together until the pasta is well coated. If the sauce is too thick, add more reserved pasta water until you like the consistency. Finally, stir in fresh basil. Taste and adjust seasoning with salt and pepper if needed. Serve your roasted garlic and tomato pasta immediately. If you want, sprinkle some grated Parmesan cheese on top. Enjoy this meal! For the full recipe, check the earlier section. Roasting garlic is simple. Start by placing unpeeled garlic cloves on a baking sheet. Cook them at 400°F (200°C) for about 20 to 25 minutes. You want them soft and golden. When done, let them cool a bit. Squeeze the garlic out of the skin with your fingers. It should be creamy and sweet. This garlic adds a rich, deep flavor to your pasta. Cooking pasta seems easy, but timing is key. Follow the package directions for cooking time. Use a large pot with plenty of salted boiling water. This boosts flavor and helps keep pasta from sticking. For the best texture, aim for "al dente," which means it should be firm to the bite. Remember to reserve some pasta water before draining. This starchy water helps thicken your sauce. Want to make your roasted garlic and tomato pasta pop? Here are some ideas: - Herbs: Add fresh basil or parsley for a bright touch. - Cheese: Toss in some feta or goat cheese for creaminess. - Nuts: Pine nuts or walnuts give a nice crunch. - Spices: For heat, add more red pepper flakes or a dash of smoked paprika. - Zest: A sprinkle of lemon zest can brighten the flavors. These enhancements will take your dish to the next level. Check out the Full Recipe for a complete guide to making this tasty meal! {{image_2}} Roasted garlic and tomato pasta is great for everyone. For a vegetarian twist, skip the cheese. You can add nutritional yeast for a cheesy taste. If you want a vegan option, use a plant-based cheese. This makes it creamy without dairy. You can also toss in fresh spinach or kale. These greens add color and nutrients to your dish. You can switch up the pasta for fun! Try whole wheat pasta for more fiber. Gluten-free pasta works well if you need it. You can even use zucchini noodles for a low-carb choice. Each type will change the dish's texture, so experiment to find your favorite. Want to make it heartier? Add protein like grilled chicken or shrimp. Cook these separately and toss them in at the end. For a veggie boost, add bell peppers or mushrooms. They roast well and taste amazing with garlic and tomatoes. Broccoli or asparagus are also great choices. These keep the dish fresh and colorful. For more details, check out the full recipe. To keep your roasted garlic and tomato pasta fresh, store it in an airtight container. Make sure it cools down before sealing. This will help keep the flavors intact. The pasta can last in the fridge for about 3 to 5 days. If you notice any off smells or changes in color, it's best to toss it. When you’re ready to enjoy your leftovers, reheating properly is key. Use a pan over low heat for the best results. Add a splash of water or olive oil to help the pasta regain its moisture. Stir often to prevent sticking. You can also microwave it, but cover the dish to retain moisture. Heat in 30-second intervals, stirring in between. If you want to save some pasta for later, freezing is a great option. Portion the pasta into individual servings and place them in freezer-safe bags. Remove as much air as possible before sealing. It keeps well for about 2 to 3 months in the freezer. When you're ready to eat, thaw it in the fridge overnight, then reheat as mentioned above. For the best taste, enjoy it within a month. Yes, you can use many types of tomatoes. Roma tomatoes add a rich flavor. Beefsteak tomatoes are juicy and sweet. You can also use canned tomatoes if fresh ones are not available. Just be sure to drain them well. This will keep your pasta from getting too watery. Experiment and find what you like best! To make this recipe gluten-free, choose gluten-free pasta. Many brands offer great options that taste good. You can find pasta made from rice, corn, or lentils. These pastas cook a bit differently, so check the package for instructions. Follow the same steps in the recipe, and enjoy your meal worry-free! Roasted garlic and tomato pasta pairs well with many sides. A fresh green salad adds crunch and color. Garlic bread is a classic choice that everyone loves. You can also serve it with grilled vegetables for a healthy twist. A nice glass of red wine makes the meal even better. Enjoy exploring different pairings! For the complete recipe, check out the [Full Recipe]. This blog post covered key ingredients for roasted garlic and tomato pasta. We explored fresh ingredients and alternatives for dietary needs. I shared step-by-step cooking instructions and helpful tips, like roasting garlic perfectly. We also discussed pasta variations and storage tips to keep leftovers fresh. In summary, this dish is simple, versatile, and delicious. You can make it fit your tastes and needs. Enjoy experimenting with flavors and ingredients! Your next meal can be a hit.](https://dailydishly.com/wp-content/uploads/2025/06/d553d96f-6423-4985-8dca-dedfc8f9e127-768x768.webp)


![To make garlic butter mushroom rice, you will need: - 1 cup jasmine rice - 2 cups vegetable broth - 2 tablespoons unsalted butter - 1 tablespoon olive oil - 3 cups mushrooms, sliced - 4 cloves garlic, minced - 1 small onion, diced - 1 teaspoon dried thyme - Salt and pepper to taste - Fresh parsley, chopped These ingredients work together to create a rich and tasty dish. Jasmine rice gives a lovely aroma and texture. The mushrooms add depth, while garlic brings a bold flavor. You can switch some ingredients if you want: - Use brown rice, basmati, or quinoa instead of jasmine rice. - Try different mushrooms like shiitake or portobello for a new taste. - Use vegan butter if you prefer a dairy-free option. These swaps let you enjoy the dish your way! Want to take your dish up a notch? Consider these ideas: - Add grated Parmesan cheese for a creamy finish. - A splash of soy sauce or Worcestershire sauce adds umami. - Crushed red pepper flakes give a nice kick of heat. These enhancements let you customize the flavor to suit your taste. For the full recipe, check out the details above! - Rinse jasmine rice until water runs clear. This step helps make the rice fluffy. - In a medium pot, bring vegetable broth to a gentle boil. Add the rinsed rice. Stir once, lower the heat, and cover. Let it simmer for about 15 minutes. The rice will absorb the broth. After that, let it sit for 5 more minutes with the lid on. - While the rice cooks, heat olive oil and 1 tablespoon of butter in a large skillet over medium heat. - Add diced onion and sauté until it turns translucent, about 3-4 minutes. This brings out the sweet flavor of the onion. - Then, stir in sliced mushrooms. Cook for about 5-7 minutes until they turn golden brown. This step enhances the mushrooms' taste and texture. - Next, add minced garlic and dried thyme to the skillet and cook for about 1 minute. You want the garlic to become fragrant but not burn. - Once the rice is done, fluff it with a fork. Then, add it to the skillet with the mushroom mixture. Stir everything together. - Add the remaining tablespoon of butter and mix well. Season with salt and pepper to taste. Make sure the butter melts and coats the rice evenly. - Now, you can serve this dish hot. For extra flair, garnish with freshly chopped parsley. For the full recipe, check out the instructions above! To make your rice fluffy, rinse it first. Rinse jasmine rice under cold water until the water runs clear. This step removes excess starch. It helps keep the rice from being sticky. When you cook the rice, use vegetable broth. This adds flavor. Bring it to a gentle boil before adding the rice. Stir once, then cover and reduce heat. Let it simmer for about 15 minutes. After that, let it sit for 5 more minutes. This resting time is key for fluffiness. For the mushrooms, choose fresh ones. I like cremini and button mushrooms for their taste. Sauté them until they are golden brown. This usually takes 5 to 7 minutes. Make sure to cook them in olive oil and butter. This combo gives them great flavor. When you add garlic and thyme, cook for just one more minute. This brings out their aromas. Serve garlic butter mushroom rice with grilled chicken or fish. The flavors complement each other well. You can also pair it with steak or vegetable stir-fry. It works as a side dish or a main meal. The rice adds a nice texture to your plate. Presentation matters! Garnish your dish with fresh parsley for color. It makes the dish look appealing. Use a large bowl for family-style serving. This helps everyone to help themselves easily. For extra flair, add some whole sautéed mushrooms on top. It makes your dish look even more special. The bright colors will catch everyone’s eye. For the full recipe, check out the details above. {{image_2}} You can boost your garlic butter mushroom rice by adding protein. Cooked chicken, shrimp, or tofu work great. For a meaty option, grilled chicken adds flavor and texture. Shrimp brings a nice seafood twist, while tofu is perfect for a vegetarian or vegan meal. For a vegan dish, use firm tofu and sauté it until golden. It absorbs flavors well. This keeps your meal hearty without losing the rice's charm. Change up your vegetable game with seasonal swaps. In spring, add fresh peas for a pop of color. In summer, sweet corn brings sweetness and crunch. You can also experiment with herbs. Try fresh basil in summer or rosemary in winter for a new twist. These small changes make the dish exciting and fresh. Take your rice on a global journey! For Asian flavors, add ginger or sesame oil. This gives the dish warmth and richness. If you prefer an Italian flair, sprinkle in extra herbs like oregano or thyme. A bit of Parmesan cheese can also elevate the dish. Mixing cultures opens up a world of taste and creativity. Feel free to explore these variations to fit your taste. Each option brings its own twist to the dish while keeping it simple and flavorful. For the full recipe, check out the [Full Recipe]. To store leftover garlic butter mushroom rice, let it cool first. Place it in an airtight container. This helps keep the rice fresh. Store it in the fridge for up to four days. When reheating, add a splash of broth or water. This keeps the rice moist and flavorful. Heat it in a skillet over medium heat or in the microwave. Garlic butter mushroom rice is great for freezing! Let the rice cool completely before packing it. Use freezer-safe bags or containers. Remove as much air as possible to prevent freezer burn. It can last up to three months in the freezer. To thaw, place it in the fridge overnight. You can reheat it straight from frozen, but add a bit of liquid. In the fridge, your garlic butter mushroom rice lasts about four days. In the freezer, it can stay fresh for up to three months. Check for signs of spoilage before using. If it smells sour or has a change in color, it’s best to toss it. Keeping track of how long it’s stored helps reduce waste. Enjoy your delicious dish without worry! Yes, you can make this dish ahead of time. Cook the rice and mushroom mixture separately. Let them cool, then store in the fridge. When ready to serve, reheat them together in a skillet. This keeps the rice fluffy and the mushrooms fresh. No broth? No problem! You can use water instead. For added flavor, add a splash of soy sauce or a few herbs. You can also make a quick homemade broth. Boil water with onion, garlic, and herbs for about 20 minutes. Strain and use it in the recipe. To make this dish gluten-free, use gluten-free vegetable broth. Always check labels on broth and seasonings. You can also add gluten-free soy sauce or tamari for that extra flavor. Absolutely! Rinse the rice and add it to the rice cooker with broth. Follow your rice cooker's instructions. While the rice cooks, sauté the mushrooms and garlic in a skillet on the stove. Once the rice is done, mix it with the mushroom mixture for a delicious meal. In this post, we explored a simple recipe for Garlic Butter Mushroom Rice. You learned about the ingredients, step-by-step cooking instructions, and various tips to make it better. I shared ways to adjust the recipe, add protein, and make it seasonal. Remember, you can store leftovers well and enjoy them later. This dish is tasty and easy to customize. With a few changes, it can fit any meal. Cooking at home can be fun and rewarding, so give it a try!](https://dailydishly.com/wp-content/uploads/2025/07/29514873-f8b8-4454-af35-97a6bac317ac-768x768.webp)
