Savory Sesame Chicken Zucchini Noodles Recipe
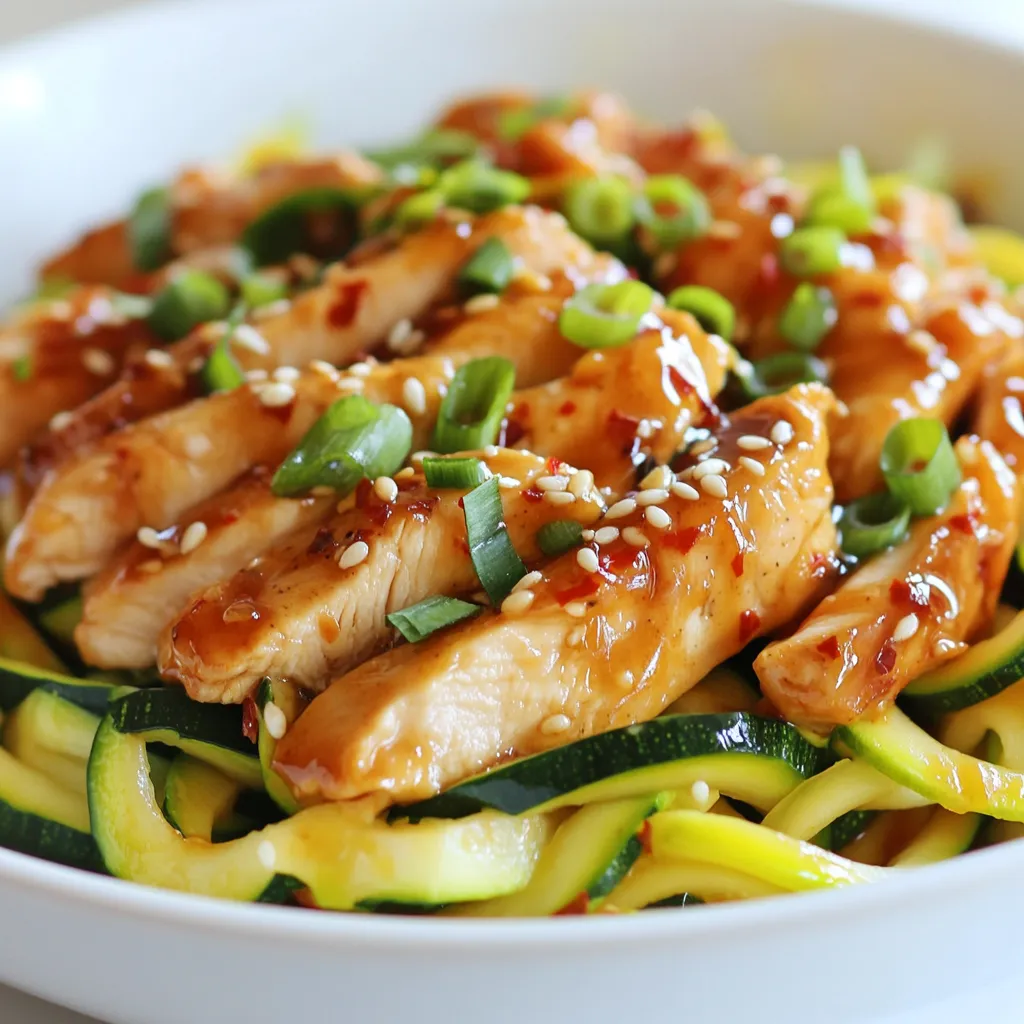
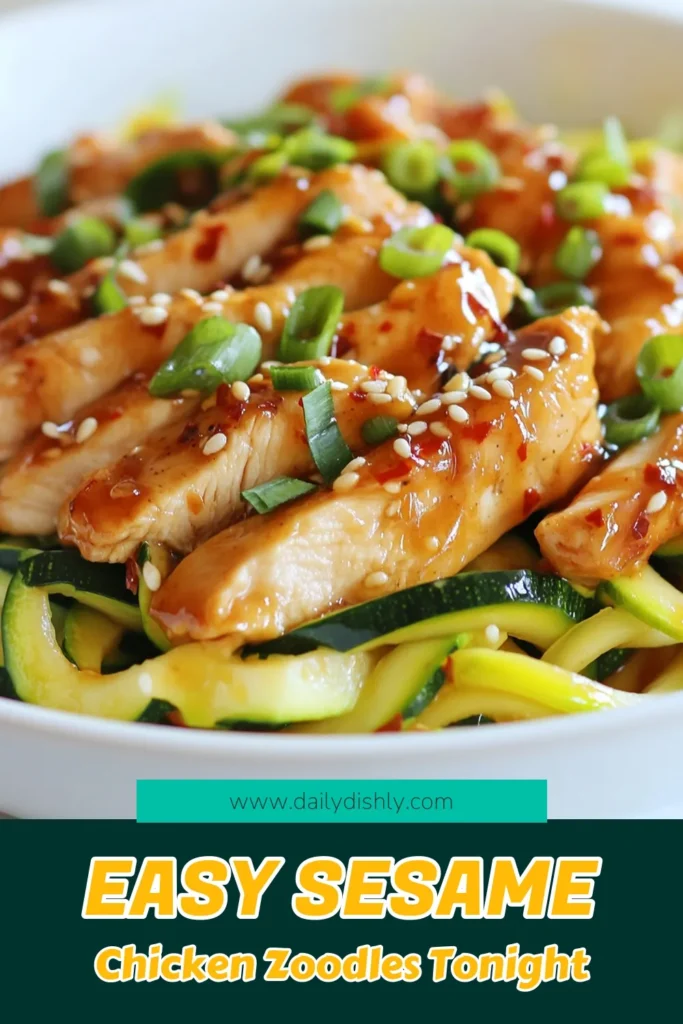
If you’re on the hunt for a quick, delicious meal, you’re in the right place! This Savory Sesame Chicken Zucchini Noodles Recipe packs a flavorful punch while keeping things light and healthy. With tender chicken, fresh zucchini noodles, and a mouthwatering sauce, you’ll fall in love with every bite. Join me as we explore the simple steps to create this vibrant dish that’s perfect for any occasion. Let’s get cooking!
Why I Love This Recipe
- Healthy Twist: This recipe swaps traditional noodles for zucchini, providing a low-carb, nutrient-rich alternative that is perfect for health-conscious eaters.
- Quick and Easy: With a total prep and cook time of just 20 minutes, this dish is ideal for busy weeknights without sacrificing flavor or nutrition.
- Flavorful Marinade: The combination of soy sauce, honey, garlic, and ginger creates a delicious marinade that infuses the chicken with rich, savory flavors.
- Customizable: This recipe allows for easy modifications; you can add your favorite vegetables or adjust the spice level to suit your taste.
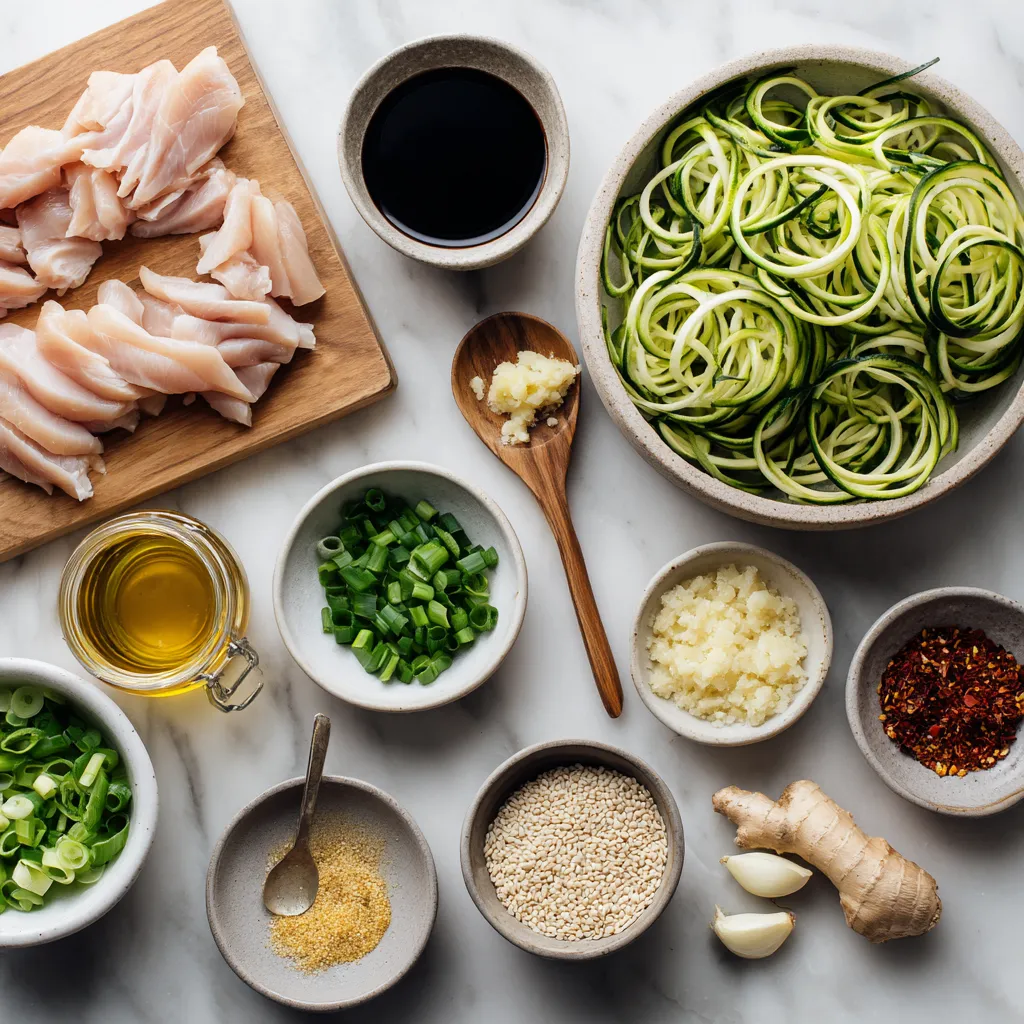
Ingredients
Main Ingredients
– Chicken Breast: Use 1 pound of thinly sliced chicken breast. This keeps the chicken tender and cooks quickly. You can use boneless, skinless chicken for ease. Cut the chicken into even pieces for uniform cooking.
– Zucchini: You will need 2 medium zucchinis, spiralized into noodles. To spiralize, use a spiralizer or a julienne peeler. Aim for thin noodles to mimic traditional pasta. This method adds texture and helps the dish feel light.
Sauce and Seasoning Ingredients
– Sesame Oil: Use 2 tablespoons of sesame oil. This oil adds a rich, nutty flavor. It pairs well with chicken and enhances the overall taste of the dish.
– Soy Sauce Alternatives: You can choose soy sauce or tamari if you prefer gluten-free. Both options add a salty depth. Tamari has a slightly smoother taste, which some people prefer.
Optional Flavor Enhancers
– Garlic and Ginger: Use 2 cloves of fresh garlic and 1 teaspoon of grated ginger. Mince the garlic and grate the ginger for the best flavor. Fresh ingredients make a big difference in taste.
– Red Pepper Flakes: Add 1/4 teaspoon of red pepper flakes if you want heat. This is optional, but it gives a nice kick. Adjust the amount based on your spice preference.
Step-by-Step Instructions
Marinating the Chicken
Marinating the chicken is key for flavor. It helps the meat soak up all the tasty ingredients. In a bowl, mix soy sauce, honey, minced garlic, grated ginger, salt, and pepper. Add the thinly sliced chicken breast. Let it sit for at least 15 minutes. This time allows the flavors to blend and makes the chicken juicy.
Cooking the Chicken
To cook the chicken perfectly, use a hot skillet. Heat 1 tablespoon of sesame oil over medium-high heat. Once the oil is hot, add the marinated chicken. Cook for about 5-7 minutes. Look for a nice golden color. The chicken should be cooked through and no longer pink inside. Remove it from the skillet and set it aside. This keeps it tender and full of flavor.
Sautéing Zucchini Noodles
For the zucchini noodles, timing is everything. In the same skillet, add the last tablespoon of sesame oil. Heat it up before adding the spiralized zucchini. Sauté for 2-3 minutes. You want them slightly tender but still firm. If you like spice, toss in red pepper flakes during this step. This will give your dish a nice kick.
Combining Ingredients
To combine everything, return the cooked chicken to the skillet with zucchini noodles. Toss all the ingredients together. This ensures each bite gets a bit of chicken and zucchini. Heat everything through for another 2 minutes. Taste and adjust the seasoning with salt and pepper if needed.
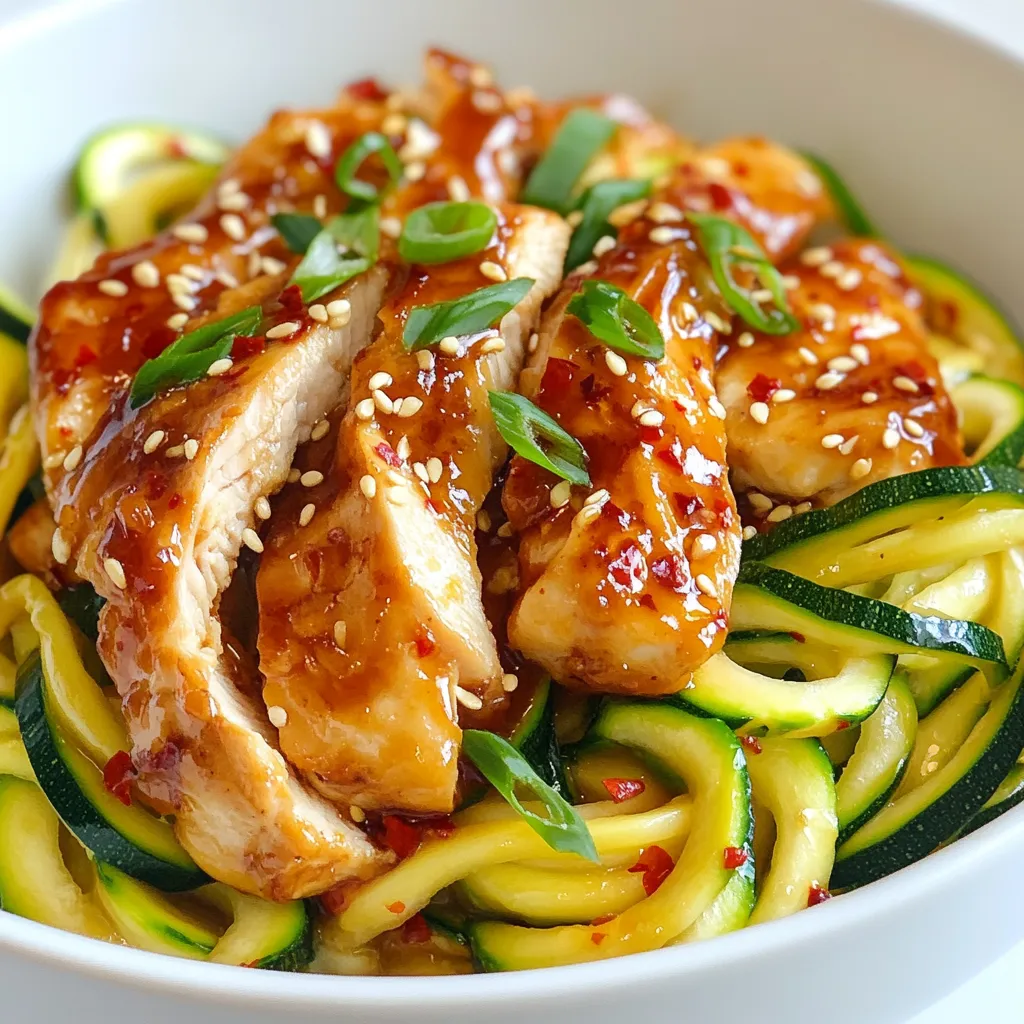
Garnishing and Serving
Presentation makes your dish pop. Once combined, remove from heat. Transfer the sesame chicken zucchini noodles to a serving dish. Sprinkle sliced green onions and sesame seeds on top. This adds color and crunch to your meal. Serve it hot, and enjoy your beautiful creation!
Tips & Tricks
Perfecting the Recipe
Adjusting flavors is key to making this dish your own. If you like it sweeter, add more honey. For a saltier taste, increase the soy sauce. You can also add more garlic or ginger for a bolder flavor. Taste as you go. This way, you can find the perfect balance for your palate.
Cooking Techniques
To avoid soggy zucchini noodles, cook them quickly. After spiralizing, sauté the noodles for only 2-3 minutes. They should still have a little crunch. If you cook them too long, they turn mushy. Also, make sure to dry the noodles with a paper towel. This helps remove excess moisture.
Food Pairing Suggestions
For sides, try serving sesame chicken zucchini noodles with a fresh salad or steamed broccoli. You can also add a light dipping sauce for extra flavor. A side of brown rice or quinoa can round out the meal. These options keep the dish light and healthy.
Pro Tips
- Marinate for Flavor: Allowing the chicken to marinate for longer than 15 minutes, ideally up to an hour, will enhance the flavor and tenderness of the meat.
- Choose Firm Zucchini: Select firm, fresh zucchinis to ensure your noodles have a good texture and hold up during cooking.
- Don’t Overcook the Noodles: Sauté the zucchini noodles just until they are tender but still al dente to prevent them from becoming mushy.
- Garnish Generously: Adding extra green onions and sesame seeds just before serving not only enhances the presentation but also adds a fresh crunch.
Variations
Protein Swaps
You can swap chicken for other proteins. Tofu is a great choice for a plant-based meal. It soaks up flavors well and adds a nice texture. Shrimp is another tasty option. Cook it quickly to keep it tender. The key is to adjust the cooking time based on the protein you choose.
Vegetable Add-ins
Add more veggies for extra nutrition. Bell peppers bring color and crunch. Carrots add sweetness and vibrant orange. Mushrooms give an earthy flavor, while spinach adds green goodness. Mix and match based on what you like. This keeps the dish fresh and exciting.
Sauce Modifications
You can adjust the sauce to your taste. Want it sweeter? Add more honey or agave syrup. For a spicy kick, increase the red pepper flakes. If you prefer less salt, use less soy sauce or a low-sodium version. These tweaks let you customize the flavor just for you.
Storage Info
Refrigeration Guidelines
To keep your sesame chicken zucchini noodles fresh, store leftovers in an airtight container. This helps prevent moisture loss and keeps the flavors intact. Place them in the fridge within two hours of cooking. They will stay good for about 3 days. When you want to eat them, just reheat in a pan or microwave until warm.
Freezing Instructions
You can freeze these noodles for later meals. First, let the dish cool completely. Then, place servings in freezer-safe bags or containers. Remove as much air as possible to avoid freezer burn. They can last up to 3 months in the freezer. To reheat, thaw overnight in the fridge, then warm in a skillet or microwave. Add a splash of water to help revive the noodles.
Shelf Life Tips
For the best taste, enjoy sesame chicken zucchini noodles within 3 days when refrigerated. If you freeze them, eat them within 3 months. Check for any off smells or changes in texture before eating. Always reheat thoroughly to ensure safety and flavor.
FAQs
Can I make this dish gluten-free?
Yes, you can make this dish gluten-free. Use tamari instead of soy sauce. Tamari is a great gluten-free alternative. It tastes similar but has a richer flavor. Also, check other ingredients for gluten. Most spices and oils are safe, but always read labels.
How do I spiralize zucchini?
To spiralize zucchini, you need a spiralizer. A simple handheld tool works well. You can also use a box grater or a peeler. Cut the ends off the zucchini first. Then, twist the zucchini against the blade. This will give you long, noodle-like strands.
What can I use instead of honey?
You can use agave syrup as a vegan substitute for honey. It has a similar sweetness. Maple syrup is another option that works well. Both will change the flavor slightly but still taste great in the dish.
Is this recipe suitable for meal prep?
Yes, this recipe is great for meal prep. You can cook the chicken and zucchini noodles ahead of time. Store them in airtight containers in the fridge. Reheat when you are ready to eat. Just be careful not to overcook the zucchini when reheating.
This dish combines easy steps and tasty ingredients for a great meal. You learned about prepping chicken, zucchini, and sauce options. I shared tips for cooking and garnishing for the best look and flavor. You can even customize the recipe to suit your taste. Remember, the right storage helps keep leftovers fresh. Enjoy trying these ideas and making the dish your ow

![To make smoky chipotle bean burritos, gather these key ingredients: - 1 cup black beans, cooked and mashed - 1 cup pinto beans, cooked and mashed - 1 tablespoon chipotle pepper in adobo sauce, minced - 4 large flour tortillas - 1 cup cooked brown rice - 1 cup corn kernels (fresh, frozen, or canned) - 1 cup shredded cheese (cheddar or a cheese blend) These ingredients create a rich and satisfying filling. The black and pinto beans add protein and flavor. The tortillas hold everything together, making it easy to enjoy. The right spices and seasonings elevate your burritos. Here’s what you need: - 1 teaspoon smoked paprika - 1 teaspoon ground cumin - ½ teaspoon garlic powder - ½ teaspoon onion powder - Salt and pepper to taste Smoked paprika gives a deep flavor. Ground cumin adds warmth and earthiness. Garlic and onion powders bring out the savory notes. Adjust the salt and pepper based on your taste. Toppings add freshness and fun to your burritos. Consider these options: - ½ cup sour cream or Greek yogurt - Fresh cilantro, chopped - Lime wedges for serving Sour cream or yogurt adds creaminess. Cilantro brings a touch of brightness. Lime juice adds zing and balances the flavors. Feel free to mix and match your toppings! Checking out the Full Recipe can help you see how to use these ingredients effectively. To start, gather your ingredients. In a medium bowl, mix 1 cup of black beans and 1 cup of pinto beans. Use a fork to mash them slightly, but leave some texture for bite. This adds a nice feel to the burrito. Next, add 1 tablespoon of minced chipotle pepper in adobo sauce. This gives the burrito its smoky kick. Then, sprinkle in 1 teaspoon of smoked paprika, 1 teaspoon of ground cumin, ½ teaspoon of garlic powder, and ½ teaspoon of onion powder. Season with salt and pepper to taste. Mix everything well, so the flavors blend nicely. Now, let’s assemble the burritos. Take a clean surface or a large plate. Lay out one large flour tortilla on the surface. Add an even scoop of the bean mixture down the center of the tortilla. Be generous, but don’t overfill! Next, add a scoop of cooked brown rice, followed by a sprinkle of corn kernels. Top it all off with a handful of shredded cheese. Now, fold the sides of the tortilla over the filling. Then, roll the burrito tightly from the bottom up. Repeat this with the remaining tortillas until all the filling is used. To cook the burritos, heat a non-stick skillet over medium heat. Place the burritos seam-side down in the skillet. Cook them for about 2-3 minutes on each side. Look for a golden brown and crispy texture. This step makes them extra tasty! Once cooked, remove the burritos from the skillet and let them cool slightly. Serve warm, topped with a dollop of sour cream or Greek yogurt, chopped cilantro, and lime wedges on the side for squeezing. Enjoy your smoky chipotle bean burritos! For more details, check out the Full Recipe. To boost the smoky taste, add more chipotle pepper. You can use two tablespoons if you like it hot. Smoked paprika also adds depth. I often sprinkle extra on top before serving. For a touch of sweetness, add a bit of honey. This balance makes the flavors pop. You can make these burritos in advance. Prepare the filling and wrap them in tortillas. Then, wrap each burrito in foil. Store them in the fridge for up to three days. When you're ready, heat them in the oven for a quick meal. This method keeps them tasty and fresh. A few tools help make this recipe easier. Use a large bowl for mixing the bean filling. A non-stick skillet is great for cooking the burritos. A spatula helps flip them without breaking. If you have a tortilla press, it can shape the tortillas perfectly. Lastly, kitchen scissors can cut cilantro quickly. For the full recipe, check out the [Full Recipe]. {{image_2}} You can make this recipe vegetarian or vegan easily. Use plant-based cheese for a vegan choice. You can also swap sour cream for cashew cream or avocado. Both options add creaminess without dairy. This way, everyone can enjoy these burritos. Feel free to add more veggies to your burritos. Try diced bell peppers, zucchini, or spinach. Sauté them before mixing with the beans for extra flavor. You can also add roasted veggies for a smoky taste. This adds color and nutrition, making your meal even better. If you want to change the protein, use lentils or quinoa. Both provide great texture and nutrients. You can also try chickpeas for a different flavor. They blend well with the smoky spices. These options keep your burritos hearty and satisfying. You can keep your Smoky Chipotle Bean Burritos in the fridge. Place them in an airtight container. They will stay fresh for about 3 to 4 days. If you want to keep them longer, consider freezing. To freeze the burritos, wrap each one tightly in plastic wrap. Then, place them in a freezer-safe bag. This keeps them safe from freezer burn. They can last in the freezer for up to 3 months. When you’re ready to eat, just thaw them in the fridge overnight. To reheat, you can use an oven or a skillet. If using the oven, preheat it to 350°F (175°C). Wrap the burrito in foil and heat for about 15-20 minutes. If using a skillet, heat it over medium heat. Cook the burrito for about 3-4 minutes on each side. This keeps them crispy and warm. For a quick option, you can use the microwave. Heat it for 1-2 minutes, but it may not stay crispy. Enjoy your delicious burritos! For the full recipe, check out the Smoky Chipotle Bean Burritos recipe. You can use any beans you like. Great options include kidney beans or chickpeas. You can also blend beans for a smoother texture. If you want a meat option, try shredded chicken or ground beef. Remember to adjust the seasoning to fit the new beans or meat. To add heat, try more chipotle peppers in adobo sauce. You can also mix in diced jalapeños or a splash of hot sauce. If you like it really spicy, use a pinch of cayenne pepper. Taste the filling as you go to reach your perfect heat level. Yes, you can use corn tortillas! They add a nice flavor and texture. Just be careful, as they can tear more easily than flour tortillas. Warm them slightly before filling to make them more pliable. This way, they’ll hold up better when you roll them. For the full recipe, check out the details above. In this post, I covered how to make smoky chipotle bean burritos. We explored key ingredients, spices, and toppings. I shared simple steps for preparation, assembly, and cooking. Helpful tips improved smoky flavors and storage methods. I also offered vegetarian options and variations. These burritos are easy, tasty, and fun to make. You can adapt them to your taste and enjoy any time. With these insights, you are ready to create a delicious meal. Happy cooking!](https://dailydishly.com/wp-content/uploads/2025/06/6af8d986-bcf9-4176-ab5b-3d565f261c50-768x768.webp)
![- 4 large bell peppers - 2 cups cooked chicken, shredded - 1/2 cup buffalo sauce - 1/2 cup cream cheese - 1 cup shredded cheddar cheese - 1/2 cup celery, finely chopped - 1/4 cup green onions, sliced - Fresh parsley for garnish - Salt and pepper to taste The ingredients for Buffalo Chicken Stuffed Peppers are simple and fun to work with. Start with four large bell peppers. These can be any color you like. Next, use two cups of cooked chicken, shredded well. This can be leftover chicken or even rotisserie chicken for ease. Now, for the star of the show: the buffalo sauce. You need half a cup, but feel free to adjust it based on how spicy you want your dish. Then, add half a cup of cream cheese. This makes the filling creamy and rich. Next, grab a cup of shredded cheddar cheese. This cheese will melt beautifully and top off your stuffed peppers. For optional crunch and flavor, consider adding half a cup of finely chopped celery and a quarter cup of sliced green onions. These add freshness and texture to the filling. Finally, don't forget salt and pepper to taste. This enhances all the flavors. If you want to make your dish pop, garnish with fresh parsley before serving. For the full recipe, check out the [Full Recipe]. - Preheat the oven to 375°F (190°C). - Cut the tops off the bell peppers and remove the seeds and membranes. Set them aside. - In a large bowl, combine the shredded chicken with the buffalo sauce. - Add the softened cream cheese and 1 cup of shredded cheddar cheese. - Toss in the finely chopped celery and sliced green onions. - Mix until everything is well combined. Season with salt and pepper to taste. - Spoon the buffalo chicken mixture into each prepared bell pepper. Pack it in generously. - Place the stuffed peppers upright in a baking dish. Cover them with foil. - Bake in the preheated oven for 25 minutes. - After 25 minutes, remove the foil. Sprinkle the remaining cheddar cheese on top. - Bake for an additional 10-15 minutes until the cheese is bubbly and golden. - Let them cool for a few minutes before serving. - If you like, garnish with fresh parsley before serving. For the full recipe, check out the details above. Enjoy your meal! To make the perfect spicy filling, adjust the buffalo sauce. If you want more heat, add more sauce. For milder flavors, use less sauce. The right amount can make or break your dish! Also, think about cheese. You can use different types like mozzarella or pepper jack. They can change the flavor and spice level. Check the doneness of your peppers while cooking. They should be tender but not mushy. A fork can help test them. Covering the peppers with foil keeps them moist and helps cook evenly. After some time, you can remove the foil to let the cheese get bubbly and golden. Garnishing with fresh parsley adds color and a fresh taste. It makes your dish look appealing. You can serve the stuffed peppers on a nice plate or in a bowl for a cozy meal. Pair them with a side salad or some crunchy veggies to round out your dinner. For more details, check the Full Recipe. {{image_2}} You can switch up the protein in your stuffed peppers. Ground turkey works well. It has a mild flavor that blends nicely with buffalo sauce. Use a 1:1 ratio when swapping it in. Rotisserie chicken is another great option. It saves time and adds flavor. Shred the chicken and mix it with the buffalo sauce, just like in the full recipe. This gives your dish a tasty and easy twist. Adding veggies can boost nutrition and flavor. Black beans are a good choice. They add protein and fiber. Just rinse and drain them before mixing. Quinoa can add a nice texture. Cook it according to package instructions and fold it into the filling. This makes your peppers heartier and more satisfying. You can mix and match these options to fit your tastes. Switching sauces can change the whole dish. Try BBQ sauce instead of buffalo sauce for a sweet twist. Just use the same amount so the filling stays creamy. You can also experiment with other hot sauces. If you like it spicy, go for a habanero sauce. For a milder touch, try a sriracha or even a chipotle sauce. Each sauce brings its own flavor, making your stuffed peppers unique every time. To keep your buffalo chicken stuffed peppers fresh, use airtight containers. Glass containers work best, as they do not absorb smells. Plastic containers are good too, but ensure they are BPA-free. Store your leftovers in the fridge. They last for about three days. You can reheat your stuffed peppers in the oven or microwave. The oven gives the best taste. Preheat your oven to 350°F (175°C). Place the peppers in an oven-safe dish and cover with foil. Heat for about 15-20 minutes. If using a microwave, place the stuffed pepper on a microwave-safe plate. Heat for two to three minutes, checking every minute. To freeze stuffed peppers, cool them first. Wrap each pepper in plastic wrap and then in foil. This helps prevent freezer burn. Store them in a freezer bag for extra protection. They can last up to three months. To thaw, place them in the fridge overnight. Reheat as mentioned above. Enjoy your buffalo chicken stuffed peppers fresh out of the oven! For the full recipe, check the earlier section. To make Buffalo Chicken Stuffed Peppers vegan, you can use several substitutes. Instead of chicken, try shredded jackfruit or tofu. For cheese, use vegan cream cheese and shredded vegan cheese. These swaps keep the dish creamy and flavorful while fitting a vegan diet. You can still use buffalo sauce because many brands are vegan-friendly. This way, you enjoy the same spicy kick without animal products. Yes, you can prepare these stuffed peppers ahead of time. Mix the filling and stuff the peppers a day before. Cover them well and store them in the fridge. When ready to cook, take them out and bake as directed. You may need to adjust the baking time if they are cold from the fridge. This makes meal prep easy and quick for busy days. Buffalo Chicken Stuffed Peppers taste great with fresh sides. Here are some ideas: - Simple Green Salad: A mix of greens, tomatoes, and cucumbers. - Veggie Sticks: Carrots and celery with ranch or blue cheese dip. - Rice or Quinoa: A flavorful grain to balance the spice. - Corn on the Cob: Sweet corn adds a nice touch. These sides make your meal complete and delicious! For the full recipe, check out the detailed instructions above. You now know how to make Buffalo Chicken Stuffed Peppers, plus some great tips. Remember to use the right mix of flavors and adjust spices to your taste. Don't forget the fun in trying new ingredients and variations. Enjoy your meal and share it with others! This dish is simple to make, and leftovers can be stored well. Get creative and have fun in the kitchen!](https://dailydishly.com/wp-content/uploads/2025/06/c965f089-28dc-4039-a3b8-814f40f3cab4-768x768.webp)