Caprese Stuffed Portobellos Flavorful Veggie Delight
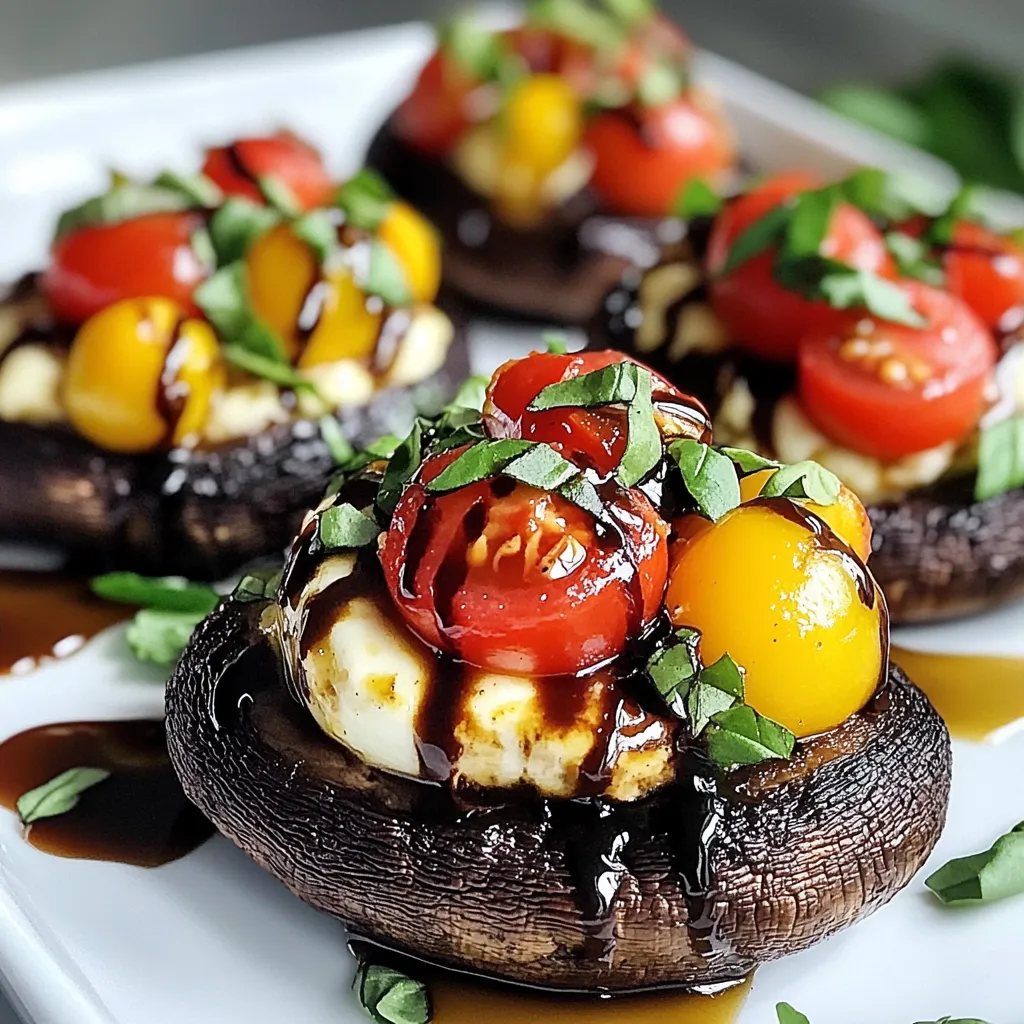

Are you ready to transform your meals? Caprese Stuffed Portobellos are a tasty veggie delight that’s easy to make! With juicy portobello mushrooms, fresh mozzarella, and vibrant cherry tomatoes, this dish packs incredible flavor. You can enjoy it as a main course or a side. Join me as we explore simple steps to create this satisfying meal that will impress your family and friends. Let’s cook something delicious!
Why I Love This Recipe
- Flavorful Combination: The pairing of juicy tomatoes, creamy mozzarella, and fragrant basil creates a delightful burst of flavor in every bite.
- Healthy and Wholesome: This recipe is packed with fresh vegetables and herbs, making it a nutritious choice for any meal.
- Easy to Prepare: With just a few simple steps, you can whip up this delicious dish in under 30 minutes, perfect for busy weeknights.
- Vegetarian Delight: These stuffed portobellos are a great meatless option that even non-vegetarians will love, adding variety to your dinner table.
Ingredients
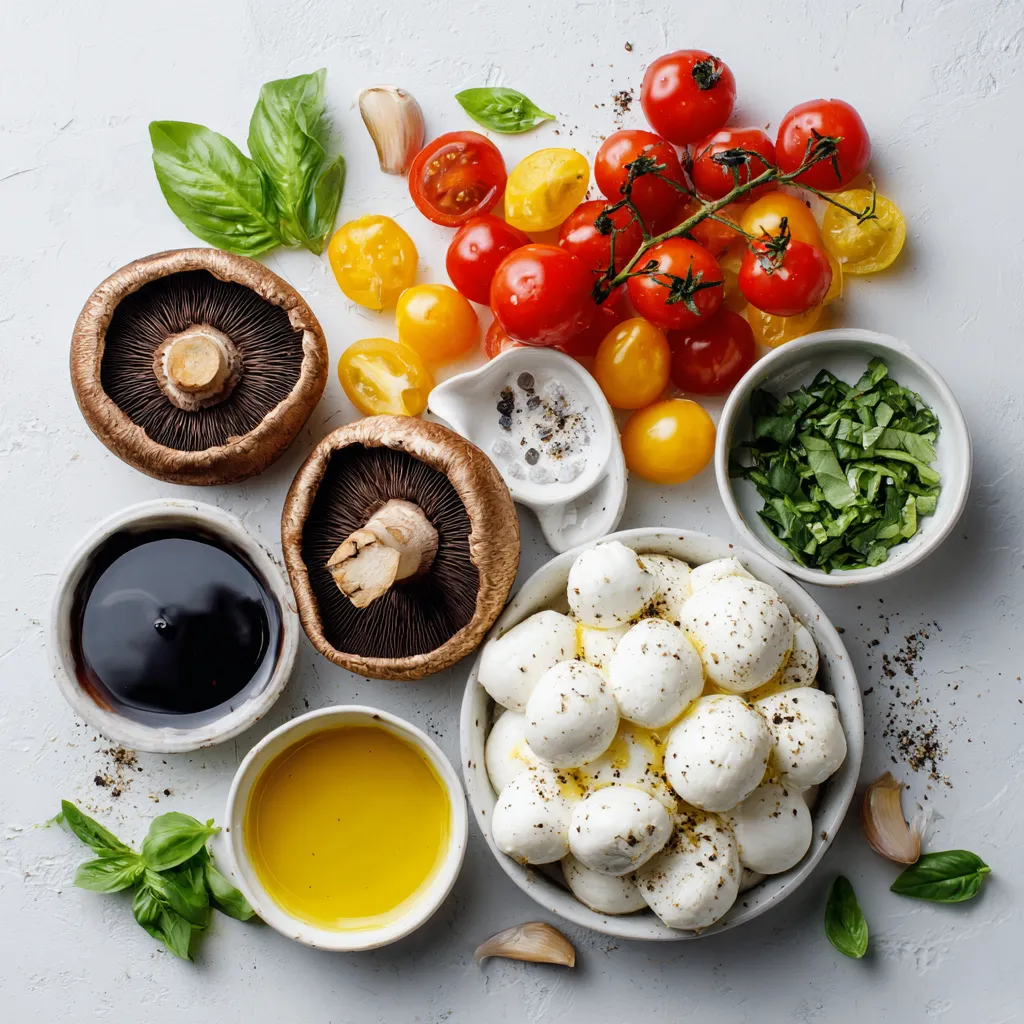
List of Fresh Ingredients
– 4 large portobello mushrooms
– 1 cup cherry tomatoes, halved
– 1 cup fresh mozzarella balls, halved or diced
– 1/2 cup fresh basil leaves, chopped
Pantry Ingredients
– 2 tablespoons olive oil
– 2 tablespoons balsamic glaze
– 2 cloves garlic, minced
– Salt and pepper to taste
Optional Garnishes
– Additional fresh basil leaves
The key to a great Caprese stuffed portobello is fresh ingredients. Start with large portobello mushrooms. They hold the filling well and offer a rich flavor. Cherry tomatoes add a sweet and juicy burst. Fresh mozzarella brings creaminess and melts beautifully. Fresh basil gives that classic Caprese taste.
In your pantry, you will need olive oil for cooking and flavor. Balsamic glaze adds a touch of sweetness and tang. Minced garlic gives a punch of flavor. Salt and pepper help to enhance all the tastes.
For garnishing, you can add more fresh basil leaves. They make the dish look beautiful and fresh. This simple list of ingredients makes for a colorful and tasty meal.
Step-by-Step Instructions
Preparation Steps
First, preheat your oven to 375°F (190°C). This step gets your oven ready for baking. While it heats, line a baking sheet with parchment paper. This helps keep the mushrooms from sticking.
Next, clean the portobello mushrooms. Use a damp cloth to wipe them gently. Avoid soaking them in water, as they can become soggy. Remove the stems and gills from the mushrooms with a spoon. This step creates space for your tasty filling.
Making the Filling
In a large mixing bowl, combine the halved cherry tomatoes, mozzarella balls, chopped basil, and minced garlic. Add balsamic glaze and olive oil to the bowl. Then, season with salt and pepper to taste. Toss all the ingredients until they mix well. This mixture brings the classic caprese flavors together.
Baking the Stuffed Mushrooms
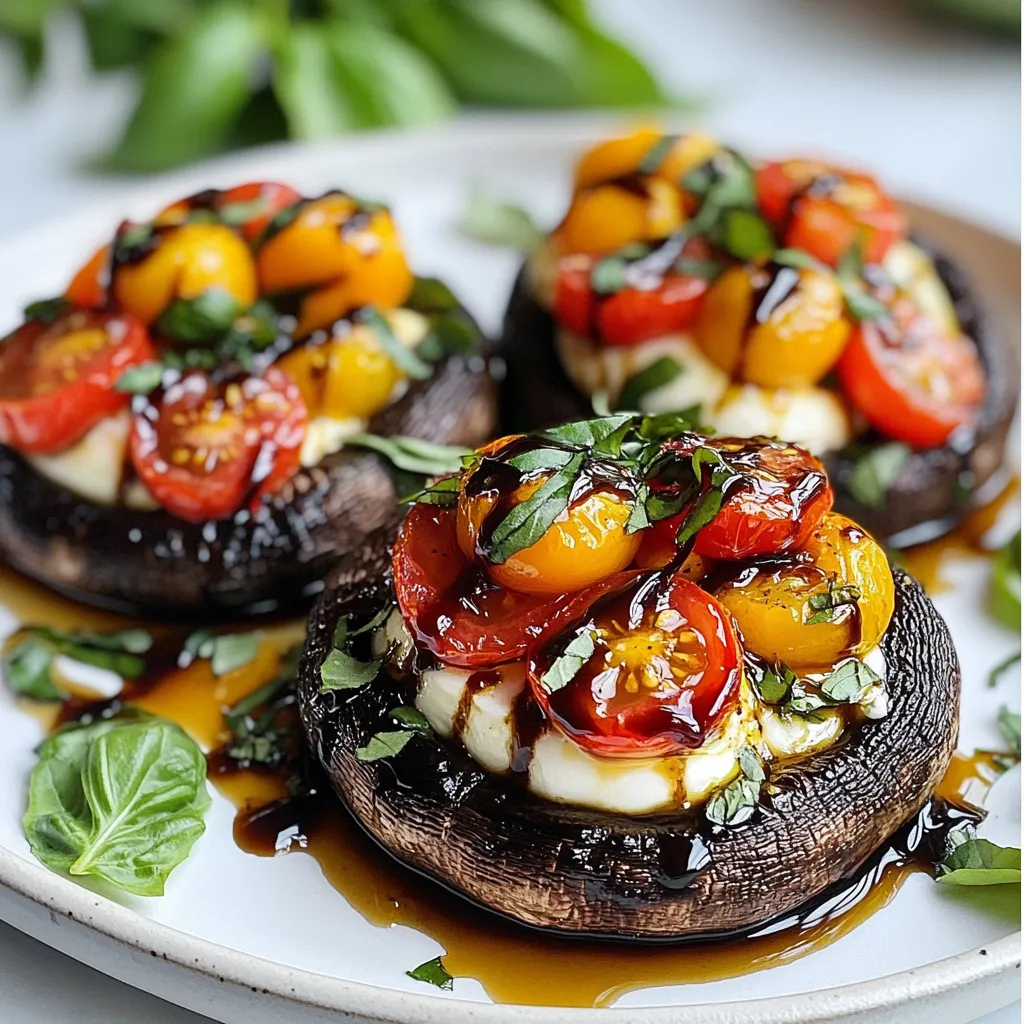
Now, take each portobello cap and place it on your prepared baking sheet, gill side facing up. Generously fill each mushroom with the caprese mixture. Make sure to mound the filling slightly in the center.
Bake the stuffed mushrooms in your preheated oven for about 20 minutes. You want the mushrooms to be tender, and the cheese should be melty and golden. When they are done, remove the baking sheet from the oven. Let them cool for a few minutes before serving. If you like, garnish with extra fresh basil leaves for a pop of color. Enjoy your Caprese Stuffed Portobellos!
Tips & Tricks
Ensuring Perfect Mushrooms
To get the best mushrooms, start by cleaning them well. Use a damp cloth to wipe off dirt. Avoid soaking them in water. This can make them soggy. Next, remove the stems and gills. This gives you more room for the filling.
Enhancing Flavor
Seasoning makes a huge difference in taste. Use salt and pepper to bring out all the flavors. Fresh herbs like basil add a nice touch. If you only have dried herbs, use less. Dried herbs are stronger than fresh ones.
Serving Suggestions
These stuffed mushrooms pair well with a simple salad. A light vinaigrette works great. You can also serve them with crusty bread. For drinks, try a crisp white wine or sparkling water.
For presentation, place the mushrooms on a nice platter. Garnish with extra basil leaves for color. This makes your dish look even more inviting.
Pro Tips
- Choose Fresh Ingredients: Use the ripest cherry tomatoes and the freshest mozzarella for the best flavor in your Caprese stuffed portobellos.
- Marinate the Mushrooms: For extra flavor, brush the portobello caps with a mixture of olive oil, balsamic glaze, and garlic before filling them.
- Experiment with Cheese: Try different types of cheese, such as goat cheese or feta, for a unique twist on the traditional Caprese flavor.
- Serve with a Side: Pair these stuffed mushrooms with a light salad or crusty bread to complete your meal.
Variations
Ingredient Swaps
You can switch up the cheese in this recipe. Try goat cheese or feta for a tangy twist. They both add a unique flavor. If you want more protein, add chicken or shrimp. Cook them first, then mix them into the filling. This adds richness and makes the dish more filling.
Dietary Modifications
For a vegetarian option, you can keep it as is. To make it vegan, use dairy-free cheese and skip the balsamic glaze. For gluten-free eaters, this dish is naturally safe. Just ensure any added ingredients are gluten-free.
Flavor Enhancements
Want to boost flavor? Add fresh herbs like oregano or thyme. They work well with the basil and add depth. You can also try spices like red pepper flakes for heat. Using flavored oils, like garlic oil, can enrich the taste too. A drizzle of herb-infused oil adds a gourmet touch.
Storage Info
Storing Leftovers
To keep your Caprese stuffed portobellos fresh, store them in the fridge. Use an airtight container for best results. Place a layer of paper towels in the container to absorb excess moisture. This helps prevent sogginess. You can also cover them tightly with plastic wrap. If you want to freeze them, wait until they cool completely. Wrap each mushroom in plastic wrap and place them in a freezer bag. Squeeze out as much air as possible to avoid freezer burn.
Reheating Instructions
For the best taste and texture, reheat your stuffed mushrooms in the oven. Preheat the oven to 350°F (175°C). Place the mushrooms on a baking sheet and bake for about 10-15 minutes. This warms them through and keeps the cheese melty. You can also use a microwave if you’re in a hurry. Just heat them for 1-2 minutes. Be careful not to overheat, as this can make them rubbery.
Shelf Life
Leftovers can last in the fridge for about 3 days. After that, they may lose flavor and quality. If you freeze them, they can last for up to 2 months. Just remember to label your container with the date. This way, you can enjoy your tasty stuffed mushrooms later without worry!
FAQs
What can I use instead of portobello mushrooms?
If you want a different mushroom, try using large shiitake or cremini mushrooms. Both of these options have a nice shape and flavor. You can also use eggplant slices for a fun twist. Eggplant gives a unique taste and holds the filling well.
Can I prepare Caprese Stuffed Portobellos in advance?
Yes, you can prepare them ahead of time! Stuff the mushrooms and place them in the fridge. Just cover them with plastic wrap. Bake them when you are ready to serve. This makes meal prep easy and quick.
How do I know when the mushrooms are done cooking?
Watch for a few signs. The mushrooms should look brown and tender. The cheese should be melted and bubbly. You can poke them gently with a fork. They should feel soft but not mushy. Enjoy your perfectly cooked Caprese Stuffed Portobellos!
The blog post covered how to make Caprese Stuffed Portobello Mushrooms. We discussed fresh and pantry ingredients needed, along with optional garnishes. I walked you through the steps and provided tips for perfect results. You can also explore variations and learn about storing any leftovers.
Remember, this dish is flexible, fun, and tasty. Enjoy your cooking and impress your family with this wonderful trea
Caprese Stuffed Portobellos
Ingredients
- 4 large portobello mushrooms
- 1 cup cherry tomatoes, halved
- 1 cup fresh mozzarella balls, halved or diced
- 0.5 cup fresh basil leaves, chopped
- 2 tablespoons balsamic glaze
- 2 tablespoons olive oil
- 2 cloves garlic, minced
- to taste salt and pepper
- optional fresh basil leaves for garnish
Instructions
- Preheat your oven to 375°F (190°C) and line a baking sheet with parchment paper.
- Clean the portobello mushrooms by gently wiping them with a damp cloth. Remove the stems and gills with a spoon to create more space for the filling.
- In a mixing bowl, combine the halved cherry tomatoes, mozzarella, chopped basil, minced garlic, balsamic glaze, olive oil, salt, and pepper. Toss the ingredients together until everything is well mixed.
- Take each portobello cap and place it on the prepared baking sheet, gill side facing up. Generously fill each mushroom with the caprese mixture, mounding it slightly in the center.
- Bake in the preheated oven for about 20 minutes, or until the mushrooms are tender and the cheese is melty and golden.
- Remove from the oven and let cool for a few minutes. Garnish with additional fresh basil leaves if desired before serving.

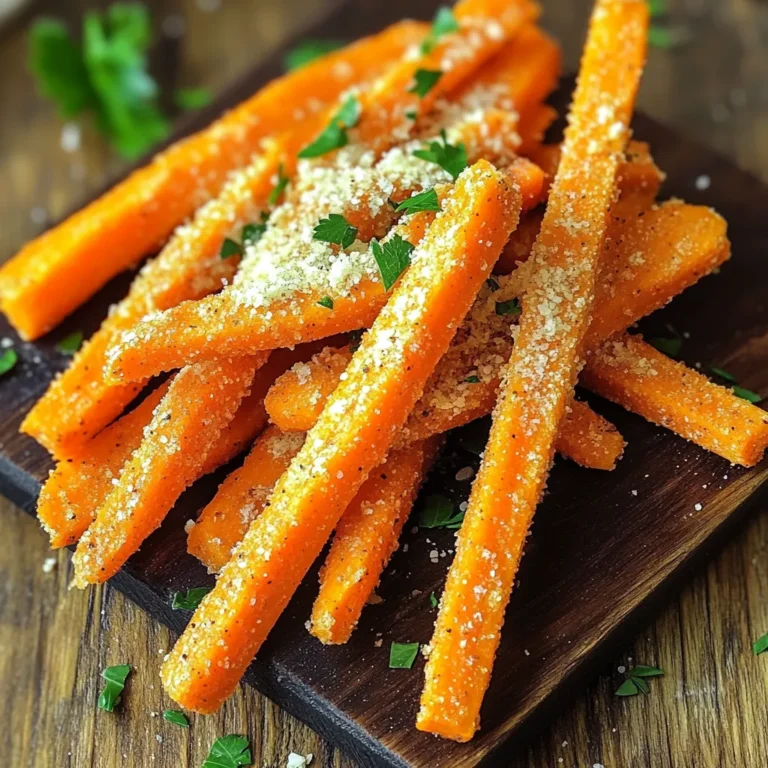
![To make a refreshing Lemon Basil Chickpea Salad, you need the following: - 1 can (15 oz) chickpeas, drained and rinsed - 1 cup cherry tomatoes, halved - 1 cucumber, diced - 1 bell pepper (any color), diced - 1/4 red onion, finely chopped - 1/4 cup fresh basil leaves, chopped - Juice of 1 lemon - 3 tablespoons extra-virgin olive oil - Salt and pepper to taste - 1/4 teaspoon garlic powder - 1/4 teaspoon red pepper flakes (optional) When picking your produce, choose firm tomatoes and bright, crisp cucumbers. Look for bell peppers that feel heavy for their size. Fresh basil should smell sweet and look vibrant. These tips help ensure your salad shines with flavor. You can add extra flavor and texture to your salad with these options: - Avocado, diced for creaminess - Feta cheese, crumbled for a salty kick - Olives, sliced for a briny touch - Grilled corn for sweetness Feel free to swap ingredients based on what’s in season. For example, use zucchini in summer or roasted butternut squash in fall. This flexibility makes the salad fun and fresh all year long. For the complete recipe, check out the [Full Recipe]. To make the Lemon Basil Chickpea Salad, start with a large bowl. Combine the following ingredients: - 1 can (15 oz) chickpeas, drained and rinsed - 1 cup cherry tomatoes, halved - 1 cucumber, diced - 1 bell pepper (any color), diced - 1/4 red onion, finely chopped - 1/4 cup fresh basil leaves, chopped Mix these well. The chickpeas add protein and texture. The tomatoes and cucumber bring freshness and crunch. The bell pepper adds color, while the onion gives a mild zing. Once mixed, let’s prepare the dressing. You can serve the salad right away, but I suggest letting it sit for at least 10 minutes. This time helps the flavors blend nicely. For the dressing, grab a small bowl. Whisk together these ingredients: - Juice of 1 lemon - 3 tablespoons extra-virgin olive oil - Salt and pepper to taste - 1/4 teaspoon garlic powder - 1/4 teaspoon red pepper flakes (optional) The lemon juice gives a bright, tangy taste. Olive oil adds richness. Adjust the salt and pepper to your liking. If you want a kick, add the red pepper flakes. Aim for a smooth blend in your dressing. Drizzle it over your salad and toss gently. Taste the salad and adjust seasoning if needed. Enjoy this vibrant dish fresh, or chill it for a refreshing bite. For the full recipe, check out the detailed instructions. You can pair Lemon Basil Chickpea Salad with many dishes. It goes well with grilled chicken or fish. You can also serve it with warm pita bread for a filling meal. For a light lunch, try it with a scoop of quinoa. When presenting the salad, use a large, bright bowl. This makes the colors pop and draws attention. Garnish with extra basil leaves or lemon slices for a fresh look. Adjusting the seasonings can make this salad perfect for your taste. If you like more zest, add extra lemon juice. For added heat, sprinkle in more red pepper flakes. You can also mix in more garlic powder for a stronger flavor. If you have leftovers, store them in an airtight container. To enhance the flavors, let the salad rest for a bit before eating. Reheating is not usually needed, but you can warm it slightly if you prefer. Just be careful not to heat it too much, as the fresh veggies taste best cold. {{image_2}} You can easily switch up the vegetables in your Lemon Basil Chickpea Salad. Here are some ideas: - Zucchini: Grate or dice it for a fresh crunch. - Carrots: Shred them for a sweet touch. - Corn: Add sweet corn for extra flavor and texture. You can also swap out chickpeas for other legumes: - Black beans: They add a rich, earthy taste. - Lentils: These will make your salad even heartier. For herbs, feel free to get creative: - Mint: It gives a refreshing twist. - Cilantro: Perfect if you love its bold flavor. When it comes to dressings, you can personalize it: - Balsamic vinaigrette: Adds a tangy sweetness. - Greek yogurt dressing: For a creamy element. This salad is versatile for different diets. To make it vegan, simply ensure the dressing is plant-based. You can replace any non-vegan ingredients with plant-friendly options: - Use nutritional yeast instead of cheese for a cheesy flavor without dairy. For gluten-free needs, this salad is already safe! Just make sure any added ingredients are gluten-free. To lower calories, skip the oil or use less. You can also add more veggies to bulk it up without extra calories. If you want to boost protein, consider these options: - Feta cheese: Crumble it on top for creamy richness. - Grilled chicken: Adds heartiness and flavor. With these variations, your Lemon Basil Chickpea Salad can fit any taste or diet. Check out the Full Recipe for all the details! To keep your Lemon Basil Chickpea Salad fresh, store it in an airtight container. Glass containers work well, but plastic ones are fine too. Make sure the lid closes tightly. Place the salad in the fridge right away. This helps lock in flavors and keeps everything crisp. If you have extra dressing, store it separately. This way, your salad won’t get soggy. When you’re ready to eat, simply drizzle the dressing over the salad and toss it again. Your salad will stay fresh in the fridge for about three days. After that, the veggies may lose their crunch. Look for signs of spoilage. If the salad smells off or looks slimy, it’s time to toss it. Make sure to check the basil too. If the leaves turn brown or wilt, it’s best to discard them. Enjoy your salad while it’s fresh for the best taste. For the full recipe, check [Full Recipe]. What can I add to make this salad heartier? You can add cooked quinoa or farro for more fiber. Chopped avocado adds creaminess. Grilled chicken or shrimp boosts protein. Can I make this salad ahead of time? Yes, you can make this salad ahead. It tastes even better after sitting for a while. Just store it in the fridge. Is there a substitute for chickpeas in this recipe? If you don't have chickpeas, try black beans or cannellini beans. Both offer protein and a nice texture. This salad is not just tasty; it’s healthy too. One serving has about 250 calories. It has 10 grams of fat and 12 grams of protein. - Chickpeas provide protein and fiber. - Tomatoes add vitamins and antioxidants. - Cucumbers keep the salad light and refreshing. - Basil offers flavor and has anti-inflammatory properties. How to make the salad more flavorful? To enhance the taste, add more lemon juice or fresh herbs. A pinch of cumin can also add depth. Recommendation for preparing for meal prepping When meal prepping, keep the dressing separate. This keeps the salad fresh and crisp. Store it in airtight containers for best results. This blog post walked you through making a fresh and tasty Lemon Basil Chickpea Salad. We covered the main ingredients and tips for choosing the best produce. You learned how to make a flavorful dressing and plenty of serving ideas. In conclusion, this salad is easy to customize for any diet and season. With proper storage, it stays fresh and tasty for days. Enjoy making this salad and share it with friends and family for a healthy treat!](https://dailydishly.com/wp-content/uploads/2025/07/d3747d36-0043-45e0-9a82-fe789303a34f-768x768.webp)
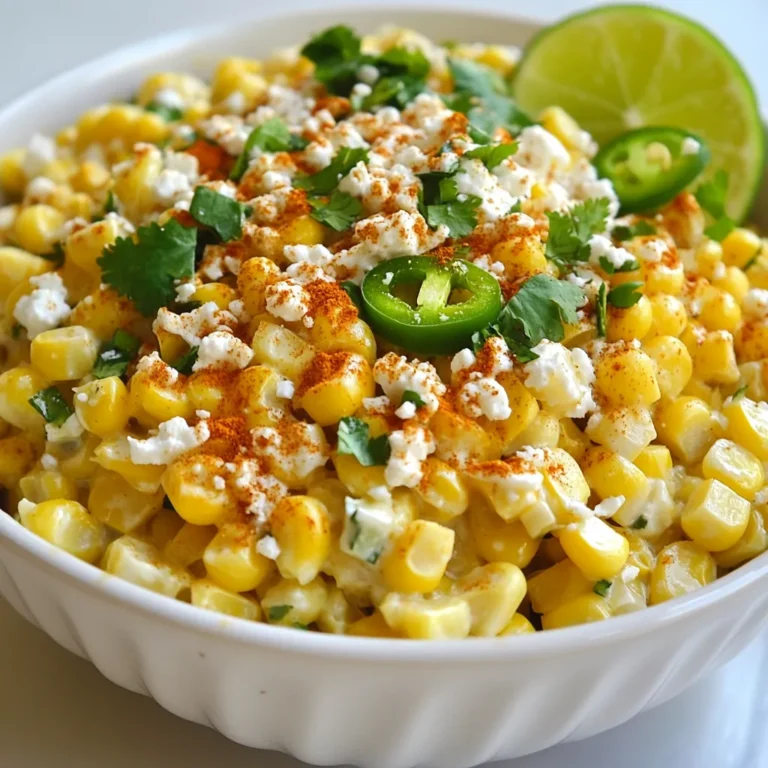
![- 4 ears of corn, husked - 4 tablespoons unsalted butter, melted - 3 cloves garlic, minced - Zest of 1 lemon - 2 tablespoons fresh lemon juice - 1 teaspoon paprika - Salt and pepper to taste - Fresh parsley, chopped (for garnish) What can I use instead of unsalted butter? You can swap unsalted butter for olive oil or coconut oil. Both choices add nice flavors. What are alternatives for fresh garlic? You can use garlic powder as a quick fix. One teaspoon of garlic powder equals one clove of garlic. How can I substitute fresh lemon juice? If you don’t have fresh lemon juice, use bottled lemon juice. You might want to adjust the amount for taste. This recipe brings a burst of fresh taste to any meal. Check out the Full Recipe for cooking details! First, preheat your oven to 400°F (200°C). This step is key for even cooking. While the oven heats, prepare your baking sheet. Line it with parchment paper for easy cleanup. Next, mix the lemon garlic butter. In a small bowl, combine the melted butter, minced garlic, lemon zest, lemon juice, paprika, salt, and pepper. Stir until everything blends well. This mixture adds a bright flavor to the corn. Now, it’s time to coat the corn. Take your husked ears of corn and lay them on the prepared baking sheet. Use a brush to apply the lemon garlic mixture generously. Make sure every ear is well coated for the best taste. Roast the corn in the oven for 25-30 minutes. Turn the corn every 10 minutes. This helps it cook evenly and get a nice char. Look for tender corn with some golden spots when done. Once the corn is roasted, take it out and let it cool for a few minutes. Garnish with chopped fresh parsley for a pop of color. You can drizzle leftover garlic butter from the baking sheet over the corn for extra flavor. This dish pairs well with grilled meats or fresh salads. It makes a lovely side for summer barbecues or family dinners. For the full recipe, check out the complete guide on Lemon Garlic Roasted Corn. To make perfect roasted corn, you want the right char and tenderness. Start by preheating your oven to 400°F (200°C). This heat gives the corn that nice roasted flavor. Roast the corn for 25 to 30 minutes. Turn it every ten minutes. This ensures even cooking and nice char spots. For even coating of flavors, brush the lemon garlic mixture on each ear of corn. Use a basting brush for the best results. Make sure to coat all sides. This helps every bite burst with flavor. Serve your lemon garlic roasted corn right after cooking. It tastes best hot and fresh from the oven. The lemon juice and garlic flavors shine when warm. If you have leftovers, store them in an airtight container in the fridge. They last about three days. You can reheat them in the oven or microwave. For a quick snack, enjoy them cold or add them to salads. Try drizzling a little olive oil over the corn for extra flavor. For the full recipe, check out the [Full Recipe]. {{image_2}} To make lemon garlic roasted corn even more exciting, you can add herbs and spices. Fresh herbs like basil or cilantro can bring a nice twist. Dried spices like cumin or chili powder also work well. These options can change the flavor profile easily. If you like heat, try adding cayenne pepper or red pepper flakes. This addition gives your corn a spicy kick. You can mix these spices right into the butter for even coverage. You can grill your corn for a smoky flavor. To grill, soak the husked corn in water for 30 minutes. Then, place it on the grill over medium heat. Turn it every few minutes until it’s charred and cooked through. This takes about 15-20 minutes. If you prefer the stovetop, you can also use a skillet. Heat a bit of butter in a large pan over medium heat. Add the corn and cook for about 10-15 minutes. Stir frequently until it's tender and has a nice golden color. Each method gives you a unique taste, so feel free to experiment! You can find the full recipe [here]. To keep your Lemon Garlic Roasted Corn fresh, store it right. First, let the corn cool down. Then, wrap each ear in plastic wrap or place it in an airtight container. This keeps moisture in and prevents drying out. You can store it in the fridge for up to four days. If you want to save it for longer, freezing is a great option. Wrap each ear tightly in foil, then place them in a freezer bag. They can last for up to six months in the freezer. When it's time to enjoy your leftovers, you want them to taste great. There are a few ways to reheat them. The oven is my favorite method. Preheat it to 350°F (175°C). Place the corn on a baking sheet and cover it with foil. Heat for about 10-15 minutes. This warms the corn evenly without losing flavor. You can also use the microwave for a quicker option. Place the corn on a microwave-safe plate and cover it with a damp paper towel. Heat for 1-2 minutes, checking often to avoid overheating. If you want a bit of char, you can quickly sear the corn in a hot pan for a minute or two. Enjoy your tasty Lemon Garlic Roasted Corn just like it was fresh! For the full recipe, check out the details above. What can I substitute for corn on the cob? You can use canned corn or frozen corn. Both options work well. For canned corn, drain it well. For frozen corn, thaw it first. This swap can save time and still taste great. Can I use frozen corn for this recipe? Yes, frozen corn is perfect for this recipe. Just make sure to thaw it completely and pat it dry. This helps to avoid excess moisture. You can then follow the same roasting steps. How can I make Lemon Garlic Roasted Corn spicier? To add heat, you can mix in red pepper flakes or cayenne pepper. Just a pinch can spice things up. You can also add a dash of hot sauce to the butter mixture for an extra kick. What is the best way to select fresh corn? Look for corn with bright green husks. The silk should be silky and slightly sticky. Check that the kernels are plump and full. If they feel firm and slightly moist, you’ve got a winner! This blog covers the best ways to make Lemon Garlic Roasted Corn. You learned about the simple ingredients, substitutions, and step-by-step cooking instructions. I shared tips for perfecting your corn and serving suggestions to impress your guests. We also discussed variations and storage to make your meal prep easier. As you try this recipe, keep these ideas in mind. Enjoy creating a delicious dish that will wow everyone who tastes it!](https://dailydishly.com/wp-content/uploads/2025/06/f91470b5-a76f-455c-a4a1-e8941e612567-768x768.webp)