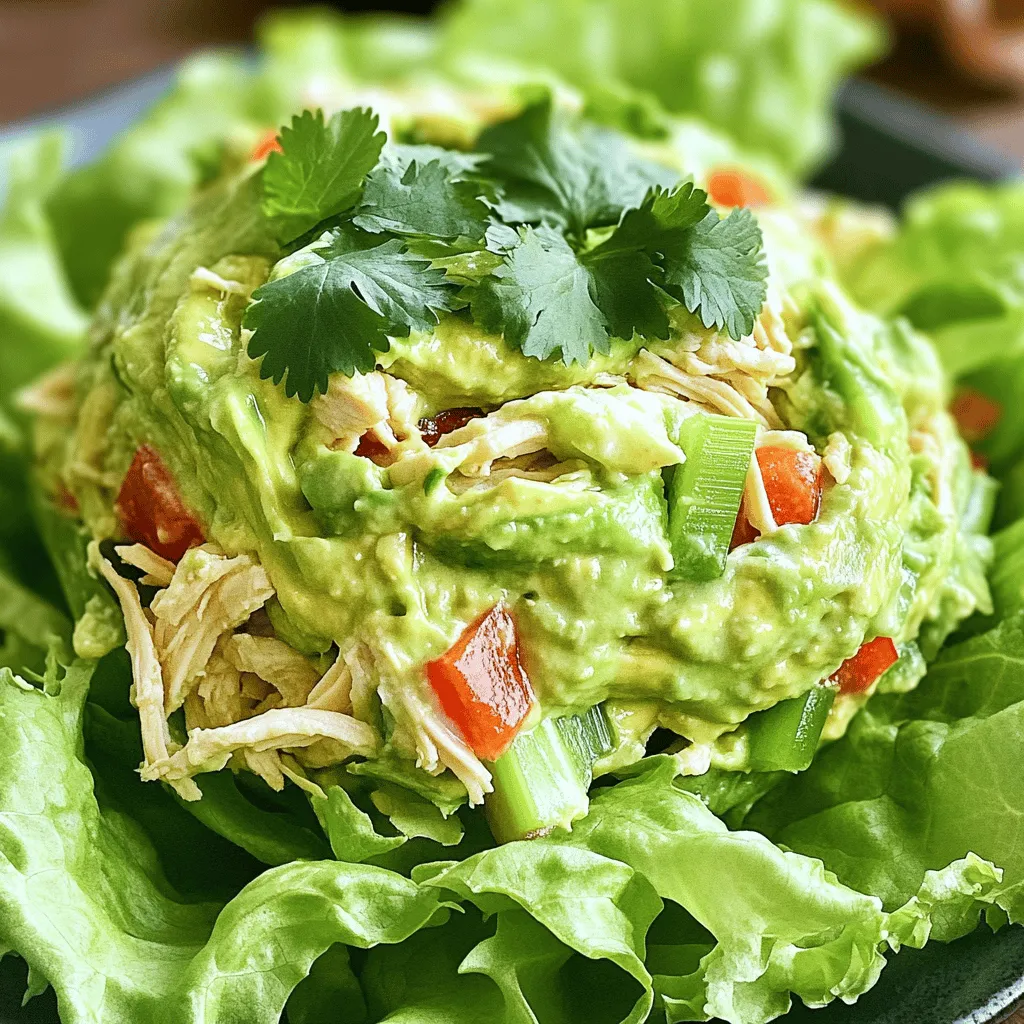
Creamy Avocado Chicken Salad Delicious and Healthy Dish

Looking for a healthy and tasty meal? My Creamy Avocado Chicken Salad packs flavor and nutrition. With just a few simple ingredients, you can create a dish that is both satisfying and good for you. Imagine tender chicken mixed with creamy avocado and zesty lime. And it’s super easy to make! Let’s dive into this delicious recipe that you can whip up in no time.
Ingredients
Main Ingredients
– 2 cups cooked chicken, shredded (grilled or rotisserie)
– 1 ripe avocado, mashed
– 1/4 cup Greek yogurt
Additional Ingredients
– 1 tablespoon Dijon mustard
– 1 tablespoon lime juice
– 1/4 cup red bell pepper, finely diced
– 1/4 cup celery, finely chopped
– 1/4 cup red onion, finely chopped
– Salt and pepper to taste
– Fresh cilantro for garnish (optional)
– Lettuce leaves for serving
For this creamy avocado chicken salad, you need fresh and simple ingredients. Start with cooked chicken. You can use grilled or rotisserie chicken for a tasty flavor. Shred the chicken into bite-sized pieces.
Next, grab a ripe avocado. Mash it well until it’s smooth. This gives the salad its creamy base. Then, you will add Greek yogurt. It adds a nice tang and creaminess too.
Now, for the extra flavor, include Dijon mustard and lime juice. The mustard gives it a kick, while lime juice adds brightness. Chop up some red bell pepper, celery, and red onion for crunch and color.
Finally, season your salad with salt and pepper. You can add fresh cilantro if you like a hint of herb. Serve it on crisp lettuce leaves for a healthy touch.
Step-by-Step Instructions
Preparation
– Step 1: Prepare the dressing with avocado
Start by taking a ripe avocado. Cut it in half, remove the pit, and scoop the flesh into a bowl. Mash it until it’s smooth and creamy. Add Greek yogurt, Dijon mustard, and lime juice. Mix these ingredients well to create a tasty dressing.
– Step 2: Combine dry ingredients
Next, chop the red bell pepper, celery, and red onion. Make sure the pieces are small for better mixing. Add these chopped veggies to a separate bowl.
Mixing
– Step 3: Fold in shredded chicken
Now, it’s time to add the star of the show: the chicken! Take your cooked chicken and shred it into bite-sized pieces. Gently fold the chicken into the avocado dressing and veggies. Be careful not to mash the avocado too much.
– Step 4: Season to taste
After mixing, taste your salad. Add salt and pepper as needed. Adjust it until the flavors pop just right for you.
Chilling and Serving
– Step 5: Chill before serving
Place the bowl in the fridge. Let the chicken salad chill for at least 30 minutes. This helps all the flavors blend together nicely.
– Step 6: Garnish and serve options
When you’re ready to eat, take the salad out of the fridge. Serve it on a bed of fresh lettuce leaves. If you want, you can also add fresh cilantro on top for a pop of color and flavor. Enjoy your creamy avocado chicken salad!
Tips & Tricks
Selecting Ripe Avocados
How to choose ripe avocados:
Look for avocados that feel slightly soft when you press them gently. The skin should be dark green or almost black. Avoid hard avocados; they are not ripe yet. If the stem is still attached, check the color underneath. If it is green, the avocado is ripe. If it is brown, it may be overripe.
Ripening avocados at home:
If you have hard avocados, place them in a paper bag with an apple or banana. This speeds up the ripening process. Check daily until they feel soft. Once ripe, store them in the fridge to slow down the ripening.
Perfecting the Salad
Texture control:
To keep the salad creamy yet chunky, mix gently. After adding the chicken and veggies, fold them in softly. This way, you keep some pieces whole. A little texture adds to the salad’s appeal.
Adjusting seasonings for personal preference:
Taste the salad as you mix in salt and pepper. Everyone has different tastes. You may like it saltier or with more lime juice. Adjust to your liking. This will make the salad more enjoyable.
Serving Suggestions
Best side dishes to pair:
This salad pairs well with whole grain bread, pita chips, or fresh vegetable sticks. You can also serve it with a light soup. These sides add great balance and flavor.
Creative serving ideas:
Serve the salad on a bed of lettuce or in a wrap. You can also use it as a filling for tacos. Another fun idea is to scoop it into avocado halves for a pretty dish. These ideas make your meal more exciting and fun.
Variations
Ingredient Substitutions
You can change the protein in this salad. Try turkey instead of chicken. It gives a nice twist. If you want a plant-based option, go for tofu. Just press it and crumble it before mixing.
For those who want a dairy-free option, skip the Greek yogurt. Use more mashed avocado instead. It keeps the salad creamy and rich without dairy.
Flavor Additions
Want to spice things up? Add some chopped jalapeños. They give a nice kick. You can also sprinkle in spices like cumin or paprika for extra flavor.
Adding more veggies is a great idea too. Corn or peas blend well with the salad. They add a sweet crunch that makes each bite fun.
Dietary Variations
If you follow a low-carb diet, swap the yogurt with an extra avocado. You can also skip the red onion for fewer carbs.
For a gluten-free option, this salad works great. All the ingredients are naturally gluten-free. Just ensure any added ingredients are also gluten-free.
Storage Info
How to Store Chicken Salad
To keep your creamy avocado chicken salad fresh, store it in the fridge. Use airtight containers to prevent air from spoiling your dish. Glass containers work great because they don’t stain and help you see what’s inside. If you plan to eat it later, try to only store what you need, so it stays fresh for longer.
Shelf Life
In the fridge, this chicken salad lasts about three days. After that, the avocado may brown and affect the taste. You can freeze it, but the texture might change. If you freeze it, use a freezer-safe container and eat it within a month. When you thaw it, stir it well to restore some creaminess.
Reheating Instructions
You can enjoy chicken salad cold, right from the fridge. If you prefer it warm, gently heat it in a pan on low. Stir it often to avoid drying it out. Just remember, reheating may change the texture of the salad. Enjoy it as is for the best taste and feel!
FAQs
Common Questions
Can I use canned chicken for this recipe?
Yes, you can use canned chicken. Just drain and shred it. Canned chicken saves time. However, fresh chicken often has better flavor. If you choose canned, pick a brand with no added salt.
How can I make this recipe vegan?
To make this salad vegan, swap the chicken for chickpeas or tofu. Use a vegan yogurt instead of Greek yogurt. You can also add nuts for added crunch and protein.
Nutritional Information
Caloric details per serving
Each serving has about 300 calories. This depends on the chicken and yogurt you use. You can also lower calories by using less yogurt.
Health benefits of ingredients
– Avocado: Rich in healthy fats and fiber.
– Chicken: A great source of lean protein.
– Greek yogurt: Packed with probiotics and calcium.
– Veggies: Full of vitamins and minerals, boosting your health.
How to Make Ahead
Can I prepare it the night before?
Yes, you can prepare this salad the night before. Just store it in an airtight container. The flavors taste great after chilling.
Best practices for meal prep with this salad
To meal prep, divide the salad into single servings. Use containers that seal well. This keeps the salad fresh and makes it easy to grab on busy days. Enjoy your creamy avocado chicken salad whenever you want!
This chicken salad recipe combines tasty ingredients and easy steps. You learned how to mix chicken, avocado, and Greek yogurt into a fresh dish. You also saw tips for choosing ripe avocados and adjusting flavors. Don’t forget the storage tips to keep your salad fresh. Experiment with variations to suit your taste or dietary needs. Enjoy making and sharing this salad with family and friends. It’s a simple way to eat well while having fun in the kitchen.


![To make the sweet potato and black bean enchiladas, gather the following ingredients: - 2 medium sweet potatoes, peeled and diced - 1 can (15 oz) black beans, rinsed and drained - 1 cup corn kernels (fresh, frozen, or canned) - 1 teaspoon cumin - 1 teaspoon smoked paprika - ½ teaspoon chili powder - Salt and pepper to taste - 1 cup shredded cheddar cheese (or a vegan alternative) - 8 large tortillas (corn or flour) - 1 cup enchilada sauce (store-bought or homemade) - 2 tablespoons olive oil - Fresh cilantro and avocado slices for garnish These ingredients create a colorful and tasty meal. Sweet potatoes bring natural sweetness and nutrition. Black beans add protein and fiber, making these enchiladas hearty. Corn gives a nice crunch, while spices add depth. You can use different types of cheese to fit your taste. Also, consider adding more veggies like spinach or bell peppers for extra flavor. The enchilada sauce can be homemade or store-bought, depending on your time. Be sure to prep your ingredients before you start cooking. This makes the assembly easy and quick. For the full recipe, check out the instructions I provided earlier. Enjoy creating a dish that is both satisfying and fun to eat! To start, I cook the sweet potatoes. I peel and dice them into small cubes. Then, I boil water in a medium pot. Once boiling, I add the sweet potato cubes. I cook them for about 10 minutes, or until they are tender. After that, I drain them and mash them slightly with a fork. I like to leave some chunks for texture. Next, I flavor the sweet potato mixture. In a large bowl, I combine the mashed sweet potatoes with black beans, corn, cumin, smoked paprika, chili powder, salt, and pepper. I mix it well until everything combines. This mixture is full of flavor and nutrition. Now, I begin assembling the enchiladas. I spread ½ cup of enchilada sauce on the bottom of a 9x13 inch baking dish. This step helps keep the enchiladas from sticking. I take a tortilla and place it on a flat surface. I add about ¼ cup of the sweet potato and black bean mixture down the center. I sprinkle a little cheese on top. Then, I roll the tortilla tightly and place it seam-side down in the baking dish. I repeat this process until I use all the tortillas and filling. It's time to bake the enchiladas. I cover the dish with foil and bake them for 20 minutes. This keeps them moist while cooking. After 20 minutes, I remove the foil and bake for another 10 minutes. This last step makes the cheese bubbly and slightly golden. Once baked, I let the enchiladas cool for a few minutes. They are ready to be served. You can garnish them with fresh cilantro and avocado slices for extra flavor. For the full recipe, refer to the provided instructions. Choosing the right tortillas is key. I prefer using corn tortillas for a classic taste. They hold the filling well and get soft in the oven. If you like flour tortillas, they work too. Just warm them up first to make them more flexible. For cheese melting tips, choose a cheese that melts easily. Cheddar is a great option. You can mix it with Monterey Jack for a creamier texture. To help your cheese melt better, cover the enchiladas with foil while baking. This traps steam and keeps the cheese gooey. Preparing the filling in advance is a great time-saver. You can cook the sweet potatoes and mix them with the beans and spices the day before. Just store it in the fridge until you are ready to assemble. When it comes to storing assembled enchiladas, cover them tightly with plastic wrap or foil. You can keep them in the fridge for up to two days. If you want to freeze them, do so before baking. Just wrap them well and they can last up to three months. When you're ready to eat, bake them straight from the freezer; just add some extra time for cooking. For the full recipe, check out the Sweet Potato & Black Bean Enchiladas . {{image_2}} For a vegan twist, skip the cheese. Use a vegan cheese substitute. Nutritional yeast also adds a cheesy flavor. Instead of regular enchilada sauce, choose a vegan option or make your own. You can add more veggies, too. Try bell peppers, zucchini, or spinach for extra nutrition. These additions make the dish colorful and tasty. Want more heat? Add diced jalapeños to the filling. You can also increase the chili powder. If you prefer milder flavors, use less chili powder. Swap it for smoked paprika for a smoky taste without the heat. Try adding cumin or coriander for added depth. These spices can bring new flavors to your enchiladas. Making your own enchilada sauce is easy and fun. Combine tomatoes, onions, and spices for a fresh taste. You can also try green sauce for a zesty change. If you're short on time, store-bought sauces work well too. Just pick a brand you like. Experimenting with different sauces can really change the dish. For the full recipe and detailed instructions, check out the [Full Recipe]. To store leftover enchiladas, let them cool down first. Place them in an airtight container. This keeps them fresh for up to three days. When storing, try not to stack them. This helps avoid breaking the tortillas. You can also cover them with plastic wrap before sealing the container. To freeze enchiladas, wrap them well in foil or plastic wrap. You can also use a freezer-safe container. They will stay good for about three months. When you want to eat them, take them out and thaw overnight in the fridge. To reheat, bake them in the oven at 350°F (175°C) for about 25 minutes. You can also add a bit of sauce to keep them moist. Enjoy them like they are fresh! For the full recipe, check out Sweet Potato & Black Bean Enchiladas. Yes, you can use other beans in this recipe. Some great options include: - Pinto beans - Kidney beans - Chickpeas - White beans These beans add unique flavors and textures. Just make sure to rinse and drain them well. Each type of bean offers a different taste, so feel free to experiment! To make these enchiladas gluten-free, choose the right tortillas. You can use: - Corn tortillas - Gluten-free flour tortillas Both options work well. Make sure to check the labels for any gluten-containing ingredients. Gluten-free tortillas hold the filling nicely, giving you that perfect bite. When serving enchiladas, consider these tasty sides: - Mexican rice - Refried beans - A fresh salad - Guacamole - Salsa These sides enhance the meal and add more flavor. Enjoy your enchiladas with your favorite accompaniments for a complete dining experience. For the full recipe, check out the details above! This guide covered making tasty enchiladas with sweet potatoes, black beans, and spices. You learned how to prepare and assemble, plus tips for the best results. Keep your enchiladas fresh with proper storage or freeze them for later. Explore variations to suit your taste. Enjoy these dishes with your favorite sides. Now you’re ready to create delicious enchiladas anytime!](https://dailydishly.com/wp-content/uploads/2025/06/7d965e75-a030-40f0-bb8d-330850614dc3-768x768.webp)