
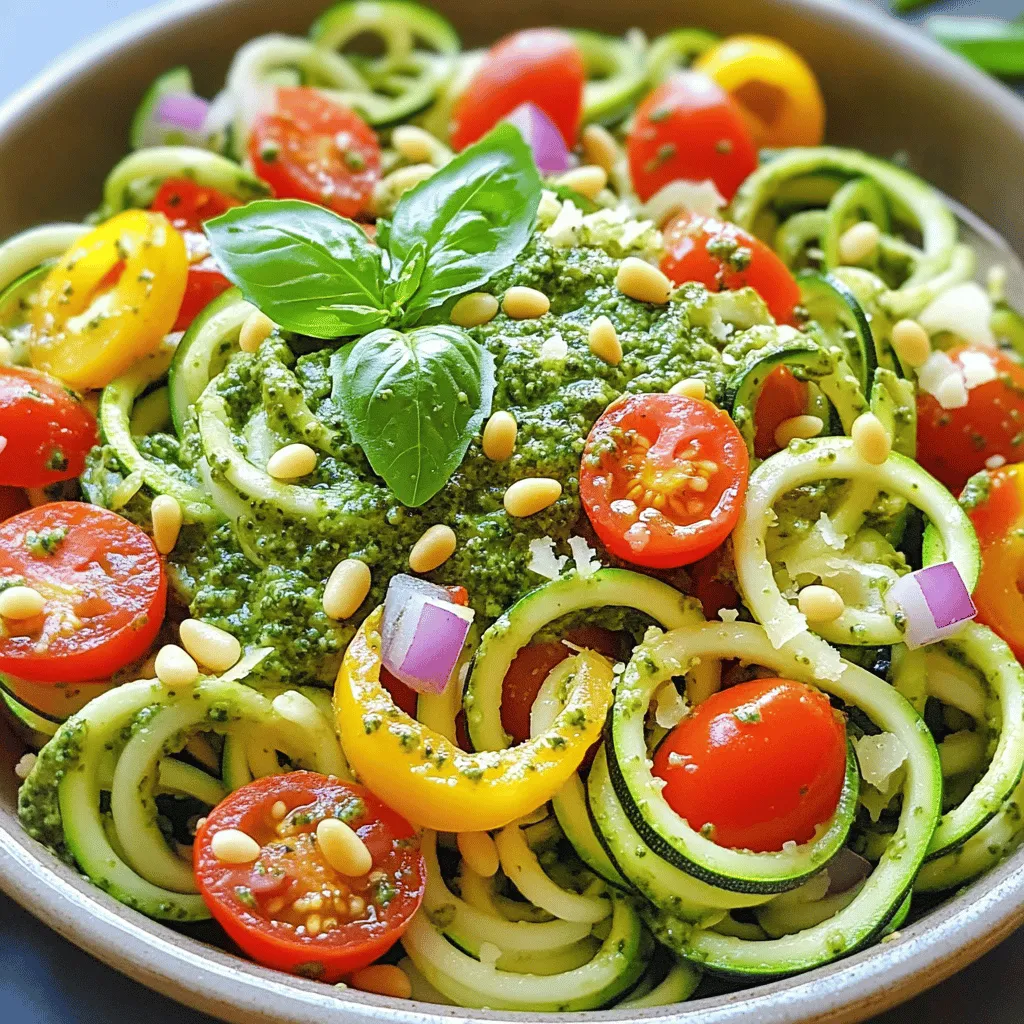
Pesto Zoodle Salad Crisp and Flavorful Summer Dish

If you’re craving a fresh and colorful dish, look no further. This Pesto Zoodle Salad burst with flavor and is perfect for summer. Made with spiralized zucchini, cherry tomatoes, and a homemade basil pesto, it’s both light and satisfying. Whether you want a quick lunch or a side for dinner, this salad is the answer. Let’s dive into how to create this crisp and vibrant dish!
Ingredients
Main Ingredients
– 3 medium zucchinis (spiralized into zoodles)
– 1 cup cherry tomatoes, halved
– 1/2 cup bell peppers, diced (any color)
– 1/4 cup red onion, thinly sliced
Pesto Ingredients
– 1 cup fresh basil leaves
– 1/4 cup pine nuts, lightly toasted
– 1/2 cup grated parmesan cheese (or nutritional yeast for a vegan option)
– 1/2 cup olive oil
– 2 cloves garlic, minced
– Salt and pepper to taste
– Juice of 1 lemon
Optional Garnishes
– Additional pine nuts
– Extra basil leaves
– Lemon zest
When making Pesto Zoodle Salad, fresh ingredients shine. Start with firm zucchinis. They should be medium-sized and easy to spiralize. I love using a spiralizer for this recipe because it makes long, fun zoodles. You can also use a julienne peeler if you don’t have one.
Next, cherry tomatoes bring a burst of sweetness. Halve them to keep their shape and add color. Any bell pepper works, so choose your favorite color. Dice them small for easy bites. Red onion gives a nice crunch and slight bite. Slice them thin for a gentle onion flavor.
Now onto the pesto. Fresh basil is a must for that herbal taste. Pine nuts add a nutty crunch, and toasting them enhances their flavor. Parmesan cheese gives richness, but you can use nutritional yeast for a vegan twist. Olive oil helps blend everything smoothly, while garlic adds depth.
Don’t forget the salt, pepper, and lemon juice. They balance the flavors. For garnishes, I recommend extra pine nuts and basil for that fresh touch. Lemon zest is a great way to brighten up the dish.
Step-by-Step Instructions
Preparing the Pesto
– Combine basil, pine nuts, parmesan, garlic, and olive oil in a food processor.
– Blend until smooth and creamy, adjusting oil for desired consistency.
I like to use fresh basil for the best flavor. The garlic adds a nice zing, while the parmesan gives it richness. If you want a lighter version, you can use nutritional yeast instead of cheese. Just add salt and pepper to taste, and a squeeze of lemon juice brightens it up.
Making the Zoodles
– Spiralize the zucchinis using a spiralizer or julienne peeler.
Zoodles are a fun and healthy twist on pasta. They add crunch and freshness to the dish. If you don’t have a spiralizer, a julienne peeler works great too. Just make sure to cut the zoodles into even sizes for a uniform bite.
Combining Ingredients
– In a large bowl, mix zoodles, cherry tomatoes, bell peppers, and red onion.
– Pour prepared pesto over the mixture and toss gently.
This step is all about bringing flavors together. The zoodles pair well with sweet cherry tomatoes and colorful bell peppers. The red onion adds a nice crunch and a bit of bite. When you add the pesto, make sure to coat everything well for maximum flavor.
Allowing Flavors to Meld
– Let the salad sit for 10 minutes before serving.
– Toss gently again and adjust seasoning if necessary.
Letting the salad sit allows the flavors to blend and develop. It’s like letting a fine wine breathe! Before you serve, give it another gentle toss to ensure every zoodle is coated in that tasty pesto. If it needs a little more salt or pepper, this is the time to adjust.Enjoy your fresh and vibrant Pesto Zoodle Salad!
Tips & Tricks
Perfecting the Pesto
To make the best pesto, always use fresh basil. It gives the dish a bright and vivid taste. Avoid using dried basil, as it lacks the same flavor. Fresh lemon juice helps prevent browning in the pesto. This keeps your sauce looking fresh and appealing.
Enhancing Texture
Add extra crunch by sprinkling more pine nuts on top. This little change makes a big difference in texture. Chilling your ingredients before mixing can also enhance the freshness. It makes every bite feel cool and crisp.
Serving Suggestions
Serve your Pesto Zoodle Salad chilled for a refreshing meal. It tastes even better on a hot day. You can pair it with grilled chicken or shrimp for extra protein. This makes it a balanced dish that fills you up.
Variations
Add Proteins
You can boost your Pesto Zoodle Salad with proteins. Try adding grilled chicken or shrimp for a heartier meal. Both options add flavor and substance. If you prefer plant-based choices, chickpeas work well too. They provide protein while keeping the dish light.
Different Vegetables
Incorporating different vegetables can enhance the salad’s flavor and texture. Roasted bell peppers or carrots add sweetness and depth. You can also add spinach or arugula for a nutrient boost. These greens bring freshness and vibrant colors to your dish.
Vegan Option
For a vegan twist, swap parmesan cheese with nutritional yeast or cashew cream. Nutritional yeast lends a cheesy flavor without dairy. Cashew cream offers a creamy texture and richness. Both options keep your salad delicious while catering to vegan diets.
Storage Info
Storing Leftovers
To keep your Pesto Zoodle Salad fresh, store leftovers in an airtight container. This helps keep the zoodles crisp and the flavors bright. Place the container in the refrigerator.
Shelf Life
Enjoy your salad within 2-3 days for the best taste and texture. After this time, the zoodles may become soggy. The pesto can also lose its vibrant flavor.
Freezing Options
You can freeze the pesto for later use. Just remember to add the zoodles fresh right before serving. This way, they stay crunchy and delicious!
FAQs
How do I spiralize zucchini?
To spiralize zucchini, use a spiralizer or a julienne peeler to create zoodles. Simply grip the zucchini and twist it against the blade. This technique makes long, thin noodles that are fun to eat and soak up flavor.
Can I make this salad ahead of time?
It’s best served fresh, but you can prepare pesto and chop vegetables in advance. This way, you can quickly assemble the salad when you’re ready to eat. Just keep everything in the fridge until you’re set to serve.
What can I substitute for pine nuts?
If you don’t have pine nuts, try walnuts or almonds for a different flavor. Both nuts add a nice crunch and pair well with the pesto. You can even toast them to enhance their taste.
Is this salad gluten-free?
Yes, all ingredients are gluten-free. This makes the Pesto Zoodle Salad a great choice for those with gluten sensitivities. You can enjoy it without worry!
What is the nutritional value of Pesto Zoodle Salad?
For a detailed breakdown, check the nutritional information per serving. It contains healthy fats from the olive oil and nuts, plus vitamins from the fresh veggies. This salad is light and nourishing, making it perfect for summer!
This blog post shares a simple recipe for Pesto Zoodle Salad. You learned about the main ingredients, like zoodles, cherry tomatoes, and basil pesto. I guided you through each step, from making pesto to mixing the salad. I also gave tips to enhance flavor and texture. You can customize the salad with different proteins and vegetables, and I covered storage options and FAQs too. Enjoy this fresh dish now or later! It’s healthy, tasty, and easy to make. Try it out, and let your kitchen creativity shine!

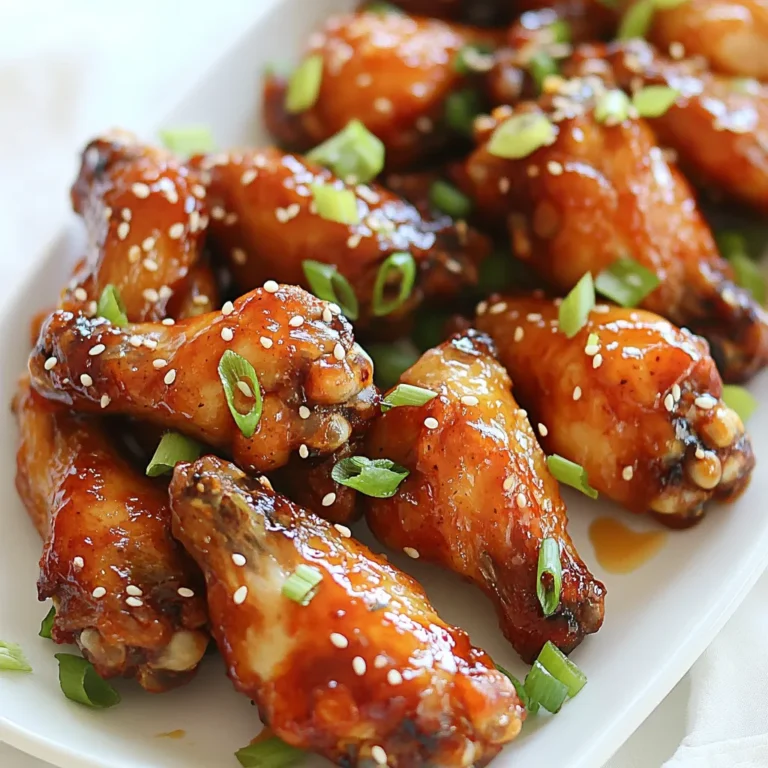

![- Chickpeas and seasoning - 1 can (15 oz) chickpeas, drained and rinsed - 2 tablespoons olive oil - 1 teaspoon smoked paprika - 1/2 teaspoon garlic powder - 1/2 teaspoon cumin - Salt and pepper to taste Chickpeas are the star of this dish. They are high in protein and fiber. Their nutty flavor pairs well with spices. I love using smoked paprika for a warm taste. The garlic powder adds depth, while cumin brings a nice earthiness. You can adjust the salt and pepper to your liking. - Fresh vegetable ingredients - 4 cups mixed greens (spinach, arugula, and lettuce) - 1 cup cherry tomatoes, halved - 1/2 cucumber, diced - 1/4 red onion, thinly sliced Fresh vegetables add crunch and color. Mixed greens provide a lovely base. Cherry tomatoes burst with flavor and sweetness. Diced cucumber gives a refreshing bite. Red onion offers a sharp contrast. Feel free to mix and match your favorite greens. - Optional toppings and dressing ingredients - 1/4 cup feta cheese, crumbled (optional) - 2 tablespoons tahini - 1 tablespoon lemon juice - Fresh parsley for garnish Feta cheese adds creaminess and saltiness. If you want to keep it vegan, skip the feta. The tahini dressing is rich and nutty. A little lemon juice brightens the flavors. Fresh parsley gives a pop of green and freshness. You can use other herbs too, like basil or cilantro. For the full recipe, check the complete list above. 1. Start by preheating your oven to 400°F (200°C). Line a baking sheet with parchment paper. This helps the chickpeas crisp up nicely. 2. In a medium bowl, take your drained chickpeas. Add 2 tablespoons of olive oil, 1 teaspoon of smoked paprika, 1/2 teaspoon of garlic powder, 1/2 teaspoon of cumin, and a pinch of salt and pepper. Toss everything well until the chickpeas are coated. 3. In a large bowl, mix the salad components. Combine 4 cups of mixed greens, 1 cup of halved cherry tomatoes, 1/2 diced cucumber, and 1/4 sliced red onion. This mix adds crunch and freshness. 1. Spread the seasoned chickpeas on the lined baking sheet. Make sure they are in a single layer for even cooking. 2. Bake them in the preheated oven for 25-30 minutes. Halfway through, shake the pan. This helps them cook evenly and become crispy. Watch closely near the end to avoid burning. 1. Once the chickpeas are golden and crispy, remove them from the oven and let them cool for a minute. 2. Top your salad mix with the crispy chickpeas. Drizzle your tahini dressing over everything. To make the dressing, whisk together 2 tablespoons of tahini, 1 tablespoon of lemon juice, and a pinch of salt and pepper in a small bowl. You can add a bit of water if you want it thinner. 3. If you like, sprinkle 1/4 cup of crumbled feta cheese on top. Finish with fresh parsley for that pop of color. Follow these steps from the Full Recipe to create a tasty, crunchy salad that’s sure to impress! To boost flavor, consider adding spices like cayenne pepper or turmeric. You could also mix in fresh herbs such as cilantro or basil. Each herb or spice brings a unique taste. For the dressing, try using yogurt instead of tahini for a creamier texture. You can also add a splash of balsamic vinegar for a tangy kick. A sprinkle of lemon zest can brighten the dish too. To get crispy chickpeas, drying them well is key. After rinsing, pat them dry with a towel. This step helps them crisp up nicely. When baking, spread them out on the pan without overcrowding. This allows hot air to circulate. You can also shake the pan halfway through baking for even crispness. If you have an air fryer, use it! It cooks chickpeas faster and often makes them crispier. Cook them at 400°F for about 15 minutes, shaking halfway through. For the full recipe, check out the Crispy Chickpea Delight Salad section. Enjoy your cooking! {{image_2}} You can change up the greens in this salad. Try kale, romaine, or even cabbage. Each green adds its own flavor and texture. If you want a vegan option, leave out the feta cheese. You can still enjoy a tasty salad without it. Consider adding avocado for creaminess instead. Want to boost the protein? Add grilled chicken or shrimp. You can even toss in quinoa for a hearty touch. For toppings, think nuts or seeds. Toasted almonds or sunflower seeds add a nice crunch. You could also sprinkle some fresh herbs like basil or cilantro for extra flavor. These small changes can make your crispy chickpea salad feel new and exciting. For the complete recipe, check out the [Full Recipe]. To keep your salad fresh, store it in an airtight container. Make sure to refrigerate it right away. The greens will stay crisp for a day or two. Avoid mixing the dressing with the salad until you are ready to eat. This keeps everything from getting soggy. For the crispy chickpeas, store them in a separate container. Use a glass jar or a paper bag. This helps them stay crunchy longer. If you store them with the salad, they will lose their crispiness. When you reheat crispy chickpeas, use the oven for best results. Preheat your oven to 350°F (175°C). Spread the chickpeas on a baking sheet. Heat them for about 5 to 10 minutes. Check often to avoid burning. If you want to use the microwave, place the chickpeas on a plate. Cover them with a paper towel. This helps absorb moisture. Heat them in short bursts of 30 seconds until warm. Avoid heating too long, as they will get soggy. Enjoy your crispy chickpeas as a tasty snack or salad topping! You can use almond butter or sunflower seed butter instead of tahini. Both have a nice, creamy texture. They add a different flavor but still taste great in the salad. You can also try using Greek yogurt for a tangy twist. This salad is mostly gluten-free already! Just make sure the tahini and any store-bought ingredients are gluten-free. Always check labels for hidden gluten. Using fresh produce and canned chickpeas keeps it safe. Yes, you can prep parts of the salad ahead. Keep the crispy chickpeas separate until serving. This way, they stay crunchy. You can mix the greens and veggies in advance and dress them just before eating. Absolutely! This salad works well for meal prep. Just store the chickpeas, salad, and dressing in separate containers. You can enjoy it all week. It makes a great lunch or dinner option. To get crispy chickpeas, dry them well before seasoning. Use a towel to remove moisture. Bake them at a high temperature, around 400°F (200°C). Shake the pan halfway through baking for even crispiness. For even better results, try using an air fryer! Check the [Full Recipe] for more details. In this blog post, we explored a tasty chickpea salad recipe. We covered key ingredients, like chickpeas and fresh veggies, to create a great meal. You learned step-by-step instructions for preparation, baking, and assembly. I shared tips on enhancing flavors and achieving the perfect crispiness. You also discovered variations to suit your taste, storage tips for leftovers, and answers to common questions. Try this chickpea salad and make it your own. You will love the flavors and textures! Enjoy!](https://dailydishly.com/wp-content/uploads/2025/06/a0161600-1d29-449f-a743-39fb8b2e717a-768x768.webp)
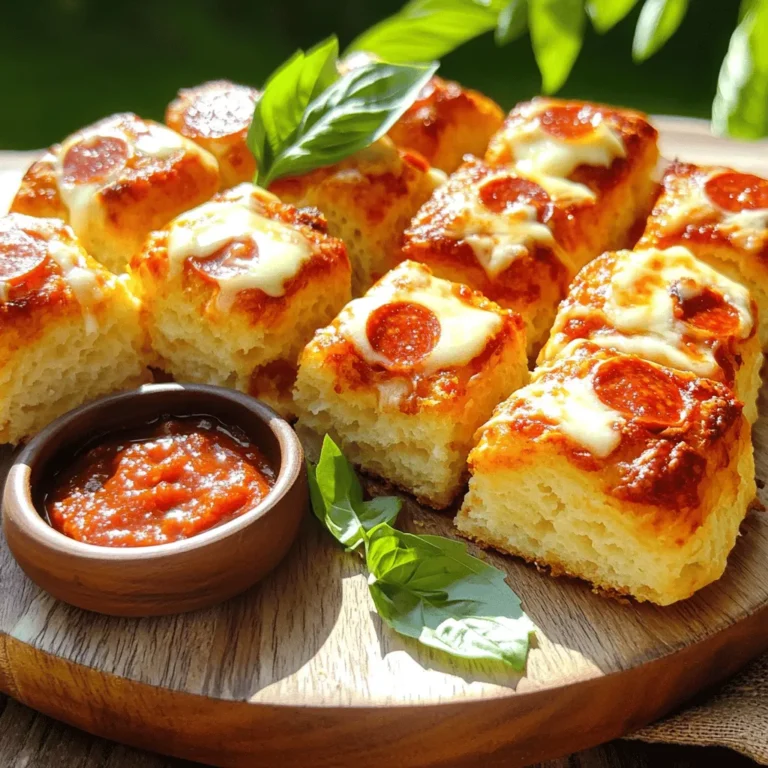
![- 12 mini bell peppers (assorted colors) - 1 cup cooked quinoa - 1 cup black beans, rinsed and drained - 1 cup corn (fresh, frozen, or canned) - 1/2 cup diced tomatoes (fresh or canned) - 1 cup shredded cheese (cheddar or pepper jack) The mini bell peppers are the stars here. Their sweet crunch makes a great bite. They come in many colors, adding fun to your dish. Quinoa adds protein and a nice texture. Black beans bring fiber and heartiness. Corn adds sweetness and color, while diced tomatoes add moisture and flavor. Finally, shredded cheese melts into a gooey topping that ties everything together. - 1 teaspoon cumin - 1 teaspoon smoked paprika - 1 teaspoon garlic powder - 1/2 teaspoon onion powder - Salt and pepper to taste Seasonings bring life to your dish. Cumin adds warmth and earthiness. Smoked paprika gives a touch of smokiness. Garlic powder adds depth, while onion powder enhances flavor. Salt and pepper balance everything out. This blend will make your stuffed mini bell peppers burst with flavor. - Fresh cilantro, chopped (for garnish) - 1 tablespoon olive oil Garnishes make your dish pretty and fresh. Fresh cilantro adds a pop of color and brightness. Olive oil adds richness and ties the flavors together. Together, they make your stuffed mini bell peppers look and taste amazing. You can find the full recipe [here]. 1. Preheat the oven to 375°F (190°C). This step gets your oven ready for baking. 2. Cut the tops off the mini bell peppers. Use a sharp knife for a clean cut. 3. Remove the seeds and any white parts inside the peppers. This helps reduce bitterness. 1. In a large mixing bowl, combine the cooked quinoa, black beans, corn, and diced tomatoes. 2. Add half a cup of shredded cheese to the mix. This adds creaminess and flavor. 3. Stir in the cumin, smoked paprika, garlic powder, onion powder, salt, and pepper. Mix well until everything is combined. 4. Drizzle one tablespoon of olive oil over the filling and stir again. This keeps it moist. 1. Carefully fill each mini bell pepper with the quinoa mixture. Press down gently to pack it in. 2. Arrange the stuffed peppers upright in a baking dish. If they tip over, use crumpled aluminum foil to help them stand. 3. Sprinkle the rest of the cheese on top of the stuffed peppers. This will melt into a tasty layer. 4. Cover the dish with aluminum foil. Bake for 20 minutes, then remove the foil. 5. Bake for an additional 10-15 minutes, until the peppers are tender and the cheese is bubbly and golden. 6. After baking, let them cool for a few minutes before garnishing with fresh cilantro. For the Full Recipe, refer to the ingredients and precise steps above. Enjoy! You can easily change this recipe. Try using ground turkey instead of black beans. It adds a nice flavor. For some heat, add chili powder or cayenne pepper. This can spice things up! If you want vegan options, skip the cheese and use tofu. For gluten-free, ensure you select gluten-free grains and beans. You have options for cooking. Baking is simple and gives a soft texture. You can also use an air fryer. Air frying makes them crispy and quick. If you want a smoky taste, grilling is great. Just watch the peppers so they don’t burn. Dips enhance the meal. Salsa and guacamole pair well with the stuffed peppers. You can serve them as appetizers or as a fun main dish. They are colorful and bright, making your table look good. For a complete meal, add a fresh salad on the side. You can find the full recipe above, so you have all the details you need. {{image_2}} You can make stuffed mini bell peppers in many tasty ways. For a Mexican twist, add taco seasoning to the filling. This adds spice and flavor. You can use ground meat or keep it vegetarian. For a Mediterranean style, mix in feta cheese and olives. This creates a salty and creamy taste. The tangy flavors work great with the sweet peppers. Both options are fun and easy to try. Feel free to play with the main ingredients. You can swap quinoa for rice if you prefer it. Rice adds a nice texture and flavor. If you want a change, use lentils instead of beans. Lentils cook fast and have a great taste. They also boost the protein in your dish. These swaps let you customize the recipe to your liking. Seasonal changes can inspire new stuffed pepper ideas. In summer, use fresh garden veggies like zucchini or corn. These add brightness and flavor. In winter, try heartier vegetables like mushrooms or kale. They give warmth and comfort to your meal. These seasonal changes keep things interesting and delicious. For the full recipe, check out the details above. After you enjoy your stuffed mini bell peppers, store the leftovers in the fridge. Place them in an airtight container. This keeps them fresh and tasty. If you have a lot, you can stack them, but make sure they are not too crowded. The best containers are glass or BPA-free plastic. They seal well and help keep the flavor. To freeze stuffed peppers, let them cool first. Then, wrap each pepper tightly in plastic wrap. After that, put them in a freezer-safe bag or container. This helps prevent freezer burn. When you want to eat them, take them out. Thaw them in the fridge overnight. You can reheat them in the oven or microwave. If using the oven, bake at 350°F (175°C) until warmed through. Stuffed mini bell peppers last about 3 to 5 days in the fridge. If frozen, they can last up to 3 months. For the best taste, eat them sooner rather than later. Always check for any signs of spoilage before eating. Keeping track of freshness helps you enjoy your meal at its best. Stuffed mini bell peppers are small, colorful peppers filled with a tasty mix. They are often stuffed with ingredients like quinoa, beans, corn, and cheese. After baking, they become soft and flavorful. The peppers add a nice crunch and sweetness. This dish is perfect as an appetizer or a main course. You can enjoy them warm or at room temperature. Yes, you can make stuffed mini bell peppers in advance. Prepare the filling and stuff the peppers. Then, cover and refrigerate them for up to a day. When ready to bake, take them out and let them sit for 15 minutes. This helps them cook evenly. You can also freeze them before baking. To do this, wrap them tightly and store them for up to three months. Thaw in the fridge overnight before baking. Stuffed mini bell peppers pair well with many sides. Here are a few tasty options: - A fresh green salad with vinaigrette - Guacamole and tortilla chips - Rice or quinoa pilaf - A light soup, like tomato or corn chowder - Sparkling water or a light white wine These sides complement the flavors of the stuffed peppers and make the meal more complete. You can tell stuffed mini bell peppers are done by checking a few signs. First, look for the peppers to be tender and slightly wrinkled. The cheese on top should be golden and bubbly. If you poke a pepper with a fork, it should feel soft but not mushy. Cooking time is usually 30 to 35 minutes at 375°F (190°C). If unsure, a food thermometer should read 165°F (74°C) inside the filling. Stuffed mini bell peppers are fun, tasty, and easy to make. We explored their main ingredients, seasonings, and garnishes. You learned how to prep, mix, and bake them perfectly. Plus, I shared great tips for customizing and serving your dish. Don’t forget about storing leftovers for later! Experiment with flavors and try different options. There’s so much you can do with this dish. Enjoy making stuffed peppers that please everyone at your table!](https://dailydishly.com/wp-content/uploads/2025/07/7be91d44-d02b-4978-8cdb-a2e2cd47e9c1-768x768.webp)