
Honey Lime Fruit Salad Refreshing and Simple Recipe
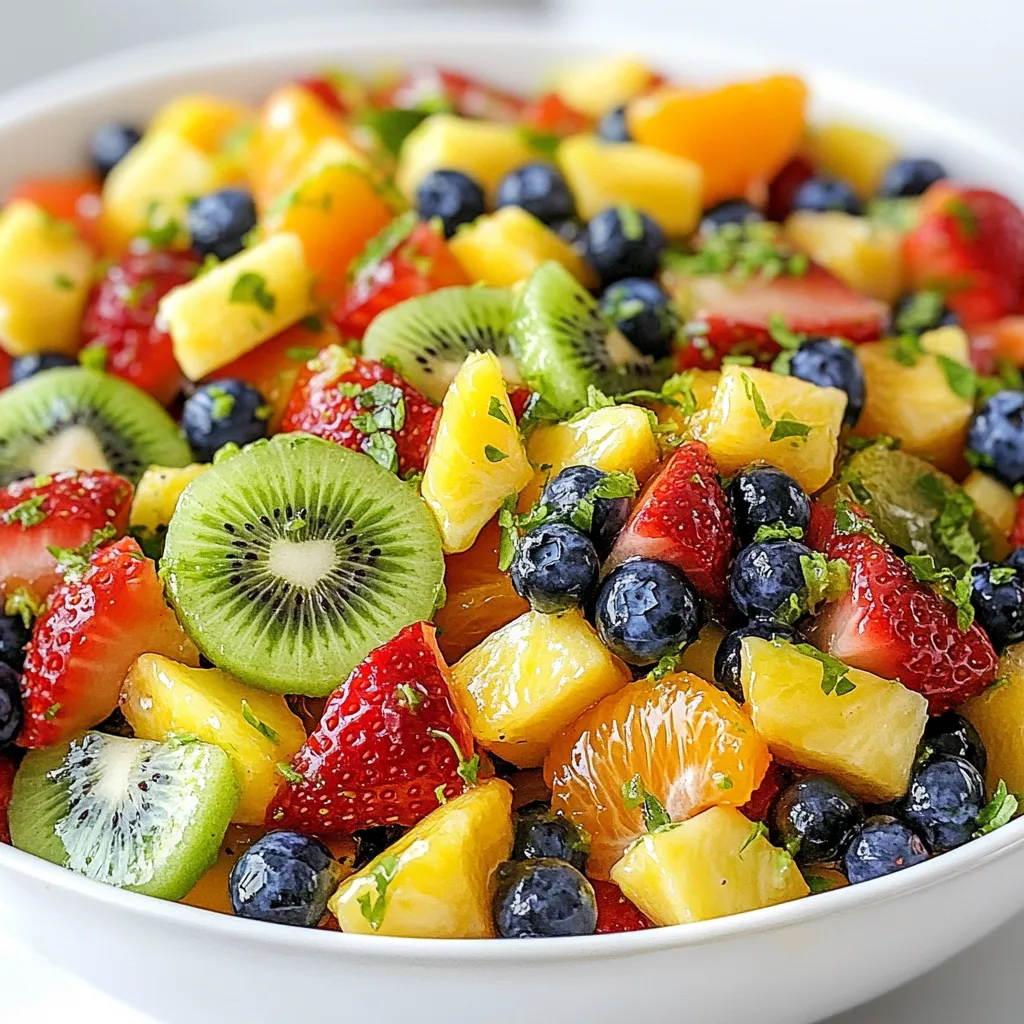

Looking for a quick and tasty treat? This Honey Lime Fruit Salad is not only refreshing but also easy to make. With sweet strawberries, juicy pineapples, and tangy kiwis, it’s perfect for summer picnics or breakfast. I’ll guide you through the simple steps to make a delicious honey lime dressing that ties it all together. Let’s get started and make your fruit salad shine!
Why I Love This Recipe
- Refreshing Flavor Combination: This fruit salad combines the sweetness of honey and the tartness of lime, creating a bright and refreshing flavor profile that is perfect for any occasion.
- Vibrant and Colorful: The mix of strawberries, pineapple, blueberries, kiwis, and orange segments not only tastes great but also looks stunning, making it an eye-catching addition to any table.
- Quick and Easy Preparation: With just 15 minutes of prep time, this recipe is perfect for busy days or last-minute gatherings, allowing you to serve a delicious dish without the hassle.
- Healthy and Nutritious: This salad is packed with vitamins and antioxidants from the fresh fruits, making it a guilt-free treat that you can enjoy anytime.
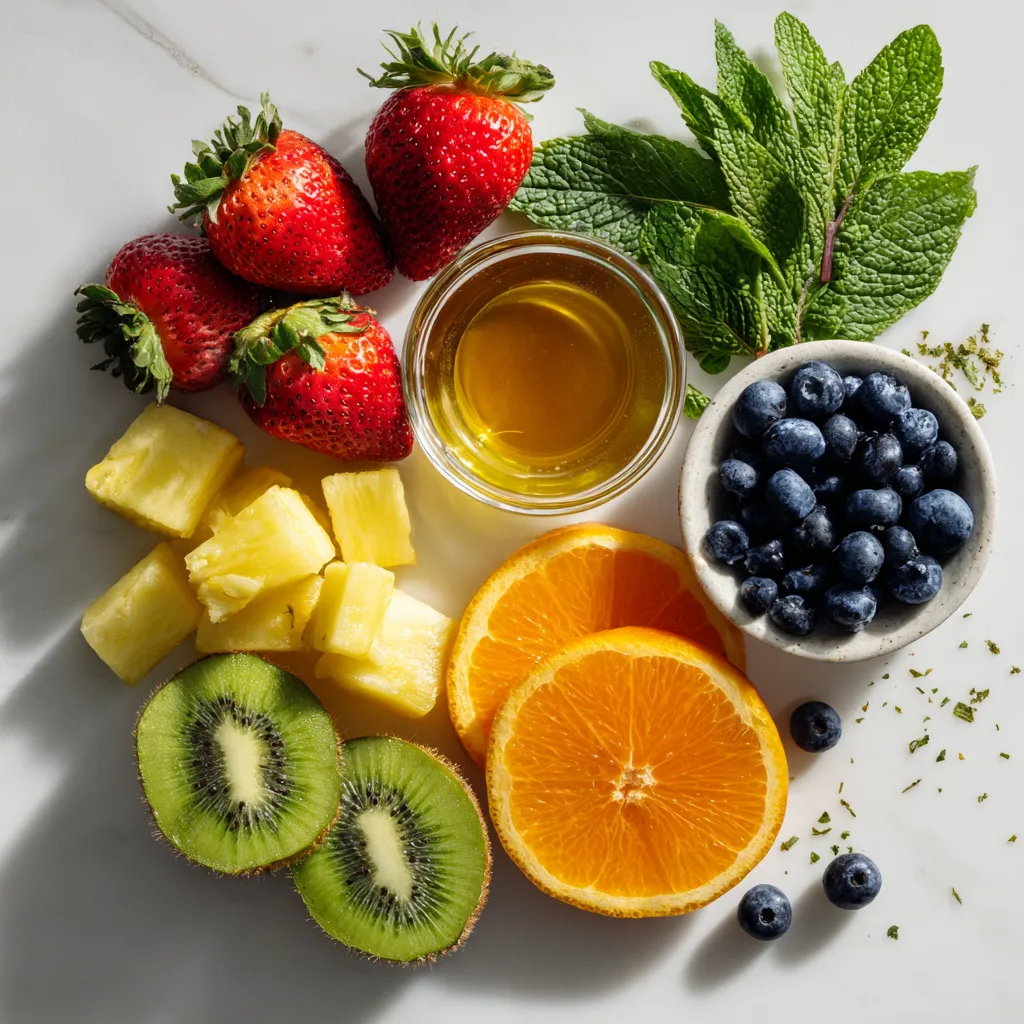
Ingredients
Fresh Fruits
– 2 cups strawberries, hulled and sliced
– 2 cups pineapple, diced
– 1 cup blueberries
– 2 ripe kiwis, peeled and sliced
– 1 orange, segmented
Honey Lime Dressing
– 1/4 cup honey
– 2 tablespoons fresh lime juice
– Zest of 1 lime
Optional Garnishes
– 1 tablespoon fresh mint, chopped
I love using fresh fruits in this Honey Lime Fruit Salad. Strawberries add a sweet burst. Pineapple gives a tropical twist. Blueberries bring a lovely pop of color. Kiwis add a unique taste and soft texture. Oranges bring a juicy zing that ties everything together.
The honey lime dressing is simple but so tasty. I mix honey, fresh lime juice, and lime zest in a small bowl. This dressing enhances the fruits’ natural sweetness. It also adds a bright, zesty flavor. You can adjust the honey if you prefer less sweetness.
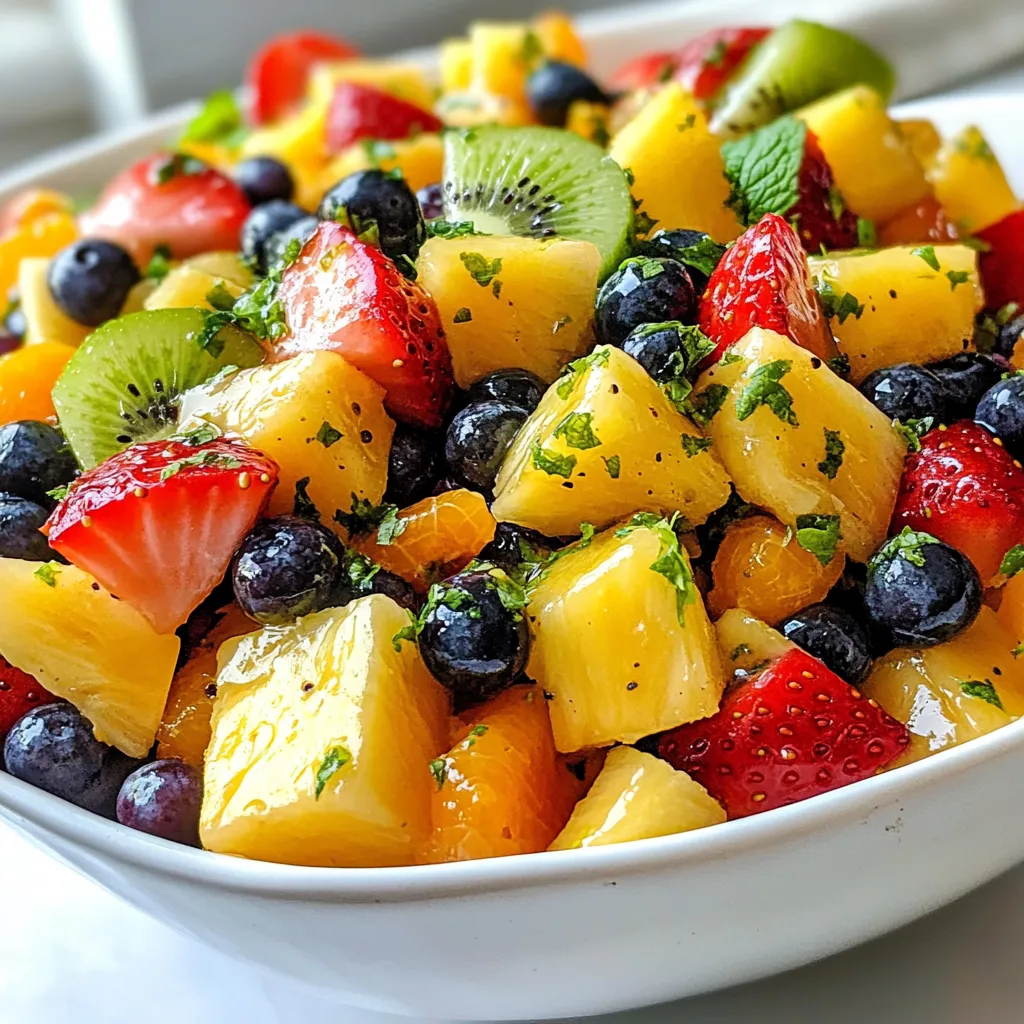
For a finishing touch, I like to add fresh mint. It adds a nice color and flavor boost. When you serve this salad, it looks vibrant and fresh. Enjoy this easy and refreshing dish at your next gathering!
Step-by-Step Instructions
Prepare the Fruit
First, you need to get the fruit ready. Start by hulling and slicing 2 cups of strawberries. Next, dice 2 cups of fresh pineapple into bite-sized pieces. Then, peel and slice 2 ripe kiwis. Finally, segment 1 orange, making sure to remove any seeds.
Make the Honey Lime Dressing
In a small bowl, whisk together 1/4 cup of honey, 2 tablespoons of fresh lime juice, and the zest of 1 lime. Mix until smooth and well combined. This dressing adds a bright flavor to the fruit.
Combine and Serve
In a large mixing bowl, toss all the prepared fruits with the honey-lime dressing. Make sure every piece of fruit gets coated. Let the fruit salad sit for 10 minutes at room temperature. This helps the flavors blend nicely. Serve the salad in a big bowl or in individual cups. Before serving, garnish with 1 tablespoon of chopped fresh mint for color and extra flavor.
Tips & Tricks
Enhancing Flavor
To make your Honey Lime Fruit Salad shine, let the flavors meld together. After mixing the fruits, let them sit for 10 minutes. This helps the fruits soak up the honey-lime dressing. Also, choose ripe fruits for the best taste. Ripe strawberries, pineapples, and kiwis bring out natural sweetness.
Presentation Tips
Serving this salad in individual cups makes it fun and fancy. You can use clear cups to show off the colorful fruits. Adding colorful garnishes can elevate the look. Fresh mint leaves not only add color but also a nice touch of flavor.
Sweetness Adjustments
You might want to adjust the honey to suit your taste. Start with 1/4 cup and add more if you like it sweeter. If you prefer, you can use alternative sweeteners like agave syrup or maple syrup. These options still give a nice flavor without using honey.
Pro Tips
- Choose Ripe Fruits: For the best flavor and sweetness, select fruits that are at their peak ripeness. Look for strawberries that are bright red, pineapples with a sweet aroma, and kiwis that yield slightly to pressure.
- Adjust Sweetness: If you prefer a sweeter fruit salad, add more honey to the dressing. Taste the mixture before drizzling it onto the fruit to get your desired sweetness level.
- Chill Before Serving: For a refreshing experience, chill the fruit salad in the refrigerator for about 30 minutes before serving. This enhances the flavors and makes it extra refreshing, especially on warm days.
- Experiment with Fruits: Feel free to customize your fruit salad by adding seasonal fruits or your favorites. Try adding mango, grapes, or pomegranate seeds for a unique twist.
Variations
Different Fruit Combinations
You can mix up the fruits in this salad. Use seasonal fruits for the best taste. In summer, try juicy stone fruits. Peaches and nectarines add a sweet touch. You can also use berries, melons, or even grapes. The key is to choose ripe, vibrant fruit. This makes your salad colorful and fun.
Healthier Alternatives
If you want to cut back on sugar, reduce the honey. You can use just a tablespoon or two. The lime juice brings out the fruit’s natural sweetness. Another option is to substitute honey with yogurt. Greek yogurt gives a creamy texture and adds protein. It’s a great way to make the salad a bit healthier.
Additional Flavorings
To make your salad even more exciting, add spices. A pinch of cinnamon can add warmth and depth. You can also incorporate vanilla extract for a sweet note. Just a few drops can make a big difference. Experiment with these flavors to find what you love.
Storage Information
Best Practices for Storage
To keep your Honey Lime Fruit Salad fresh, store it in the refrigerator. Use an airtight container to prevent moisture loss. This salad is best enjoyed within 1-2 days for optimal taste and texture.
Preparing Ahead
You can make the honey lime dressing in advance. Simply whisk together honey, lime juice, and lime zest. Store this dressing in the fridge. It stays good for up to a week. Keep the fruits separate until you are ready to serve. This helps them stay fresh and crisp.
Signs of Freshness
Look for overripe fruits to determine freshness. Strawberries should be bright red, not mushy. Kiwis should feel slightly firm. Blueberries need to be plump and smooth. Pineapple should smell sweet and not have brown spots. Always check the texture and color before serving.
FAQs
Can I use frozen fruit for Honey Lime Fruit Salad?
Yes, you can use frozen fruit. However, fresh fruit gives better taste. Frozen fruit may lose its crunch. If you use frozen fruit, thaw it first. This helps to avoid excess water in the salad. Use a mix of strawberries, blueberries, and mangoes for a great flavor.
How do I adjust the recipe for a larger group?
To serve more people, simply double the ingredients. Use 4 cups of strawberries and 4 cups of pineapple. You can also add more fruits like bananas or grapes. If you want a bigger bowl, add 2 more tablespoons of lime juice and 1/2 cup of honey. Mix well so all the flavors blend.
What are the health benefits of honey and lime?
Honey has natural sugars and antioxidants. It can help soothe your throat and boost energy. Lime is rich in vitamin C. It aids digestion and can help your skin. Together, they make a tasty, healthy dressing for your fruit salad. Enjoy the health benefits while treating your taste buds!
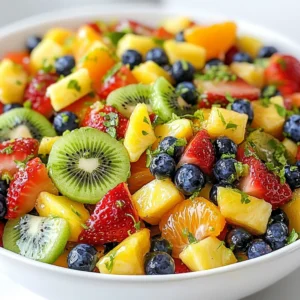
This blog post covered how to make a delicious honey lime fruit salad. You learned about fresh fruits like strawberries and pineapple, plus a simple honey lime dressing. I shared tips for flavor and presentation to make your salad shine. You can also explore variations and the best ways to store your creation.
Remember, use ripe fruits for the best taste. Enjoy your salad today for a fresh, healthy trea
Honey Lime Fruit Salad
Ingredients
- 2 cups strawberries, hulled and sliced
- 2 cups pineapple, diced
- 1 cup blueberries
- 2 ripe kiwis, peeled and sliced
- 1 orange segmented
- 0.25 cup honey
- 2 tablespoons fresh lime juice
- 1 lime zest
- 1 tablespoon fresh mint, chopped (for garnish)
Instructions
- In a large mixing bowl, combine the sliced strawberries, diced pineapple, blueberries, sliced kiwis, and orange segments.
- In a separate small bowl, whisk together the honey, fresh lime juice, and lime zest until well combined.
- Drizzle the honey-lime dressing over the mixed fruit and gently toss until the fruits are evenly coated.
- Allow the fruit salad to sit for 10 minutes at room temperature to let flavors mingle.
- Once the flavors have combined, transfer the fruit salad to a serving bowl or individual cups.
- Garnish with chopped fresh mint for added color and flavor before serving.


![- Zucchini and Raisin Essentials - 2 cups grated zucchini - 1 cup raisins Zucchini adds moisture and a soft texture to the bread. Raisins bring sweetness and chewiness. Using fresh, firm zucchini makes the best bread. - Sweeteners and Fats - 1 cup granulated sugar - 1/2 cup packed brown sugar - 1/2 cup vegetable oil - 3 large eggs - 2 teaspoons vanilla extract Granulated sugar gives a crisp crust. Brown sugar adds depth and moisture. Vegetable oil keeps the bread soft. Eggs bind the ingredients and add richness. - Dry Ingredients Overview - 2 cups all-purpose flour - 1 teaspoon baking soda - 1/2 teaspoon baking powder - 1 teaspoon ground cinnamon - 1/2 teaspoon ground nutmeg - 1/4 teaspoon salt Flour provides structure. Baking soda and powder help the bread rise. Cinnamon and nutmeg add warmth and flavor. Salt balances the sweetness. - Optional Add-ins (Nuts, Spices) - 1/2 cup chopped walnuts (optional) Nuts add crunch and a nutty flavor. You can also add spices like ginger or cloves for a twist. Check out the Full Recipe for exact measurements and instructions! Preheating the Oven and Preparing the Pan First, preheat your oven to 350°F (175°C). This step is key for even baking. While the oven heats, grease and flour a 9x5-inch loaf pan. This helps the bread release easily after baking. Mixing Wet Ingredients In a large bowl, combine the grated zucchini, granulated sugar, brown sugar, vegetable oil, eggs, and vanilla extract. Use a whisk or spoon to mix until everything is well blended. This creates a moist base for your bread. Combining Dry Ingredients In another bowl, whisk together the flour, baking soda, baking powder, cinnamon, nutmeg, and salt. This mixture adds structure and flavor to your bread. Make sure there are no lumps. Final Batter Preparation Gradually add the dry ingredients to the wet mixture. Stir gently until just combined. It's important not to overmix. This keeps the bread light and fluffy. Fold in the raisins and walnuts if you choose to use them. This adds texture and sweetness. Pouring Batter into the Pan Carefully pour the batter into your prepared loaf pan. Use a spatula to smooth the top. This helps the bread bake evenly and look nice. Baking Duration and Temperature Place the pan in the preheated oven. Bake for 50-60 minutes. The bread is ready when a toothpick inserted in the center comes out clean. Checking for Doneness To check if your bread is done, look for a golden-brown color on top. If the toothpick has wet batter, bake for a few more minutes. Let it bake fully for the best taste. You can find the full recipe above for more details on this delightful zucchini raisin bread! - Ensuring Moisture with Grated Zucchini Grated zucchini adds moisture to your bread. Use a box grater or food processor to shred it finely. Before adding it to the mix, squeeze out excess water. This step keeps your bread from being too wet or soggy. - Avoiding Overmixing When mixing the wet and dry ingredients, stir just until combined. Overmixing makes the bread tough. It’s okay if some lumps remain. This helps keep the bread light and fluffy. - Proper Cooling Techniques After baking, let the bread cool in the pan for about 10 minutes. This helps it firm up. Then transfer it to a wire rack. Cooling it completely helps avoid sogginess and allows the flavors to settle. - Ideal Pairings and Presentation Ideas Serve slices warm with butter or cream cheese. For a special touch, sprinkle cinnamon on top. You can also pair it with a hot cup of tea or coffee. This makes for a cozy snack or breakfast. - Storage Tips for Maximum Freshness Store leftover bread in an airtight container at room temperature. This keeps it soft for several days. For longer storage, wrap it in plastic wrap and freeze. When you want to eat it, thaw it at room temperature. Enjoy fresh slices whenever you like! For the complete recipe, refer to the Full Recipe section above. {{image_2}} You can make your zucchini raisin bread even better with simple tweaks. Adding spices beyond cinnamon and nutmeg works wonders. Try ginger or allspice for a warm, fragrant touch. A pinch of cardamom also brings a lovely depth. Incorporating other fruits or nuts boosts flavor and texture. Chopped apples or crushed pineapple add sweetness and moisture. You can swap raisins for dried cranberries for a tart burst. If you prefer nuts, walnuts or pecans lend a delightful crunch. If you're looking for vegan substitutions, replace eggs with flaxseed meal or applesauce. Use a plant-based oil too. Almond or coconut milk can replace regular milk if you choose to add some. Using whole wheat flour is a smart swap. It adds fiber and nutrients while keeping the bread moist. You can use half all-purpose and half whole wheat flour for a balanced taste. Reducing sugar content is another way to make this bread healthier. You can cut the granulated sugar by a third. The zucchini adds natural sweetness, so you won’t miss much. Using ripe bananas or unsweetened applesauce can also help cut sugar while adding flavor. For the full recipe, check out the section above! To keep your zucchini raisin bread fresh, store it at room temperature. Wrap it in plastic wrap or place it in an airtight container. This helps keep the bread moist and flavorful. Enjoy it within a few days for the best taste. If you want to keep it longer, consider refrigerating it. But remember, the cold may change the texture slightly. If you want to save your zucchini raisin bread for later, freezing is a great option. First, let the bread cool completely after baking. Then, wrap it tightly in plastic wrap, followed by aluminum foil. This dual layer helps prevent freezer burn. You can freeze it for up to three months. To thaw your bread, simply remove it from the freezer. Leave it wrapped at room temperature for a few hours. When it's soft, you can slice it. If you want it warm, pop a slice in the toaster. This makes a delicious treat. Don't forget, you can use the [Full Recipe] to make more for your freezing needs! Can I use frozen zucchini in this recipe? Yes, you can use frozen zucchini. Just thaw it first and drain any extra water. This helps keep your bread moist. Frozen zucchini works well in baked goods. It still adds great flavor and texture. How can I make this recipe gluten-free? To make this recipe gluten-free, swap the all-purpose flour for gluten-free flour. Many brands offer blends that work well in baking. Just ensure they contain xanthan gum or add it separately. This helps with the bread's structure and texture. What are the nutritional benefits of zucchini in baking? Zucchini is low in calories and high in fiber. It adds moisture to your bread without extra fat. Zucchini also contains vitamins A and C, which are good for your health. Plus, it has antioxidants. These benefits make zucchini a smart choice for baking. For the complete recipe, take a look at the Full Recipe section. In this post, we explored the step-by-step process of making delicious zucchini raisin bread. We discussed essential ingredients, baking tips, and storage methods. You learned how to mix wet and dry components effectively and check for perfect doneness. Remember, don’t skip on the grated zucchini for moisture, and feel free to add your favorite nuts or spices. Whether you enjoy it fresh or stored, this bread is sure to please. Happy baking!](https://dailydishly.com/wp-content/uploads/2025/06/9b9e6e77-b918-4e2e-978b-be2d7f9f5a48-768x768.webp)

. To make blueberry almond overnight oats, start by gathering all your ingredients. This recipe takes just 10 minutes to prep. You can make two servings, perfect for a quick breakfast. In a medium bowl or a mason jar, add these base ingredients: - 1 cup rolled oats - 1 cup almond milk (or any plant-based milk) - ½ cup Greek yogurt (or plant-based yogurt) - 2 tablespoons honey or maple syrup - 1 teaspoon vanilla extract - ½ teaspoon cinnamon - A pinch of salt Mix all these items well. Make sure they blend together smoothly. This mix is the heart of your oats. Now, gently fold in 1 cup of blueberries. If you want, save a few for topping later. Then, add ¼ cup of sliced almonds for crunch. Stir carefully so you don’t mash the blueberries. Cover the bowl or seal the jar, then put it in the fridge. Let it chill overnight. This helps the oats soak up the flavors. The next morning, stir the oats. If they are too thick, add a splash of almond milk. Top with the reserved blueberries and sliced almonds for extra flavor and crunch. You can find the full recipe for this delicious dish above. Enjoy your tasty and nutritious breakfast! To make great overnight oats, follow these steps: - Use rolled oats. They soak up liquid well. - Choose a container you can seal tight. A mason jar works well. - Mix all the base ingredients first. This helps flavors blend. - Refrigerate for at least six hours. This allows the oats to soften. - Stir before serving to combine everything. Add more milk if needed. Personalize your overnight oats easily. Here are some ideas: - Swap almond milk for coconut or oat milk. - Use different fruits like strawberries or bananas. - Add seeds like chia or flax for extra nutrition. - Try nut butters for creaminess and flavor. - Experiment with spices like nutmeg or cardamom. Let’s look at the benefits of the main ingredients: - Rolled oats: They provide fiber, which is good for digestion. - Almond milk: It is low in calories and rich in vitamins. - Greek yogurt: This adds protein and probiotics for gut health. - Blueberries: They are full of antioxidants and vitamins. - Almonds: They offer healthy fats and help keep you full. Each ingredient brings something special to your meal. Enjoy the great taste while knowing you are eating well. For the full recipe, check out the details above. {{image_2}} You can change the taste of your Blueberry Almond Overnight Oats easily. Here are some ideas: - Mixed Berries: Swap blueberries for strawberries, raspberries, or blackberries. - Nut Butters: Stir in a spoon of almond or peanut butter for creaminess. - Chocolate: Add cocoa powder or chocolate chips for a fun twist. - Coconut: Sprinkle in some shredded coconut for a tropical flair. These variations will make your oats more exciting and tasty. If you have special dietary needs, you can still enjoy this recipe. Here are some substitutes: - Dairy-free: Use almond milk and plant-based yogurt for a vegan option. - Sugar-free: Skip the honey or maple syrup. Use ripe bananas for sweetness. - Gluten-free: Make sure you choose certified gluten-free rolled oats. These changes let everyone enjoy this dish. Want to make more servings? Scaling the recipe is simple. Just multiply each ingredient: - For 4 servings, use 2 cups of oats and 2 cups of almond milk. - For 6 servings, use 3 cups of oats and 3 cups of almond milk. You can prepare these oats in a large bowl or several jars. This way, you have breakfast ready for days! For the full recipe, check out the Berry Delights: Blueberry Almond Overnight Oats section. To keep your blueberry almond overnight oats fresh, store them in an airtight container. A mason jar works great because it's easy to seal. Make sure the oats are covered well with the lid. This keeps out air and moisture. If you make a big batch, divide them into individual servings. This way, you grab just what you need. When stored properly in the fridge, blueberry almond overnight oats can last for up to five days. This means you can meal prep for the week! Just remember to check for any changes in smell or texture before eating. If it looks or smells off, it’s best to toss it. You can also freeze your oats for longer storage. To do this, place the oats in a freezer-safe container. Leave some space at the top, as the oats will expand when frozen. They will stay good for up to three months. When you’re ready to eat them, thaw in the fridge overnight. You can warm them up or enjoy them cold. This is a great option for quick breakfasts! For the full recipe, check out the details above. Yes, you can! Other fruits work well too. Try strawberries, raspberries, or bananas. Each fruit adds its unique flavor and texture. Just make sure to adjust the amount based on the fruit’s sweetness. For example, use less honey if your fruit is sweet. Overnight oats stay fresh for up to five days. Store them in a sealed jar or container. This makes them great for meal prep. Just keep an eye on the texture. If they get too thick, add a splash of almond milk before serving. No, sweeteners are not a must. The oats and fruit add natural sweetness. If you prefer less sugar, skip the honey or maple syrup. You can also use ripe bananas or applesauce for sweetness. Adjust it to fit your taste! Blueberry almond overnight oats are simple to make and delicious. We covered the key and optional ingredients, plus tips on choosing the best. The step-by-step instructions guide you from mixing to adding fruit. I shared tips for customizing and highlighted the nutritional benefits of oats. Don't forget the variations you can try to suit your taste. Lastly, we discussed how to store your oats safely. With these insights, you're ready to enjoy a healthy breakfast that keeps you full and satisfied.](https://dailydishly.com/wp-content/uploads/2025/07/39185b14-c6b2-4e99-b0b5-ab17b9785ad3-768x768.webp)