Apple Cinnamon Overnight Oats Simple and Tasty Boost

Are you ready to wake up to a delicious and healthy breakfast? Apple Cinnamon Overnight Oats are not just simple; they’re a tasty boost for your morning routine. In this post, I’ll share easy steps to prepare them, tips for variations, and answers to common questions. Keeping your mornings stress-free and flavorful is my goal. Let’s dive into the details and make breakfast something to look forward to!
Ingredients
Detailed ingredient list
To make Apple Cinnamon Overnight Oats, gather these key ingredients:
– 1 cup rolled oats
– 2 cups almond milk (or any milk of choice)
– 1 medium apple, diced (preferably a sweet variety like Fuji or Gala)
– 1 teaspoon ground cinnamon
– 2 tablespoons maple syrup (or honey)
– 1/2 teaspoon vanilla extract
– 1/4 cup Greek yogurt (optional for creaminess)
– Pinch of salt
– Chopped nuts (such as walnuts or pecans, for topping)
– Extra apple slices and a dash of cinnamon for garnish
These simple ingredients come together to create a tasty and filling breakfast.
Substitutions for dietary restrictions
If you have dietary restrictions, don’t worry! You can easily adapt this recipe.
– For a nut-free option, use oat milk instead of almond milk.
– If you want it vegan, replace Greek yogurt with dairy-free yogurt.
– Use agave nectar or stevia instead of maple syrup for a lower-sugar choice.
These swaps keep the flavors and textures intact while meeting your needs.
Fresh vs. dried fruits and their impact on flavor
Using fresh apples gives a crisp and juicy bite to your oats. They add brightness and freshness. On the other hand, dried fruits, like raisins or dried apples, provide a chewy texture and a concentrated sweetness.
If you choose dried fruits, soak them in water for a bit to soften them. This will prevent them from being too tough. Each type of fruit adds its own unique flavor profile, making it fun to experiment!
Step-by-Step Instructions
Preparing the oat mixture
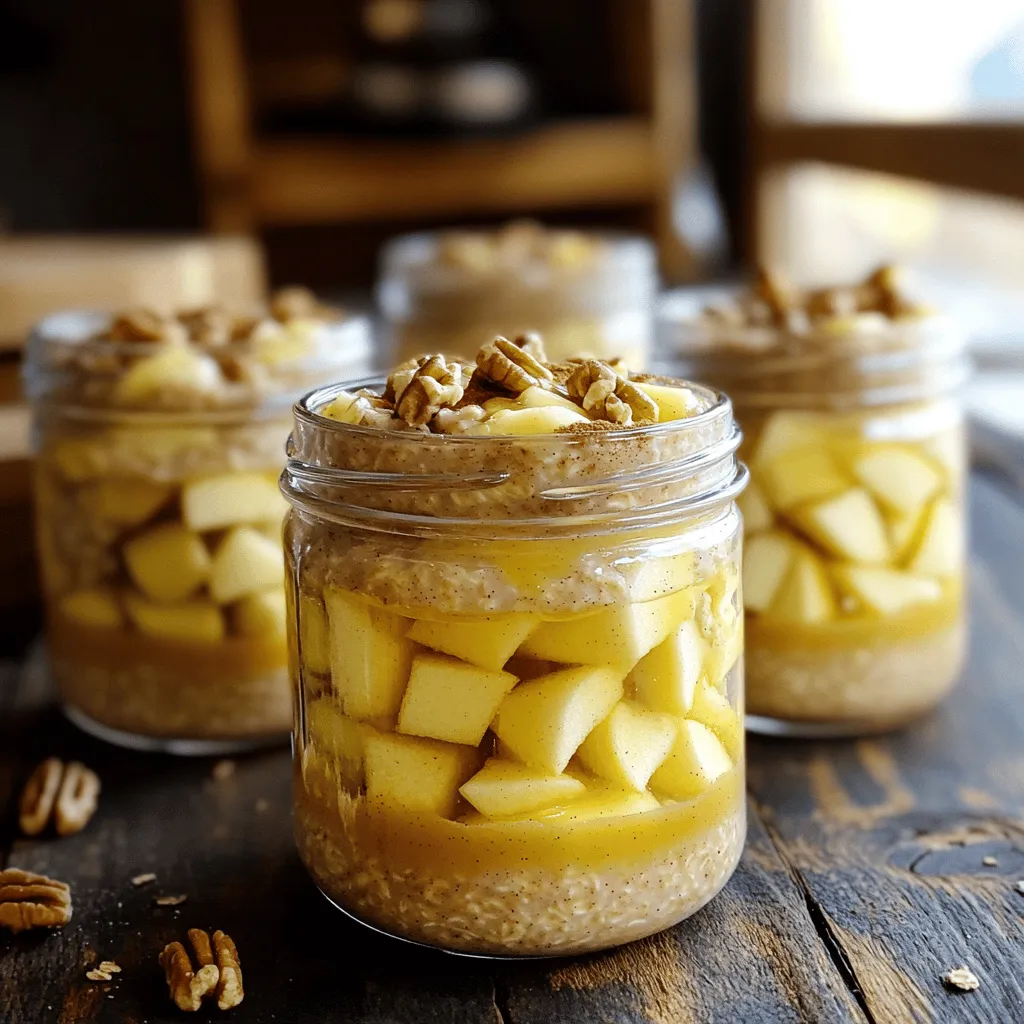
Start by gathering your ingredients. You need rolled oats, almond milk, diced apple, and some seasonings. In a large bowl, mix one cup of rolled oats with two cups of almond milk. If you want it creamy, add a quarter cup of Greek yogurt.
Next, toss in the diced apple, one teaspoon of ground cinnamon, two tablespoons of maple syrup, and half a teaspoon of vanilla extract. Don’t forget a pinch of salt! Stir everything together well. You want all the flavors to mix nicely.
Layering and storing overnight oats
Once your mixture is ready, it’s time to portion it out. Grab some jars or airtight containers. Divide the oat mixture evenly among them. Make sure the apples are spread out in each jar.
Seal the jars tightly and place them in your fridge. Let them chill overnight. If you are short on time, four hours will work too. This soaking lets the oats absorb the liquid and flavors.
Serving suggestions for a delicious breakfast
In the morning, take your jars out of the fridge. Give the oats a good stir. If they seem too thick, add a splash of almond milk to loosen them up.
Now for the fun part! Top your oats with chopped nuts, like walnuts or pecans. Add extra apple slices and a dash of cinnamon for a nice finish. These toppings make your breakfast look great and taste even better. Enjoy your Apple Cinnamon Overnight Oats for a tasty and filling start to your day!
Tips & Tricks
Achieving the perfect texture
To get the perfect texture, use rolled oats. They soak up liquid well. If you like a creamier mix, add Greek yogurt. It gives a rich taste and smooth feel. Let the oats sit overnight. This helps them soften just right. If your oats feel too thick in the morning, add a splash of almond milk. Stir it in until you reach the texture you enjoy.
Enhancing flavor with additional spices
Cinnamon is a star in this recipe, but you can add more spices. Try a pinch of nutmeg for warmth. A dash of ginger adds a nice kick, too. If you like it sweeter, a bit of vanilla extract can help. Mix and match spices to find your favorite blend. Experimenting makes your overnight oats exciting!
Meal prep tips for busy mornings
To make busy mornings easier, prep multiple jars at once. It only takes about ten minutes. Use clear jars to see the layers and colors. This makes breakfast feel special. Store them in the fridge for up to five days. Grab a jar each morning, and you are ready to go! For a quick morning treat, top with chopped nuts or extra apple slices before eating.
Variations
Different fruit combinations (e.g., banana, berries)
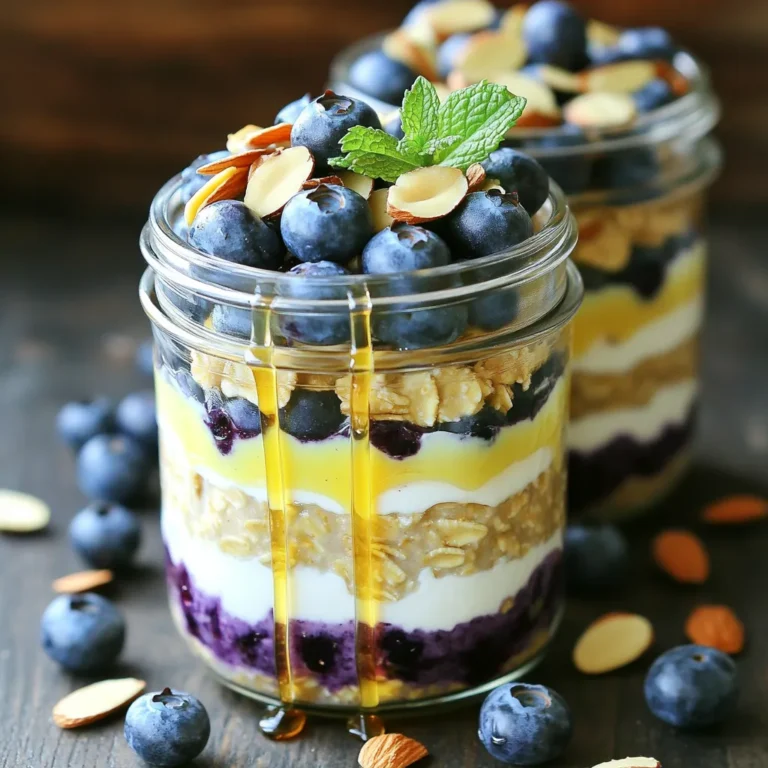
You can mix up your apple cinnamon overnight oats with different fruits. Bananas add a creamy texture and natural sweetness. Berries like blueberries or strawberries offer a burst of tartness. You can also try pears for a juicy twist. Each fruit brings its own flavor, making breakfast fun and varied.
Adding protein (e.g., nut butters, protein powder)
Boosting protein in your oats is easy. You can stir in nut butters like almond or peanut for a rich taste. Just one tablespoon adds a lot of creaminess. If you prefer a lighter option, try protein powder. Mix in a scoop when you combine your oats and milk. This keeps you full and supports muscle health.
Vegan alternatives for added creaminess
If you want a vegan version, there are great options. Replace Greek yogurt with a plant-based yogurt. Coconut yogurt is a fantastic choice for added creaminess. Another option is to use mashed avocado. It sounds odd, but it gives a smooth texture without changing the taste much. These swaps make your oats creamy while keeping them vegan-friendly.
Storage Info
How long do they last in the fridge?
Apple Cinnamon Overnight Oats stay fresh in the fridge for about 3 to 5 days. Make sure to store them in airtight containers. This keeps them tasty and safe to eat. If you notice any changes in smell or texture, it’s best to toss them.
Freezing options for longer storage
You can freeze the oats for up to 3 months. To do this, use freezer-safe containers. Leave some space at the top, as the oats will expand. When you’re ready to eat, let them thaw in the fridge overnight. This method keeps all the flavors intact.
Reheating instructions if necessary
If you prefer warm oats, simply reheat them in the microwave. Place the oats in a bowl and microwave for 30 seconds. Stir and check the temperature. If they need more heat, microwave in 10-second intervals. You can add a splash of almond milk before heating to keep them creamy.
FAQs
Can I make Apple Cinnamon Overnight Oats in advance?
Yes, you can make Apple Cinnamon Overnight Oats in advance. In fact, preparing them the night before is best. This allows the oats to soak up the milk and flavors. You can store them in jars or containers. Just seal them well and place them in the fridge overnight. They will be ready to eat in the morning!
What can I use instead of almond milk?
You can use several options instead of almond milk. Here are some great choices:
– Cow’s milk
– Soy milk
– Oat milk
– Coconut milk
Each type of milk brings its own flavor. Choose the one you enjoy most!
Are overnight oats healthy?
Yes, overnight oats are healthy! They are high in fiber, which helps digestion. They provide energy and keep you full. Plus, they have vitamins from the apples and spices. You can also add yogurt or nuts for extra protein.
How do I adjust the sweetness?
To adjust the sweetness, you have a few options:
– Add more maple syrup or honey.
– Use a ripe banana for natural sweetness.
– Sprinkle in some brown sugar or any sweetener you like.
Start small and taste as you go until you find your perfect mix!
This blog post covered the key elements of making delicious overnight oats. We explored ingredients and substitutions, plus how fresh or dried fruits can change the taste. The step-by-step guide showed you how to prepare, layer, and enjoy these oats.
With tips for texture and flavor, you can customize your breakfast easily. Variations let you mix and match fruits and proteins to fit your needs. Remember, proper storage keeps your oats fresh. Enjoy your tasty and healthy morning meal!


![- 200g dark chocolate (70% cocoa), chopped - 3 tablespoons unsalted butter - 3 large eggs, separated - 1/4 cup granulated sugar - 1 teaspoon vanilla extract - 1 cup heavy cream - A pinch of salt To make a great chocolate mousse, we need high-quality ingredients. The star of this dessert is dark chocolate, which gives it rich flavor. I always choose chocolate with at least 70% cocoa. This ensures a deep, intense taste. Next, we add unsalted butter. It helps the chocolate melt smoothly. Eggs are crucial, too. They add structure and richness. Separating them allows us to whip the whites for a light texture. Granulated sugar sweetens the mousse, while vanilla extract adds warmth. Heavy cream is essential for that luscious, creamy mouthfeel. Lastly, a pinch of salt balances the flavors. - Whipped cream - Chocolate shavings - Fresh berries While the mousse is delightful on its own, garnishes can elevate it. Whipped cream adds a fluffy touch. Chocolate shavings bring a nice crunch and more chocolate flavor. Fresh berries add color and a slight tartness. These toppings make your dessert even more appealing. For the full recipe, check [Full Recipe]. Melt Chocolate Start by chopping 200g of dark chocolate. Place it in a heatproof bowl with 3 tablespoons of unsalted butter. Put this bowl over a pot of simmering water. Stir it gently until the chocolate and butter melt and blend into a smooth mix. Once melted, take it off the heat and let it cool. Whisk Egg Yolks In another bowl, take 3 large egg yolks. Add 1/4 cup of granulated sugar. Whisk these together until the mix turns pale and creamy. Next, pour in the cooled chocolate and butter blend. Add 1 teaspoon of vanilla extract and mix until combined. Whip Egg Whites In a clean bowl, add 3 large egg whites with a pinch of salt. Beat them until soft peaks form. Now, slowly add the remaining sugar while beating until stiff peaks form. This will give your mousse a light texture. Fold Egg Whites into Chocolate Mixture Gently fold one-third of the whipped egg whites into the chocolate mix. This lightens it. Then, carefully fold in the remaining egg whites. This step is key to keeping your mousse fluffy. Incorporate Whipped Cream In a separate bowl, whip 1 cup of heavy cream until soft peaks form. Now, fold this whipped cream into the chocolate mixture. Do this slowly to avoid deflating the mousse. Spoon into Serving Cups Once everything is combined, spoon the mousse into serving cups. You can use bowls or fancy glasses. Chill Time Cover the cups and place them in the fridge. Chill for at least 2 hours, or until the mousse is set. This step is vital for the best texture. For the full recipe, check the detailed instructions above. Enjoy your creamy and decadent dessert! To get the best texture, I recommend using the right ingredients. Start with high-quality dark chocolate, about 70% cocoa. This gives your mousse a rich flavor. Room temperature ingredients are also key. Eggs and butter blend better when they are not cold. One common mistake is overwhipping the cream or egg whites. This can make your mousse grainy instead of smooth. Aim for soft peaks when whipping. Another pitfall is not cooling the chocolate properly. If you add hot chocolate to eggs, it can cook them. Let the melted chocolate cool a bit before mixing. By following these tips, you can create a mousse that is creamy and decadent. For a full recipe, check out the detailed instructions. {{image_2}} To make your chocolate mousse even more exciting, try adding some fun flavors. You can add espresso powder for a coffee twist. Just mix in one teaspoon of espresso powder with the melted chocolate. This gives the mousse a rich, coffee flavor that pairs well with chocolate. Another idea is to infuse your mousse with orange zest or mint. For orange, add one teaspoon of fresh zest to the chocolate mix. This adds a bright, citrus taste. For mint, use a few drops of mint extract. It creates a refreshing flavor that feels special. If you follow a vegan diet, you can still enjoy this dessert! Use aquafaba instead of eggs. Aquafaba is the liquid from canned chickpeas. It whips up just like egg whites. Replace the three egg whites with 1/2 cup of aquafaba. This keeps your mousse fluffy and light. For those looking for sugar-free options, try using sweeteners like erythritol or stevia. These substitutes can replace the granulated sugar in the recipe. Just follow the package instructions for the right amount. This way, you can enjoy a guilt-free treat without the extra sugar. These variations keep the mousse fun and fit for everyone. For the full recipe, check out the detailed instructions above. After you make the mousse, you can store leftovers in the fridge. Place the mousse in airtight containers. This keeps it fresh and prevents it from absorbing other smells. It lasts about 3 to 4 days in the fridge. Make sure to cover it well. If you want to keep it safe, place plastic wrap over the top of the container. You can freeze chocolate mousse if you want it to last longer. Use a freezer-safe container and fill it to leave some space. The mousse will expand as it freezes. It can stay in the freezer for up to 2 months. To thaw the mousse, take it out and place it in the fridge for several hours. This keeps the texture nice. Avoid using a microwave, as it may change the mousse's creamy feel. Once thawed, use it within a couple of days for the best taste. If you want the full recipe, check it out here: [Full Recipe]. Chocolate mousse can last about 3 to 5 days in the fridge. Make sure to cover the mousse well to keep it fresh. After a few days, the texture might change, but it should still taste good. Yes, you can make chocolate mousse ahead of time. It’s a great dessert for parties. Just make sure to chill it for at least 2 hours. You can prepare it a day before serving. This allows the flavors to develop fully. If you need a substitute for heavy cream, you can use coconut cream or full-fat yogurt. These options will change the flavor a bit but will still give a creamy texture. You can also whip silken tofu for a dairy-free alternative. Using raw eggs can be safe if they are pasteurized. Pasteurized eggs reduce the risk of foodborne illness. If you are concerned, you can use whipped aquafaba instead of egg whites. Aquafaba is the liquid from canned chickpeas and works well in this mousse. For the full recipe, check out the recipe section above. This blog post covers how to make a simple and delicious chocolate mousse. I shared key ingredients and easy steps to create the perfect dessert. Remember to avoid common mistakes, like overwhipping cream. You can also try different flavors or adjust for dietary needs. In the end, this mousse is a treat you can make any time. With practice, you'll impress everyone. Enjoy making it, and have fun with the toppings!](https://dailydishly.com/wp-content/uploads/2025/06/b5ca571b-81f1-451e-9d8a-f7e9dc6262da-768x768.webp)