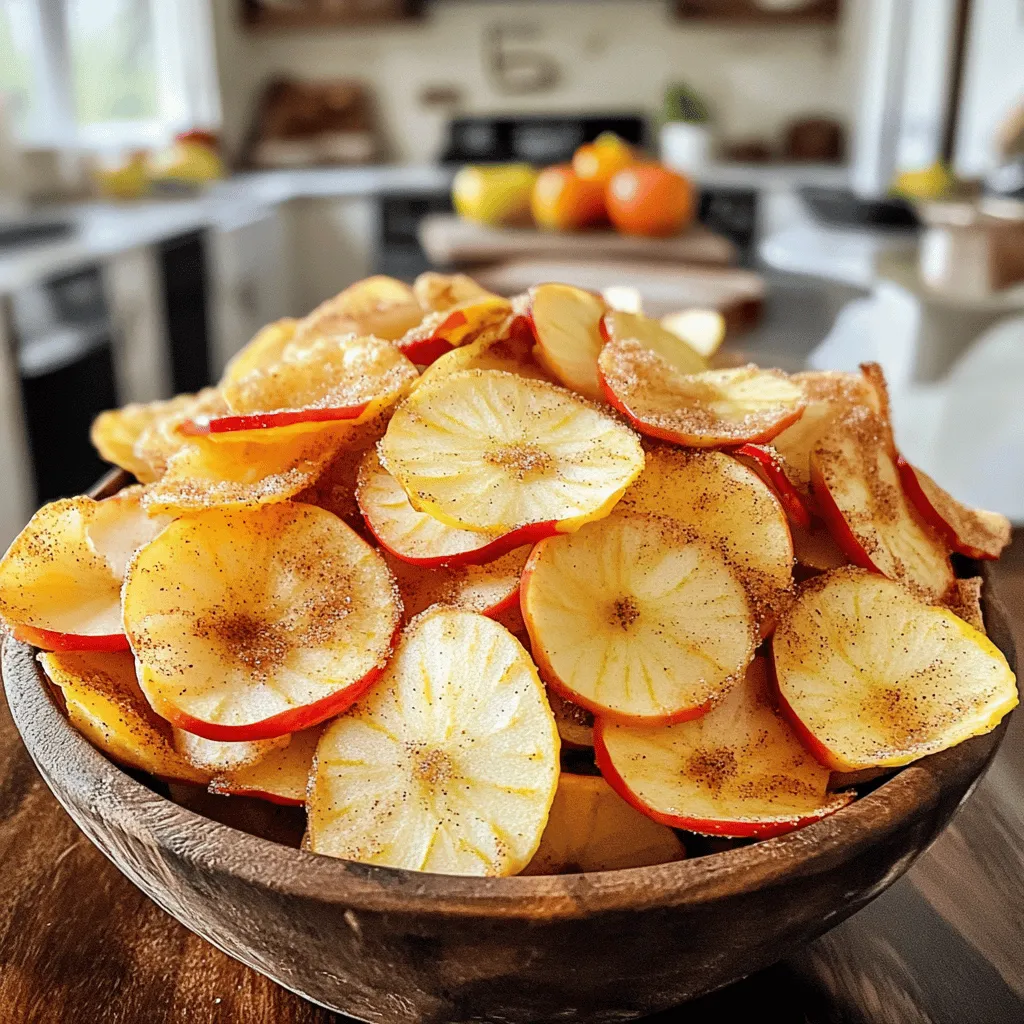
Baked Cinnamon Apple Chips Crispy and Simple Snack

Are you ready for a tasty snack that’s both healthy and easy to make? Baked Cinnamon Apple Chips are your perfect choice! With just a few simple ingredients, you can whip up a crispy treat that satisfies your cravings. Whether you’re looking for a quick snack or a fun recipe to enjoy with friends, these apple chips will hit the spot. Let’s dive into the delightful world of baking apple chips together!
Ingredients
List of Ingredients
– 3 medium-sized apples (Fuji or Honeycrisp recommended)
– 1 tablespoon ground cinnamon
– 1 tablespoon sugar (optional)
– 1 teaspoon lemon juice
– Pinch of salt
Optional Add-ins
– Other spices like nutmeg or ginger can add warmth.
– Sweeteners such as honey or maple syrup can enhance the flavor.
Suggested Apple Varieties
– Best apple types for baking: Fuji and Honeycrisp are ideal. They stay crisp and sweet.
– Flavor profiles of different apples:
– Granny Smith: Tart and crisp, great for a tangy snack.
– Gala: Sweet and juicy, perfect for a sweeter chip.
– Braeburn: Balanced flavor, combines sweetness and tartness well.
Choosing the right apple affects the taste and texture of your chips. Stick with varieties that stay firm when baked.
Step-by-Step Instructions
Preparation Steps
1. Preheat the oven and line baking sheets. Set your oven to 225°F (110°C). While it heats, grab two baking sheets and line them with parchment paper. This step helps prevent the chips from sticking.
2. Wash and core the apples. Rinse your apples under cool water. Use a sharp knife or corer to remove the core. You want clean, fresh apples for the best flavor.
Slicing Techniques
– Using a mandoline vs. a knife. A mandoline slicer gives you even slices quickly. If you don’t have one, a sharp knife works too. Just be careful to slice thinly and evenly.
– Tips for even slicing. Aim for slices about 1/8 inch thick. This thickness helps them bake evenly. If your slices are too thick, they may not get crispy.
Baking Process
1. Arranging apple slices on baking sheets. Lay the apple slices in a single layer on your baking sheets. Make sure they don’t touch or overlap. This step is key for crispiness.
2. Checking for doneness. Bake the apple slices for about 1.5 to 2 hours. Turn the slices halfway through for even cooking. Keep watching them near the end. You want them dry and crisp, not burnt.
These steps help you create tasty, crispy baked cinnamon apple chips.Enjoy your snacking!
Tips & Tricks
Perfecting Crispiness
To get the best apple chips, slice them thin. Aim for about 1/8 inch thick. Thinner slices bake better and become crispier. If your slices are too thick, they won’t crisp up as well.
During baking, turn the slices halfway through. This helps them cook evenly. It also prevents one side from getting too brown. Keep a close eye on them towards the end. You want them golden, not burnt.
How to Avoid Browning
Lemon juice plays a key role in keeping apples fresh. It slows down the browning process. Toss the apple slices in lemon juice right after slicing. This simple step makes a big difference.
Other methods include soaking the slices in saltwater. Just mix a bit of salt in water and soak for a few minutes. Rinse and dry them before baking. This also helps keep the apples looking bright.
Enhancing Flavor
You can add more flavor to your chips. Consider spices like nutmeg or ginger for a new twist. Mixing in a bit of vanilla extract can also boost the taste.
For snacking, these apple chips pair well with dips. Try peanut butter or yogurt for a creamy touch. You can also sprinkle them on salads or add them to granola for extra crunch.
Variations
Flavor Combinations
You can play with flavors in many ways. If you want to try new tastes, swap the cinnamon and sugar for other spices. Nutmeg gives a warm, cozy flavor. Ginger adds a spicy kick, which can be nice for fall.
Adding nuts or coconut is another great idea. Chopped pecans or walnuts add crunch. Shredded coconut gives a tropical twist. Just sprinkle them on before baking. This makes your chips even more fun and tasty.
Different Fruit Chips
You can also make chips from other fruits. Pears are juicy and sweet, making great chips. Slice them thin, just like apples. Bananas are another option. They turn chewy when baked. Just remember, they will bake faster than apples.
Mixing apples with other fruits creates a colorful snack. Try adding berries or peaches. Just slice them thin and use the same baking method. This gives you a mix of flavors and colors.
Serving Suggestions
Apple chips are great on their own, but you can pair them with dips. Yogurt or almond butter makes a tasty combo. You can also try hummus for a savory kick.
You can use apple chips in many recipes, too. Toss them in salads for crunch. Add them to granola for a sweet touch. They make breakfast or snacks more exciting.
Storage Info
Best Storage Practices
To keep your baked apple chips fresh, store them in an airtight container. I recommend using glass jars or resealable bags. Make sure to seal them tightly. This keeps moisture out and helps the chips stay crispy.
Shelf Life
Baked apple chips can last for up to two weeks when stored properly. After that, they may lose their crunch. Look for signs of spoilage, like softness or a change in color. If they feel chewy, it’s time to toss them.
Making Ahead
Batch cooking is a great way to have snacks ready. I suggest making a larger batch and storing them. You can freeze apple chips too. Just place them in a freezer-safe bag. When you want to enjoy them, let them thaw at room temperature. This keeps them tasty and crunchy!
FAQs
Can I use any type of apple for this recipe?
Yes, you can use many types of apples. Each kind offers a unique taste and texture. Fuji and Honeycrisp apples are my favorites. They are sweet and crisp. Tart apples like Granny Smith work too, but they may taste more sour. The choice of apple impacts how your chips taste and feel. Experiment with different varieties to find your perfect chip!
How long do I bake the apple chips for?
Baking time can change based on your oven. Typically, I bake them for 1.5 to 2 hours at 225°F (110°C). Make sure to check them often. It might take longer in some ovens or less in others. Turning the slices halfway helps them bake evenly. Keep an eye on them near the end to avoid burning.
Are baked apple chips healthy?
Yes, baked apple chips are a healthy snack! They have less fat than regular chips. Apples are rich in fiber and vitamins. You get the taste of a sweet treat without the guilt. Plus, you control the sugar. This makes them a great option for kids and adults alike.
Can I add sugar to the recipe?
You can add sugar if you want a sweeter chip. Just remember, sugar can change the healthiness of your snack. Using a small amount keeps it tasty without too many calories. You might try honey or maple syrup for a different flavor too. Balance is key when adding sweetness.
How do I make this recipe more kid-friendly?
To make these chips more appealing to kids, add a little more sugar. You can also try using sweeter apples. Let your kids help with the task of sprinkling the cinnamon-sugar mix. They will enjoy the process. Serve these chips with a tasty dip like yogurt or nut butter for added fun!
Can I make these cinnamon apple chips in a dehydrator?
Yes, you can use a dehydrator! Slice the apples as you would for baking. Arrange them on the dehydrator trays. Set the dehydrator to around 135°F (57°C). The drying time will be longer, usually 6 to 8 hours. Check them often to get the right crispiness. Enjoy your homemade chips made with this method!
To sum up, we explored how to make delicious baked apple chips. We covered key ingredients and suggested some tasty add-ins. You learned about the best apple types and their flavors. I shared step-by-step instructions for preparation and baking. We also discussed tips for crispiness and ways to keep apples fresh. These chips offer healthy snacking options and can be easily stored. Experiment with flavors and enjoy the process! Making apple chips is simple and fun, and they taste great, too.
![To make a tasty no-bake strawberry cheesecake, you need a few key ingredients: - 200g digestive biscuits, crushed - 100g unsalted butter, melted - 400g cream cheese, softened - 100g powdered sugar - 1 teaspoon vanilla extract - 250ml heavy cream - 300g fresh strawberries, hulled and sliced - 100g strawberry jam These ingredients work together to create a rich and creamy dessert. The digestive biscuits form a crunchy base, while the cream cheese and heavy cream give it a smooth texture. You can customize your cheesecake with a few optional ingredients: - Fresh mint leaves for garnish - Additional fruit toppings like blueberries or raspberries - A splash of lemon juice for a tangy flavor - Chocolate shavings for a sweet touch These extras allow you to add your personal flair to the cheesecake. If you need substitutions, here are some ideas: - Use graham crackers instead of digestive biscuits for the base. - Swap cream cheese with Greek yogurt for a lighter option. - Try coconut cream instead of heavy cream for a dairy-free version. - Use honey instead of powdered sugar for a natural sweetener. These alternatives can make the recipe fit your needs while still tasting great. For the full recipe, check the detailed steps to create this delightful dessert. To start, gather your ingredients. You need crushed digestive biscuits and melted butter. In a mixing bowl, combine these two. Mix until you see a texture that looks like wet sand. Next, take a 9-inch springform pan. Press the biscuit mixture firmly into the bottom. Make sure it is even. This will be the base of your cheesecake. After that, refrigerate the pan for about 10 minutes. This helps the base to set nicely. Now, let’s make that creamy filling. In a new bowl, add softened cream cheese, powdered sugar, and vanilla extract. Beat these together until they become smooth and creamy. In another bowl, whip the heavy cream. Keep whipping until stiff peaks form. This means it will hold its shape well. Now, gently fold the whipped cream into the cream cheese mixture. Do this carefully so the filling stays light and airy. Once your filling is ready, pour it over the chilled biscuit base. Spread it evenly with a spatula. Now, let’s add some color. Arrange the sliced strawberries on top of the cheesecake. You can be creative with this step! In a small saucepan, melt the strawberry jam over low heat. Once it is runny, let it cool a little. Drizzle the jam over the strawberries for a shiny finish. Finally, cover your cheesecake with plastic wrap. Refrigerate it for at least 4 hours, or even overnight. This waiting time helps it set perfectly. For the full recipe, check the earlier section. When making a no-bake strawberry cheesecake, a few common mistakes can spoil your treat. First, don’t skip chilling the biscuit base. It needs to set before adding the filling. Second, make sure your cream cheese is fully softened. Cold cream cheese can create lumps in your mixture. Lastly, don’t rush the whipping of the heavy cream. Whip it until stiff peaks form for the best texture. To get a creamy and smooth texture, follow these steps. Mix the cream cheese, powdered sugar, and vanilla extract until it’s really smooth. Then, whip the heavy cream separately until it’s nice and fluffy. When you fold the whipped cream into the cream cheese mix, do it gently. This keeps air in the mixture, making it light and fluffy. Serving your cheesecake can be fun and creative. Cut slices and place them on pretty dessert plates. You can add fresh mint leaves on top for a pop of color. For extra sweetness, drizzle more strawberry jam over the slices. You can also serve it with a side of fresh strawberries. This adds a nice touch and makes the dessert look even better. For the full recipe, refer to the earlier sections. {{image_2}} You can change up the fruity flavor of your cheesecake. Swap strawberries for other berries like blueberries or raspberries. You can also use peaches, mangoes, or even kiwi. Just chop the fruit and layer it on top or mix it into the filling. This makes your dessert colorful and fun. Want a richer taste? Try adding chocolate or caramel. For chocolate, mix in cocoa powder or melted chocolate into the cream cheese. Drizzle caramel sauce on top for a sweet touch. Both options give your cheesecake a new twist that chocolate lovers will adore. If you need a gluten-free option, use gluten-free cookies for the base. Many brands offer tasty gluten-free biscuits. Check the label to be sure. This way, everyone can enjoy this delicious treat without worry. Make sure to use gluten-free cream cheese and whipped cream too. For the full recipe, check out the [Full Recipe]. To keep your No-Bake Strawberry Cheesecake fresh, store it in the fridge. Use an airtight container to prevent any odors from mixing in. If you don’t have one, cover the cheesecake tightly with plastic wrap. This keeps it safe and tasty. Your cheesecake stays fresh in the fridge for about 3 to 5 days. After that, the texture may change, and the flavor might fade. Keep an eye on any signs of spoilage, like a sour smell or discoloration. Yes, you can freeze No-Bake Strawberry Cheesecake. Wrap it well in plastic wrap and then foil. This keeps out air and prevents freezer burn. It can last up to 3 months in the freezer. When ready to eat, thaw it in the fridge for a few hours. Enjoy the creamy goodness! For the full recipe, check out the details above. Baked cheesecakes use heat to set the filling. This process gives a dense, rich texture. No-bake cheesecakes rely on cold temperatures to firm up. They often taste lighter and creamier. Baked cheesecakes need time in the oven, while no-bake ones chill in the fridge. This makes no-bake cheesecakes quicker to prepare. To make your cheesecake firmer, try these tips: - Use full-fat cream cheese. This adds richness and firmness. - Add gelatin to the filling. Dissolve it in water and mix it in. - Chill the cheesecake longer. Let it set overnight for the best results. - Avoid overmixing the cream cheese. This keeps air out and helps it firm up. Yes, you can use frozen strawberries. Just thaw them first and drain excess liquid. The flavor will still be great, but the texture may change slightly. Fresh strawberries give a firmer bite and vibrant look. For best results, try to use fresh strawberries in the recipe. For the full recipe, check the main article. No-bake strawberry cheesecake is easy and fun to make. We explored key ingredients, like strawberries and cream cheese, and even how to customize them. I shared step-by-step instructions to help you prepare the base, filling, and assembly. Tips on avoiding common mistakes will guide you to the perfect texture. With various topping options, you can get creative. Finally, proper storage keeps your cheesecake fresh longer. Remember, this dessert is versatile, so don't hesitate to experiment. Enjoy every bite of your delicious creation!](https://dailydishly.com/wp-content/uploads/2025/06/5274bd3f-8d96-4968-97f1-1841490db53b-768x768.webp)