
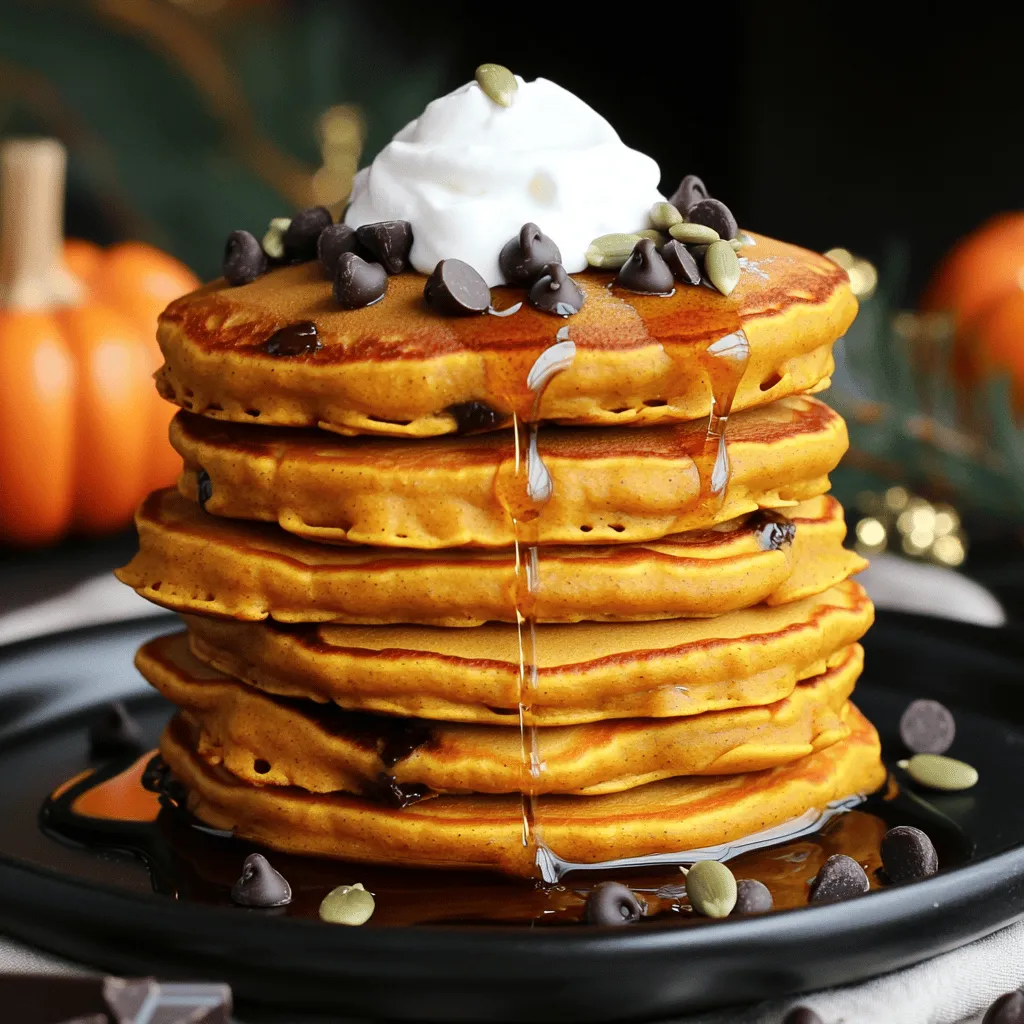
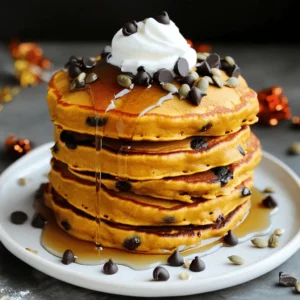
Pumpkin Chocolate Chip Pancakes Delightful and Easy Recipe

Looking for a fun and easy pancake recipe? You’ve found it! These Pumpkin Chocolate Chip Pancakes combine the rich flavor of pumpkin with sweet chocolate chips. Perfect for autumn, they are simple to make and taste amazing. In this post, I’ll share everything you need, from ingredients to cooking tips, to help you whip up a delightful batch for breakfast. Let’s dive into this tasty treat!
Ingredients
Primary Ingredients
– 1 cup all-purpose flour
– 1/2 cup canned pumpkin puree
– 1 cup milk (dairy or non-dairy)
The primary ingredients form the base of your pancakes. The all-purpose flour gives structure. The pumpkin puree adds moisture and flavor. The milk brings everything together and makes the batter smooth.
Baking Essentials
– 2 tablespoons sugar
– 2 teaspoons baking powder
– 1/2 teaspoon baking soda
Baking powder and baking soda are key for fluffiness. They help the pancakes rise and become light. Sugar adds a touch of sweetness, balancing the pumpkin’s earthiness.
Flavor Additions
– 1/2 teaspoon cinnamon
– 1/4 teaspoon nutmeg
– 1/4 teaspoon salt
– 1/2 cup chocolate chips
Cinnamon and nutmeg provide warmth and spice. They make your pancakes cozy and festive. The chocolate chips add bursts of sweetness. They melt slightly, creating gooey pockets in each bite.It’ll guide you step-by-step to delicious pancakes.
Step-by-Step Instructions
Mixing Dry Ingredients
Start by gathering your dry ingredients. In a large bowl, whisk together:
– 1 cup all-purpose flour
– 2 tablespoons sugar
– 2 teaspoons baking powder
– 1/2 teaspoon baking soda
– 1/2 teaspoon cinnamon
– 1/4 teaspoon nutmeg
– 1/4 teaspoon salt
Make sure to measure each ingredient carefully. Accurate measurements ensure your pancakes rise well and taste great. If you add too much flour, your pancakes will be dense.
Combining Wet Ingredients
In another bowl, mix the wet ingredients. Combine:
– 1/2 cup canned pumpkin puree
– 1 cup milk (dairy or non-dairy)
– 1 large egg
– 3 tablespoons melted butter
Stir these ingredients until the mixture is smooth. If you see lumps, that’s okay! A smooth mixture helps the pancakes cook evenly.
Cooking the Pancakes
Heat a non-stick skillet over medium heat. Lightly grease it with butter or oil. Once hot, pour 1/4 cup of batter onto the skillet for each pancake. Cook until bubbles form on the surface, which takes about 2-3 minutes.
To flip, use a spatula and gently lift the pancake. Cook for another 2-3 minutes until golden brown. Check to make sure they are cooked through. You want a soft and fluffy pancake, not a gooey one.
Tips & Tricks
Perfecting the Batter
For fluffy pancakes, avoid overmixing the batter. Mix just until the dry and wet ingredients combine. A few lumps are okay. This helps keep your pancakes light. If you want thicker pancakes, add a bit more flour. For thinner pancakes, add a splash of milk.
Cooking Techniques
Use a non-stick skillet or griddle for the best results. You can also use a bit of butter or oil to help. Heat your skillet over medium heat. This temperature gives even cooking. If it’s too hot, your pancakes may burn. Check the heat by splashing a drop of water; it should dance and evaporate.
Serving Suggestions
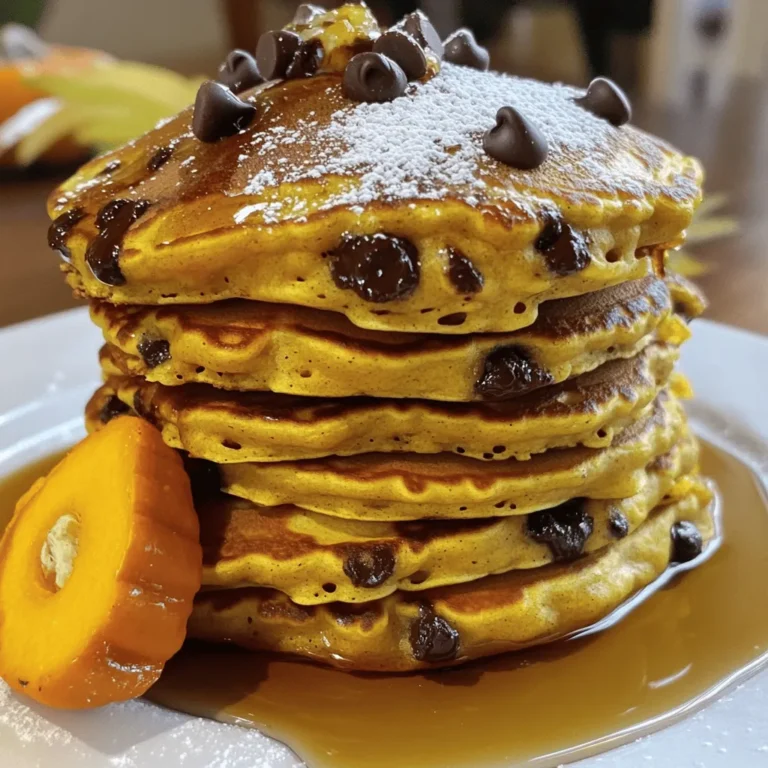
Get creative with your toppings! Beyond maple syrup, try whipped cream, nuts, or yogurt. You can also add fresh fruit like bananas or berries. For a festive look, stack the pancakes high, drizzle with syrup, and sprinkle some extra chocolate chips and pumpkin seeds on top. A dollop of whipped cream adds a delightful touch.
Variations
Flavor Changes
You can change the flavor of your Pumpkin Chocolate Chip Pancakes easily. Try adding spices like cloves or ginger. A pinch of these spices can bring warmth and depth. They enhance the pumpkin flavor and make the pancakes even more delightful. If you have dietary needs, substitute ingredients to fit your lifestyle. You can use a sugar substitute or swap out the chocolate chips for dried fruit.
Ingredient Swaps
If you want gluten-free pancakes, use a gluten-free flour alternative. Almond flour or oat flour works well in this recipe. They create a nice texture and keep the flavor rich. For those who prefer dairy-free options, switch to plant-based milk. Almond milk or coconut milk gives the same creamy consistency. You can also use coconut oil instead of butter for a dairy-free twist.
Seasonal Twists
Pumpkin Chocolate Chip Pancakes shine during the holidays. You can add festive touches like crushed candy canes or nuts for extra crunch. In fall, try adding apples or pears. These fruits blend perfectly with pumpkin. You can even serve the pancakes with a warm spiced syrup for a seasonal treat. Enjoying these pancakes with seasonal ingredients makes them feel special all year long.
Storage Info
Storing Leftovers
To keep your pumpkin chocolate chip pancakes fresh, store them in the fridge. Place them in an airtight container. This helps prevent them from drying out. They last about three to four days in the fridge. When ready to eat, just reheat them!
Freezing Instructions
Freezing pancakes is easy. First, let them cool completely. Then, stack the pancakes with a piece of parchment paper between each one. This keeps them from sticking together. Wrap the stack tightly in plastic wrap. Place it in a freezer bag and remove as much air as possible. You can freeze them for up to two months. When you’re ready to eat, reheat them in the toaster or microwave. For the best results, use medium heat in the microwave. Heat for about 30 seconds, check, then heat more if needed.
Meal Prep Ideas
You can prepare pancakes ahead of time for busy mornings. Make a big batch on the weekend. Store them in the fridge or freezer as described. In the morning, just grab a few and reheat. For quick reheating, a toaster works great. You can also use a microwave for a faster option. Enjoy your pancakes anytime!
FAQs
How to make pancakes fluffy?
To make pancakes fluffy, start with fresh baking powder. Use buttermilk or add vinegar to your milk to create a tangy flavor. Mix your dry and wet ingredients separately. Combine them gently, leaving some lumps. Avoid overmixing; this keeps the air in the batter, which helps it rise. Let the batter rest for a few minutes before cooking. This step allows the gluten to relax and creates a lighter texture.
Can I make this recipe vegan?
Yes, you can make this recipe vegan! Substitute the milk with a plant-based option, like almond or oat milk. Replace the egg with a flaxseed egg or applesauce for binding. Use coconut oil instead of butter for a rich flavor. These swaps maintain the taste and texture of the pancakes while making them suitable for a vegan diet.
How do I know when the pancakes are done cooking?
You can tell pancakes are done when bubbles form on the surface and the edges look set. Flip them when the bottom is golden brown, about 2-3 minutes. After flipping, cook for another 2-3 minutes. They should be fluffy and slightly firm to the touch. If you’re unsure, you can use a toothpick to check the center; it should come out clean.
You now have all the steps to make delicious pumpkin pancakes. You learned about the key ingredients, like flour and pumpkin puree. Mixing dry and wet components, plus cooking tips, will help you achieve the perfect stack. Remember, don’t overmix your batter for fluffy results. Explore fun variations and toppings to suit your taste. Store any extras properly for future enjoyment. With these tips, you can easily whip up tasty pancakes any time! Enjoy your cooking adventure and impress your family and friends!
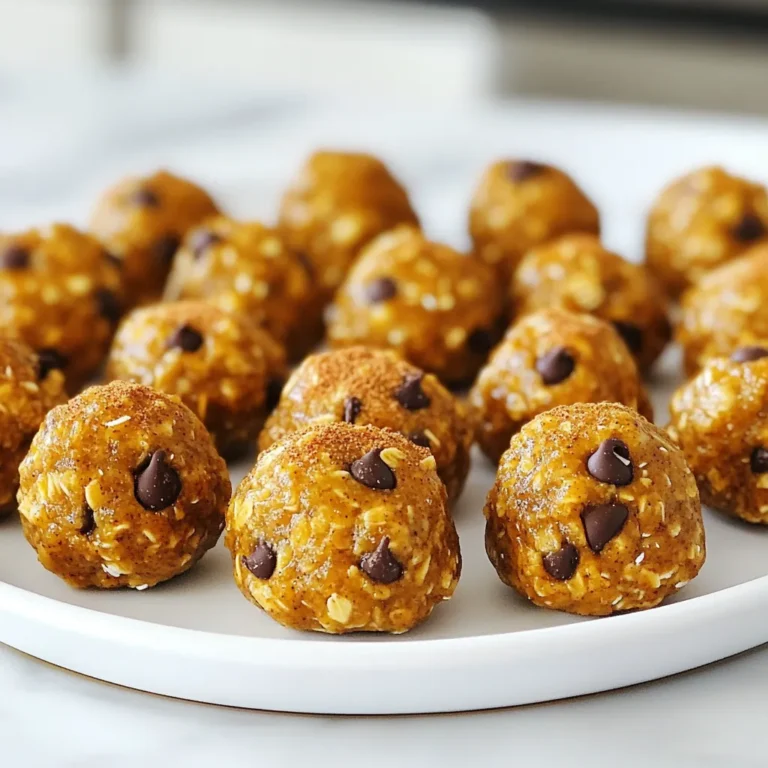
![- 1 cup rolled oats - 1 cup almond butter - 1/2 cup shredded unsweetened coconut These main ingredients are the heart of your Almond Joy Energy Bites. Rolled oats provide fiber, giving you energy and keeping you full. Almond butter adds healthy fats and protein, making these bites more satisfying. Shredded coconut brings a delicious tropical flavor and a nice texture. - 1/4 cup honey or maple syrup - 1 teaspoon vanilla extract - 1/2 teaspoon sea salt For sweetness, you can use honey or maple syrup. Both options add a rich flavor. Vanilla extract enhances the overall taste, making it more delightful. Sea salt balances the sweetness and adds depth to every bite. - 1/4 cup mini dark chocolate chips - 1/4 cup chopped almonds Mini dark chocolate chips make these bites even more fun. They add a sweet, chocolatey burst in every mouthful. Chopped almonds give a crunch that contrasts with the softness of the other ingredients. This mix of textures makes them exciting to eat. You can find the complete recipe [Full Recipe]. - Step 1: Combine ingredients in a large mixing bowl. Start with rolled oats, almond butter, shredded coconut, honey, and vanilla extract. Mix these until you see a smooth blend. - Step 2: Ensure all ingredients are thoroughly mixed. You want a thick, sticky mixture that holds well together. - Step 3: Scoop and roll the mixture into bite-sized balls. Aim for about one inch in diameter. This size is easy to eat and perfect for snacking. - Step 4: Place on a parchment-lined baking sheet. This helps prevent sticking and makes cleanup easier. - Step 5: Refrigerate for at least 30 minutes. This step helps the bites firm up nicely. - Step 6: Transfer to an airtight container. Store them in the fridge where they can last up to a week. Enjoy them whenever you need a tasty pick-me-up! For the full recipe, check out the complete instructions above. To get the best Almond Joy Energy Bites, use room temperature almond butter. This makes mixing much easier. You can also change the size of the bites. Make them big or small based on what you like. When you serve these bites, arrange them nicely on a plate. You can use a clear glass jar for a fun look. For extra charm, sprinkle some shredded coconut or chopped almonds on top. This makes the bites more eye-catching. These energy bites taste great with a glass of milk or nut milk. They also work well as a post-workout snack or a treat during lunch. Feel free to enjoy them any time you need a boost. If you want to make them even better, check out the Full Recipe for more tips! {{image_2}} You can easily change the taste of your Almond Joy Energy Bites. Try swapping almond butter for another nut butter, like peanut or cashew. This simple switch gives a new flavor twist. You can also add different mix-ins. Consider using dried fruits like cranberries or raisins. Seeds, like chia or pumpkin, add crunch and nutrition. The texture of these bites can be fun to play with too. Experiment with different types of chocolate. Use dark, milk, or even white chocolate for a sweet touch. If you want to boost the nutrition, add protein powder. This makes your bites more filling and adds a protein punch. You can make these bites fit various diets. To make them vegan, just use maple syrup instead of honey. This keeps them sweet and plant-based. If you need them gluten-free, check that your oats are not cross-contaminated with gluten. This way, everyone can enjoy these tasty snacks. For the full recipe, check out the complete guide to making these delicious bites. To keep your Almond Joy Energy Bites fresh, store them in an airtight container in the refrigerator. This helps maintain their texture and flavor. Always keep them away from direct sunlight and heat. This prevents them from getting too warm and losing their yummy taste. These energy bites are good for up to a week in the fridge. If you want to store them for longer, you can freeze them. They can last in the freezer for up to three months. Just make sure to keep them in an airtight container to avoid freezer burn. When you’re ready to enjoy your frozen energy bites, leave them at room temperature for a few minutes. This makes them easy to eat. For the best results, refrigerate them overnight if they are frozen. This way, they will taste fresh and delightful when you’re ready to snack. Yes, adjust honey or maple syrup to taste. If you want less sweetness, start with half. You can always add more later if you need it sweeter. This way, you control the flavor to match your liking. They are a nutritious snack that kids generally enjoy. The mix of oats, chocolate, and nuts makes them tasty. Plus, they are fun to eat! Kids love the chewy texture and the sweet bits of chocolate. Yes, they can be prepared in advance and stored for later use. Make a batch over the weekend and enjoy them all week. This saves time and gives you quick snacks ready to go. They should be firm after chilling for at least 30 minutes. Check them by pressing gently. If they hold their shape, they are ready to eat. Enjoy your Almond Joy Energy Bites as a quick treat or snack! You learned how to make Almond Joy Energy Bites with simple ingredients. Combine oats, almond butter, and coconut for a tasty mix. Sweeten with honey or maple syrup, and add chocolate chips for fun. Follow the steps to roll and chill the bites. These treats are easy to customize and store well. Enjoy them as snacks or post-workout fuel. With endless variations, you can always explore new flavors. Get ready to share these tasty bites with friends and family!](https://dailydishly.com/wp-content/uploads/2025/07/b2b32087-befa-4ffb-92e8-3f970098e72d-768x768.webp)

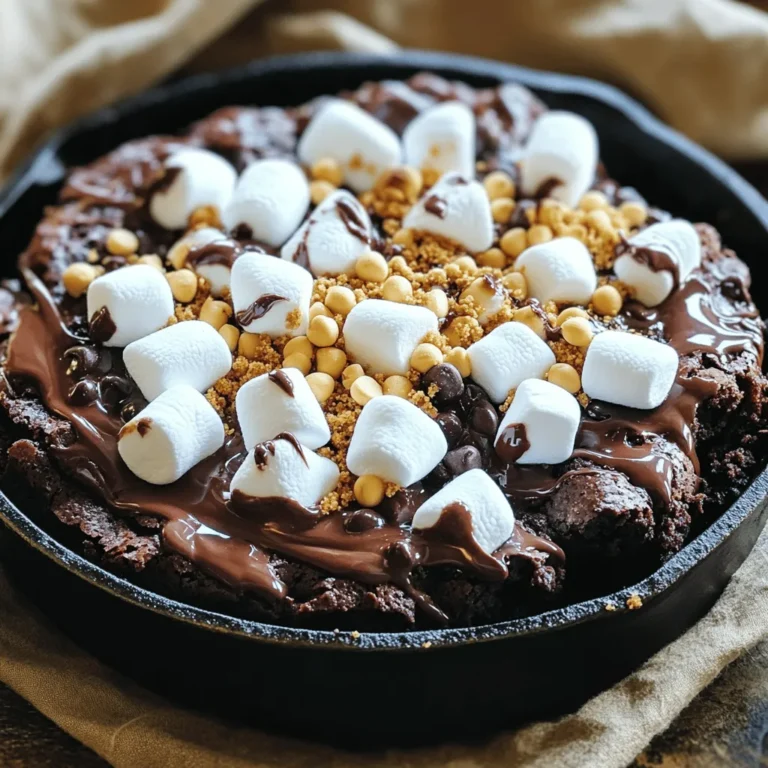
![- 1 cup all-purpose flour - 1/2 cup granulated sugar - 2 teaspoons baking powder - 1/2 teaspoon salt - 1 teaspoon ground cinnamon (for the batter) - 1/2 teaspoon vanilla extract - 1 large egg - 1/2 cup milk - 2 tablespoons melted butter - 1/4 cup granulated sugar - 1 tablespoon ground cinnamon - 2 tablespoons unsalted butter, melted (for coating) Making homemade cinnamon sugar donuts is fun and simple. You will need a few key ingredients. First, gather your main ingredients: flour, sugar, baking powder, and salt. These form the base of your donuts. The flour gives structure, while sugar adds sweetness. Baking powder helps them rise, and salt balances flavors. Next, you’ll want flavor enhancers. Ground cinnamon in the batter gives that warm spice taste. Vanilla extract adds depth. A large egg binds everything together, while milk keeps your donuts moist. The melted butter adds richness, making every bite a treat. Finally, for the cinnamon sugar coating, mix granulated sugar and ground cinnamon. This sweet mix will cover your donuts and bring them to life. Use melted butter to help the sugar stick. For the full recipe, you can refer to the [Full Recipe]. Now, let’s get ready to whip up these irresistible delights! - Preheat your oven to 350°F (175°C) and lightly grease a donut pan. - In a large mixing bowl, whisk together dry ingredients: flour, sugar, baking powder, salt, and cinnamon. - In another bowl, combine egg, milk, melted butter, and vanilla until well blended. - Gently combine wet and dry ingredients without overmixing. - Fill each donut mold about 2/3 full with batter. - Bake for 10-12 minutes until golden and a toothpick comes out clean. You can find the Full Recipe to get all the details and tips you need! To get the best donuts, make sure your wet and dry ingredients are at room temperature. This helps them mix well and creates a smooth batter. Remember, don’t overmix the batter! Overmixing can lead to tough donuts that lack the softness we love. When baking, use a toothpick to check if the donuts are done. Insert the toothpick in the center; it should come out clean. This simple trick ensures your donuts are perfectly baked. Let the donuts cool for a few minutes before coating them. This helps the cinnamon sugar stick better, making them even more delicious. Want to add a little twist? Try adding nutmeg or a splash of vanilla extract to the batter. These small changes can create new flavors that surprise your taste buds! If you prefer deep-frying, feel free to experiment with different oils. Each oil can give your donuts a unique taste and texture. For the full recipe, check out the details above and enjoy making these treats! {{image_2}} When it comes to homemade cinnamon sugar donuts, the fun doesn't stop with the basics. You can play around with flavors, fillings, and toppings to make them truly your own. - Chocolate-Dipped Cinnamon Sugar Donuts For a sweet twist, dip your cooled donuts in melted chocolate. This adds a rich layer that pairs well with the cinnamon sugar. Just melt some chocolate and dip half of each donut. Let the chocolate set before serving. - Pumpkin Spice Cinnamon Sugar Donuts To celebrate fall, mix in some pumpkin puree and pumpkin spice into your batter. This gives a cozy flavor that everyone loves. You can add a bit more cinnamon for that extra kick! - Cream-filled options: Custard, chocolate, or fruit jam make tasty fillings. After baking, you can inject these fillings using a piping bag. Just poke a hole in the donut and fill it up. Each bite will surprise you with sweetness! - Savory versions with cheese or herbs offer a unique twist. Think of using cream cheese or even a sprinkle of herbs for a different flavor. These donuts can be great for brunch. - Glazed options with chocolate or vanilla icing add a beautiful shine. Just melt some icing sugar with a splash of milk, dip the donuts, and let them dry. This adds a sweet touch. - Use powdered sugar or toasted nuts for added texture. A light dusting of powdered sugar can make your donuts look fancy. Toasted nuts will add crunch and flavor. Feel free to experiment with these variations to find the perfect donut for you. Remember, the full recipe will guide you through every step! Store your cinnamon sugar donuts in an airtight container at room temperature. They stay fresh for up to 2 days. If you want them to last longer, place them in the fridge. They can stay good for up to a week that way. If you want to save donuts for later, freeze them uncoated. They can last up to 2 months in the freezer. When you are ready to eat them, thaw the donuts at room temperature. This will keep them tasting fresh. To enjoy warm donuts, warm them in the oven at a low temperature. A few minutes should do the trick. Avoid microwaving them, as this can make them soggy. You want to keep that perfect texture for a delightful bite. For the full recipe, check out the delightful cinnamon sugar donuts section! Yes, you can use a baking sheet to bake them as "cinnamon sugar muffins." Just pour the batter into muffin cups. This method gives you a similar taste and texture. Adjust the baking time to about 15-18 minutes. Always check with a toothpick to ensure they’re done. Substitute whole wheat flour or reduce sugar in the recipe. Whole wheat flour adds fiber and nutrients. You can also use less sugar for a lighter treat. Consider using natural sweeteners like honey or maple syrup. These changes can make your donuts a bit healthier without losing flavor. Almond or oat milk work well as dairy alternatives. These options provide similar moisture and richness. Almond milk has a mild nutty flavor, while oat milk is creamier. Both can be used in equal amounts as a milk substitute in the recipe. Look for a golden-brown color and use a toothpick test for doneness. Insert a toothpick into the center of a donut. If it comes out clean, your donuts are ready. If it has batter on it, bake them a few more minutes. This simple test helps ensure perfectly baked donuts every time. You now have a complete guide to making delicious cinnamon sugar donuts. The main ingredients bring sweetness, while the preparation steps ensure the perfect bake. Remember to experiment with flavors and toppings to make them your own. Store them properly for freshness, and enjoy them warm for the best taste. Donuts can be fun and easy to create at home. Try out this recipe today and share your results!](https://dailydishly.com/wp-content/uploads/2025/06/b4007b44-caf0-426e-8ec6-b6c4a5f754ff-768x768.webp)